Author: arthurized

Cottage Style Race Medal Display – A Tutorial

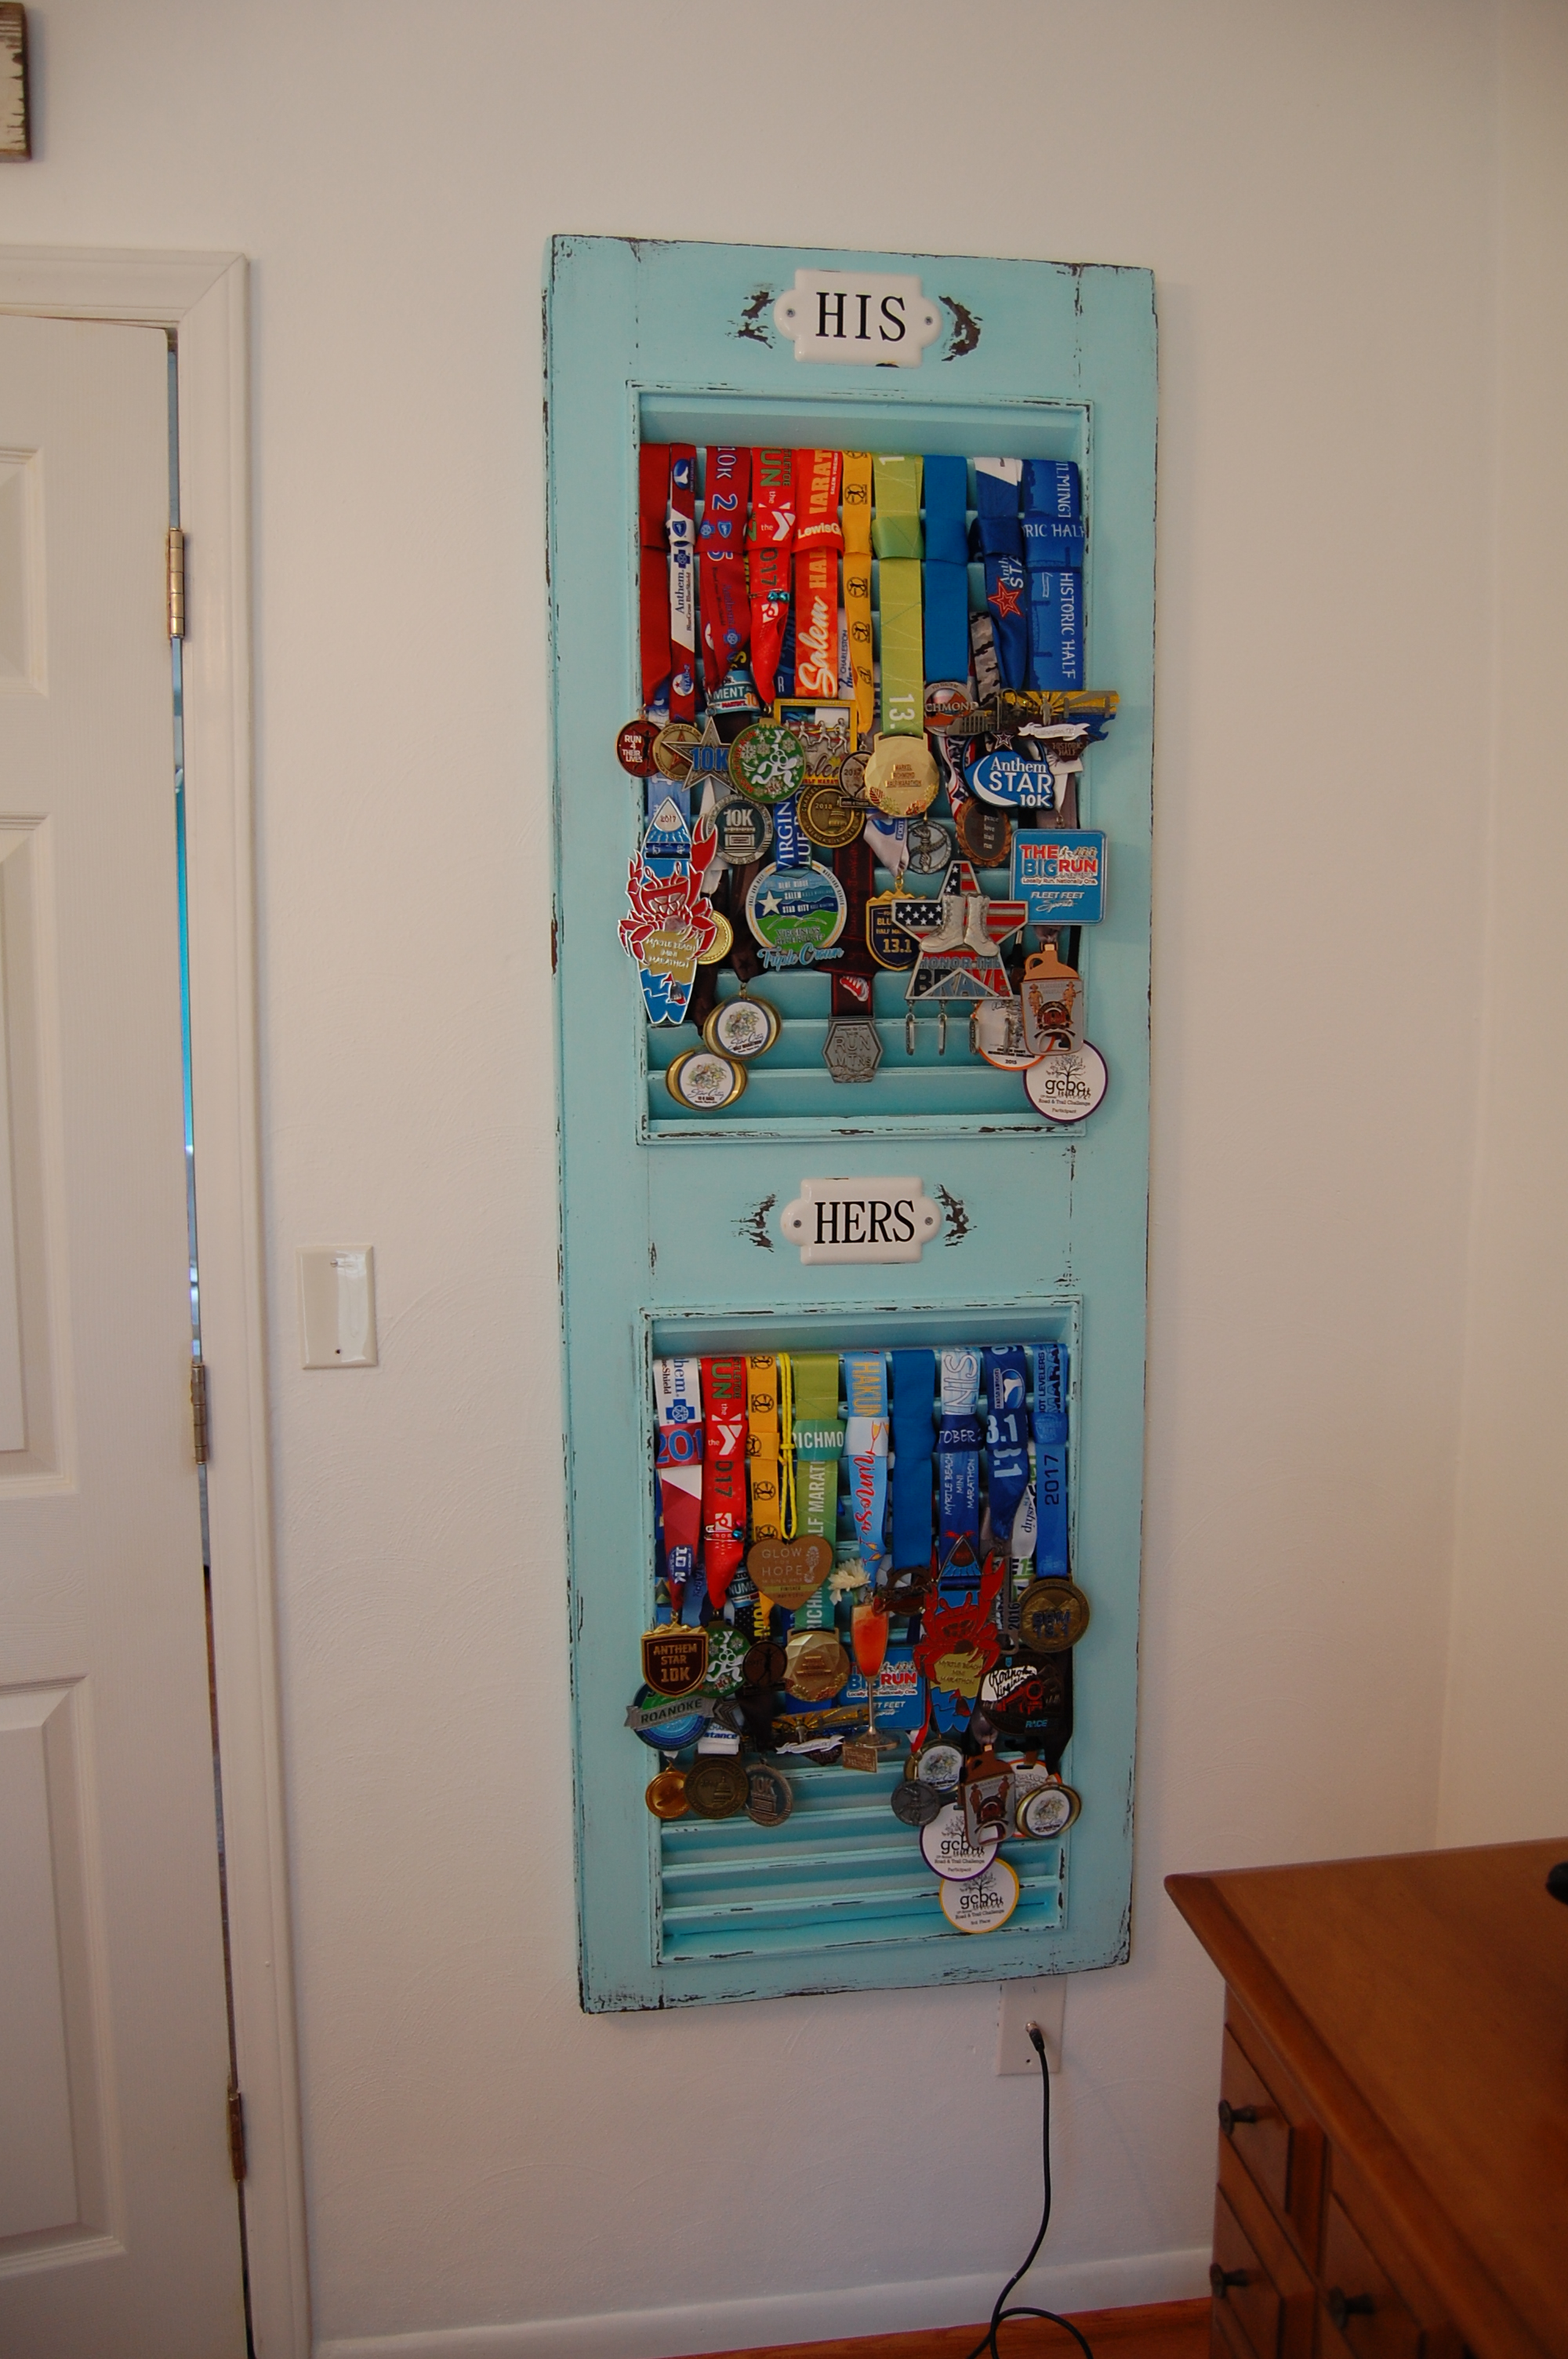
One of my goals for the year is to find a way to display the race medals that my husband and I have accumulated. We’ve got them stuffed into storage boxes in closets and the basement. I’ve been shopping for a large medal holder and just haven’t found the perfect thing. So I decided to make one from a wooden shutter.

Adapt this project for your own use! Make sure the louvers are fixed and strong enough to support whatever you hang from them. You could use a sturdy shutter and hooks to hang kitchen utensils, towels and aprons. If you have a young girl in your life, make a display for hair clips, bows and jewelry, etc. Create one for your garage or potting shed to hang work gloves and hand tools. The possibilities are endless!

Materials List:
A note about the paint: Eggshell or matte acrylic is best. I used leftover “oops” paint for this project and found that the semi-gloss topcoat peeled a little more than I liked during sanding. Choose a color for the undercoat that contrasts nicely with the topcoat.

  • Shutter
  • Paint for undercoat
  • Wax candle in white or ivory
  • Paint for topcoat
  • Old paint brush
  • Sandpaper
  • Cleat for hanging, rated for the weight of your project – I bought mine at Lowe’s
  • Optional – decorative trim of your choosing
  • Optional – spray matte sealer to protect the painted finish

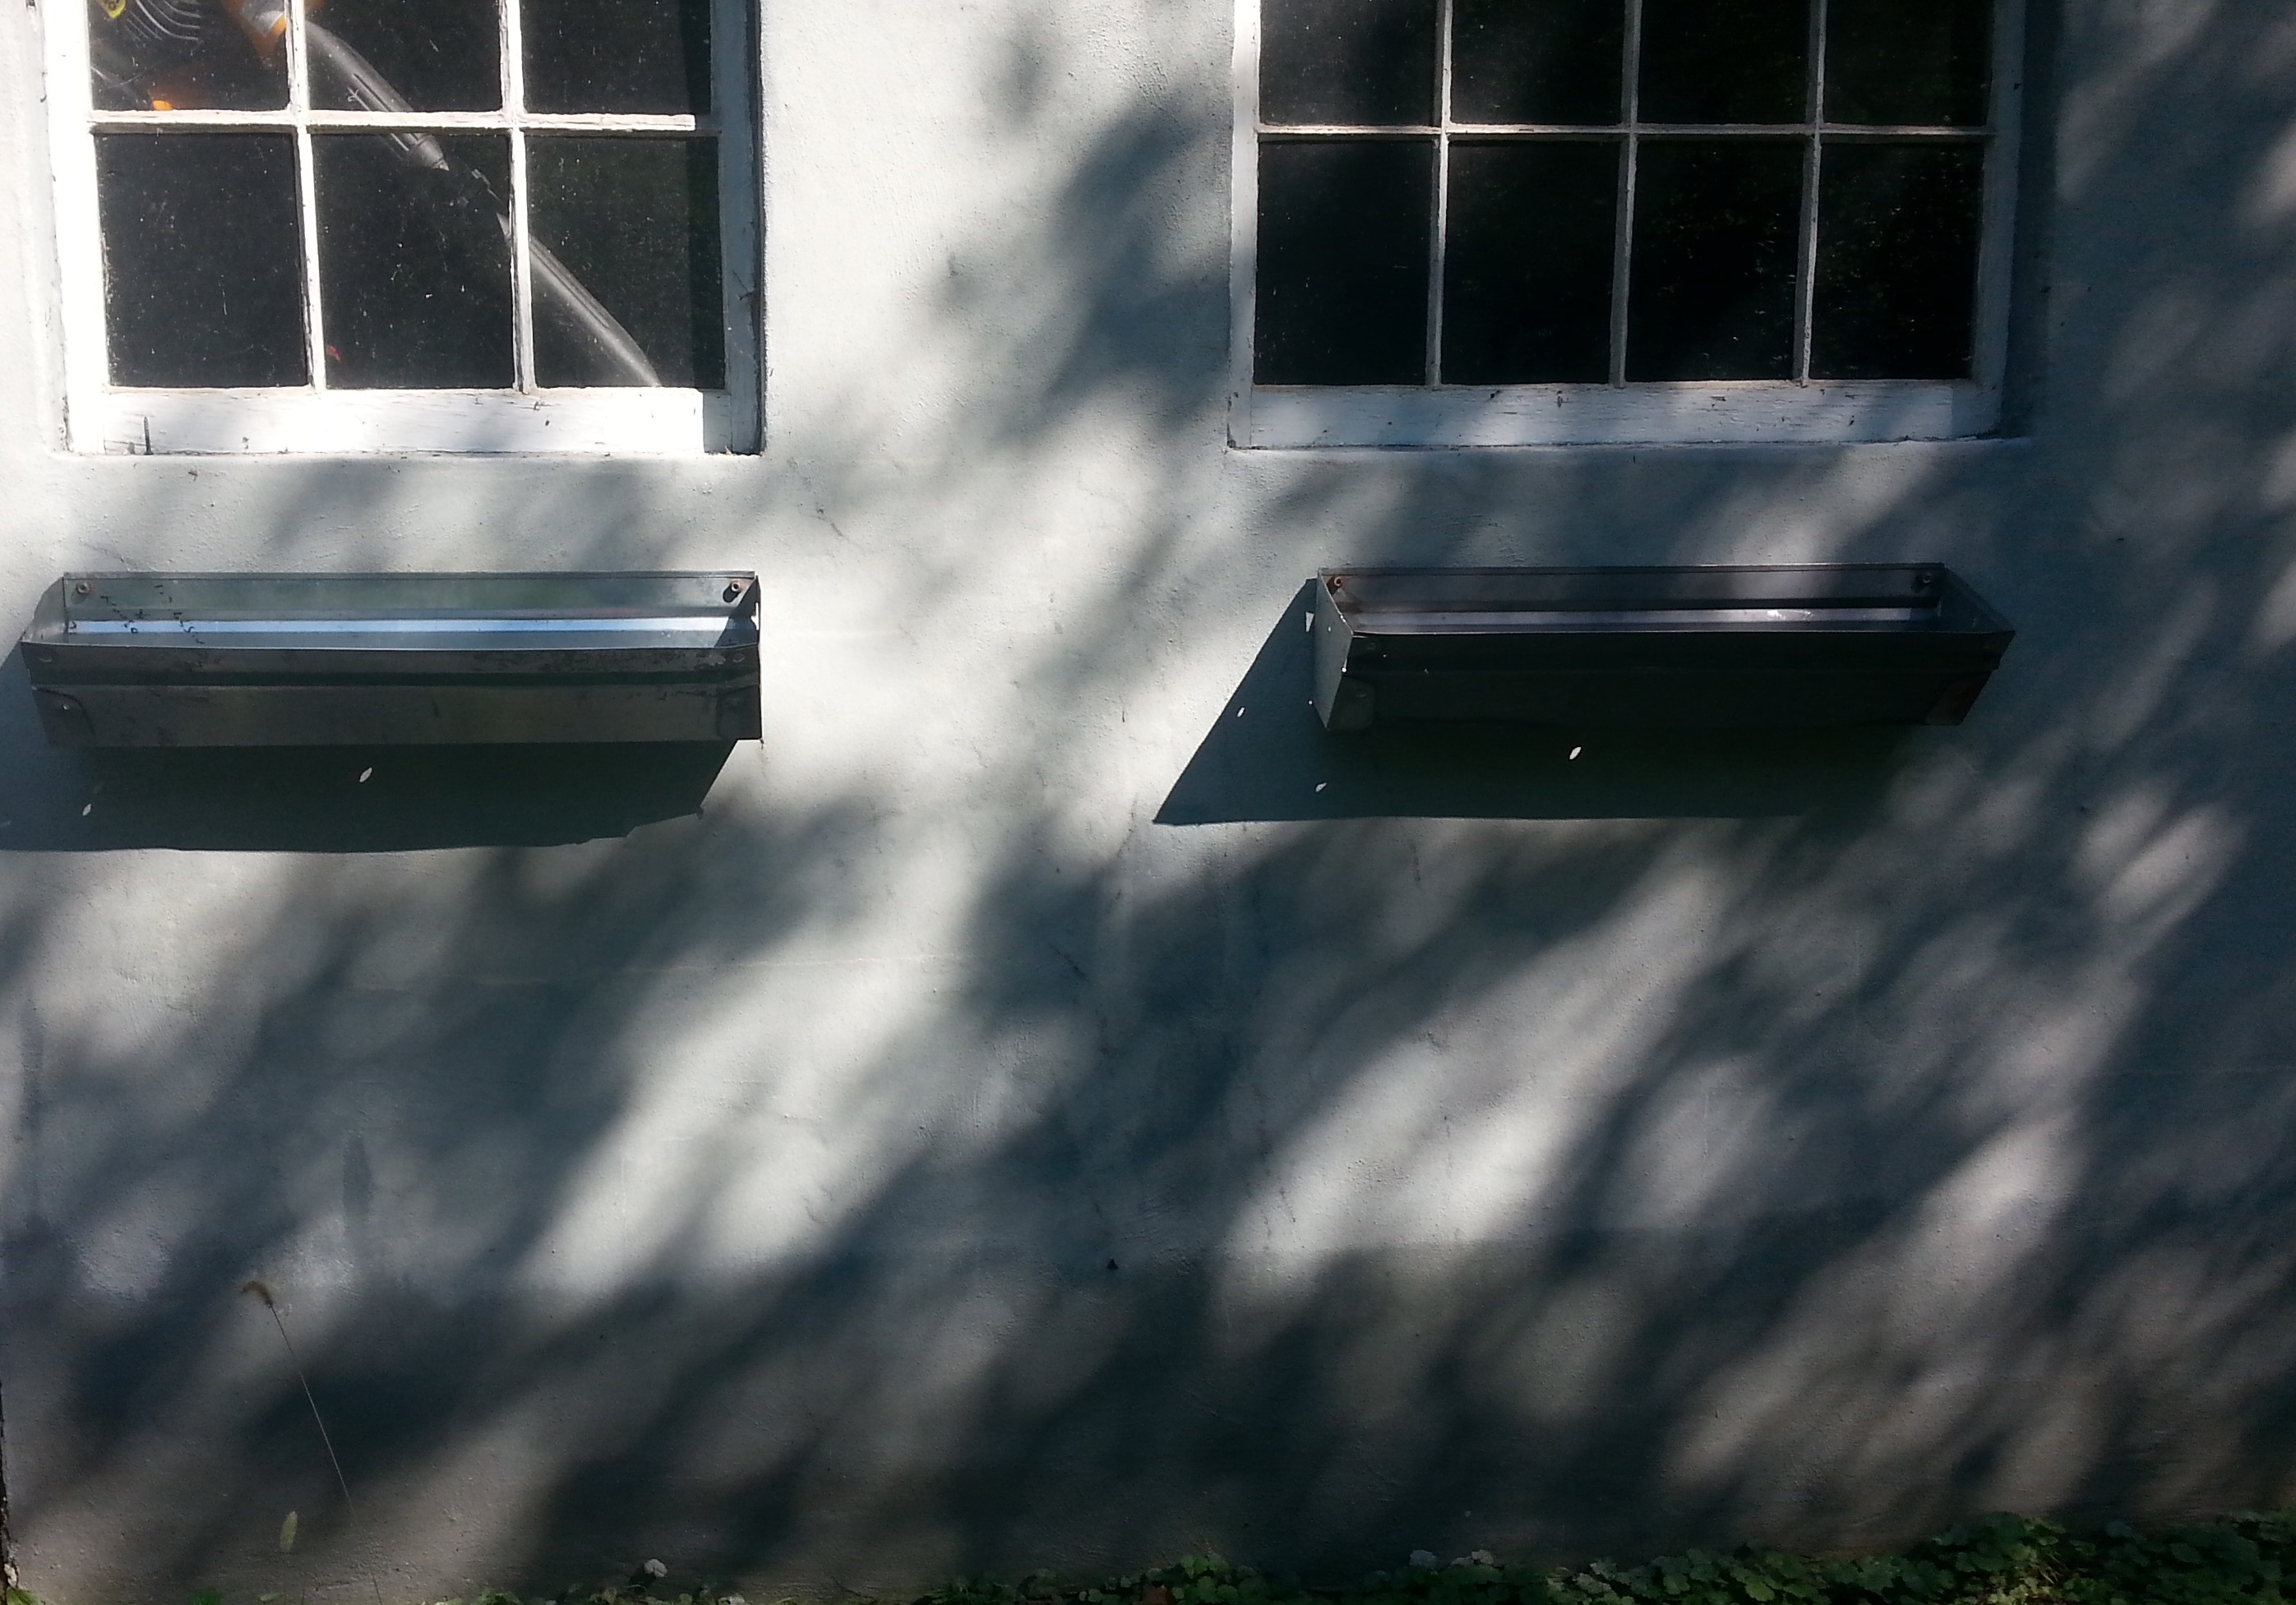
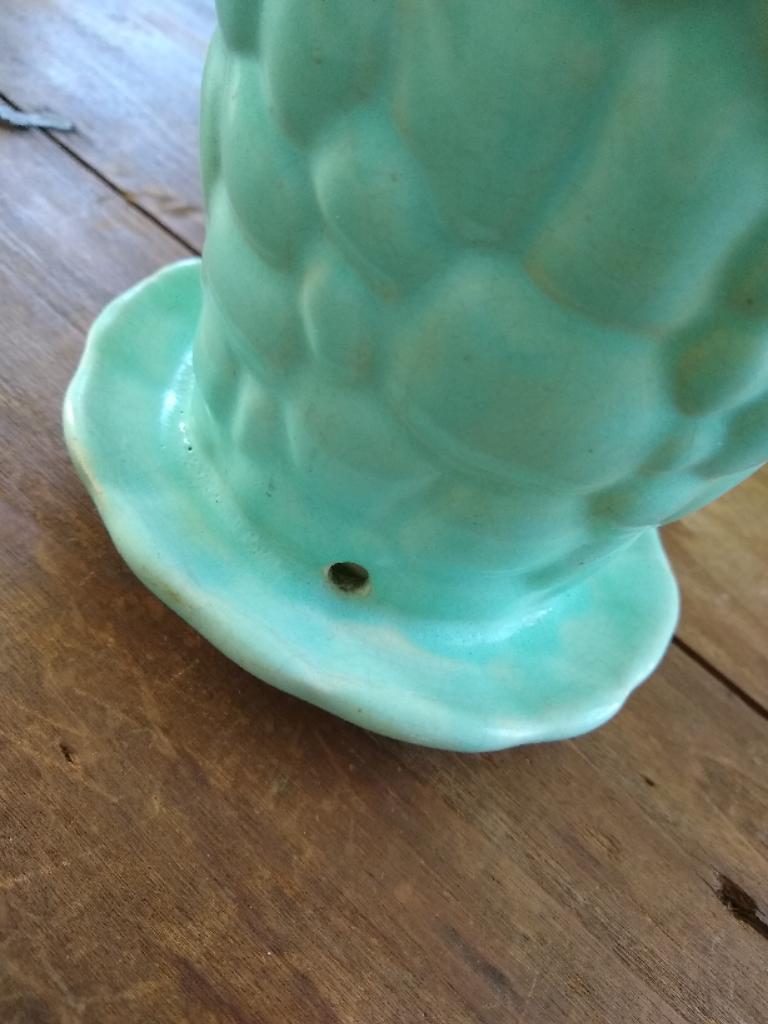
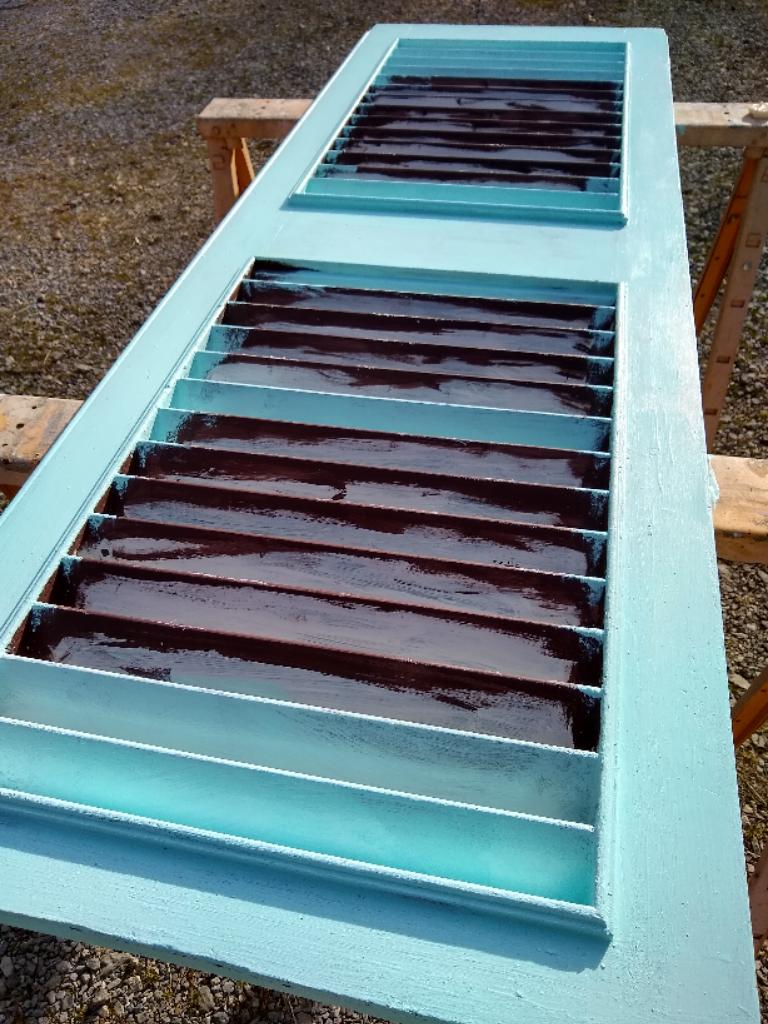
I found this shutter at the Habitat ReStore and it is in great condition;
22″ wide by 66″ tall made from solid wood with wide louvers.
Weighing about 20 pounds, it’s not too heavy to hang on the wall.

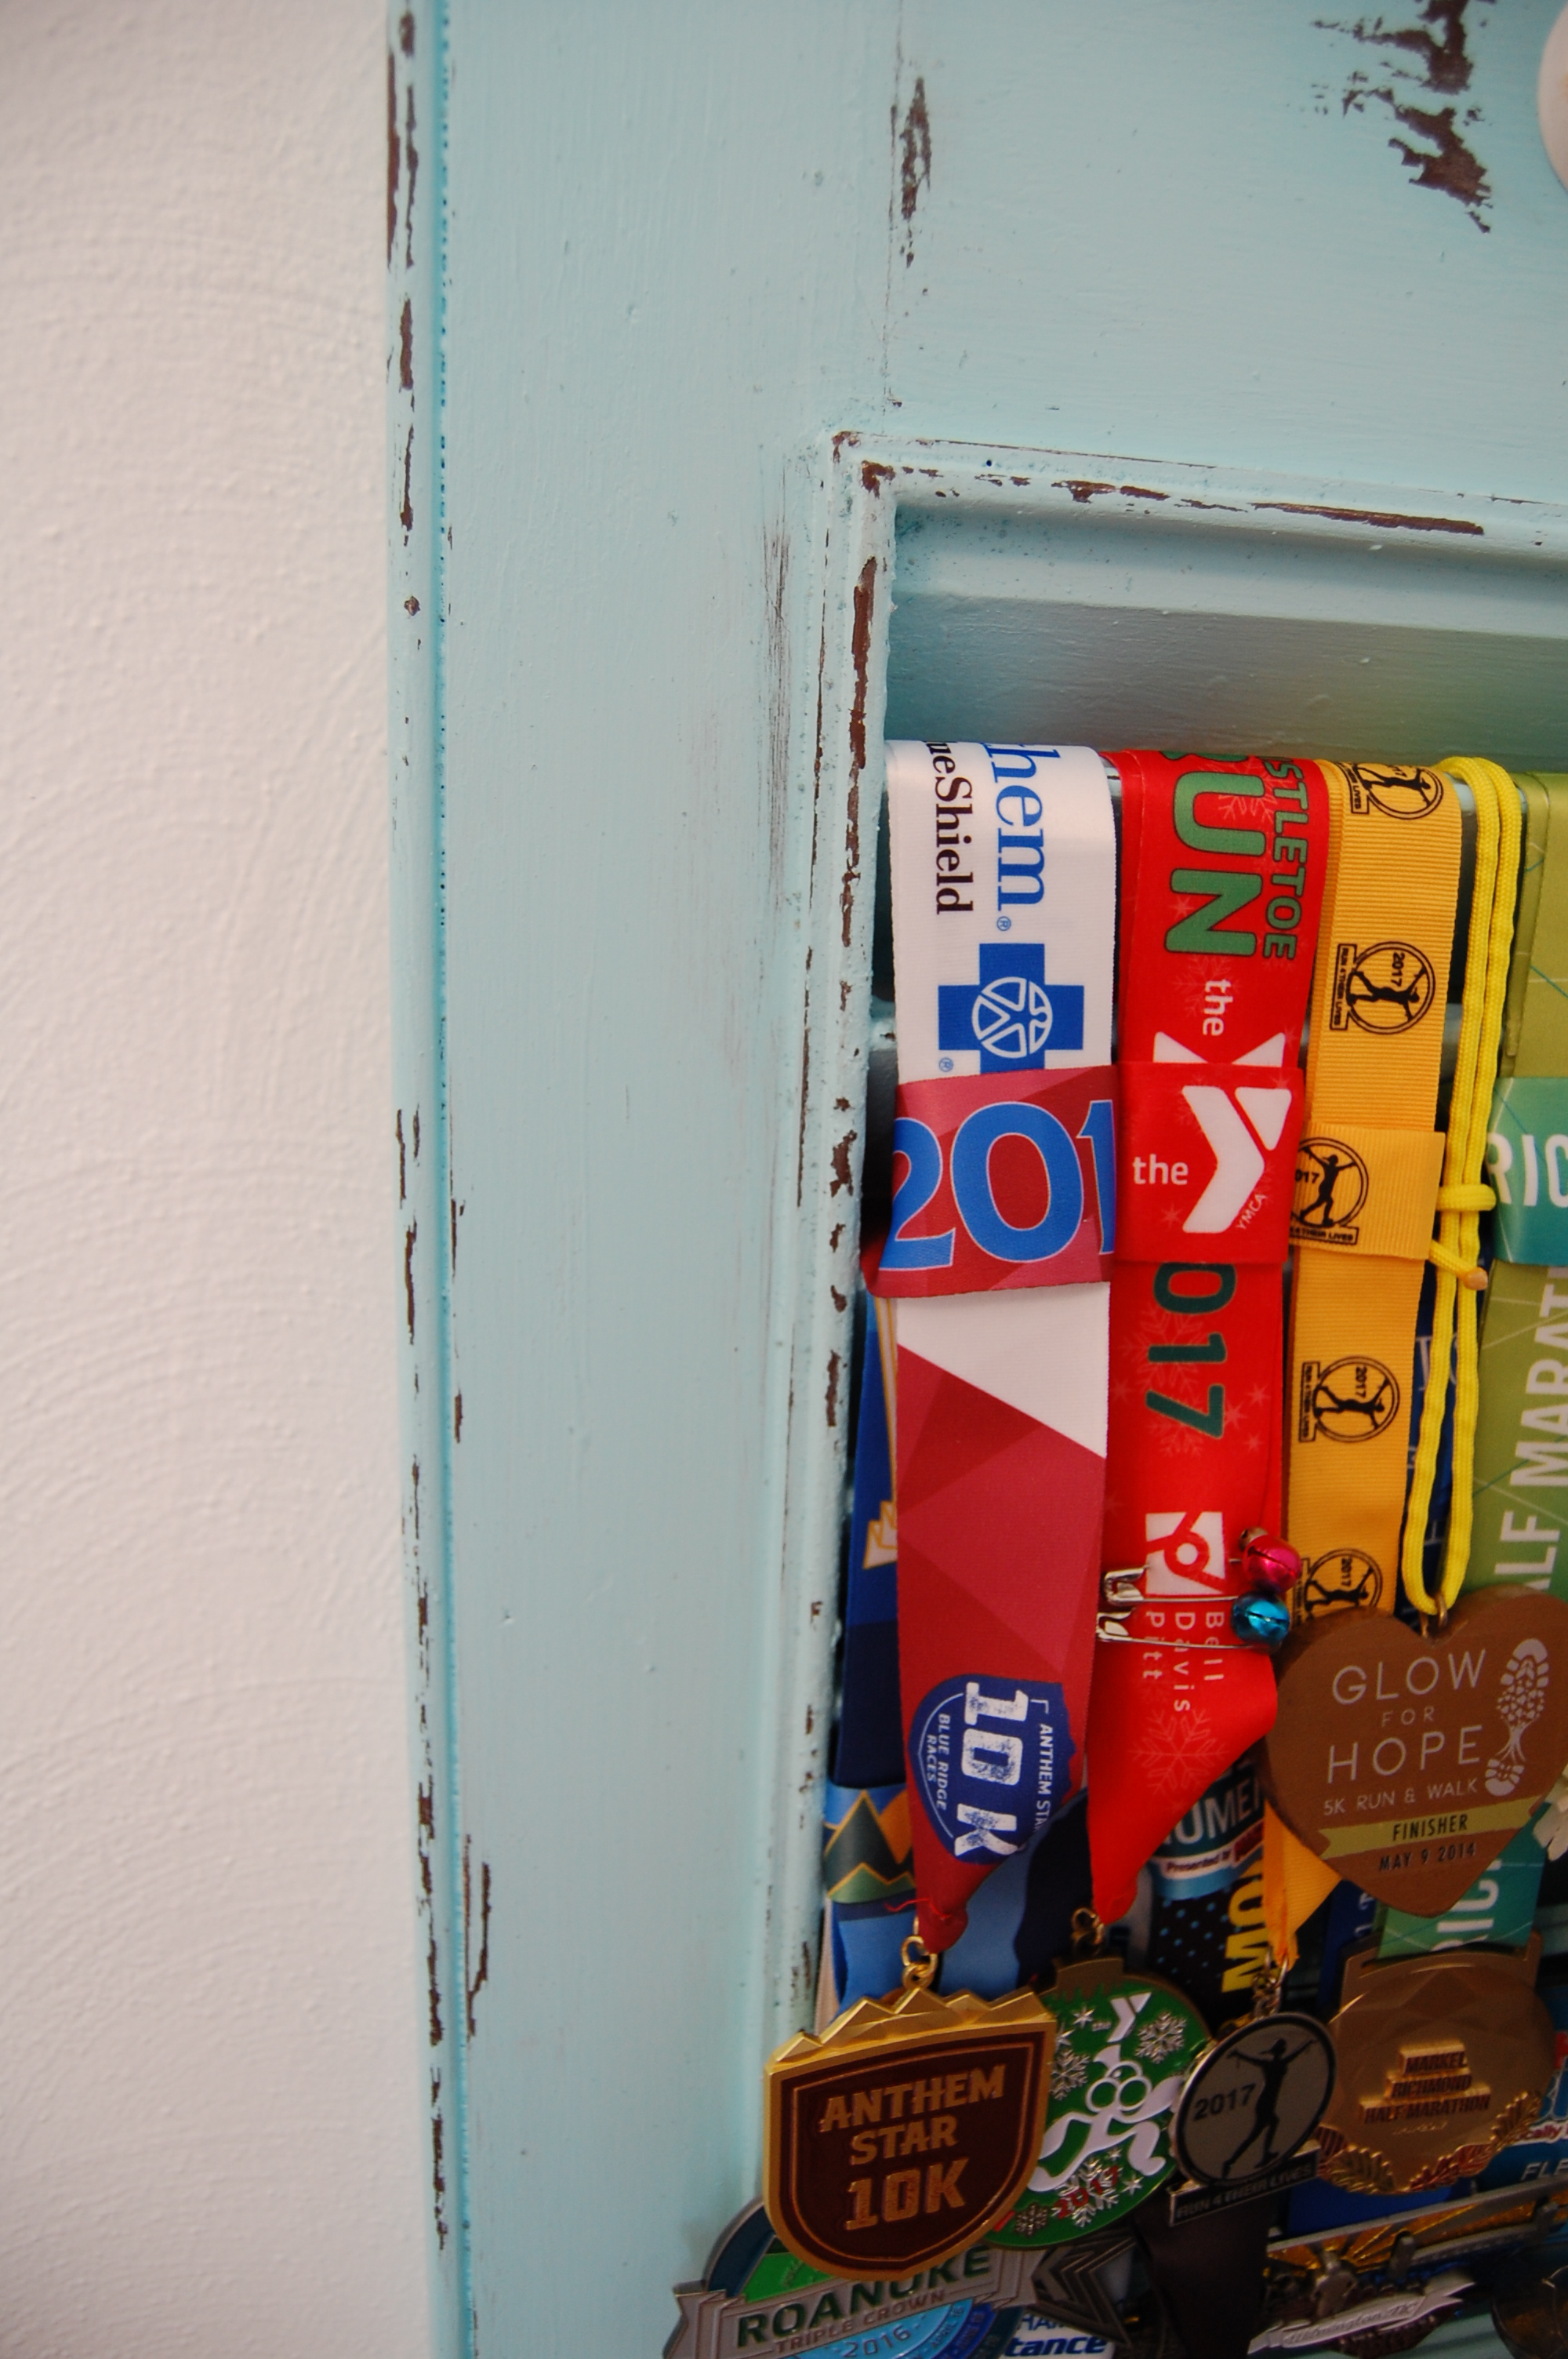
The shutter had some brown stains on it that I initially thought were water damage, but it was just sawdust(?) and rinsed right off. I didn’t bother to sand it. I’m going for a rough/chippy/distressed look. A few lumps and bumps contribute to that.

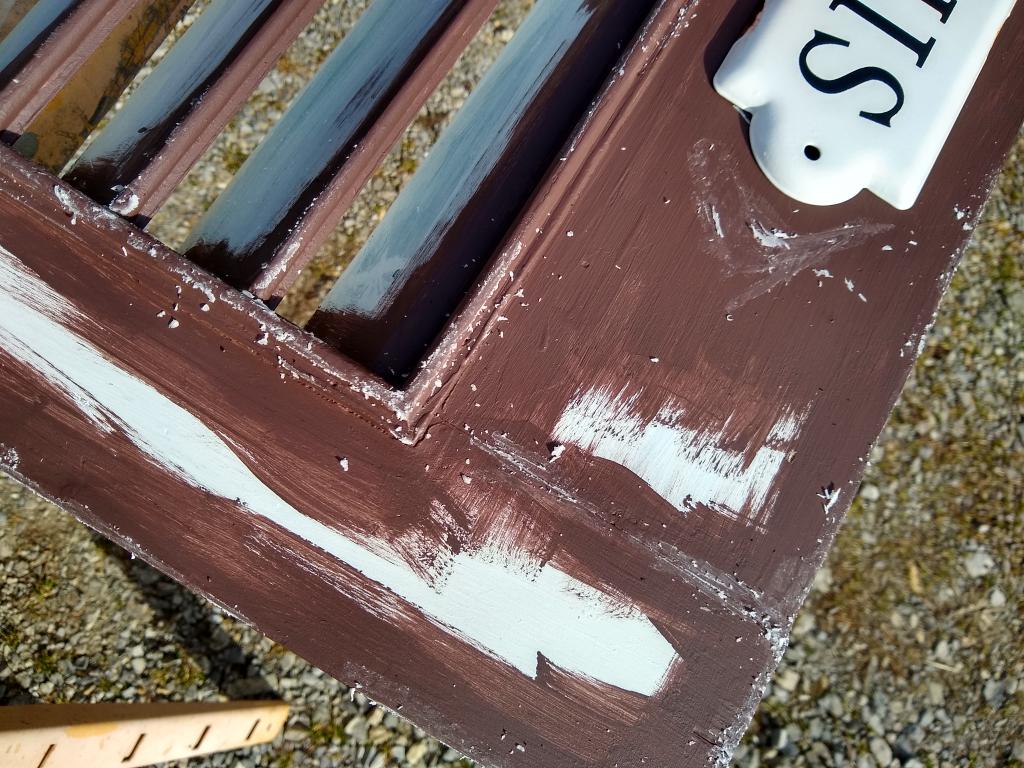
The first step is to add paint in a color that contrasts with the top coat. I chose a chocolate brown paint, because I want the impression that the shutter is old and made from a dark wood. Apply the undercoat to corners, decorative trim and edges where time and use would have worn the paint away.

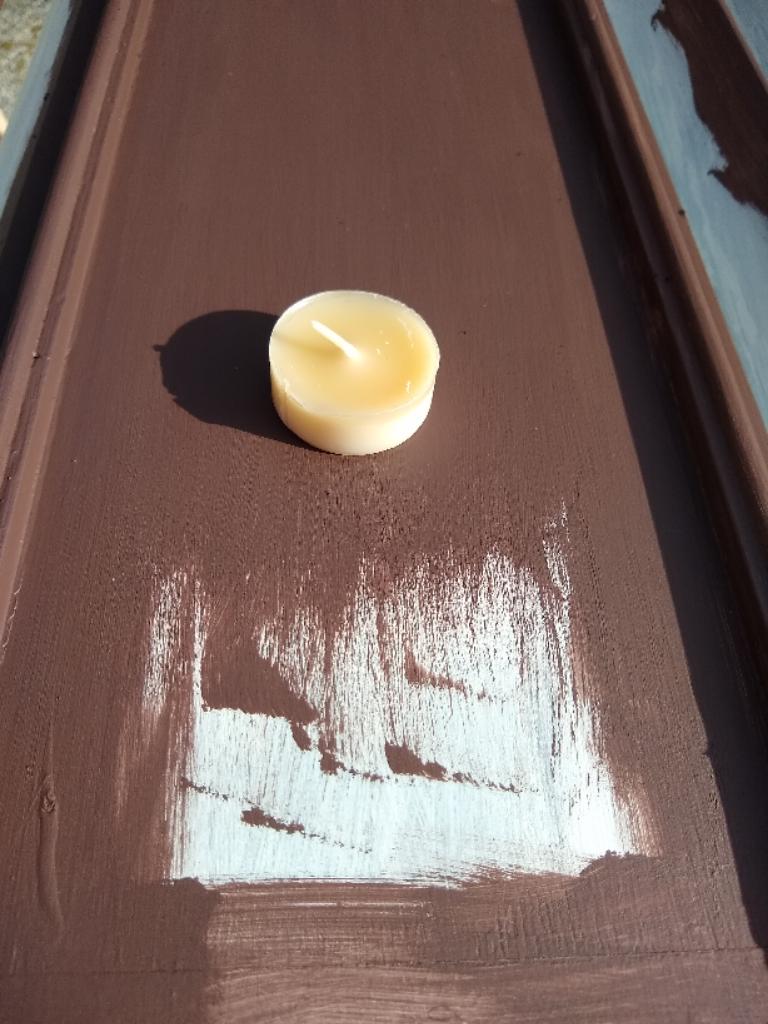
Next rub a wax candle on areas where you want the top coat to sand off easily. The wax will resist the paint. It’s important to use a white or light colored candle, otherwise you might stain the undercoat.

My sister gave me some enameled ‘his’ and ‘hers’ plates that are perfect for this project. Thanks, Allie!

Apply the wax heavily and don’t worry about removing the excess. Remember, we’re going for an aged/chippy/distressed look.

Now, it’s time for the top coat. If you have one, use an old project paint brush because jamming it down between the louvers will ruin the bristles. I tried using a foam brush and it didn’t hold up well.


Touch up any bare spots if needed and let the paint dry completely. Now, it’s time for the magic! If you’re like me and have forgotten where you waxed, start lightly sanding the piece and the paint will easily release in the waxed areas. Affix any decorative pieces and attach the hanging cleat to the back of the shutter and to the wall.

I bought the 200 lb. hanging cleat; you could certainly go lighter. This one has a level that slides into the cleat. We did not drill into studs to install, but the shutter is very secure.

The total cost of this project was $41. I paid $25 for the shutter, $15 for the hanging cleat and used about $1 of Oops paint.

Don’t mind my internet cable; I’ll place a basket there to hide it!

If you make this project, I would love to see it! Send me an email at arthurized dot home at gmail dot com.

Disclosure: In addition to occasional sponsored posts, Arthurized Home uses clickable affiliate links. That means that I may receive a small commission from sales at no extra charge to you. As always, my opinion is 100% my own, and I only recommend things that I truly love or use myself. Thank you for patronizing the brands that support Arthurized Home!

Copyright 2019-2021 © Arthurized Home – All Rights Reserved. This post is the original content of Arthurized Home. If you’re reading this on another site, it’s unArthurized.

Window Boxes on the Garage – An Upcycling Project

The garage at Arthurized Home once serviced our small neighborhood.
The previous owners supported themselves and their 14 children with income from this garage. (As much as I love a good exaggeration, that’s not one. They really raised 14 children in our 950 square foot cottage! But that’s a story for another day.) The garage has a pit for changing oil and a beam for hoisting engines. There’s a fireplace out there; you can see where someone closed up a 4′ x 8′ window (yet another story) and blocked up a bay door. We’ve got some future goals for fixing it up, but for now it’s a utilitarian eyesore.

Why yes, that is a leaf blower hanging in the window!

A few years ago while my sister was visiting, we stumbled upon the Funky Junk Interiors website. She made the brilliant suggestion that I should “junk up” the garage. I started with some upcycled window boxes made from discarded metal sawhorses.

Here’s how: Wearing safety glasses and heavy leather gloves, my husband cut the legs off of the saw horses, leaving the attachment and folding the cut edge down into the box. (You could file the sharp edges if you like. We didn’t bother.) He then drilled holes for hanging along the back of the window boxes using a drill bit for metal. Next he positioned the boxes and marked on the wall where the screws would go. Then he drilled pilot holes into the cinder block using a masonry drill bit. He aligned the boxes with the pilot holes, placed a large washer over the holes and secured each one with a masonry screw.

Using my coffee filter trick, I blocked the gaps on the corners and filled the planters with soil and flowers. Because the planters are shallow, I use a moisture retaining potting mix. I feed and water these on the same schedule as my other outdoor container plants. When it’s hot outside they get a drink twice a day.

While I wouldn’t recommend installing them on a playhouse, (hello, potential sharp metal edges) these window boxes would be great on a deck, a potting shed or other outbuilding. A she-shed? A chicken coop?
I could go on all day.

If you make this project, I’d love to see it! Email your pictures to arthurized dot home at gmail dot com.

Disclosure: In addition to occasional sponsored posts, Arthurized Home uses clickable affiliate links. That means that I may receive a small commission from sales at no extra charge to you. As always, my opinion is 100% my own, and I only recommend things that I truly love or use myself. Thank you for patronizing the brands that support Arthurized Home!

Copyright 2019-2021 © Arthurized Home – All Rights Reserved. This post is the original content of Arthurized Home. If you’re reading this on another site, it’s unArthurized.

Meal Prep for the Week of 3.31.2019

Happy Monday to you! Our weekend was crazy-busy which is a little unusual for us. We painted our bedroom last week so we played catch-up on all the delayed chores while the house was turned upside down.

Here’s what we’re eating this week:

Breakfast:
Tuesday, April 2nd is National Peanut Butter and Jelly Day in the US, so it seems like the perfect time for PBJ Overnight Oats. Plus, they’re insanely tasty! For a smooth mixture, whisk the PB and J together before the other ingredients.
https://cleanfoodcrush.com/clean-eating-pb-j-overnight-oats/

PB&J Overnight Oats

Lunch:
BLT Bowls with Cabbage – New recipe
https://cleanfoodcrush.com/blt-bowls-with-cabbage-eat-clean/

Dinner:
Ina’s Perfect Roast Chicken with Carrots and Onions
https://www.foodnetwork.com/recipes/ina-garten/perfect-roast-chicken-recipe-1940592
Lemon Baked Cod – New recipe
https://momfoodie.com/lemon-baked-cod/
Meatballs and Marinara with Zoodles – I don’t bother baking the meatballs separately. In a large skillet, bring the marinara sauce to a simmer and carefully place the meatballs in the sauce so they are not touching each other. Simmer for about twenty minutes or until cooked through. While the meatballs are simmering. saute the zucchini noodles in a separate skillet. Drain liquids from the zoodles and serve with meatballs and sauce on top. A little sprinkle of parmesan and Italian parsley doesn’t hurt! https://cleananddelicious.com/easy-meatball-recipe-gluten-free-paleo-whole-30

Meatballs and Marinara with Zoodles
My husband cooked, styled and photographed this one. I think he did a great job!

Teriyaki Salmon and Veggies – We use tamari to make this gluten free.
https://cleanfoodcrush.com/homemade-teriyaki-salmon-meal-prep/
Balsamic Chicken with Onions – New recipe: I’m going to try this with chicken thighs, brown rice and green beans on the side.
https://www.5dollardinners.com/balsamic-chicken-with-onions/

Sheet Pan Teriyaki Salmon and Veggies – not the prettiest dinner, but it’s flavorful!

Snacks:
Cantaloupe, Pineapple, Grapes, Apples, Oranges, Bananas
Bell Peppers, Cucumbers, Celery and Peanut Butter, Cheddar Cheese

Treat: Coconut Snowballs
https://cleanfoodcrush.com/coconut-snowballs-recipe/

Be on guard today for any April Foolin’ and have a fantastic week!

Disclosure: In addition to occasional sponsored posts, Arthurized Home uses clickable affiliate links. That means that I may receive a small commission from sales at no extra charge to you. As always, my opinion is 100% my own, and I only recommend things that I truly love or use myself. Thank you for patronizing the brands that support Arthurized Home!

Copyright 2019-2021 © Arthurized Home – All Rights Reserved. This post is the original content of Arthurized Home. If you’re reading this on another site, it’s unArthurized.

I Better See A Daggone Hobbit Up In Here

A hiking review of Cascades and Barney’s Wall near Pembroke, VA
8 miles round trip, 1,600′ elevation gain
TRIGGER WARNING: Terrifying Photos

If there’s one thing you should know about me, it’s that I don’t hike. I’m not one of those people who gets blissed out in the woods. The beach, yes. Ticks, bears, snakes, serial killers and poison ivy? No. However, I enjoy being married to one of those blissed out hikers, so I hike. Occasionally. And under great duress.

We paid $3 for this super awesome warning, but I guess they won’t tow away your car if you have it, so, okay cool. Also, nobody listens to me. Hiking. Is. Dangerous.
They even tell you that up front. Can’t say you weren’t warned.

So the hike to the falls is gorgeous.

We got there early and had the trail to ourselves. This section felt like hiking into The Shire.

There were fallen trees everywhere and even over the trail in several places. We climbed over some and crawled under two of them. Yes, crawled on our knees. Not kidding.

The falls are truly magical. Especially early in the morning before the waters fill with amorous Virginia Tech students.

I maintained a good attitude for the first 2.5 miles of our hike. Right up until we met a couple on their return trip from Barney’s Wall. They had just encountered a bear at a campsite near the top. I went into High Alert! Stressed out of my mind for the next 5.5 miles, I scanned the woods in every direction. Every boulder was a bear. Every distant stump was a bear. I’ll never understand how this is supposed to be relaxing.
Panic mode: Expert Level

View from Barney’s Wall. We met a lady on the way down from Cascades who said she’s never made it up to Barney’s Wall. My advice to her: Don’t. Just Google pictures of it. It looks the same. That lady said her group had just seen an enormous snake. The biggest one she’d ever seen. Good times.

Bear Campsite. And I really had to pee. No worries, we’re only 4 MILES from a bathroom.

Remember that I said we climbed over fallen tree trunks? I started over this one, reaching out to steady myself on a small tree nearby. Guess what I wrapped my hand around?

Creepy.

And his friend Super Creepy. And yes, I screamed like a girl. Hiking is like being trapped in a horror flick set in nature, not in some axe murderer’s wood shed. They don’t tell you that dying of a heart attack while hiking is a very real possibility. Just from sheer terror.

Oh, thank you, Jesus! Only two more miles of this mess. I just have to make it back to the car. I can do this, right? The sound of rushing water from the creek was not helping the really-gotta-pee situation.

We took the Upper Trail back to the parking lot and freedom. It was a nice assortment of rocks, pointy rocks, sharp pointy rocks, rocks covered in wet slippery leaves and mud puddles. And trees overhead just waiting to fall and crush us.
And my husband l.o.v.e.d. it.

If you’d still like to visit after all that, go here to check it out: https://www.virginia.org/listings/OutdoorsAndSports/CascadesNationalRecreationTrail/

https://www.hikingupward.com/JNF/TheCascadesBarneysWall/

Cascades Pro Tips: Highly recommended for a quick hike with great views. Get there early for parking and solitude. Because the Cascades hike is so popular, the trails fill up in beautiful weather. We took the Lower Trail for the climb to the falls. The scenery is beautiful, but be prepared to climb up and down stone steps toward the end. A little challenging for this shorty. If you want an easier stroll, the Upper Trail is wider and more accessible. The Upper Trail views are slightly less spectacular but still pretty.


Disclosure: In addition to occasional sponsored posts, Arthurized Home uses clickable affiliate links. That means that I may receive a small commission from sales at no extra charge to you. As always, my opinion is 100% my own, and I only recommend things that I truly love or use myself. Thank you for patronizing the brands that support Arthurized Home!

Copyright 2019-2021 © Arthurized Home – All Rights Reserved. This post is the original content of Arthurized Home. If you’re reading this on another site, it’s unArthurized.

Seed Starting Pots – A Recycling Project

Do you know that you’ve got an endless supply of seed starting pots in your home? Well, they’re not pots yet. They’re more commonly known as empty paper towel and toilet paper rolls! (I’m trying to refrain from potty puns.)

If you’re using paper towel rolls, cut them in half or thirds.
(Do you think my background looks like tiny rolls of toilet paper?)
Press the tube flat.
Open up the tube and pinch the first folds together and press flat again to form a square.
Measure across the top; mine is just over one inch.
Use half of that measurement to mark the fold lines. My fold line is 1/2″ from the bottom.
Using sturdy scissors, cut along each of the 4 corners up to the fold line. You don’t have to mark the flaps A, B, C & D. I’ve done that to better explain this step. I hope!
Now fold each flap toward the center of the pot. Starting from the top (A),
work clockwise (B, C). When you reach the flap on the left (D), tuck the top half of it
under the first flap (A). That will secure the bottom of the pot.

You want the pot to close tightly at the bottom so the soil is contained.
If yours has a gap, re-fold the flap a little higher until the gap is closed.
Now you have a little seed starting pot!
But he needs some friends.
Fill with potting soil and plant those seeds!

When your seedlings are ready to transplant into a larger pot or the garden, open the flaps and plant it whole. Or, carefully cut the side of the pot open from top to bottom without disturbing the roots. The pot will decompose over time. Happy gardening!

Disclosure: In addition to occasional sponsored posts, Arthurized Home uses clickable affiliate links. That means that I may receive a small commission from sales at no extra charge to you. As always, my opinion is 100% my own, and I only recommend things that I truly love or use myself. Thank you for patronizing the brands that support Arthurized Home!

Copyright 2019-2021 © Arthurized Home – All Rights Reserved. This post is the original content of Arthurized Home. If you’re reading this on another site, it’s unArthurized.

Meal Prep for Week of 3.24.19

We’re trying several new recipes this week. Three of these are recipes that we’ve made before and they are keepers! The baked oatmeal is a breakfast favorite. It’s an easy dish for guests and is a crowd-pleaser. The Steak Fajitas and Roast Chicken with Carrots and Bacon are tried and true as well.

Here’s the menu for this week:
Breakfast:
Blueberry and Raspberry Baked Oatmeal https://www.sohowsittaste.com/blueberry-raspberry-baked-oatmeal

Lunch:
Sweet N’ Spicy Pineapple Chicken Skillet https://cleanfoodcrush.com/sweet-n-spicey-pineapple-chicken-skillet/

Dinner:
Strawberry Avocado Salad with Honey Lime Dressing https://cleanfoodcrush.com/strawberry-avocado-salad-clean-eating/
Roast Chicken with Carrots and Bacon – I’m taking some help from the grocery store and using a bag of organic baby carrots. I prefer crispy bacon, so I’ll fry it separately and sprinkle it on top when I serve this dish. https://cleanfoodcrush.com/chicken-bacon-skillet/
Sheet Pan Steak Fajitas https://kirbiecravings.com/sheet-pan-steak-fajitas/
Quick and Easy Chicken Salad https://cleanfoodcrush.com/quick-easy-chicken-salad-recipe/
Garlic Butter Salmon and Red Potatoes https://cleanfoodcrush.com/one-sheet-pan-garlic-butter-salmon/

Quick and easy Chicken Salad – I made a little extra dressing because we are serving this over a bed of baby spinach.

Snacks:
Homemade Granola – This recipe name should say “processed sugar free” because it contains maple syrup. https://www.5dollardinners.com/homemade-granola-sugar-free/
Greek Yogurt, Grapes, Mandarins, Cantaloupe, Pineapple
Bell Peppers and Cucumbers, Celery and Peanut Butter
Homemade Dill Dip is from this dressing recipe. We use Sir Kensington’s Organic Mayonnaise and substitute raw honey for the sugar. https://thepioneerwoman.com/cooking/layered-salad/

I found the joie containers at Home Goods; they hold about two tablespoons of dip. The tiny jar in the back is from a restaurant. It’s the perfect size for this use.

Treat:
Double Dark Chocolate Brownies https://cleanfoodcrush.com/clean-eating-double-dark-chocolate-brownies/

So good! The recipe says to finely grate the zucchini, but we don’t have kids that we’re trying to sneak vegetables into, so I gave my zukes a regular grate. You can see them in the finished product, similar to a chocolate zucchini bread. If that bothers you, go with the fine grate.

I hope you’ll try some of these recipes this week. Let me know in the comments if you do! Have a great week!

Disclosure: In addition to occasional sponsored posts, Arthurized Home uses clickable affiliate links. That means that I may receive a small commission from sales at no extra charge to you. As always, my opinion is 100% my own, and I only recommend things that I truly love or use myself. Thank you for patronizing the brands that support Arthurized Home!

Copyright 2019-2021 © Arthurized Home – All Rights Reserved. This post is the original content of Arthurized Home. If you’re reading this on another site, it’s unArthurized.

Real Food Meal Planning

An empty refrigerator can only mean one thing. It’s time to get meal planning! But first, a note about “real” food: I define real food as made in nature and not in a factory. If you define it differently, that’s great! Do what works best for your health, lifestyle and budget.

If you are on a budget like me, the first step is to review the online weekly grocery ads. In our small city we have Aldi, Kroger, Earth Fare, Fresh Market, Wal-mart and Food Lion. Skim the ads quickly because we’re looking for foods that are natural or minimally processed. List the sale items by store. I’m old school, so I use a low tech piece of paper for this step. Use ‘notes’ in your phone or a grocery store app if that works best for you.

Now it’s time for the menu. If you have go-to recipes for the sale items, list those. When I need some recipe inspiration I search my favorite real food websites. If strawberries are on sale this week, enter “strawberries” into the search box. Scroll through the recipes for something appealing and save to Pinterest or print the recipe out. I typically plan five dinners per week. This leaves room in the schedule for a leftovers night or eating out.

Bonus points if your meal uses more than one sale item!

We have a high tolerance for eating the same meal repeatedly, so breakfast and lunch are the same Monday-Friday. If that’s not you, make enough at dinner to have lunch leftovers the next day.

Once you’ve compiled your recipes, fill out the rest of the grocery list. I skim each recipe and make sure that I have the pantry items on hand. If not, they are added to the list, keeping a tally of how many of each item I need. For example, if three recipes call for garlic, total up the number of cloves needed and note that next to “garlic” on the list.

If I’m going to buy an item at a certain store, I add the store’s initial to the check box.

Now it’s time to grocery shop! I’m heading to the store(s), but if you’re using a grocery app, plug in your list or order online. I hope this is helpful to you. If you have any questions about my process let me know in the comments.

This is not a sponsored post. I am not in partnership with, nor do I own any of these websites or the recipes linked here.

Disclosure: In addition to occasional sponsored posts, Arthurized Home uses clickable affiliate links. That means that I may receive a small commission from sales at no extra charge to you. As always, my opinion is 100% my own, and I only recommend things that I truly love or use myself. Thank you for patronizing the brands that support Arthurized Home!

Copyright 2019-2021 © Arthurized Home – All Rights Reserved. This post is the original content of Arthurized Home. If you’re reading this on another site, it’s unArthurized.

How to Make a Date Night Passport

Here’s a fun gift idea for your honey or anyone you enjoy spending time with, really. Create a Date Night Passport for them filled with gift cards to your favorite restaurants, IOUs or tickets to events. This does not have to be expensive!


I made this one for my husband’s Christmas gift a few years ago.

For this project, you will need:

  • Slim pocket calendar or notebook with a plain cover  – I found mine at the dollar store. If you don’t want the clear, plastic cover you can create your own booklet. You’ll need a piece of heavy cardstock to make a cover. The advantage to creating your own is that you can make it any size, design or theme you like.
  • Sturdy white or ivory cardstock paper – a few sheets, depending on the size of the calendar. I used six pages of 8.5” x 11” cardstock cut to 6.75” x 6.5” for a total of 6 passport pages, 12 folded.
  • A variety of stamps or stickers – for the book title and to mimic passport stamps on the inside pages.
  • Stamping ink in black, brown, navy or dark grey

If you would rather doodle your own passport stamps, you won’t need the stamps or ink. Just grab your favorite pens or markers.

  • Paper cutter or a ruler and scissors
  • Stapler

Remove the paper calendar from the cover and measure the pages, unfolded. Cut 6 cardstock pages to that measurement. Neatly fold each page in half. If your measurements are not square, make sure to fold in the direction of the passport cover spine. Next, stamp the pages however you like. I made a page for each month of the year and stamped ornate keys, postage stamps, medallions and fleur-de-lis, using chocolate brown stamping ink.

A favorite passport ‘stamp’. This is a rub-on transfer from the craft store.

On the passport cover, add your title. I used silver stickers to spell out “Date Night” and added a small silver flourish below the title. Assemble the pages in order inside the cover and staple down the spine.

Now comes the fun part; filling the passport! Here are some ideas:

Gift cards: Restaurants, Coffee Shops, Ice Cream and Frozen Yogurt Shops, Book Store, Massage, Manicure/Pedicure

Tickets: Movie Theater, Sporting Events, Concerts, Live Theater, Comedy Club

IOUs: Back Rub, Breakfast in Bed, Foot Massage, A Day Trip, Hiking, Movie Night at Home, A Honey-Do Chore, Seasonal Activities (Pumpkin Patch, Fall Foliage Drive, Ice Skating, A day at the Lake or Pool, Parades, Farmer’s Market, Holiday Lights Tours) Antiquing, Thrift Shopping, Picnic in the Park

No truer love was ever found than that of my husband and Starbucks coffee!

Kid’s Activities: Zoo Trip, Water Park, Go-carts, Mini Golf, Aquarium, Geocaching, Hot Chocolate Date, Run a 5k together, Science Museum

IOUs for Kids: Library Date, Build a Fort, Pillow Fight, Favorite Dinner, Favorite Dessert, Craft Day, Card/Board Game Night, Permission to Jump on the Bed, Bake Cookies together, Skip a Chore, No Rules Day (My SIL occasionally did this with our nephew)


Oh, hey! Date night at the movies?

Now it’s time to make this your own! What activities would you add to this list?

Disclosure: In addition to occasional sponsored posts, Arthurized Home uses clickable affiliate links. That means that I may receive a small commission from sales at no extra charge to you. As always, my opinion is 100% my own, and I only recommend things that I truly love or use myself. Thank you for patronizing the brands that support Arthurized Home!

Copyright 2019-2021 © Arthurized Home – All Rights Reserved. This post is the original content of Arthurized Home. If you’re reading this on another site, it’s unArthurized.

A Quick Tip for Potting House Plants

This sweet little planter belonged to my Grandma. She had a fierce green thumb and could grow anything.

I had a shamrock (oxalis) house plant that hung in with me and my less-than-fierce green thumb for over 15 years. No, I don’t keep track of my houseplant’s birthdays; I only know this because he moved jobs with me and I’ve been at this job for 15 years. Over the past year he started languishing and I knew it was time to let him go to Jesus.

Enter Shamrock 2.0

See that drainage hole? If you plant without blocking it, when you water the plant the fresh soil will wash right out and you’ll have a muddy planter tray. Not pretty.

To prevent that we’re literally going to filter it. With a paper coffee filter, or three.

Place the first filter over the drainage hole and then layer a few more in the bottom of the pot. Without disturbing the filters, carefully place the plant in the pot. Top off with extra soil if needed and you’re done!

Enjoy your new house plant!

Do you have favorite tips and tricks for container gardening? Please share in the comments.

Disclosure: In addition to occasional sponsored posts, Arthurized Home uses clickable affiliate links. That means that I may receive a small commission from sales at no extra charge to you. As always, my opinion is 100% my own, and I only recommend things that I truly love or use myself. Thank you for patronizing the brands that support Arthurized Home!

Copyright 2019-2021 © Arthurized Home – All Rights Reserved. This post is the original content of Arthurized Home. If you’re reading this on another site, it’s unArthurized.

Meal Prep for the week of 3.17.19

With St. Pat and his truckload of potatoes in the rear-view mirror, it’s time for a fresh week of clean eating. We’re trying some new recipes and eating a few meals from the freezer, which is the beauty of double batching during meal prep. The taco and bell pepper soups are ready to heat and eat. Here’s what’s on the menu this week:

Baking Chocolate and Coconut Granola. Your kitchen will smell amazing while this is in the oven!

Breakfast:
Berries and Cream Overnight Oats. If it ain’t broke, why fix it? We make this recipe as is and add a handful of blueberries. https://cleanfoodcrush.com/clean-mornings-strawberries-cream-overnight-oats/

Lunch:
We’re trying a couple of new recipes this week.
Sheet Pan Steak Fajitas https://kirbiecravings.com/sheet-pan-steak-fajitas/
and
Creamy Coconut Lentil Curry https://www.theendlessmeal.com/creamy-coconut-lentil-curry/

Sheet Pan Steak Fajitas – The flavor is amazing and the spice mixture is spot on. The next time we make them we’ll try grilling the steaks and sauteing the onions and peppers separately.

Dinner:
Southwest Sausage and Egg Breakfast Casserole. My sister-in-law, Kathy gave me this recipe, so I don’t have a link but I’ve shared it below.
Taco Soup https://cleanfoodcrush.com/clean-eating-weeknight-taco-soup/
Pizza Baked Chicken https://cleanfoodcrush.com/clean-eating-pizza-baked-chicken/
Bell Pepper Soup https://cleanfoodcrush.com/?s=bell%20pepper%20soup
Grass Fed Beef Burgers with Steak Fries

Taco Soup

A note about pepperoni:
We try to eat 90/10. 90% foods made in nature, and less than 10% foods made in a factory. This is part of the 10%. Try to find uncured pepperoni without added nitrates.
We eat pepperoni sparingly, as a condiment.

Snacks:
Bananas, Apples, Oranges, Cantaloupe, Grapes
Cucumbers, Bell Peppers, Cherry Tomatoes
Chocolate Coconut Granola with Greek Yogurt – I left out the brown sugar and added some honey. I also reduced the baking time to about 12 minutes, each round. Watch this carefully so that it doesn’t burn. I sprinkled some Lily’s chocolate chips on while the granola was still warm and let them melt into it. The next time, I will sprinkle some extra coconut along with the chocolate. https://www.momables.com/chocolate-coconut-granola-recipe/

Treat: Carrot Cake Breakfast Cookies https://kristineskitchenblog.com/carrot-cake-breakfast-cookies/

Kathy’s Southwest Sausage and Egg Breakfast Casserole – Great for guests and brunch potlucks. Bake it the night before and warm gently before serving.
Recipe:
1 lb. Sausage – I use Jimmy Dean’s Natural
1 medium onion, minced
1 4oz. can green chilies, drained
1 t. garlic powder
Cook all of the above together and spread evenly in the bottom of a 9 x 13 pan.
10 eggs, beaten
1 T. crushed red pepper flakes (or to your taste)
4 oz. sharp cheddar cheese, grated
Mix the eggs with the crushed red pepper flakes and pour over sausage mixture. Sprinkle the cheese on top and bake for 45 minutes at 350°.

If you try these recipes, let me know in the comments. Have a great week!

This is not a sponsored post. I am not in partnership with, nor do I own any of these websites or the recipes linked here.

Disclosure: In addition to occasional sponsored posts, Arthurized Home uses clickable affiliate links. That means that I may receive a small commission from sales at no extra charge to you. As always, my opinion is 100% my own, and I only recommend things that I truly love or use myself. Thank you for patronizing the brands that support Arthurized Home!

Copyright 2019-2021 © Arthurized Home – All Rights Reserved. This post is the original content of Arthurized Home. If you’re reading this on another site, it’s unArthurized.