Author: arthurized

Real Food Menu for Week of 9.15.2019

I had a hot minute to pop into a thrift store on Friday evening, and scored some vintage Pyrex bowls for a Hamilton Beach mixer. I also bought a Pyrex square baker. ‘Cause I need more stuff! In my defense, I’ve already used everything but the pour bowl.

We’ve been busy in the Arthurized Home Test Kitchens, prepping 7 new recipes for this week’s menu! We’ve found several keepers and a new favorite vegetarian soup. This one will be in the rotation frequently. Let’s dive in, shall we? (To the menu, not the soup.)

Breakfast:
Sausage Breakfast Scramble – New Recipe! Here’s a bowl of savory, comfort food for breakfast. We made the Italian version; omitting the salt and using just one half cup of cheese. But, if you like two cups, toss it in there! I don’t judge.
https://www.southyourmouth.com/2016/07/sausage-breakfast-scramble-low-carb.html

Lunch:
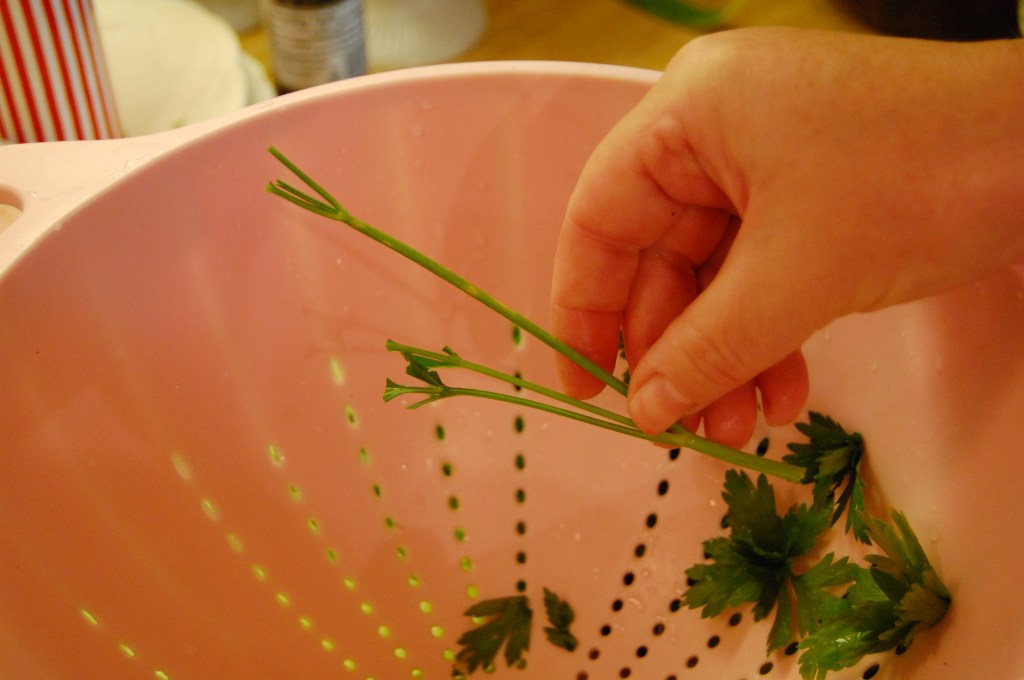
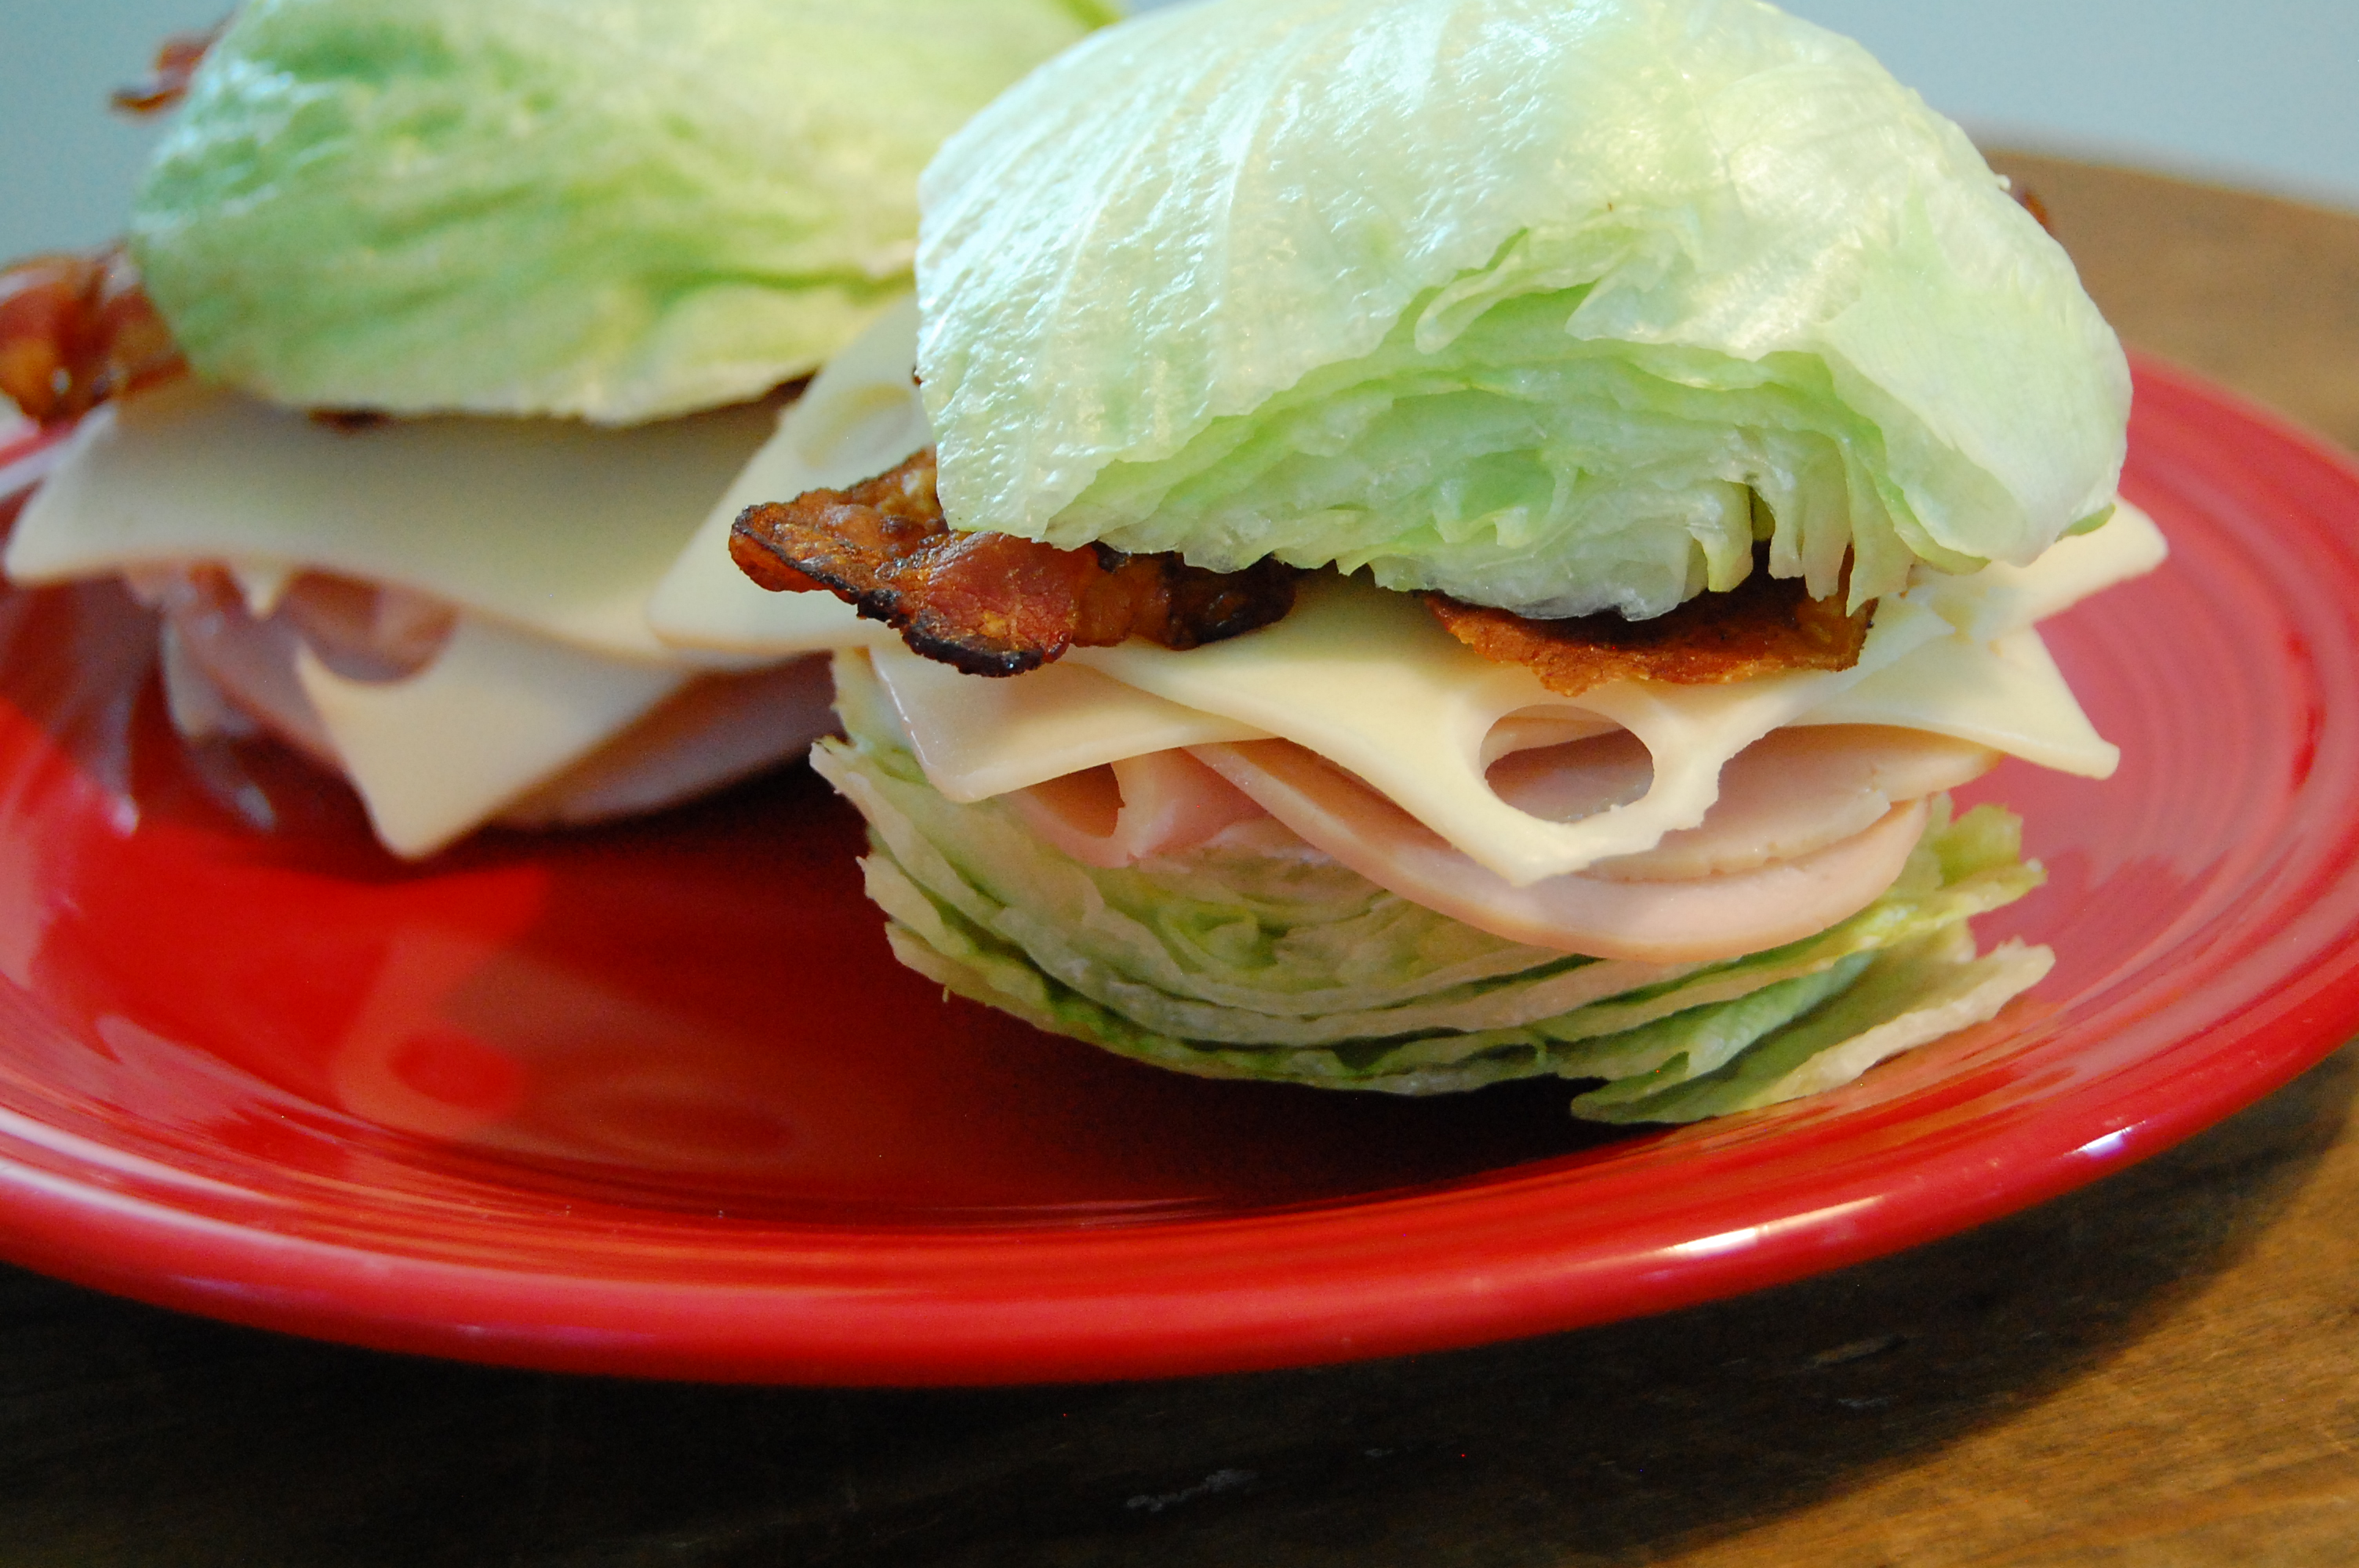
Lemony Avocado Tuna Salad – Mark doesn’t care for avocado, so we sub in chopped cucumber. It’s every bit as delicious.
https://cleanfoodcrush.com/eat-clean-lemony-avocado-tuna-salad/

Dinner:

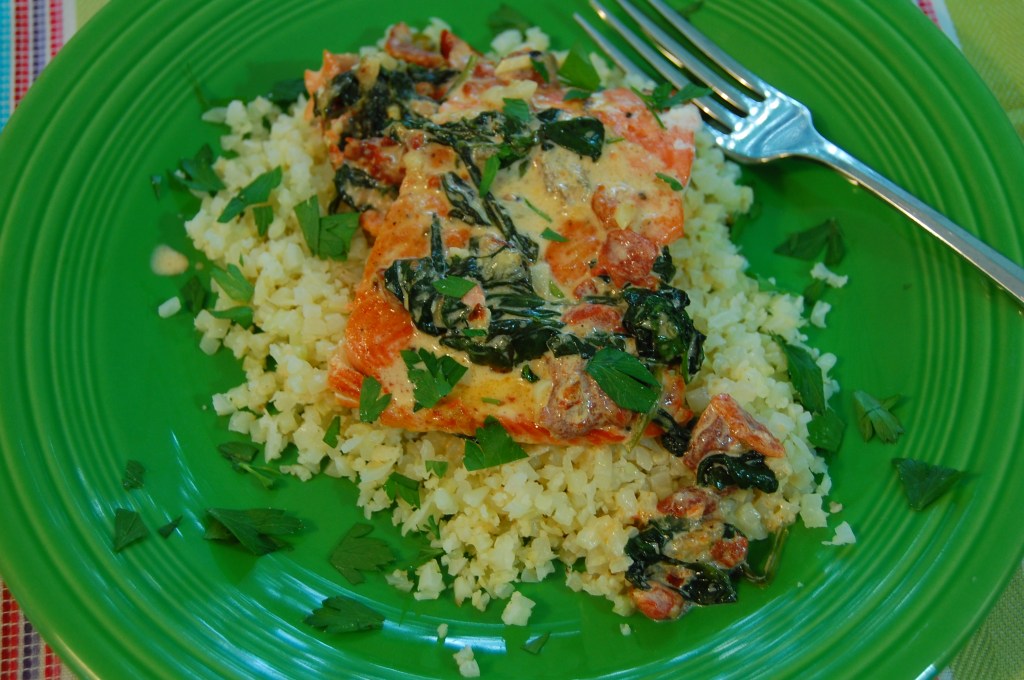
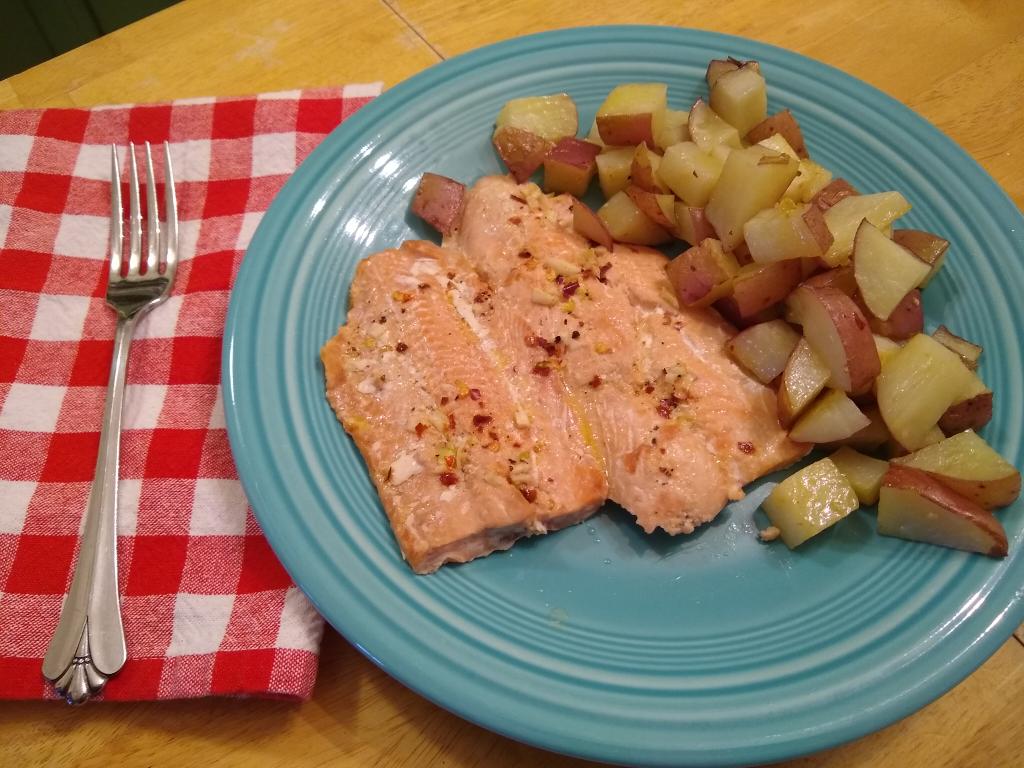
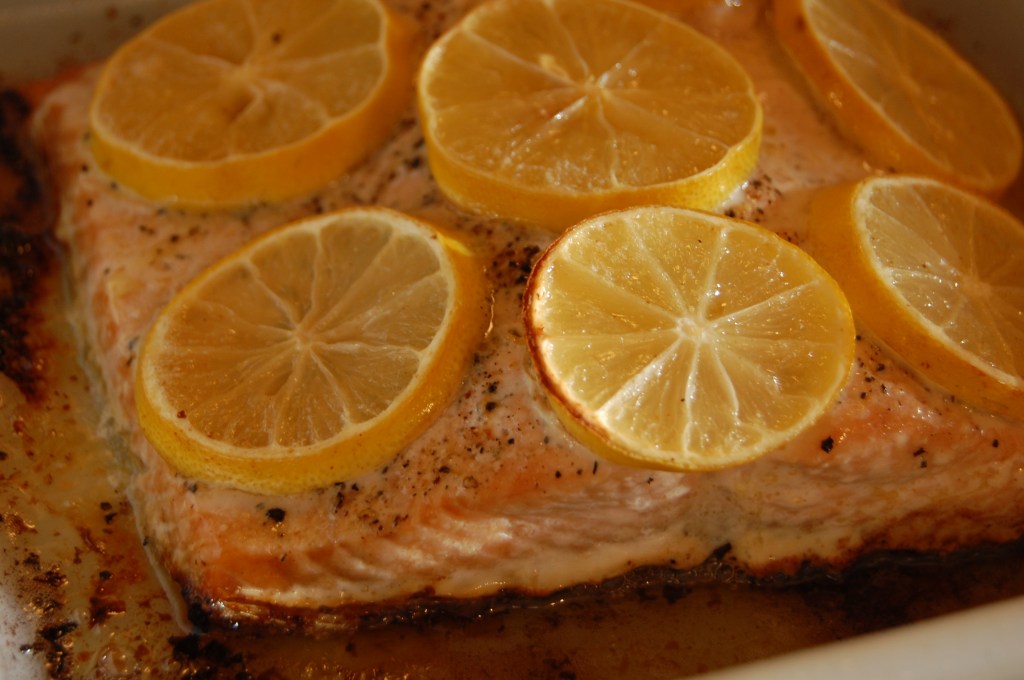
Baked Salmon with Lemon Butter – New Recipe! The fastest entree you’ll ever throw together. You can have this in the oven in five minutes, tops! I didn’t bother to make the side of lemon butter. Because dang, that’s dedication to your butter, there. Clearly, I’m just not at that level.
https://www.dietdoctor.com/recipes/keto-baked-salmon-lemon-butter/servings/2

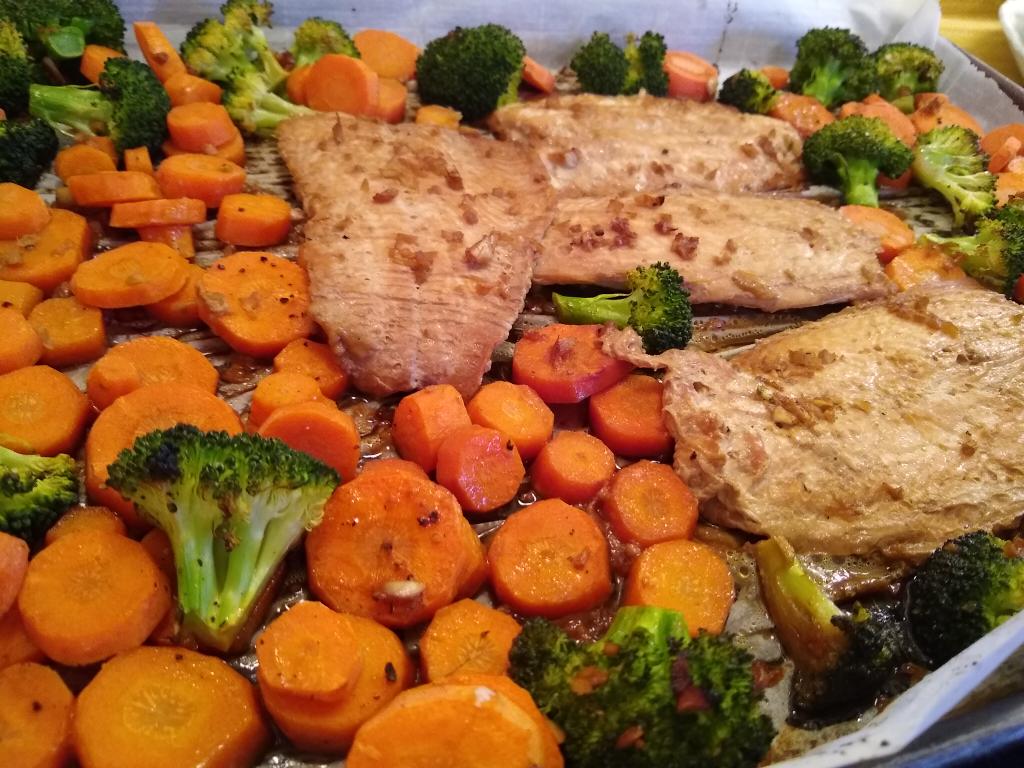
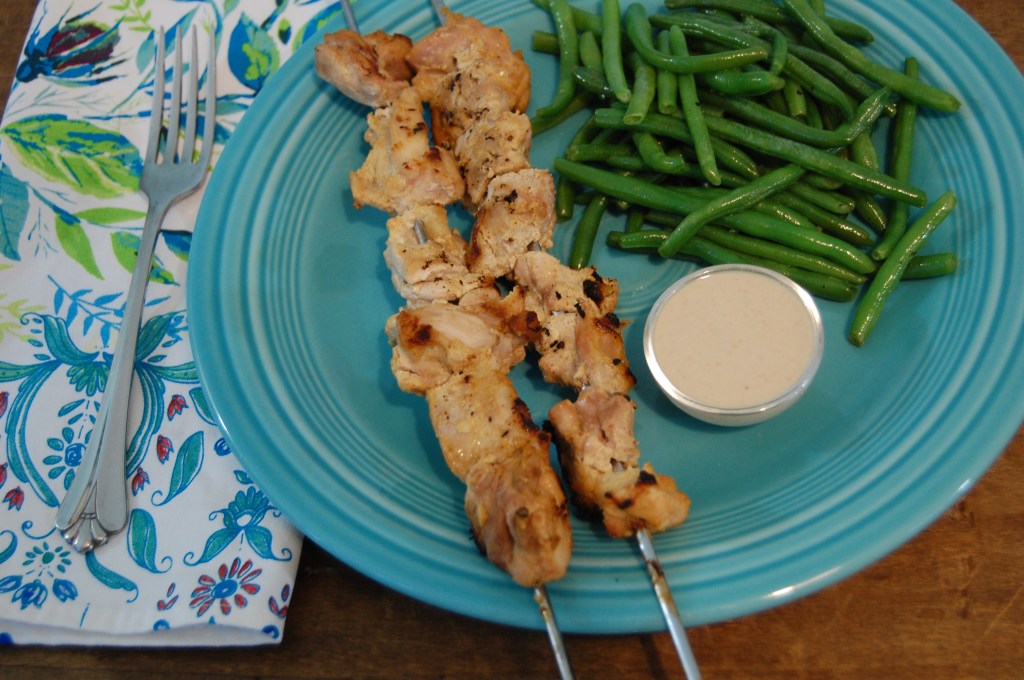
Middle Eastern Chicken Kebabs – New Recipe! When we’re cooking for a crowd, we use bamboo skewers, but when it’s just the two of us, we use stainless.
https://mythreeseasons.com/middle-eastern-chicken-kebabs/
Basic Tahini Sauce
https://mythreeseasons.com/tahini-dressing/

Forty-Clove Chicken Filice – New Recipe! Take some help from the grocery store on this one, and buy a package of peeled garlic cloves. Ain’t nobody got time for peeling forty cloves of garlic! Don’t be afraid of all that garlic; baking just makes them sweeter. You won’t repel vampires.
https://www.cooks.com/recipe/u81yk046/40-clove-chicken-filice.html

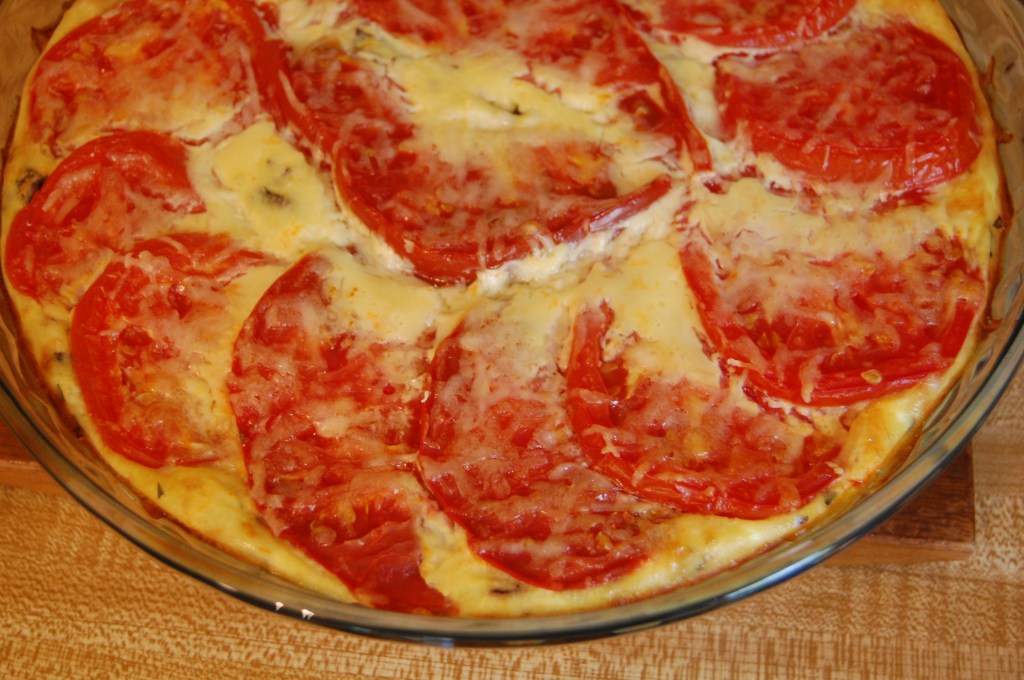
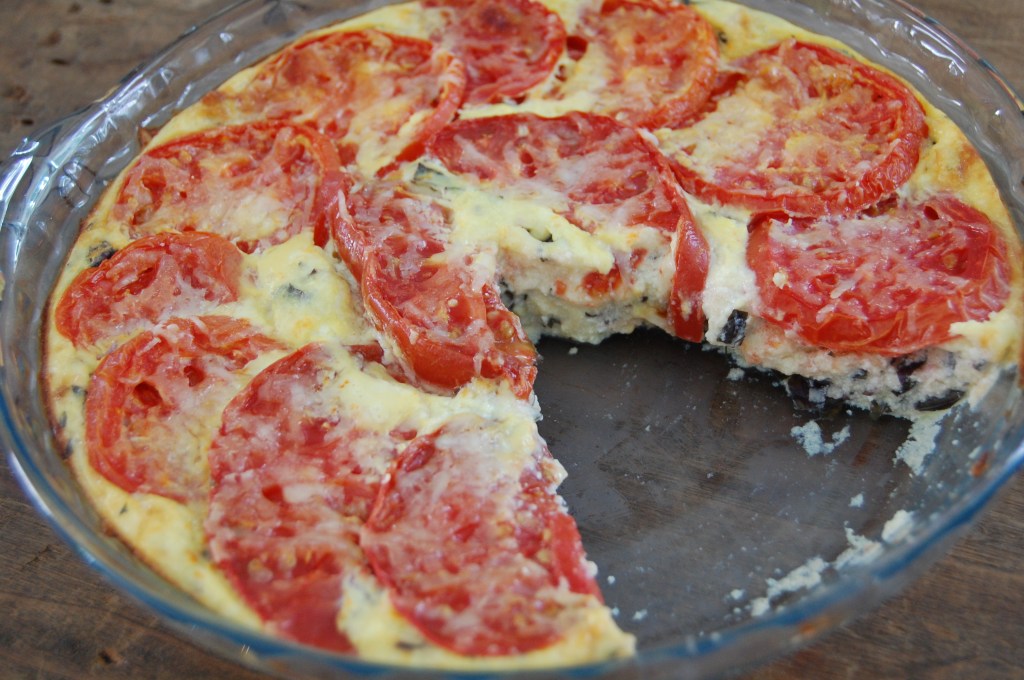
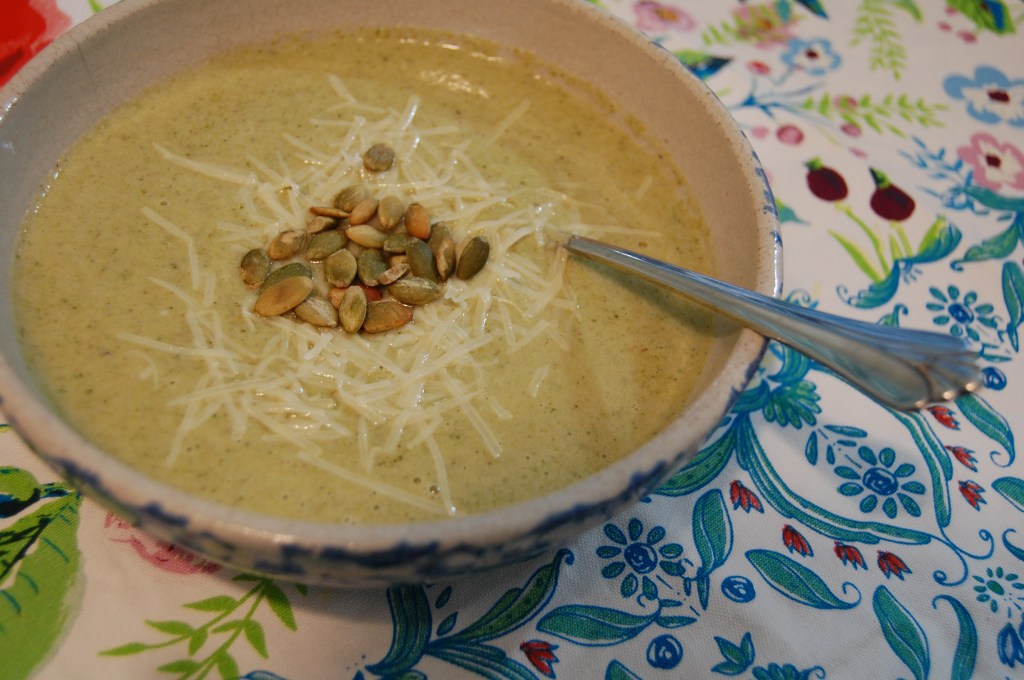
Green Curry of Broccoli Soup – New Recipe! She’s no beauty queen, but if you’re looking for a mild curry, I’ve gotcha covered. Mine is the vegetarian version, topped with a little parmesan and a few toasted pepitas.
https://thestonesoup.com/blog/2012/01/16/7-surprising-reasons-to-eat-more-soup-green-curry-of-broccoli-soup/

Ropa Vieja

  • Servings: 6-8 very hungry people
  • Difficulty: Easy
  • Print

My very Americanized version of this hearty shredded beef dish.

Ingredients

  • 3 lbs beef chuck roast
  • 1 package (1 oz.) dry onion soup mix – or make your own like this: https://feedingbig.com/clean-eating-onion-soup-mix.html
  • 1 onion, chopped
  • 1 c. red wine
  • 3 T. coconut oil
  • 1/2 c. salsa – look for salsa with no added sugar
  • 1/2 c. water – optional (I almost never add this)
  • Garnishes: Any combination of sour cream, salsa, cilantro, lime wedges, shredded cheese, olives and avocado
  • 3-4 cups cooked rice of your choice or cauliflower rice for low-carb

Directions

  1. Preheat oven to 325°. Heat oil in dutch oven, over med-high. Add beef and brown on all sides.
  2. Reduce heat, add onion and cook until soft but not browned.
  3. Add onion soup mix, wine, salsa and water (if using). Bring to a boil.
  4. Cover and place in preheated oven for 2 1/2 to 3 hours. Check occasionally to make sure there is sufficient liquid in the pan, add more wine if necessary.
  5. Shred beef before serving. Serve over rice, or cauliflower rice for low-carb. Garnish as desired. Enjoy!

Snack:
Parmesan chips – New Recipe! – These chips are dangerously addictive! They would be great on a little appetizer tray. Scale this recipe to the number of servings you need. I used my 1″ cookie scoop to portion them onto the Silpat. The Silpat is great for this, because if you’re baking several batches, you won’t need a fresh piece of parchment paper each time.
https://www.dietdoctor.com/recipes/parmesan-chips

Treat:
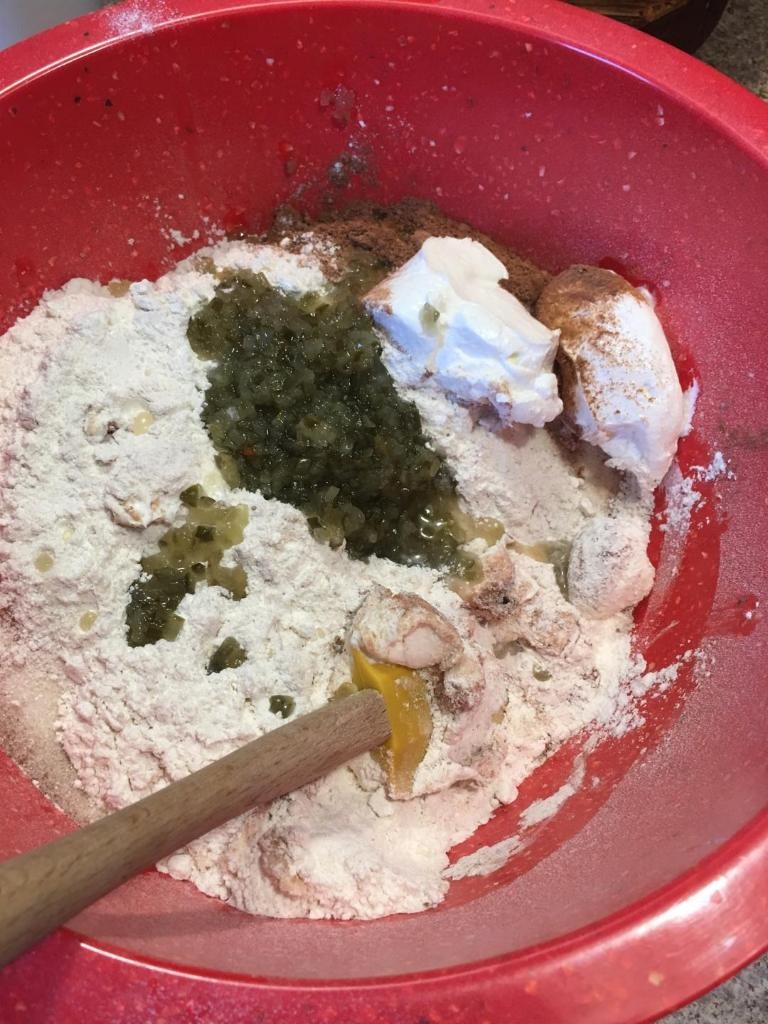
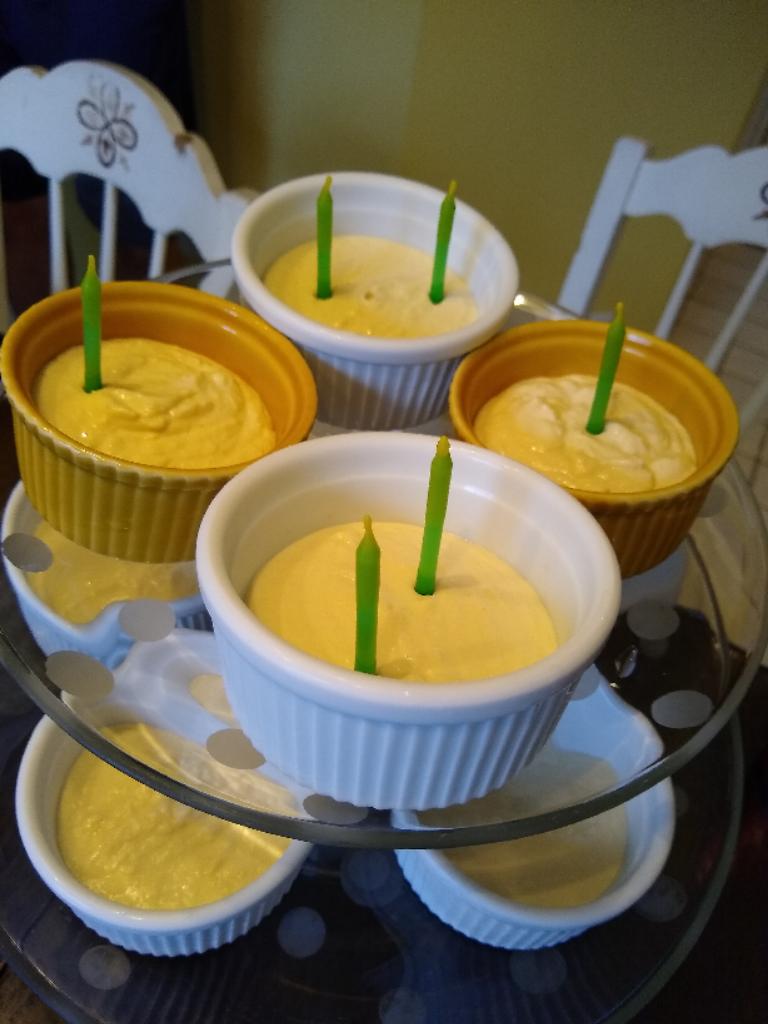
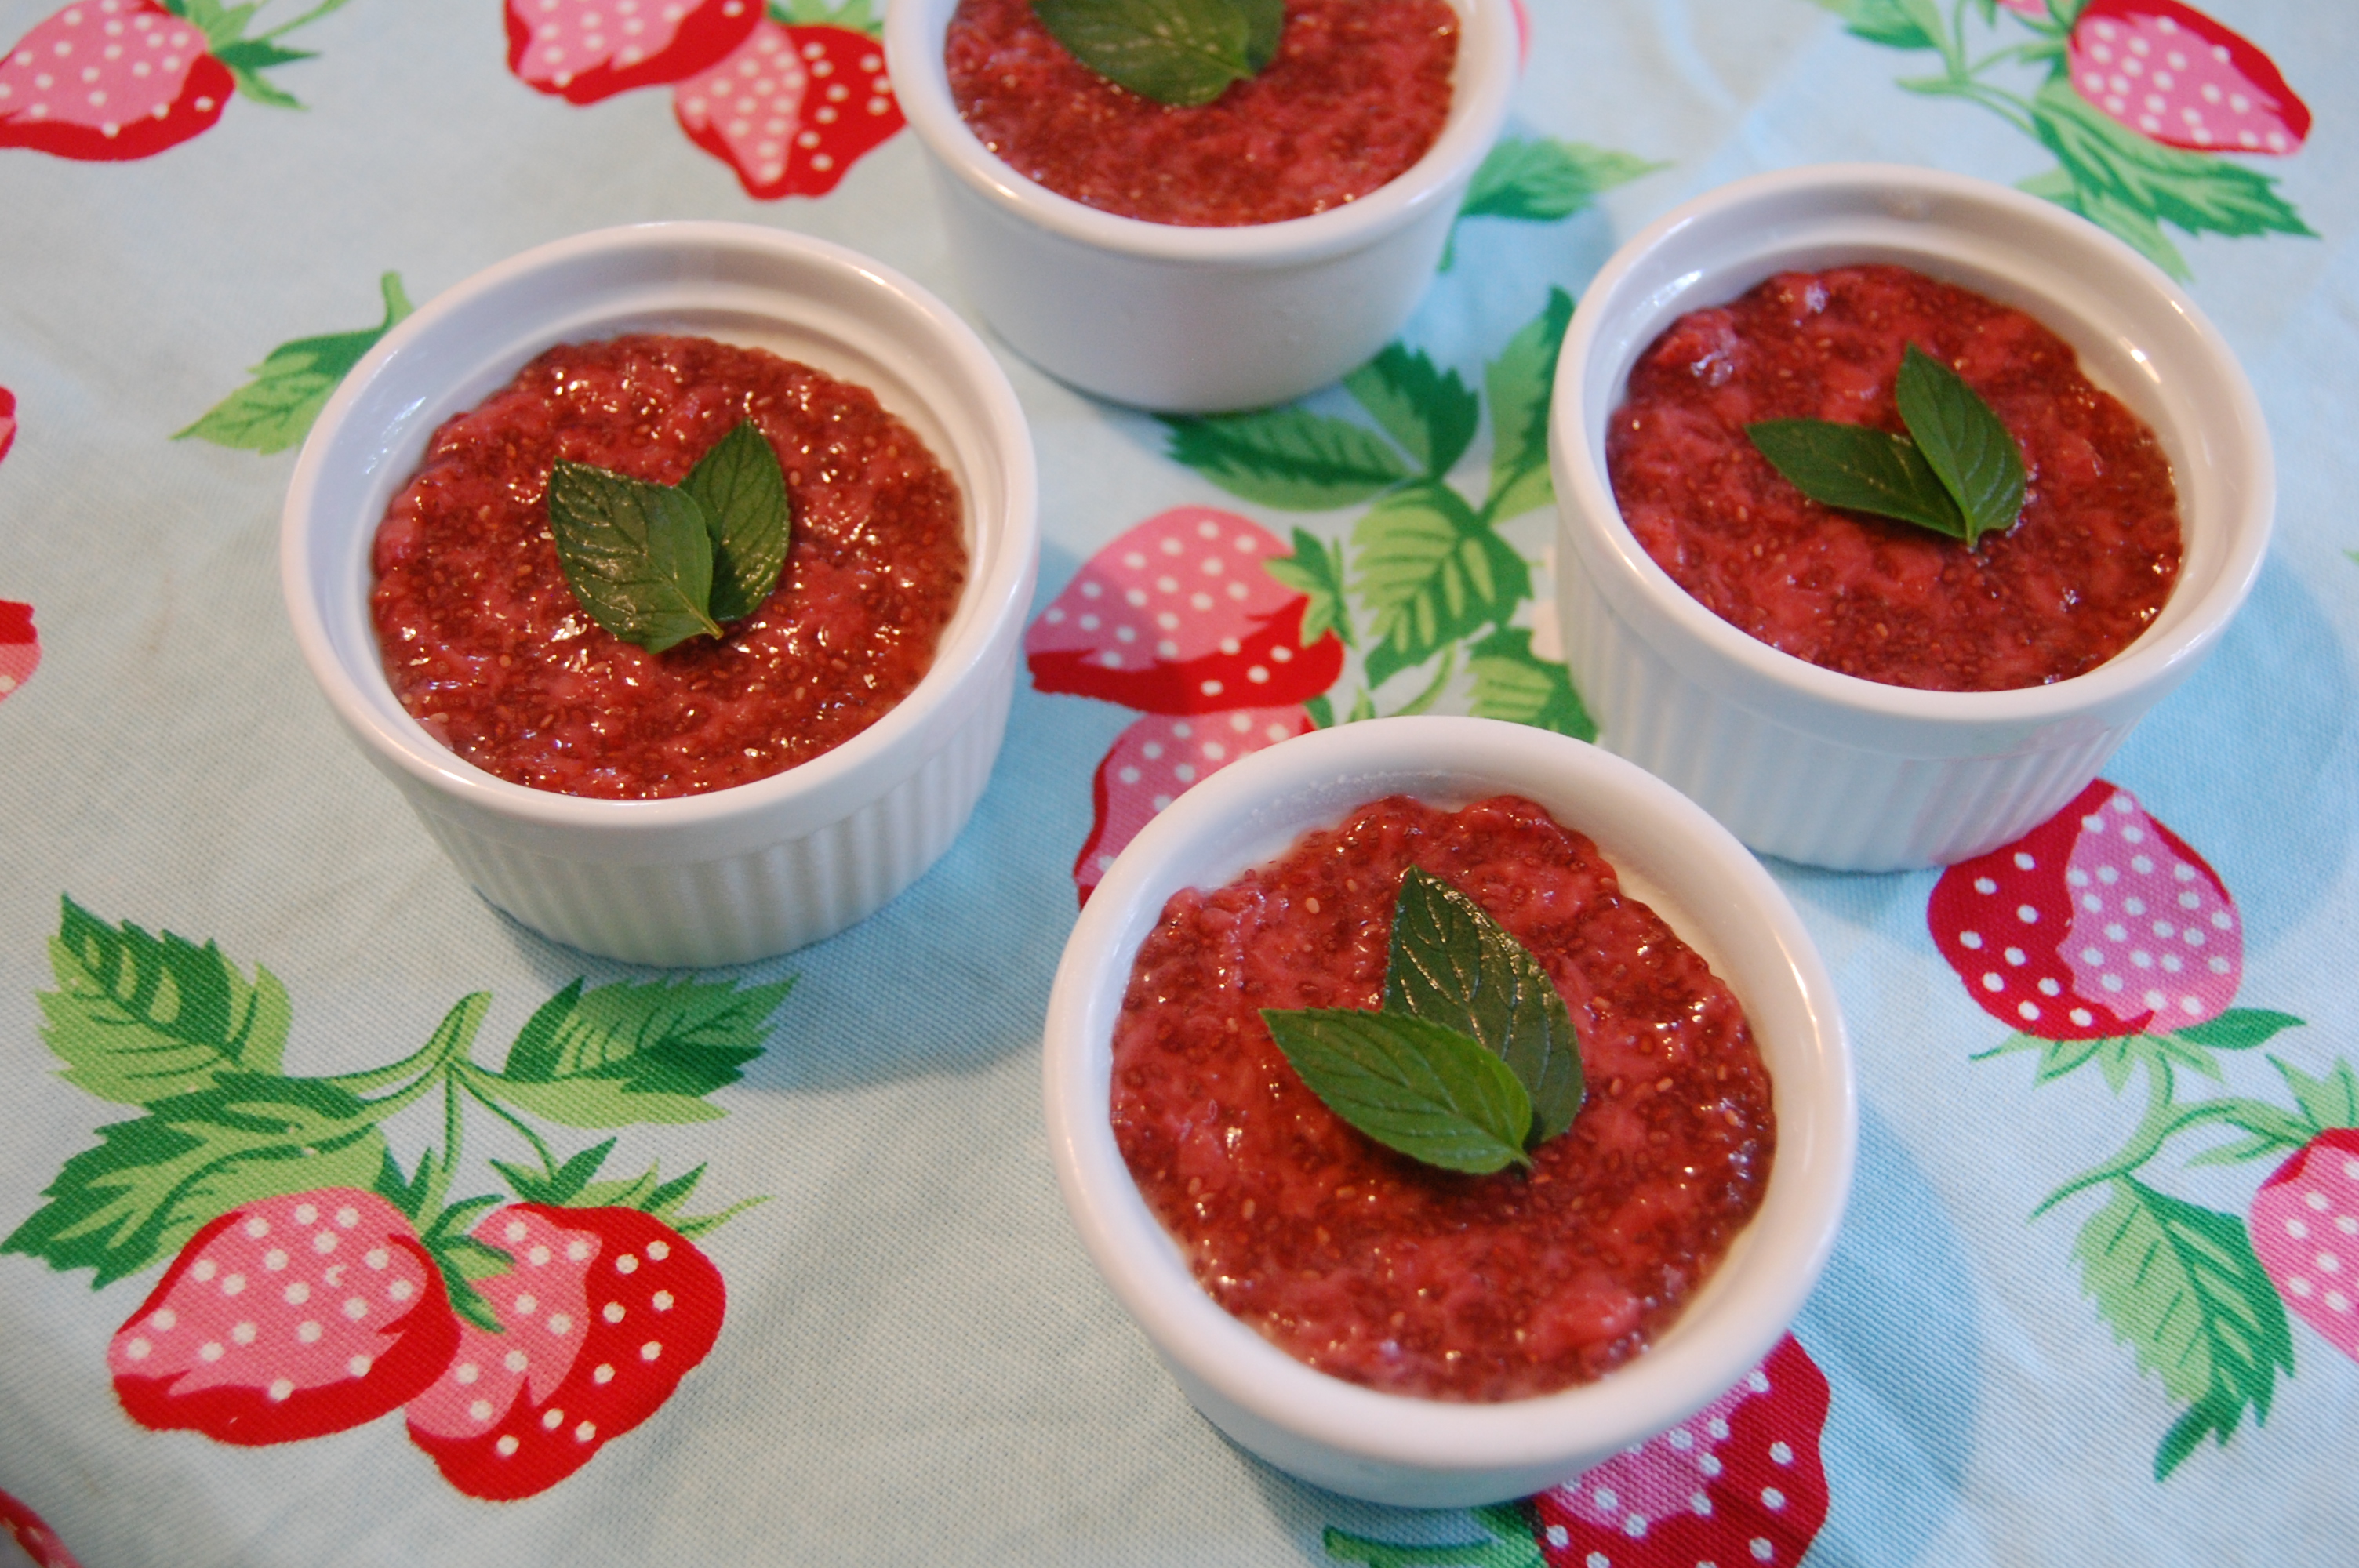
Keto Key Lime Pie Jars – New Recipe! There’s no need for chemical food dyes in this pretty, green dessert. An under-ripe avocado lends unpleasant sharpness, so use a guacamole-ready avocado for smooth, buttery flavor. I used powdered Swerve in the filling and increased it slightly. Add extra lime juice to the filling if you like.
As an experiment, I pressed plastic wrap onto the surface of the filling to remove the air, and placed these in the refrigerator and freezer. These kept just fine in both places for a few days. The avocado did not oxidize at all. I imagine they would keep longer in the freezer. If they’re not eaten first!
https://peaceloveandlowcarb.com/keto-key-lime-pie-jars/

I hope your week is off to a great start!

Disclosure: In addition to occasional sponsored posts, Arthurized Home uses clickable affiliate links. That means that I may receive a small commission from sales at no extra charge to you. As always, my opinion is 100% my own, and I only recommend things that I truly love or use myself. Thank you for patronizing the brands that support Arthurized Home!

Copyright 2019-2021 © Arthurized Home – All Rights Reserved. This post is the original content of Arthurized Home. If you’re reading this on another site, it’s unArthurized.

Boho Desk Makeover

Years ago, our neighbor gave us this wooden desk. She was dull, dated, worn (the desk, not the neighbor) and didn’t really coordinate with our other decor. So we painted her aqua and pressed her into service.

Ten years later, her paint and primer was peeling from the desk top and chipped on the sides, so it was time for a new look.

We began by stripping the paint off and sanding her down to bare wood. That statement makes this sound like an easy process, but I can assure you it was not. If you’ve ever stripped furniture, you know what I mean. It’s labor intensive, soul-sucking work.

Things are about to get real ugly up in here.

The time in between bouts of stripping, (again, the desk, just to be clear) was spent searching the internet for paint tutorials to achieve the look I imagined. I’m using the paint technique from the following video:

Because she is a plain Jane, we used construction adhesive and a few well-placed nails to add bead board to the inset panels.

Once satisfied that all the paint and stain was removed, we gave her a final sanding and wiped her down with Formby’s paint and poly remover. That particular product seems to be obsolete, but any bare wood cleaner/conditioner should work.

I began dry-brushing the paint on using the vintage turquoise paint effect tutorial. I used a narrow brush and a light hand for this step. Yep, that’s the same paint that we used for the original coat ten years ago.

I didn’t have three stains that worked for this, so I used red chestnut and provincial. The red chestnut didn’t have quite the impact that I expected, but the provincial stain adds a deep richness to bare wood. It’s just gorgeous.

See the paint on the top of the desk below? My original idea was to have the distressed paint technique on the desk top as well as the sides. The more I worked on it, the more I hated how it was turning out, so back to the drawing board sander I went. We sanded the top back down to bare wood and re-stained it. Ugh. Stupid creative process.

Note how the stain darkened the aqua paint to a sage color.

Once the stain dried, I began layering on more aqua paint using a 1.5″ putty knife. Dip the end of the putty knife in paint, lightly dab it onto the wood, spray it with water and then quickly scrape the paint over the section you want to layer. I found the key to this technique is to use a tiny bit of paint and spray it lightly with water. I wanted a time-worn look, not paint dripping everywhere. As with every good DIY project, this step takes 10 times longer than it should.

Using paint that I had on hand in my craft stash and leftover paint from other projects, I added accents of the brighter shades: my Hoosier Grandma’s favorite vintage shade of green, pink, coral and tiny touches of mustard. I used my finger as an applicator for this step. Just smear it on here and there, then layer, layer, layer until you cain’t layer no more!

At that point, Mr. Arthurized Home announced that he wasn’t feeling the bright accent colors, so I dry-brushed most of the piece with the aqua paint. That toned down the color, and we agreed that it looked slightly less bonkers after that step.

There’s a little surprise on the sides of the drawers. I used a floral stencil (Hello, 1980’s. Everything old is new again!) and creamy white paint mixed with pearlizing medium. I left large areas of the drawer sides untouched for a random effect. I’m debating taking the sander to the sides of the drawers to make it look worn from use.

When the entire piece was finished, I gave it the same Annie Sloan soft wax treatment as the bar chair. That soft wax is some of the best money I’ve ever spent. It dries buttery smooth and adds a richness to painted surfaces. The wax doesn’t change the color dramatically, just deepens it slightly, if that makes sense.

EXPIRED: The nice folks at Carolina Pine Country Store would love for you to try out their range of Annie Sloan paint products, or anything you’d like from their gorgeous stock of home goods. I think you’ll like their quick fulfillment and stellar customer service as well.
They have a special offer just for Arthurized Home readers:
Spend $1 – $25 (before shipping cost) and mention this post, and they will include a FREE box of Magnolia Home safety matches. (I’ve ordered these, and love them!)
If you spend $26 – $50+ (again, before shipping) they will give you the free matches PLUS a FREE small Magnolia Home tin candle. (Gift idea: The candle and matches would make a sweet gift when given together.) This offer is good for the next 60 days (through 11.13.2019); and don’t forget to mention Arthurized Home and this post when you order!

TADA! Isn’t she pretty?! I’m so pleased with how this turned out, happy to have my desk back and hope to get another ten years out of this look.

To shop the post: Citristrip / Red Chestnut Stain / Provincial Stain / Floral Stencil / Pearlizing Medium / Annie Sloan Soft Wax

Disclosure: In addition to occasional sponsored posts, Arthurized Home uses clickable affiliate links. That means that I may receive a small commission from sales at no extra charge to you. As always, my opinion is 100% my own, and I only recommend things that I truly love or use myself. Thank you for patronizing the brands that support Arthurized Home!

Copyright 2019-2021 © Arthurized Home – All Rights Reserved. This post is the original content of Arthurized Home. If you’re reading this on another site, it’s unArthurized.

Family Fun Activities – Twelve Year Old Niece Edition

When we visited Pittsburgh over Labor Day weekend, our twelve year old niece created an itinerary of genius (if slightly wacky) activities for us to try. We’re no strangers to shenanigans and nonsense. They’re some of our favorite things. After all, we’ve got thirty years of experience having fun with nieces and nephews.

Disclaimer: My attorney wants me to tell you these activities involve risk. Don’t blow up the kitchen. Don’t explode canned goods in the oven. Don’t choke on a pretzel chip. I shouldn’t have to tell you not to sample the Google Bake. Don’t give each other conjunctivitis. As always, use the good sense God gave you when trying out any new activity. Just because you can, doesn’t mean you should.

Google Bake: Unfamiliar? We were too. Here are the rules:
1) Paste a recipe into Google Translate, then translate into many different languages in succession.
2) Translate back into the original language.
3) Without reading the recipe first, follow the new instructions line by line and see where it takes you!

Because my niece and I weren’t allowed to peek, my sister and cousin translated the keto Death by Chocolate Cake recipe for us. Here’s the recipe with our notes and adjustments italicized:

kweKetone Marwolaethcacen kuqukethezekhekhe (Zulu?!)

lokuxuba lokuxubhawesinkwa (of the breadcrumb mix)
2 umhlabathienomhlabathi (soil and soil) million cups of almond powder – This cake is getting expensive. We didn’t have *quite* that much almond flour, so we used an enormous bag of wheat flour instead.
1 cup of molten sweetener Noman erythritol – Everything I microwave becomes “molten”, so…..
is 1/2 cup flour and cocoa – MORE flour!
half age 1. Bake – It didn’t say how long to bake. A few seconds should do.
butter1/2 cuprhowchôl – We didn’t know what rhowchôl was, but we thought that sounded vaguely like chow-chow, which is kind of like the pickle relish we found in the fridge, so…in you go, 1/2 cup of dill pickle relish.

vanilla extract 1 teaspoon then – Throw in a teaspoon. That’s gonna crunch when bitten into.
egg in – Initially, the egg went in whole, then the 12 year old decided we should probably crack it so that she could sample the cake after baking.
2cwpan milk – We assumed cwpan means cup. It does!

glaze
caws8oz, replace – Caw. Like a crow.
half the butter, replaced – Not sure what was wrong with the first half of butter. But we replaced it anyway.
flour flour 1/3 of erythritol – Flour. Flour. This is gonna be one gluey glaze.
for 1 hour. L. Remove the vanilla 3 meters.
L. – We didn’t have nearly ten feet to work with, so we placed the bottle of vanilla as far to the left as we could. On the floor. In front of the pots and pans cabinet.
It’s not fun, but you’re dying – Oh, but it is fun!
2 meters. L. a new cream to choose – Reject cream cheese, choose whipping cream instead.
chocolate chip lily (isikhwamangentuthu – the haze!) with
bread – Melt chocolate, spread on Mom’s good Dave’s Killer Bread. She won’t mind.

  1. sentuthusibe350 degrees.
  2. Mix almond powder, erythritol, cocoa powder and baking powder well in a large bowl. Mix butter and vanilla. Incorrect eggs (so judgy!), mix well, stir well and mix well (that’s a whole lotta mixing) with almond milk.
  3. Carefully wrap three standard cake pans (or use stickers if necessary) or use a spoon to prevent sticking. Gives a third with cans. Huh? Canned goods? Okay. We didn’t have gift wrap, so we stickered the cans instead. I’m still not convinced that prevents sticking, but whatevs. We didn’t write this recipe. We’re just the test kitchen.
  4. Bake in the oven for 20-25 minutes (replace the oven) until it comes in contact again and the toothbrush is clean. Just in case you thought 2 million cups of almond flour was expensive; you could replace an oven for that.
  5. Allow it to cool completely before removing it from the pan. I kept it at room temperature for a few hours and kept the room warm at night, which worked well. It’s September. The room is already warm at night.
  6. Put in a large bowl and stir all ingredients until foamy for 3-5 minutes. Less foamy, more concrete in texture and weight.
  7. Combination: Put the first piece of cake on top and clean it from freezing to high. We’ve already brushed it’s teeth, I’m not cleaning it again.
  8. Put the second layer of the cup and add the glass, this will damage the ice on the cake. Too bad we threw out that broken glass. Could’ve used it in this recipe.
  9. If necessary, specify customization options. I think we’ve customized this enough.

Floor Picnic:
When your niece invites you to have a “Floor Picnic” with her, you just say yes! Never mind that you don’t know what a floor picnic is. Turns out, it’s just what it seems. Spread a quilt on the floor and place favorite picnic foods in the center. Try to keep the peanut shell/popcorn mess contained to the quilt. Get comfy and watch a movie together. Simple, indoor fun!

Googly Eyes Makeovers:
Partner up with a willing victim participant. Spread old makeup that you don’t mind ruining onto the table. Raid the Halloween supplies for this one. Place the “hard” lenses into the frames of the glasses from the game Googly Eyes. We needed a fourth player for this one, so our niece used her powers of persuasion on him, and Mark extremely reluctantly agreed to step in. He’s a good sport!

The player with the glasses on must take an unassisted “before” selfie of the two of you. They then give the other player a makeover using the cosmetics before them. Again, unassisted. No hints, no help opening containers. Nothing. Once the makeover is complete, the player with the glasses on takes an “after” selfie. Switch glasses and give the other player a makeover. Makeup remover wipes are optional equipment for this game, but highly recommended.

Pro tip: Keep your eyes tightly shut during your makeover. Don’t worry too much though, your cosmetologist shouldn’t be able to find your eyes to hit them!

Best uncle ever. I think *someone* needs to go to a rock concert made up like this! She better remember this day when we’re old and in a nursing home. Just sayin’.

Is your family game to try these activities? If so, plan an itinerary for them! Let me know how that goes in the comments. A certain twelve year old will be waiting to hear all about it.

Disclosure: In addition to occasional sponsored posts, Arthurized Home uses clickable affiliate links. That means that I may receive a small commission from sales at no extra charge to you. As always, my opinion is 100% my own, and I only recommend things that I truly love or use myself. Thank you for patronizing the brands that support Arthurized Home!

Copyright 2019-2021 © Arthurized Home – All Rights Reserved. This post is the original content of Arthurized Home. If you’re reading this on another site, it’s unArthurized.

Real Food Menu for Week of 9.8.2019

Birthday Month has officially started! Mark and I both have September birthdays so we decided to celebrate all month long. Actually, we kicked off the partying in August (why limit it to one month?!) with a family lunch at Wildflour, and then continued the celebration last weekend in Pittsburgh. My sister made beautiful and delicious keto Death by Chocolate Cake and Coconut Cream Custards.

Breakfast:
Almond Flour Biscuit with Tomato – We’re still working those garden tomatoes and this is one of the simplest ways to enjoy them!
https://www.wholesomeyum.com/recipes/paleo-almond-flour-biscuits-low-carb-gluten-free/

Lunch:
Chop Chop Fresh Veggie Salad – Crunchy and delicious! To reduce carbs, I left the chickpeas out altogether, and I’m serving the olives and feta on the side, because a certain someone still doesn’t care for them. *ahem*
https://cleanfoodcrush.com/chop-chop/

Dinner:

Carb Buster Breakfast for Dinner – New Recipe! So simple and so yum! I could eat this once a week.
https://thepioneerwoman.com/cooking/carb-buster-breakfast/

Perfect Roast Chicken – Earth Fare had whole chickens on sale this weekend, so we’ll have roast chicken one night and then make chicken salad the next day.
https://barefootcontessa.com/recipes/perfect-roast-chicken

Quick and Easy Chicken Salad on Spinach – I’ll take extra celery, Hubs can have my grapes.
https://cleanfoodcrush.com/quick-easy-chicken-salad-recipe/

Salmon in Roasted Pepper Sauce – New Recipe!
https://cooktoria.com/salmon-in-roasted-pepper-sauce/

Spinach Salad with Bacon and Eggs – New Recipe!
https://www.healthyseasonalrecipes.com/spinach-salad-with-bacon-eggs/

Snacks:
Celery and peanut butter, Gouda snacking cheese (Aldi)
Hubby: Tiny but Mighty popcorn, grapes, bananas, cottage cheese

Treat:
Chocolate Dipped Strawberries – We’re keeping it simple this week with fresh strawberries dipped in melted Lily’s dark chocolate chips. I add about a teaspoon of coconut oil to 1/2 cup chocolate chips while melting them in a double boiler. If you don’t have a double boiler, simply boil about an inch of water in a saucepan underneath a tempered glass bowl. Make sure that the boiling water does not touch the bowl above. Dip the strawberries and sprinkle with unsweetened coconut if desired.

Have a great week, everyone!

Disclosure: In addition to occasional sponsored posts, Arthurized Home uses clickable affiliate links. That means that I may receive a small commission from sales at no extra charge to you. As always, my opinion is 100% my own, and I only recommend things that I truly love or use myself. Thank you for patronizing the brands that support Arthurized Home!

Copyright 2019-2021 © Arthurized Home – All Rights Reserved. This post is the original content of Arthurized Home. If you’re reading this on another site, it’s unArthurized.


De-stemming Herbs – A Kitchen Tip

A few months ago, my aunt shared a video of this simple kitchen tip. I was intrigued, tried it, and pleased to discover that it works!

Ready to give it a try? Gather your herbs and rinse them thoroughly. Line up the end of the stem with a hole in the colander and gently pull the stem through. The leaves should stay on the inside of the colander. Rotate the colander as you work your way through the herbs. When done, simply brush the leaves onto a cutting board and chop them.

I’ve tried out all three of my colanders and they each work for different types of herbs. The vintage aluminum colander has the smallest holes, and works best for herbs with thin stems like dill. Colanders with larger holes work for herbs with thick stems such as parsley and basil. The Kitchenaid colander has graduated holes, so this might be the most practical option for this use. I found the blue enamelware colander at the Southern Living store in Myrtle Beach, SC. I couldn’t find this product on their website, so I’ve linked to a similar one.

This simple kitchen tip has been such a time saver when prepping fresh herbs and I hope you’ll give it a try!

Disclosure: In addition to occasional sponsored posts, Arthurized Home uses clickable affiliate links. That means that I may receive a small commission from sales at no extra charge to you. As always, my opinion is 100% my own, and I only recommend things that I truly love or use myself. Thank you for patronizing the brands that support Arthurized Home!

Copyright 2019-2021 © Arthurized Home – All Rights Reserved. This post is the original content of Arthurized Home. If you’re reading this on another site, it’s unArthurized.

Tomato and Cheese Pie

HoldingOntoSummerAsLongAsPossible is an annual event in our home. I’m not dying to bundle up in sweaters and boots just yet. While the summer produce is still rolling in, let’s give this savory pie a little love, shall we? This dish should really be named Tomato Basil Pie because the ricotta and parmesan take a back seat to the fresh flavors of the basil and tomato. It’s easy to whip together, and makes a nice breakfast or brunch side dish.

Tomato and Cheese Pie
adapted from The Supermarket Diet Cookbook
Prep: 20 Minutes
Bake: 30 Minutes
Makes: 4 Servings
1 container (15 ounces) ricotta cheese 
4 large eggs
1/4 cup freshly grated Parmesan cheese
1/2 tsp. salt, plus additional for sprinkling
1/8 tsp. coarsely ground black pepper, plus additional for sprinkling
1/4 cup milk
1 T. cornstarch – I use arrowroot powder 
1 cup packed fresh basil leaves, chopped
1 pound ripe tomatoes (three medium), thinly sliced

The top three eggs are pastured, the egg on the bottom is “cage free”. Notice the difference in the yolk color! Totally subjective, but we think pastured egg yolks have a richer flavor.

1) Preheat oven to 375°F. In a large bowl, with whisk or fork, beat ricotta, eggs, Parmesan, salt and pepper until blended. 

I used purple basil because it has the most traditional basil flavor of the three types that I planted this year. I don’t think lime basil or Thai basil would be tasty in this recipe!

2) In cup, with fork, stir milk and cornstarch (arrowroot) until blended; whisk into cheese mixture. Stir in basil. Pour mixture into 9 inch glass or ceramic pie plate. Arrange tomatoes on top, overlapping if necessary. Sprinkle tomatoes with salt and pepper. 

3) Bake pie until lightly browned around edge and center is puffed, 30 to 35 minutes.

Enjoy! Happy Labor Day!

Disclosure: In addition to occasional sponsored posts, Arthurized Home uses clickable affiliate links. That means that I may receive a small commission from sales at no extra charge to you. As always, my opinion is 100% my own, and I only recommend things that I truly love or use myself. Thank you for patronizing the brands that support Arthurized Home!

Copyright 2019-2021 © Arthurized Home – All Rights Reserved. This post is the original content of Arthurized Home. If you’re reading this on another site, it’s unArthurized.

Packing a Shoe Box for Operation Christmas Child

Y’all, this is so fun! Operation Christmas Child shares the joy and promise of Christmas with children around the world, by distributing shoe boxes filled to the brim with gifts. For many of these children living in poverty, this is the first gift they receive. Some of these deliveries are made on camel back, loaded onto elephants, others strapped to motorcycles; but all are delivered with love.

In 2018, more than 10.6 million shoe boxes were collected for distribution to 112 countries and territories. That’s a whole lot of joy!

Boxes carried by oxen in Mongolia. (Oxen with boxen?! Ha ha!) Photo Credit: Samaritan’s Purse

With just twelve weeks to go until national collection week, here are some fun ideas for shoe box packing:

One Wow Item: Dolls, stuffed animals and deflated soccer balls (with a pump) are all great. Mickey and Minnie are our “wow” items this year; boys get Mickey, and girls get Minnie. We folded them over, and placed rubber bands around them to make them as small as possible. The indignity! I tried using hair ties, but the fabric is too slick and they slid right off. Oh, well. The kids can have a humdinger of a rubber band fight!

Other Fun Stuff: Marbles, jacks, jump ropes, Matchbox cars, beach balls, sticky catch games, water bottles, playing cards, stickers, coloring books, journals and Lego kits are all fun additions to shoe box gifts. See Shanika and Sherika’s story below to learn why they were thrilled to get a set of jacks in their shoe boxes.

School supplies: In many areas around the world, school supplies are the ticket to education. Can you imagine not attending school simply because you don’t have paper or a pencil? One lady on a distribution trip reported that teachers break pencils into several pieces, so that more students can have one.

Something to Wear: Walmart and Kohls had great end-of-summer sales on kid’s clothing. The boys get tees and shorts, and I found tees, capri pants and dresses for the girls. Shoes and flip-flops are useful and appreciated.

I sure hope that the boy who receives this outfit is a little spitfire. He’ll need a lot of personality to rock that monster tee!

We’ll KonMari the heck out of the clothing, and keep them folded during processing and shipment using rubber bands.

Personal Care Items: We’re packing for elementary age children this year, so a comb, washcloth, toothbrush with cover and a bar of soap will do the job. Just picture twelve children sharing a washcloth, or 25 children sharing a toothbrush. Such simple items can mean the world to a child in need.

Tuck a Christmas card, your picture and a note of encouragement into your shoe box. Let the child know that you love them, and are praying for them. Include your address if you like; sometimes the recipient or their parents will write to you!

Here are some helpful tips I’ve learned from the Shoebox Shoppers Facebook group:

  • You do not have to use OCC boxes, although they’re nice! Any shoe box will do. Standard sizes are best because they can pack more into a carton when they are a uniform size. However, odd/larger size boxes will not be rejected.
  • Remove all packaging material from the shoe box items. Most of the receiving countries do not have the resources to handle trash. The recipient will not think that your gift is used if it’s not in the manufacturer’s packaging.
  • Fill the box to the brim. Don’t ship air!
  • Boxes are inspected at 8 different processing centers around the U.S. The volunteers view each box as your unique gift to a child, and do not remove items unless they’re on the prohibited list. (Liquid, glass, seeds, war-related, etc.) They do not re-distribute gifts from one box to another. They will add to a box if needed, and keep small filler items on hand in case a box has extra room.
  • Track your box online, but know that some boxes go to sensitive countries and you might not learn the final destination of your gift. Be sure to include $9 per box to cover the costs of shipping and transportation.

No time to pack a shoebox? You can quickly build one online here:
https://www.samaritanspurse.org/operation-christmas-child/buildonline/

Here are some stories from shoe box recipients.
Izabella’s Story:
https://www.samaritanspurse.org/operation-christmas-child/shoebox-stories-izabella-and-a-snow-globe/
Shanika and Sherika’s Story:
https://www.samaritanspurse.org/operation-christmas-child/shoeboxstories-shanika-sherika-and-the-notebooks/
TRIGGER WARNING (Abuse/Sexual Assault) Boun’s story is difficult to hear, but so important:
https://video.samaritanspurse.org/boun-thornes-story-gifts-from-god/?fbclid=IwAR1-6fwko-4FOINBMsc4C94PRSIXCwngixknbyDvYAk9n6YvJxN_O_hl9PU

What a beautiful and simple way to bring the good news of Jesus to children around the world!

Helicopter delivery in Honduras. Photo credit: Samaritan’s Purse

This post is not sponsored. I only endorse charities that I personally support, and I hope you will consider supporting them too.

Copyright 2019-2020 © Arthurized Home – All Rights Reserved. This post is the original content of Arthurized Home. If you’re reading this on another site, it’s unArthurized.

Easy Care Plants – Solomon’s Seal

Second only to rhododendrons, Solomon’s Seal is a favorite of Mark’s. I’m not sure where he first learned about them, but suddenly he *had* to find some for the shade garden at our prior house.

Rabbit Trail: After we’d gardened for a few years at that fixer-upper, our property tax assessment increased dramatically. I appealed it with the City, because most of the real improvements were done away from the prying eyes of the assessor. When they returned the final determination, she said the increase was due to the “park-like setting” of our side yard. All that expense and back-breaking labor, just so we could pay higher taxes!
Oh, well. We enjoyed the park.

When we moved to Arthurized Home, we brought about 8 divisions with us. Those transplants have multiplied to become hundreds, and we’ve divided them into several beds throughout our property. Division is best done in spring or fall, leaving several rhizomes on each piece. If you want value for money, these are a sure thing.

There are several different varieties of this native plant. Ours is variegated fragrant Solomon’s Seal and grows to about two feet tall. I love the painterly brush strokes on the leaf tips!

Solomon’s Seal is a relative of lily-of-the-valley; and in the spring, has similar white bell-shaped blooms along the stem. There is no need to deadhead the blooms. They dry and fall off the plant on their own.

Once established, this woodland plant is practically maintenance free. Solomon’s Seal likes rich soil in moist shade, but will tolerate a little sun in cooler climes. Planted in full sun, they will burn, like hosta. You can amend poor soil with compost, and use mulch or leaf litter to insulate the plants while they take root. These plants are drought tolerant once established, and as an added bonus, deer resistant. *insert Madea shouting Hallelujer!*

They’re very hardy and don’t seem to be susceptible to pests or fungal disease. We’ve heard that slug like ’em, but haven’t seen any evidence of that in our garden. Solomon’s Seal will even grow at the base of our oak tree where little else will.

See the brown leaves below?

Those mean that summer is winding down and cooler temps are on the way. Sad, I know.

Over the winter, Solomon’s Seal dies back all the way to the ground. But don’t you worry your pretty little head about that. He’ll be back in the spring, poking his pointy noggin out of the ground before you know it!

Solomon’s Seal make attractive container plants on shady porches and patios.

For more reading on Solomon’s Seal:
https://www.bhg.com/gardening/plant-dictionary/perennial/solomons-seal/

Shop the post: Solomon’s Seal
My favorite gardening gloves: Mud Gloves

Disclosure: In addition to occasional sponsored posts, Arthurized Home uses clickable affiliate links. That means that I may receive a small commission from sales at no extra charge to you. As always, my opinion is 100% my own, and I only recommend things that I truly love or use myself. Thank you for patronizing the brands that support Arthurized Home!

Copyright 2019-2021 © Arthurized Home – All Rights Reserved. This post is the original content of Arthurized Home. If you’re reading this on another site, it’s unArthurized.

Meal Prep for Week of 8.25.2019

The garden produce is slowing down a little, but we’re still up to our eyeballs in fresh herbs. The herb garden has become my happy place. (Well, in addition to Sunset Beach, the greenway, any ol’ clearance rack and, and, and…!) I absolutely love strolling out there to snip something fresh to add to our meals. I’ve got four new recipes for you this week, including a few vegetarian options:

Breakfast:
Keto Coconut Porridge – New Recipe! This porridge has an almost savory, mild, coconut flavor; which we enjoy. It’s quick and easy to prepare. However, we’re pounding through one can of coconut milk per day, so that adds up over the course of a week. We’ll likely reserve this one for occasional breakfasts going forward.
Recipes from Diet Doctor can be scaled to the number of servings needed. Don’t scale the salt in this recipe. Ask me how I know that.
https://www.dietdoctor.com/recipes/keto-coconut-porridge/servings/2

Lunch:
Turkey, Bacon and Swiss on a Lettuce Bun – Slice “cheeks” from a head of iceberg lettuce to make the bun. I like my sandwich with spicy dijon mustard.

Dinner:

Tuscan Chicken with Sun-Dried Tomatoes and Creamy Garlic Sauce – New Recipe!
https://www.savorytooth.com/sun-dried-tomato-chicken/?utm_source=pinterest&utm_medium=social&utm_campaign=BlogButton

Garlicky Parmesan Zucchini Bake – New Recipe! We’ll serve this with a piece of fish or grilled chicken.
https://cleanfoodcrush.com/garlicky-parmesan-zucchini-bake-clean-eating/

Annnnnd sometimes you add the parsley too early. Oops!

Oh well, I happen to love parsley and don’t think a half cup is too much for this recipe. I also love garlic, and this made the house smell like a pizzeria while it was baking. Broiling it for a few minutes with a little extra parmesan on top is always a good idea.

Cumulus Spiced Eggs – Super quick dinner! You can have this meal on the table in twenty minutes, start to finish. The eggs are the start of this show, so I recommend pastured eggs if available.
https://stonesoupvirtualcookeryschool.com/2013/06/cumulus-spiced-eggs/

Garlic Butter Salmon from this recipe:
https://cleanfoodcrush.com/one-sheet-pan-garlic-butter-salmon/
…with the carrots and broccoli from here:
https://cleanfoodcrush.com/homemade-teriyaki-salmon-meal-prep/

Chop Chop Fresh Veggie Salad – New Recipe! This salad is so tasty! To reduce carbs, I left the chickpeas out altogether, and I’m serving the olives and feta on the side, because a certain someone doesn’t care for them. *ahem*
https://cleanfoodcrush.com/chop-chop/

Snacks:
Mine: Gouda Snacking Cheese, Celery and Peanut Butter. Meh.
Hubby: Watermelon, grapes, bananas, Tiny but Mighty Popcorn…

Treat: Coconut Milk Panna Cotta topped with Chia Seed Strawberry Jam – To decrease the carbs, swap the honey in the panna cotta for a tablespoon (or so) of your favorite low-carb sweetener. I used Swerve.
https://deliciouslyorganic.net/coconut-panna-cotta-dairy-free-gaps-paleo-grain-free/
Same here. Deep-six the honey for a couple teaspoons of low-carb sweetener.
https://cleanfoodcrush.com/chia-seed-strawberry-jam-clean-eating/

What’s fresh in your kitchen this week? Let me know in the comments!

Disclosure: In addition to occasional sponsored posts, Arthurized Home uses clickable affiliate links. That means that I may receive a small commission from sales at no extra charge to you. As always, my opinion is 100% my own, and I only recommend things that I truly love or use myself. Thank you for patronizing the brands that support Arthurized Home!

Copyright 2019-2021 © Arthurized Home – All Rights Reserved. This post is the original content of Arthurized Home. If you’re reading this on another site, it’s unArthurized.

12 Great Reasons to Run Virtual Races

Over the past few years, I’ve run several virtual races. That’s where you run the distance at a time, place and pace of your choosing, then upload your results to the race’s website. I’m a fan of virtuals and here’s why:

  • You get the opportunity to run races that aren’t local. Occasionally, I see upcoming races that aren’t available nearby and running it virtually is a nice option.
  • Awesome race bling in the form of shirts and finisher medals. Let’s get real: Will run for swag. My favorite running shirt came from a virtual, the Hakuna Mimosa.
  • Walkers are always welcome. Not every classic race is open to walkers, but in a virtual, you get to decide who can participate. It’s open to everyone!
  • No travel required. Now, I love a good away game, but that can be expensive and time-consuming. Sometimes it’s just not convenient or possible.
We ran Honor the Brave on Memorial Day Weekend in Fishers, IN. Back home, we ran 4 additional 5ks to earn the ‘dog tags’ that attach to the bottom of the medal.
  • A virtual is all the fun of race day without the pre-race jitters. There is no pressure to compete, unless you want that. One you upload your results, you can see see how you stack up against the other racers.
  • No packet pick-up with limited hours. Although I love a good pre-race expo, there’s something to be said for sitting back and letting the mailman deliver your swag.
Shirt on offer at the pre-race expo for Charleston Distance Run.
  • Race at your convenience. If you need to run at 7:00 AM instead of 9:00 AM, do that! You’re not locked down to rearranging your schedule for an event. Running with friends? Choose a time that works for all of you!
  • No parking hassles. You don’t have to pay to park, or get extra mileage by parking in no-man’s-land. I mean, we’re here to exercise, but let’s not get too crazy!
Having a little tongue-in-cheek fun with our team name for the Run A Latte virtual. Run on Memorial Day 2019, we were team Stinking Hotties by the end of the 10k!
  • No port-o-johns and no waiting in line for them. Hallelujah! Having to use a port-o-john is my #1 race day worry. I hate them with a passion.
  • Injured on race day? Is the weather bad? Re-schedule it! There’s no need to defer or DNS.
  • Pause your GPS whenever you need to. Competing in classic races, I’ve run through beautiful neighborhoods and thought “I’d really like to slow down and explore this area for a bit.” That’s not a problem with a virtual. You’re the official timer. Stop and smell the roses lilies, take in the view, selfie, use a legit bathroom.

You never know what strange things you might see.

Organically grown, grass-fed BBQ sauce. Found free-ranging, down by the Roanoke River.
  • Choose your own recovery food. No pre-race and post-race gluten-filled food that I can’t eat anyway. I’m looking at you, pizza, donuts and beer!

Bonus Reason to love virtual races:
They make great gifts. The recipient can customize the experience to their tastes. I registered for The Easter Bunny brought us race entries to the Run A Latte virtual this year.

I’ve used and recommend 131 Events for classic and virtual races:
https://131events.com/

Are you tempted to register for a virtual? There are so many fun reasons to give it a try. I think you’ll like it!

Disclosure: In addition to occasional sponsored posts, Arthurized Home uses clickable affiliate links. That means that I may receive a small commission from sales at no extra charge to you. As always, my opinion is 100% my own, and I only recommend things that I truly love or use myself. Thank you for patronizing the brands that support Arthurized Home!

Copyright 2019-2021 © Arthurized Home – All Rights Reserved. This post is the original content of Arthurized Home. If you’re reading this on another site, it’s unArthurized.