Are you all worn out from the Fourth of July? Did you stay up too late watching the fireworks? Our local fireworks were postponed due to thunderstorms, so we stayed up too late watching a movie. If you still have a pool party or backyard BBQ (or several!) to attend over the weekend, bring these cute treats for the dessert table.
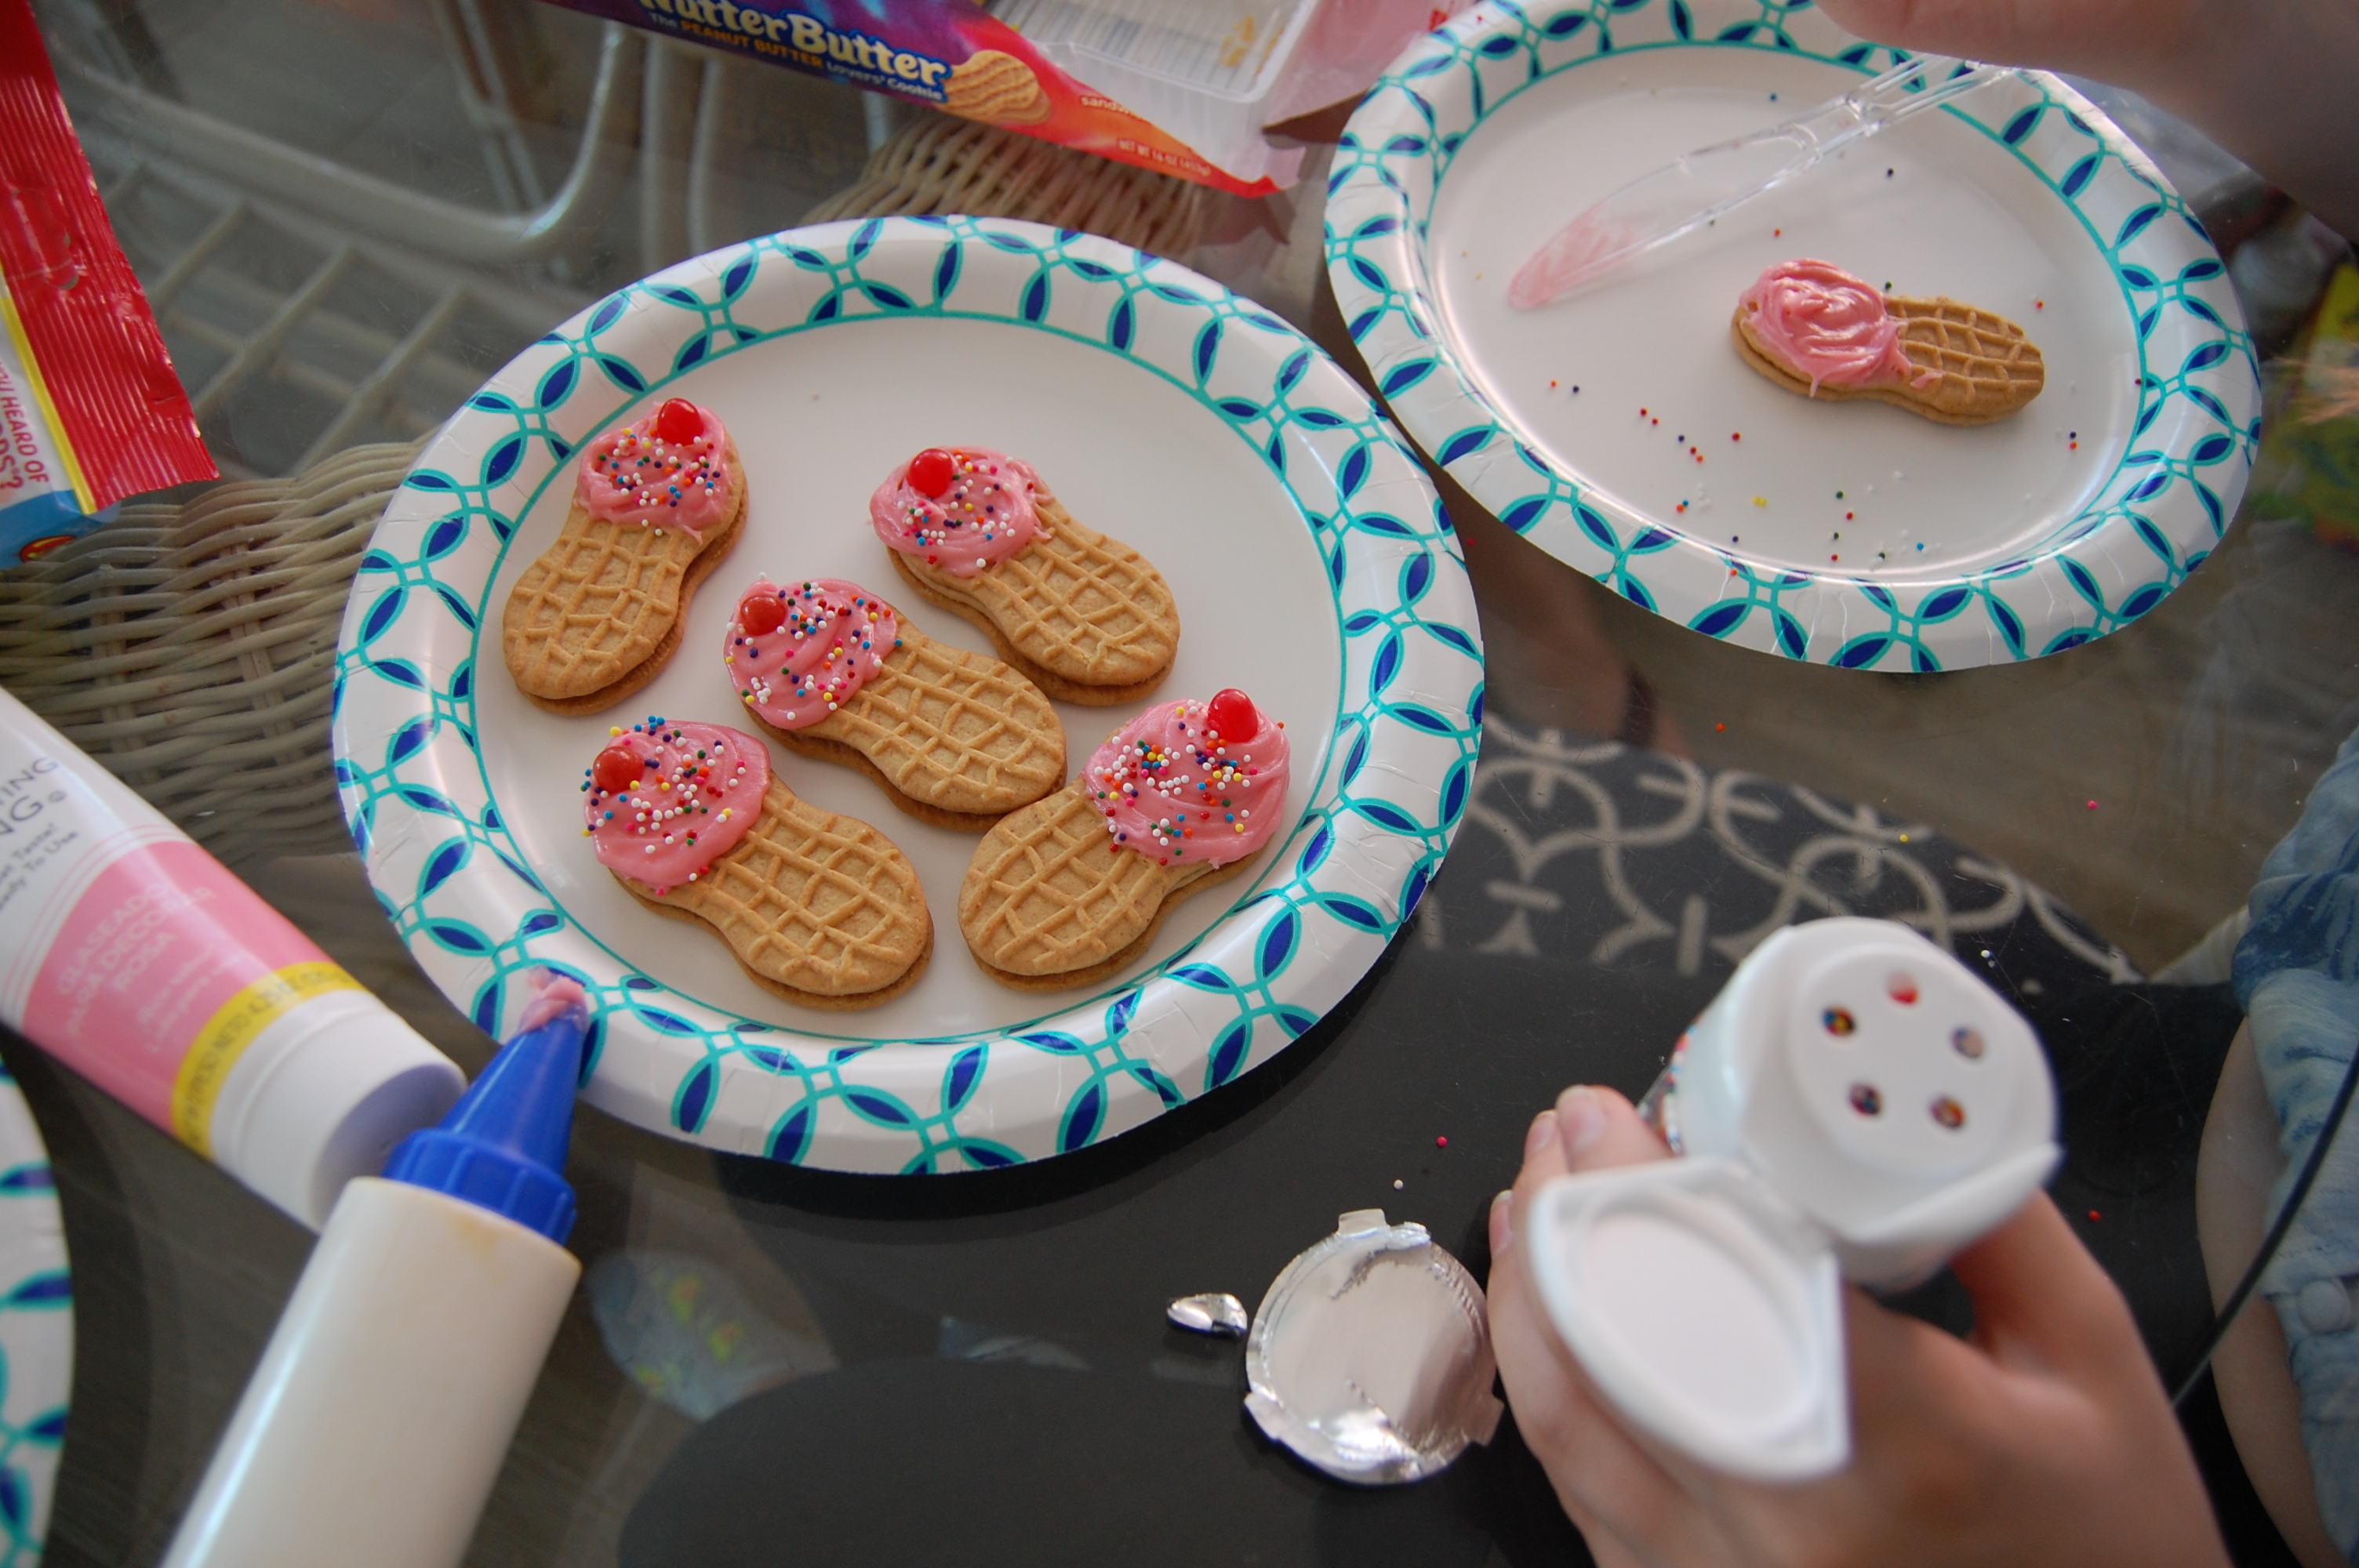
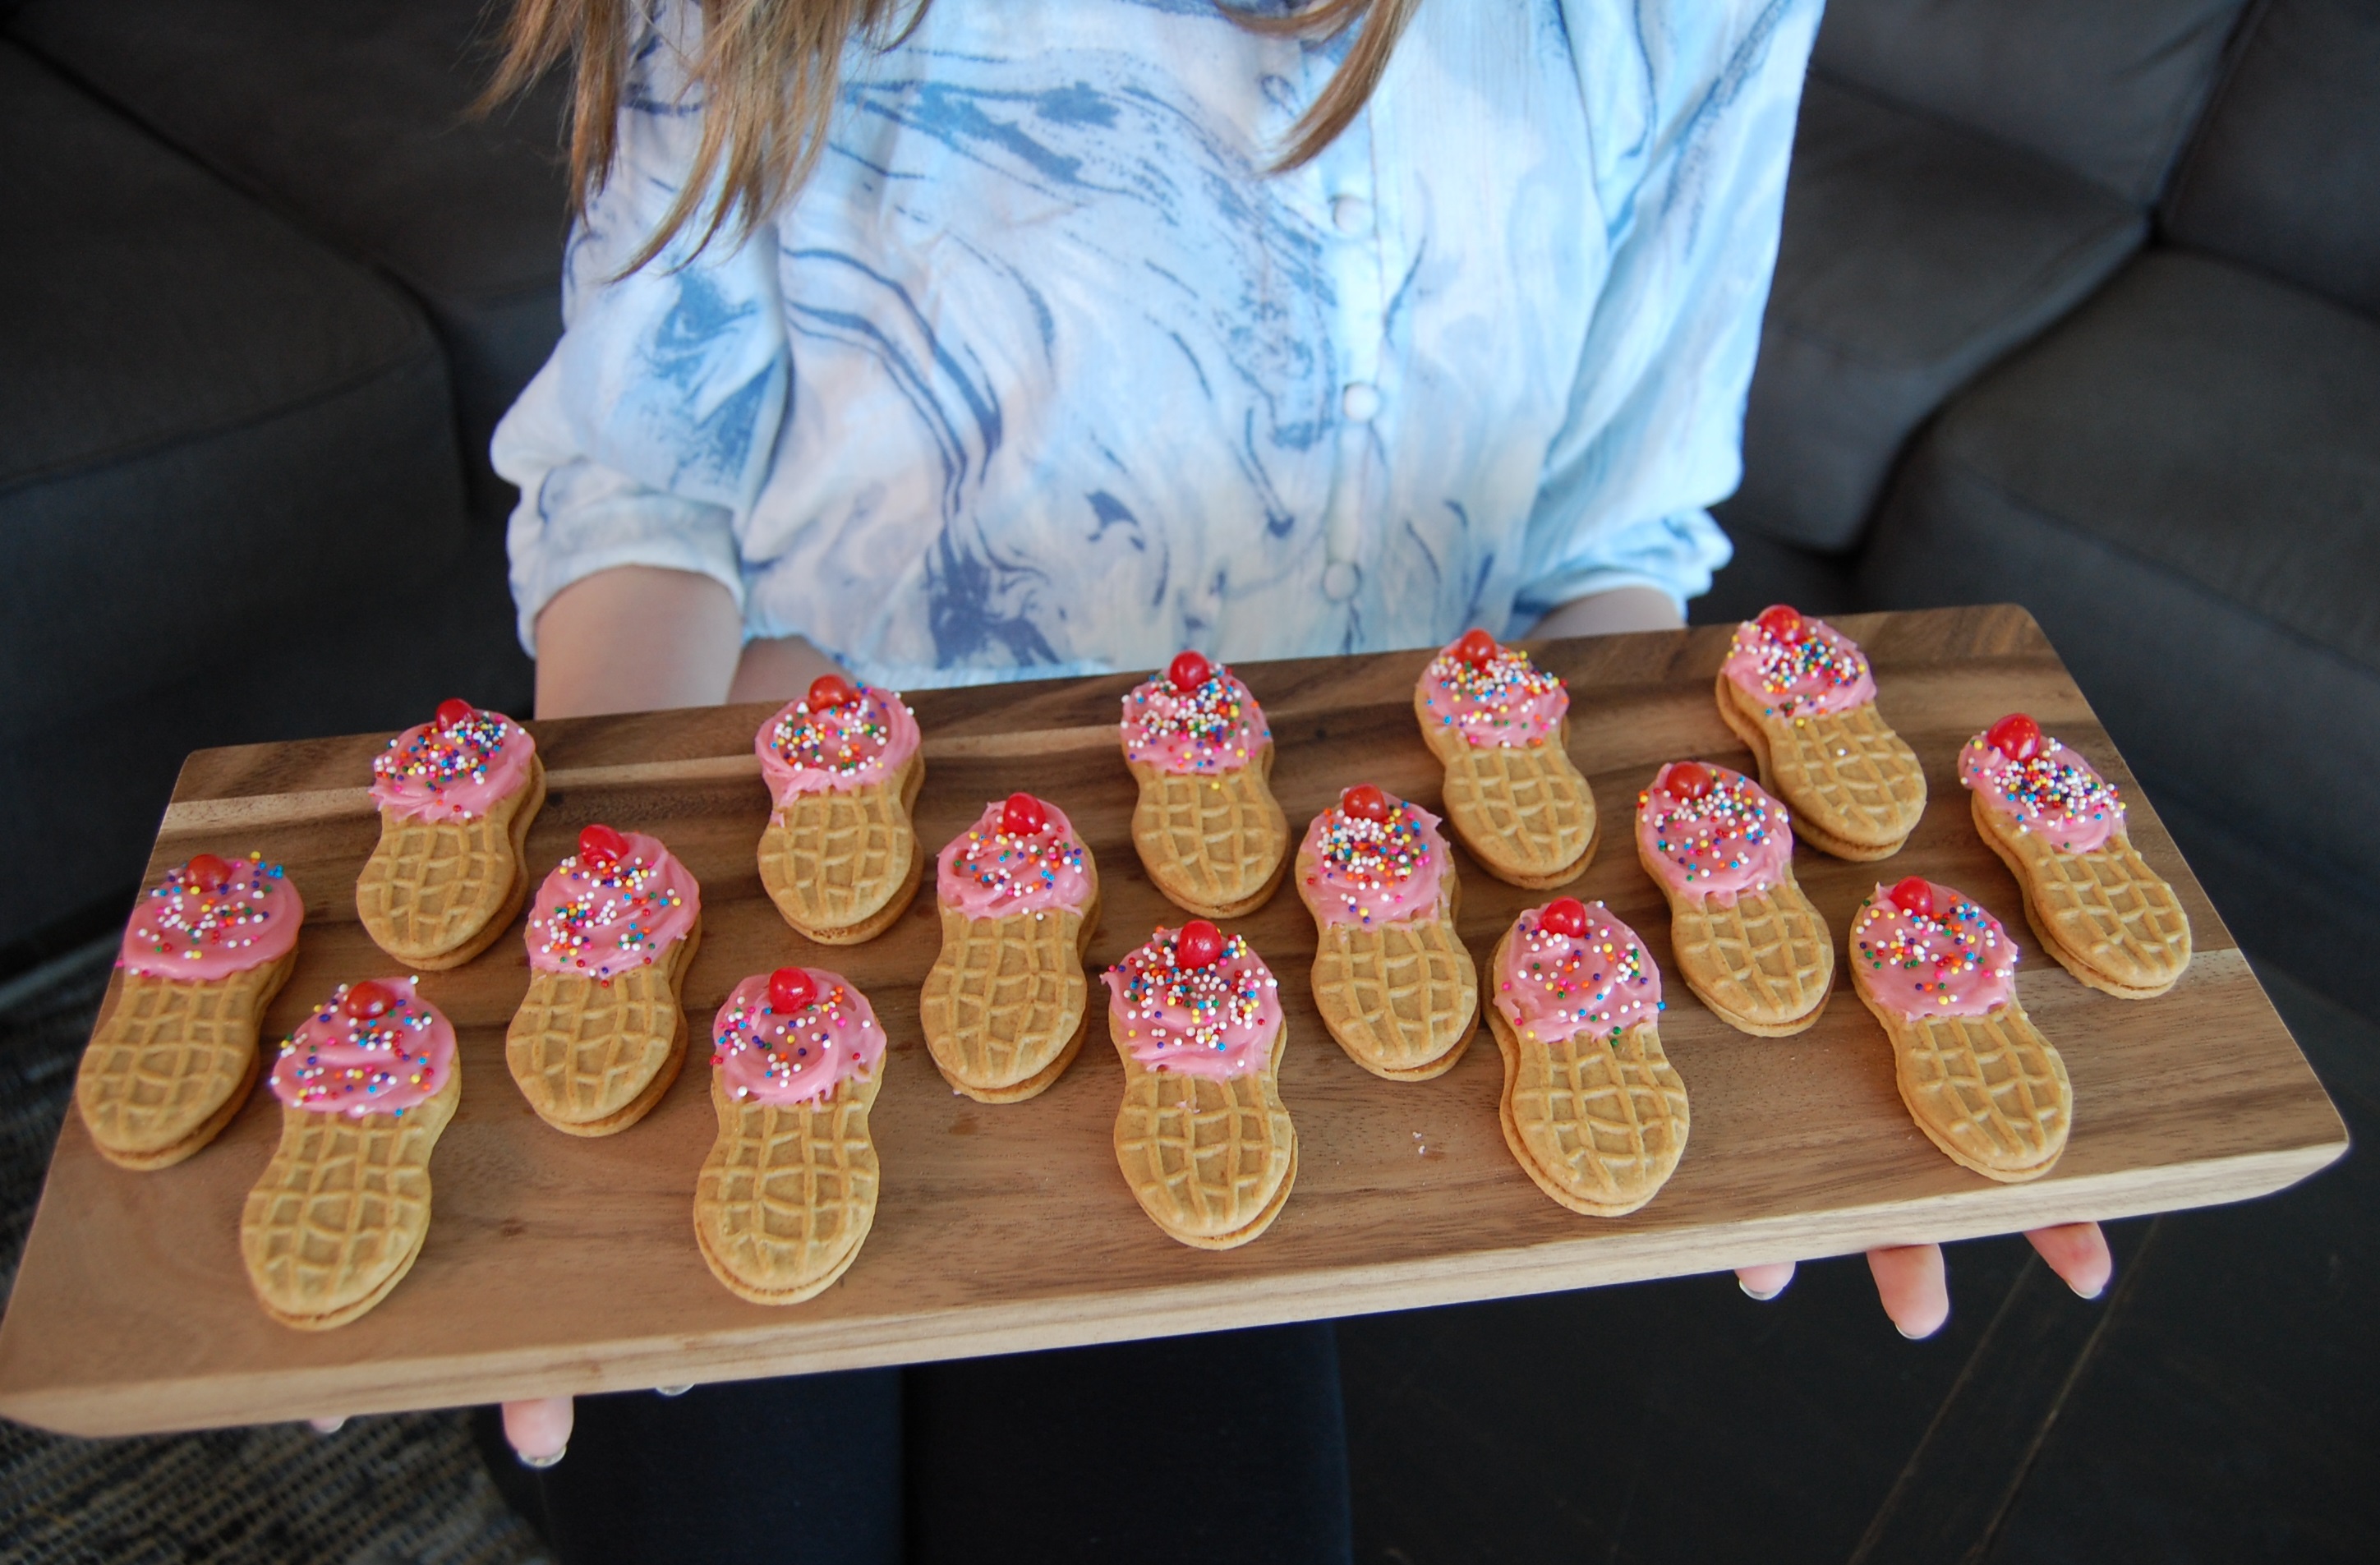
These cookies are a simple project for kids to make! My niece decorated these while we were at the beach. For both cookies, she piped the frosting using a medium sized, round decorator tip.
Flip Flop Cookies Materials: Nutter Butter sandwich cookies Icing – We used Wilton decorating icing in yellow Small, decorative candies – Any tiny candy will work here. Well, maybe not those candy eyeballs! But, just about anything else.
Pipe the straps for the flip flops onto the cookies in an exaggerated “Y” shape. Place the decorative candy in the center of the strap. So easy!
Ice Cream Cone Cookies Materials: Nutter Butter sandwich cookies Icing – We used Wilton decorating icing in pink Tiny, round sprinkles and small, round red candies (I used Jelly Belly jelly beans sliced in half. Cinnamon red hots would work as well.)
Spread or pipe the frosting in a circle on one end of the cookie, make those sprinkles fall like rain on the icing, then place the “cherry” on top. Done!
And….if you get tired of decorating cookies, you can always decorate the plate!
I hope your summer is off to a great start!
I’m not in partnership with any brands referenced in this post. I’m simply sharing products that I use and enjoy, and I hope you will like them too!
Disclosure: In addition to occasional sponsored posts, Arthurized Home uses clickable affiliate links. That means that I may receive a small commission from sales at no extra charge to you. As always, my opinion is 100% my own, and I only recommend things that I truly love or use myself. Thank you for patronizing the brands that support Arthurized Home!
There are very few events in life that I find more frustrating than trying to pack the car the night before a trip. I’m generally tired after a long day (or week) of work, distracted, maybe hungry, definitely cranky. Perhaps hubby is as well? Not a good dynamic.
To top that off, we’re over-packers. I don’t know why, but we load up like we’re vacationing in the hinterlands, not 10 minutes from a shopping center. We’ve tried to change our ways, but I’m not sure we can.
Imagine that late-night scene of us cramming stuff into the back of the car only to realize that it won’t all fit. CUE: DEFCON 1 readiness
Here’s the good news. By using this one simple tip, we can avoid all of that drama: Pack and unpack for your trip ahead of time. Yep, I said unpack.
Do this a few days ahead, a week ahead, it doesn’t matter. You’re going to pack your clothes at some point, anyway. Might as well do it early.
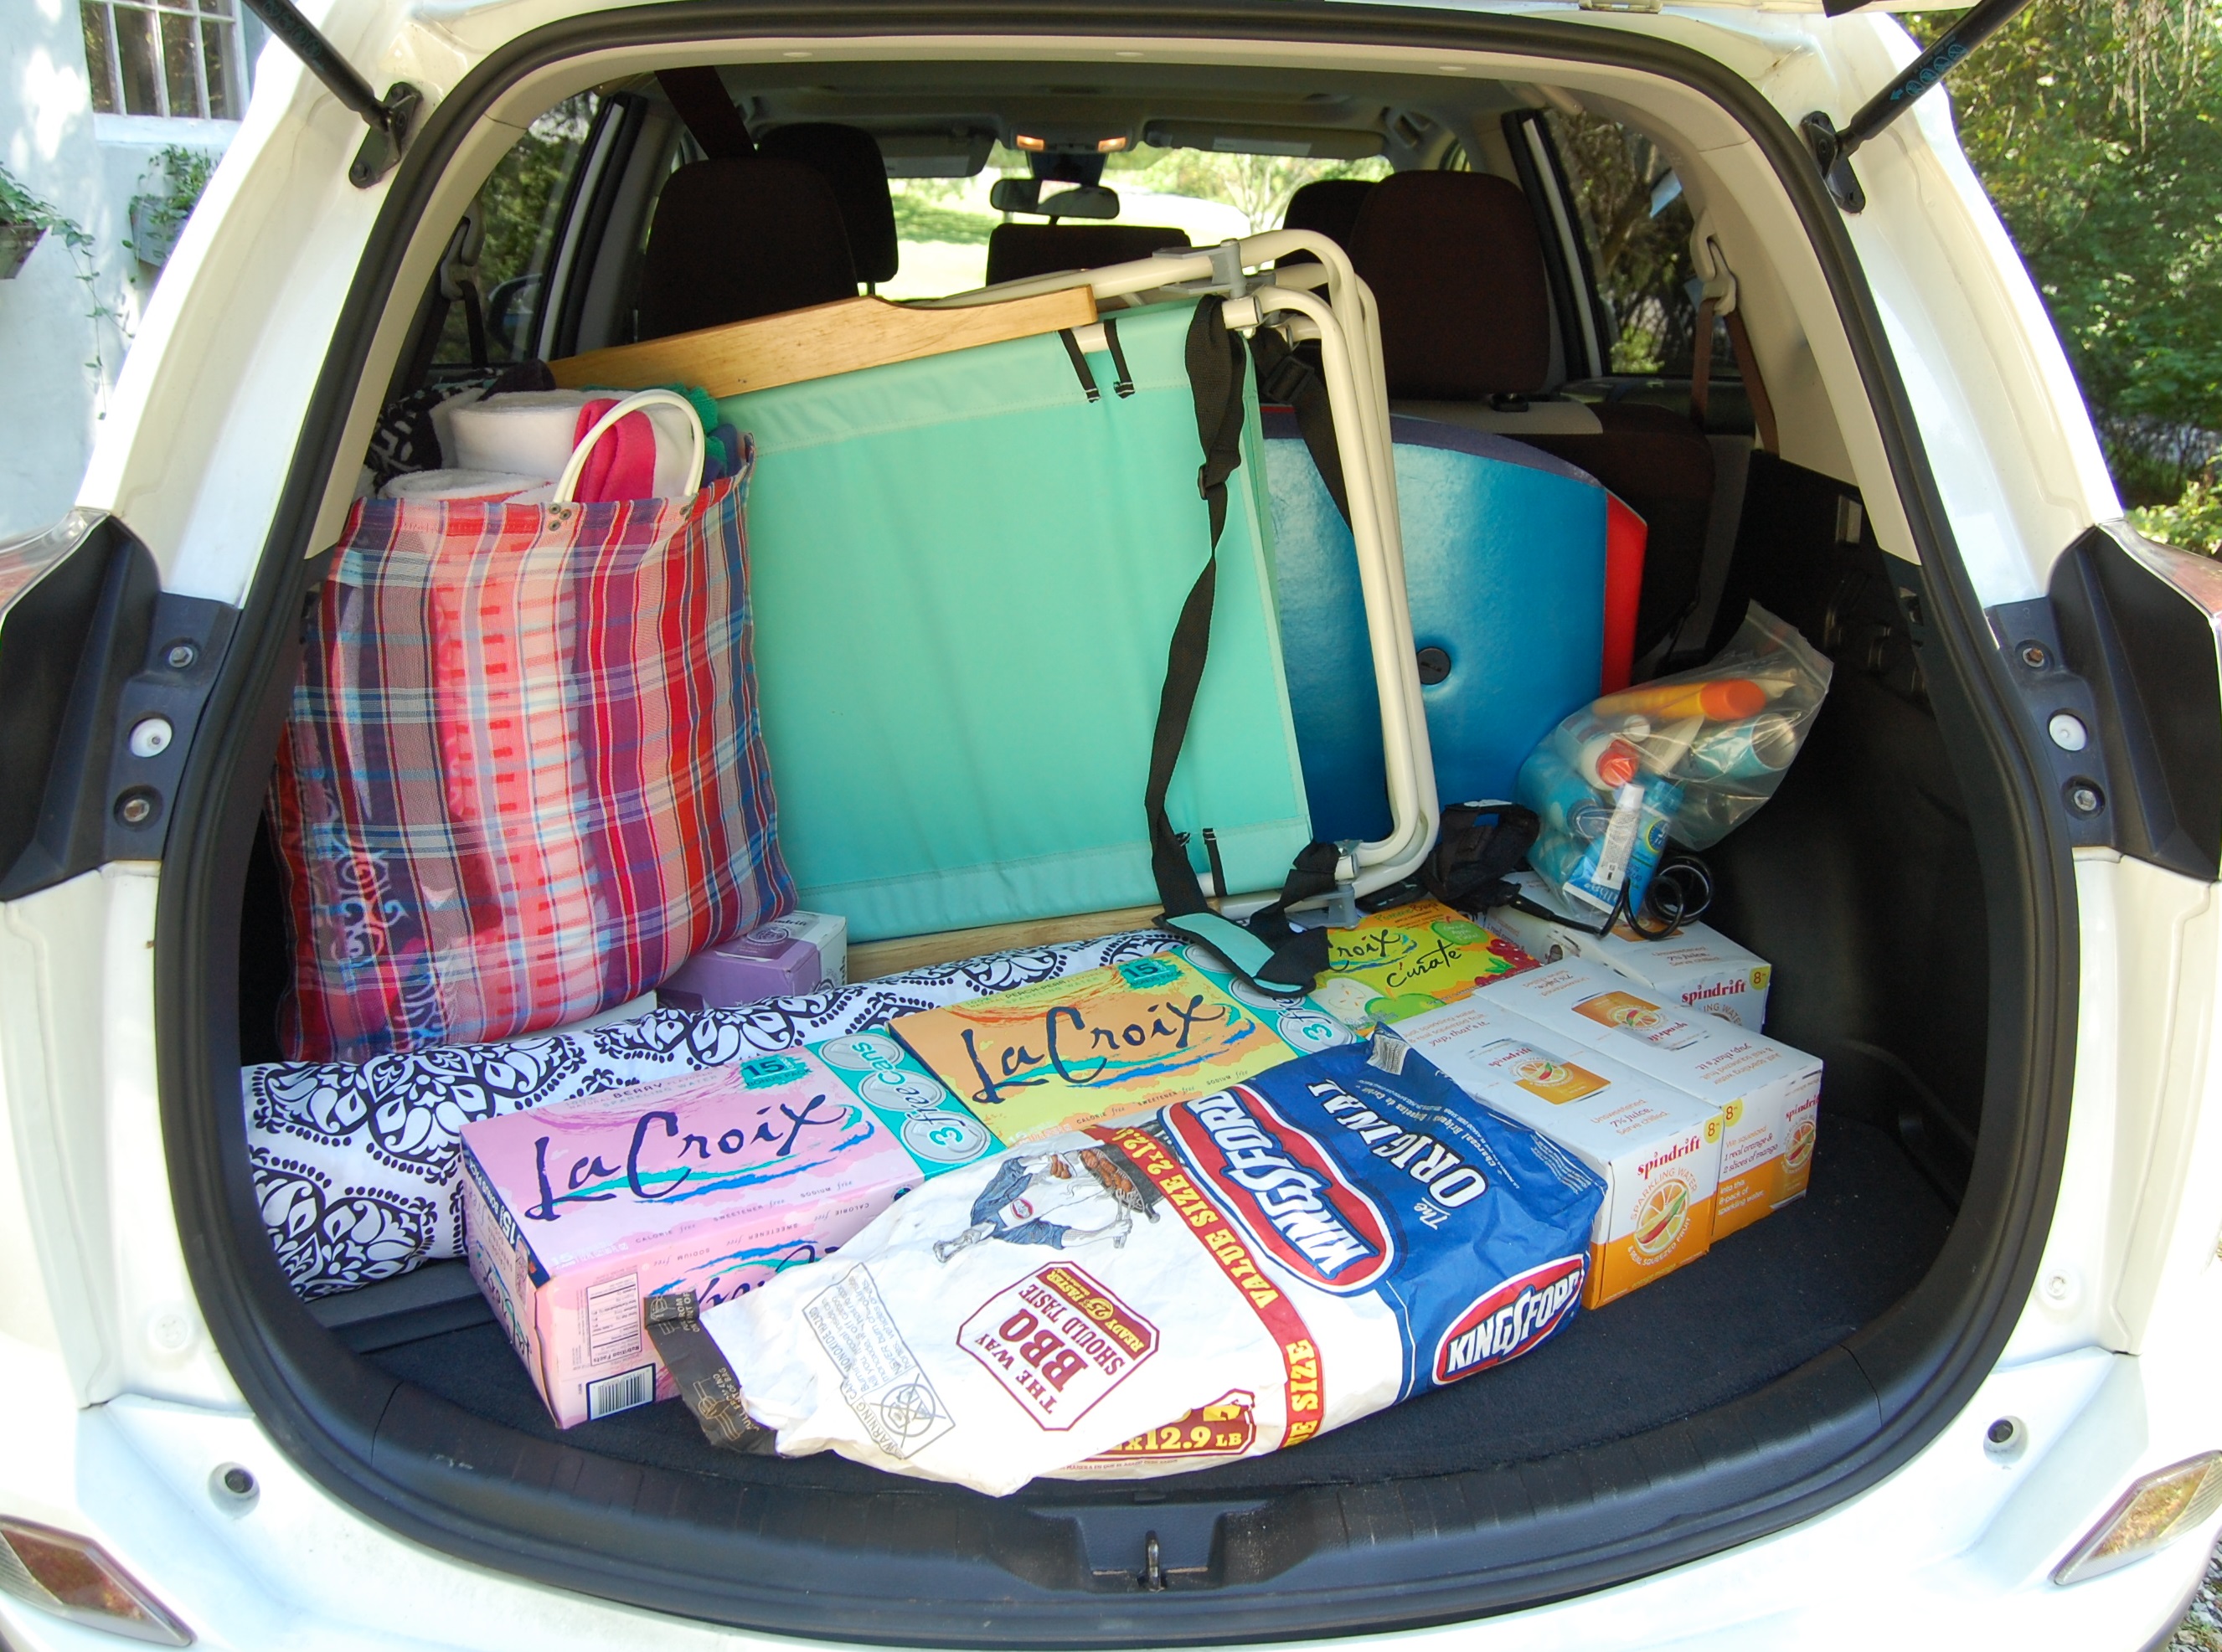
Layer Five – Fully Loaded
After you’ve loaded the car with everything you’re taking, snap a picture of the trunk or cargo area using your phone’s camera.
Layer Four
Next, unload the car one layer at a time, taking a picture after each layer is removed.
Layer Three
This whole process of loading, photographing and unloading the car should not take very long; and it will save you from a massive headache when you’re ready to hit the road.
Layer Two
Simply pull out your phone, follow the photos starting with Layer One and re-pack the car.
Layer One – Don’t forget to pack the cargo cover!
You’ve got a handy reference on your phone for packing the car at the end of your vacation. You can hit the road relaxed, happy and have a great vacation!
Disclosure: In addition to occasional sponsored posts, Arthurized Home uses clickable affiliate links. That means that I may receive a small commission from sales at no extra charge to you. As always, my opinion is 100% my own, and I only recommend things that I truly love or use myself. Thank you for patronizing the brands that support Arthurized Home!
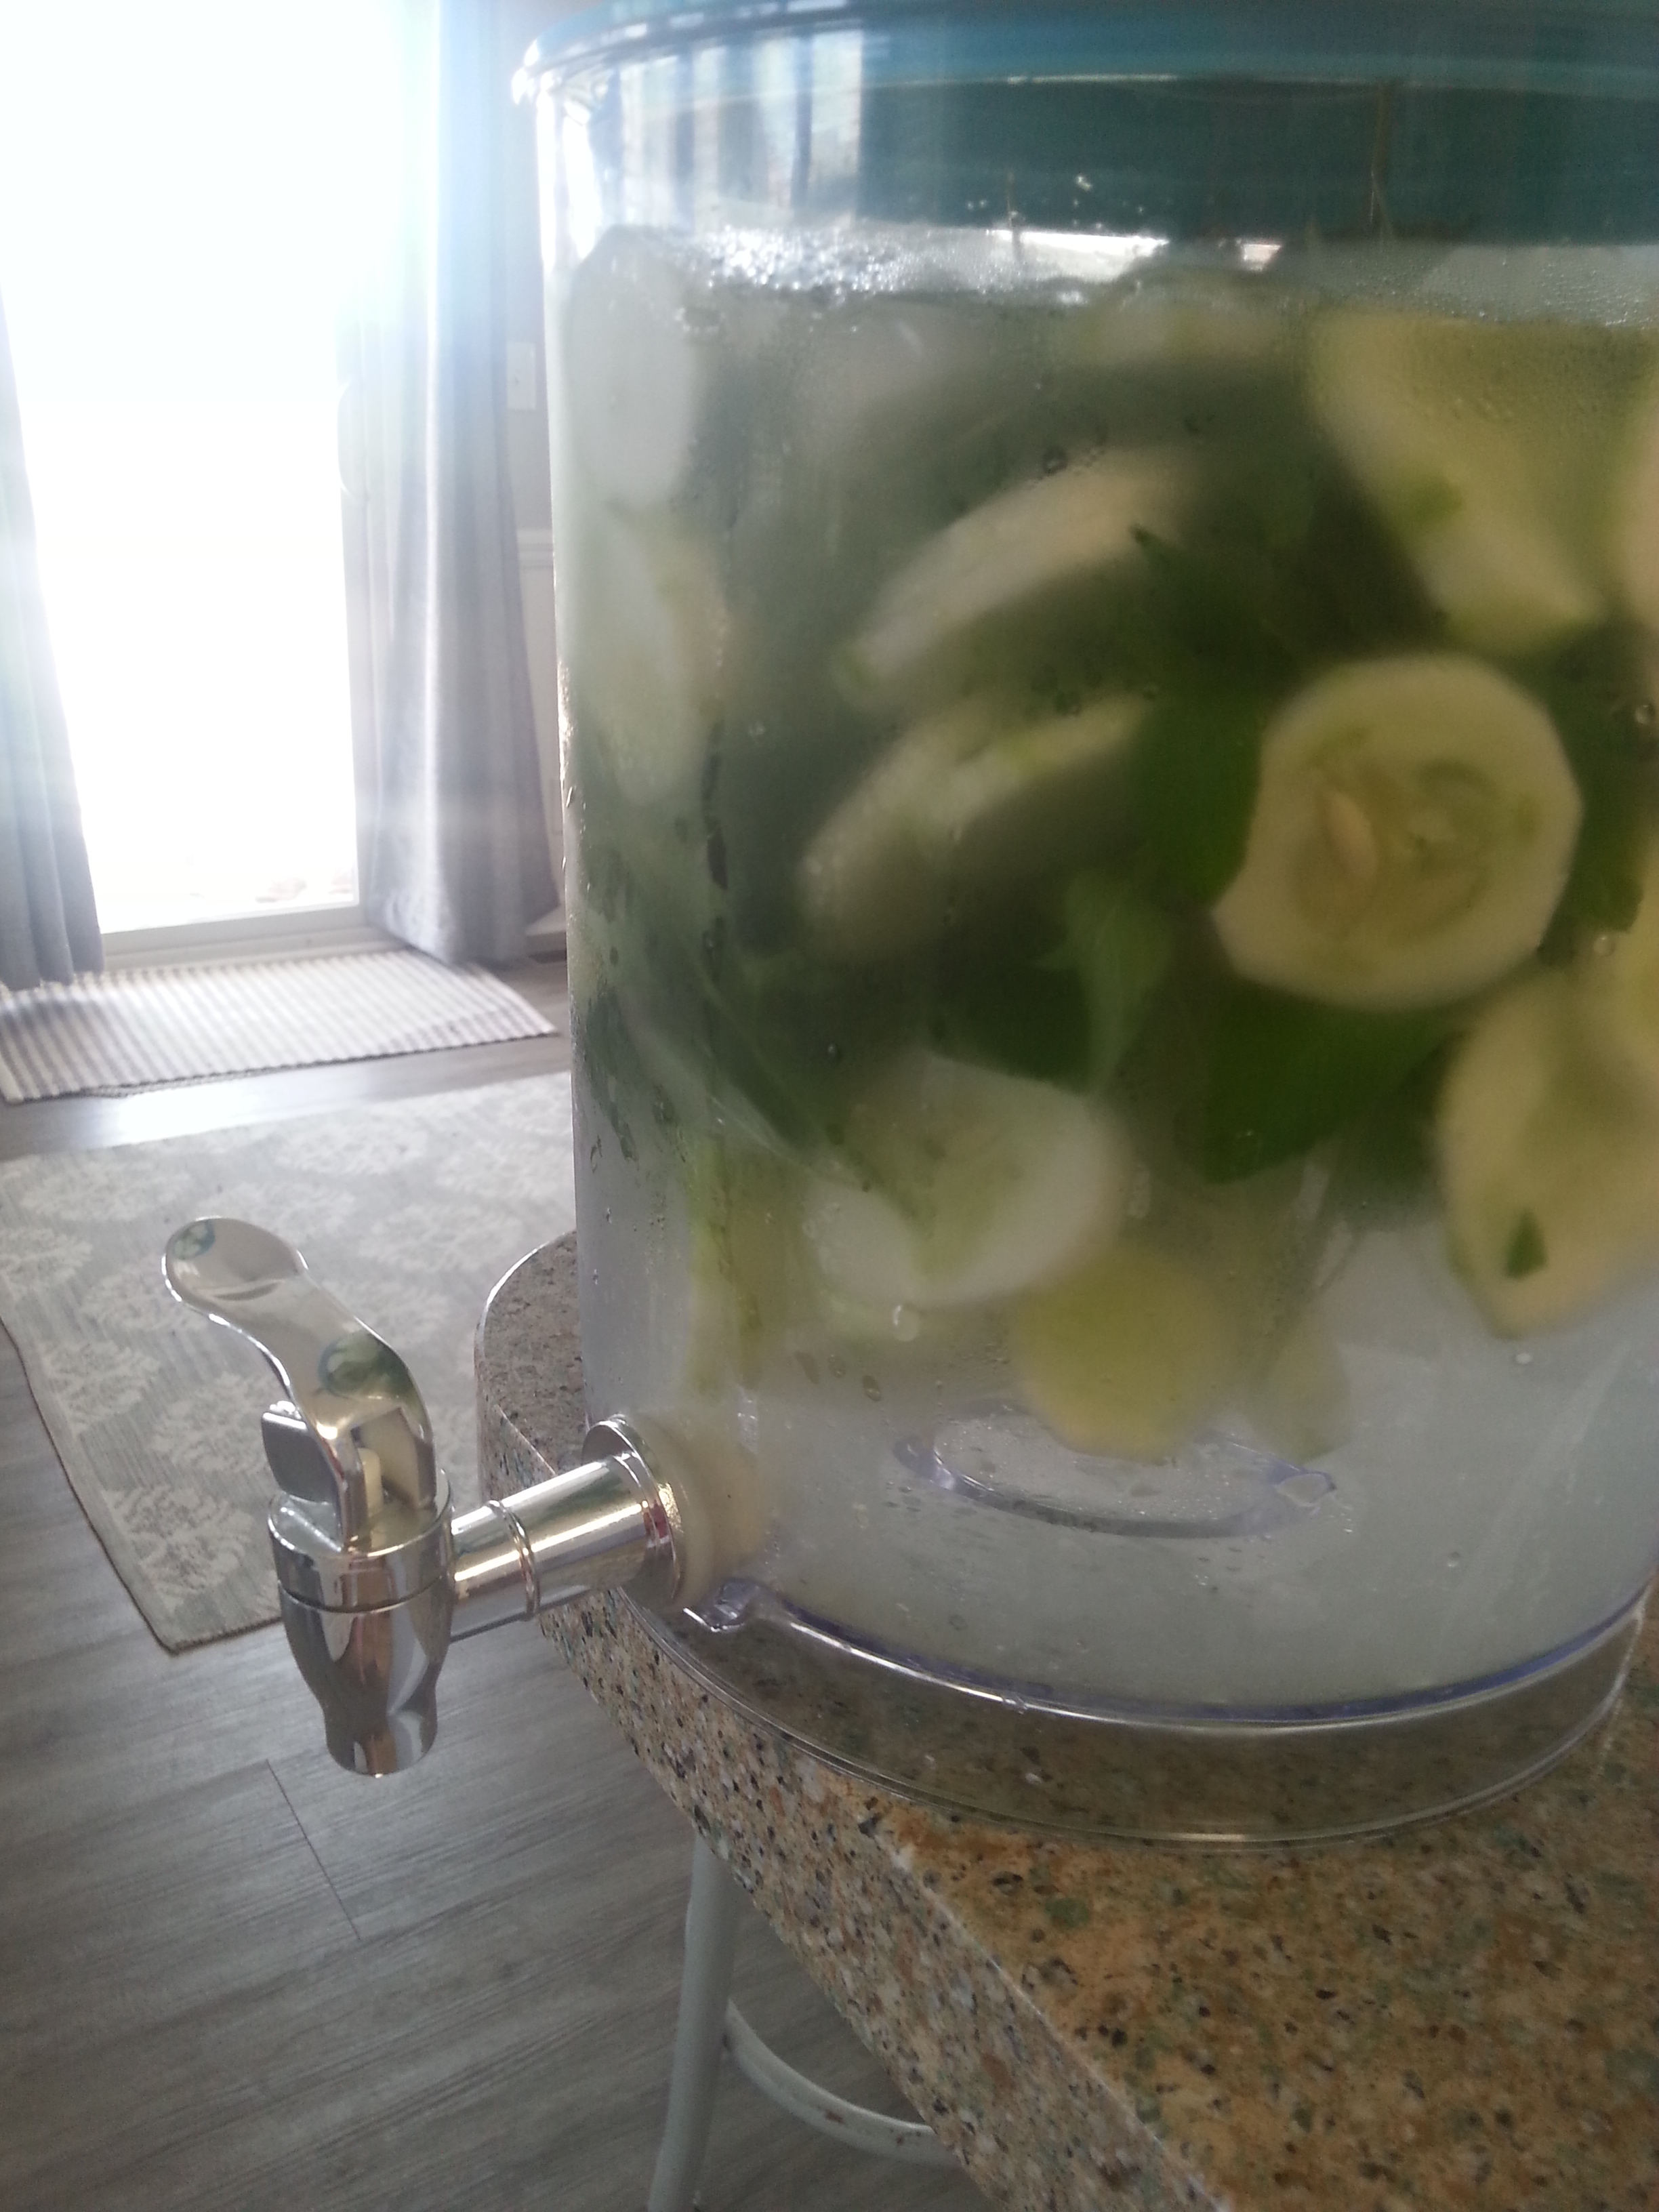
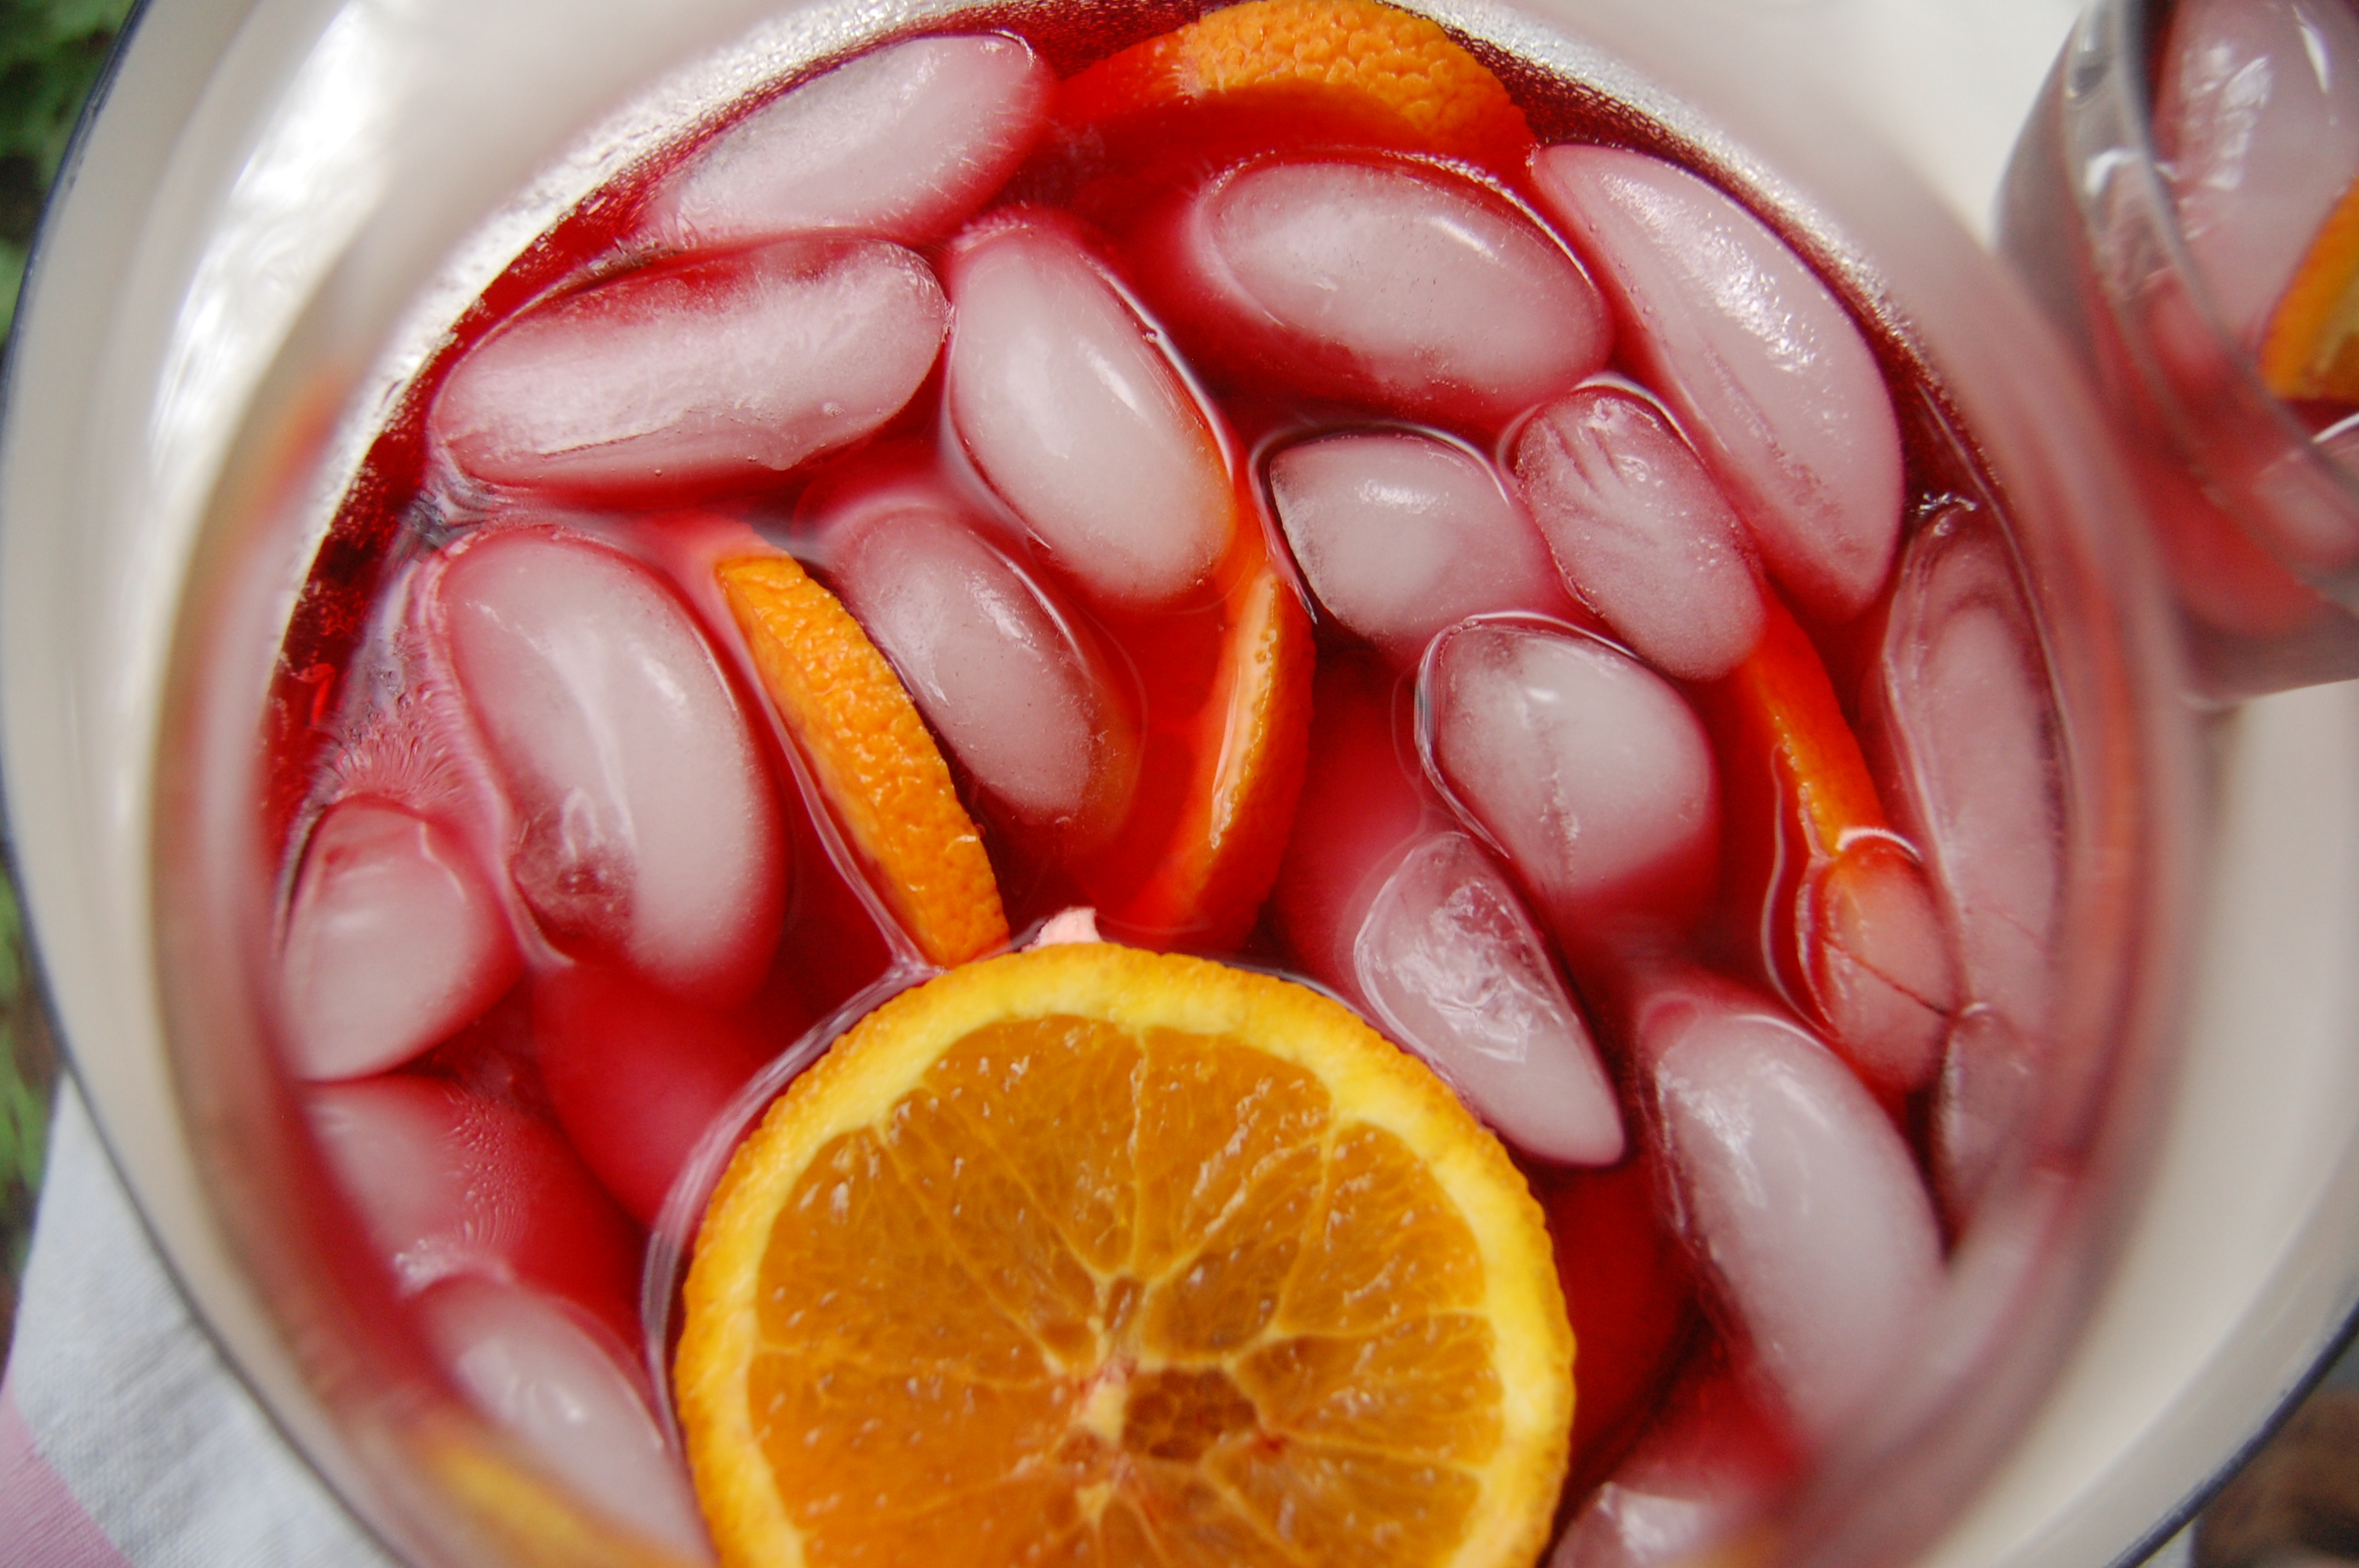
Don’t you love going to a hotel that serves infused water to their guests? I do! You can recreate that same experience at home, and stay on top of your hydration at the same time.
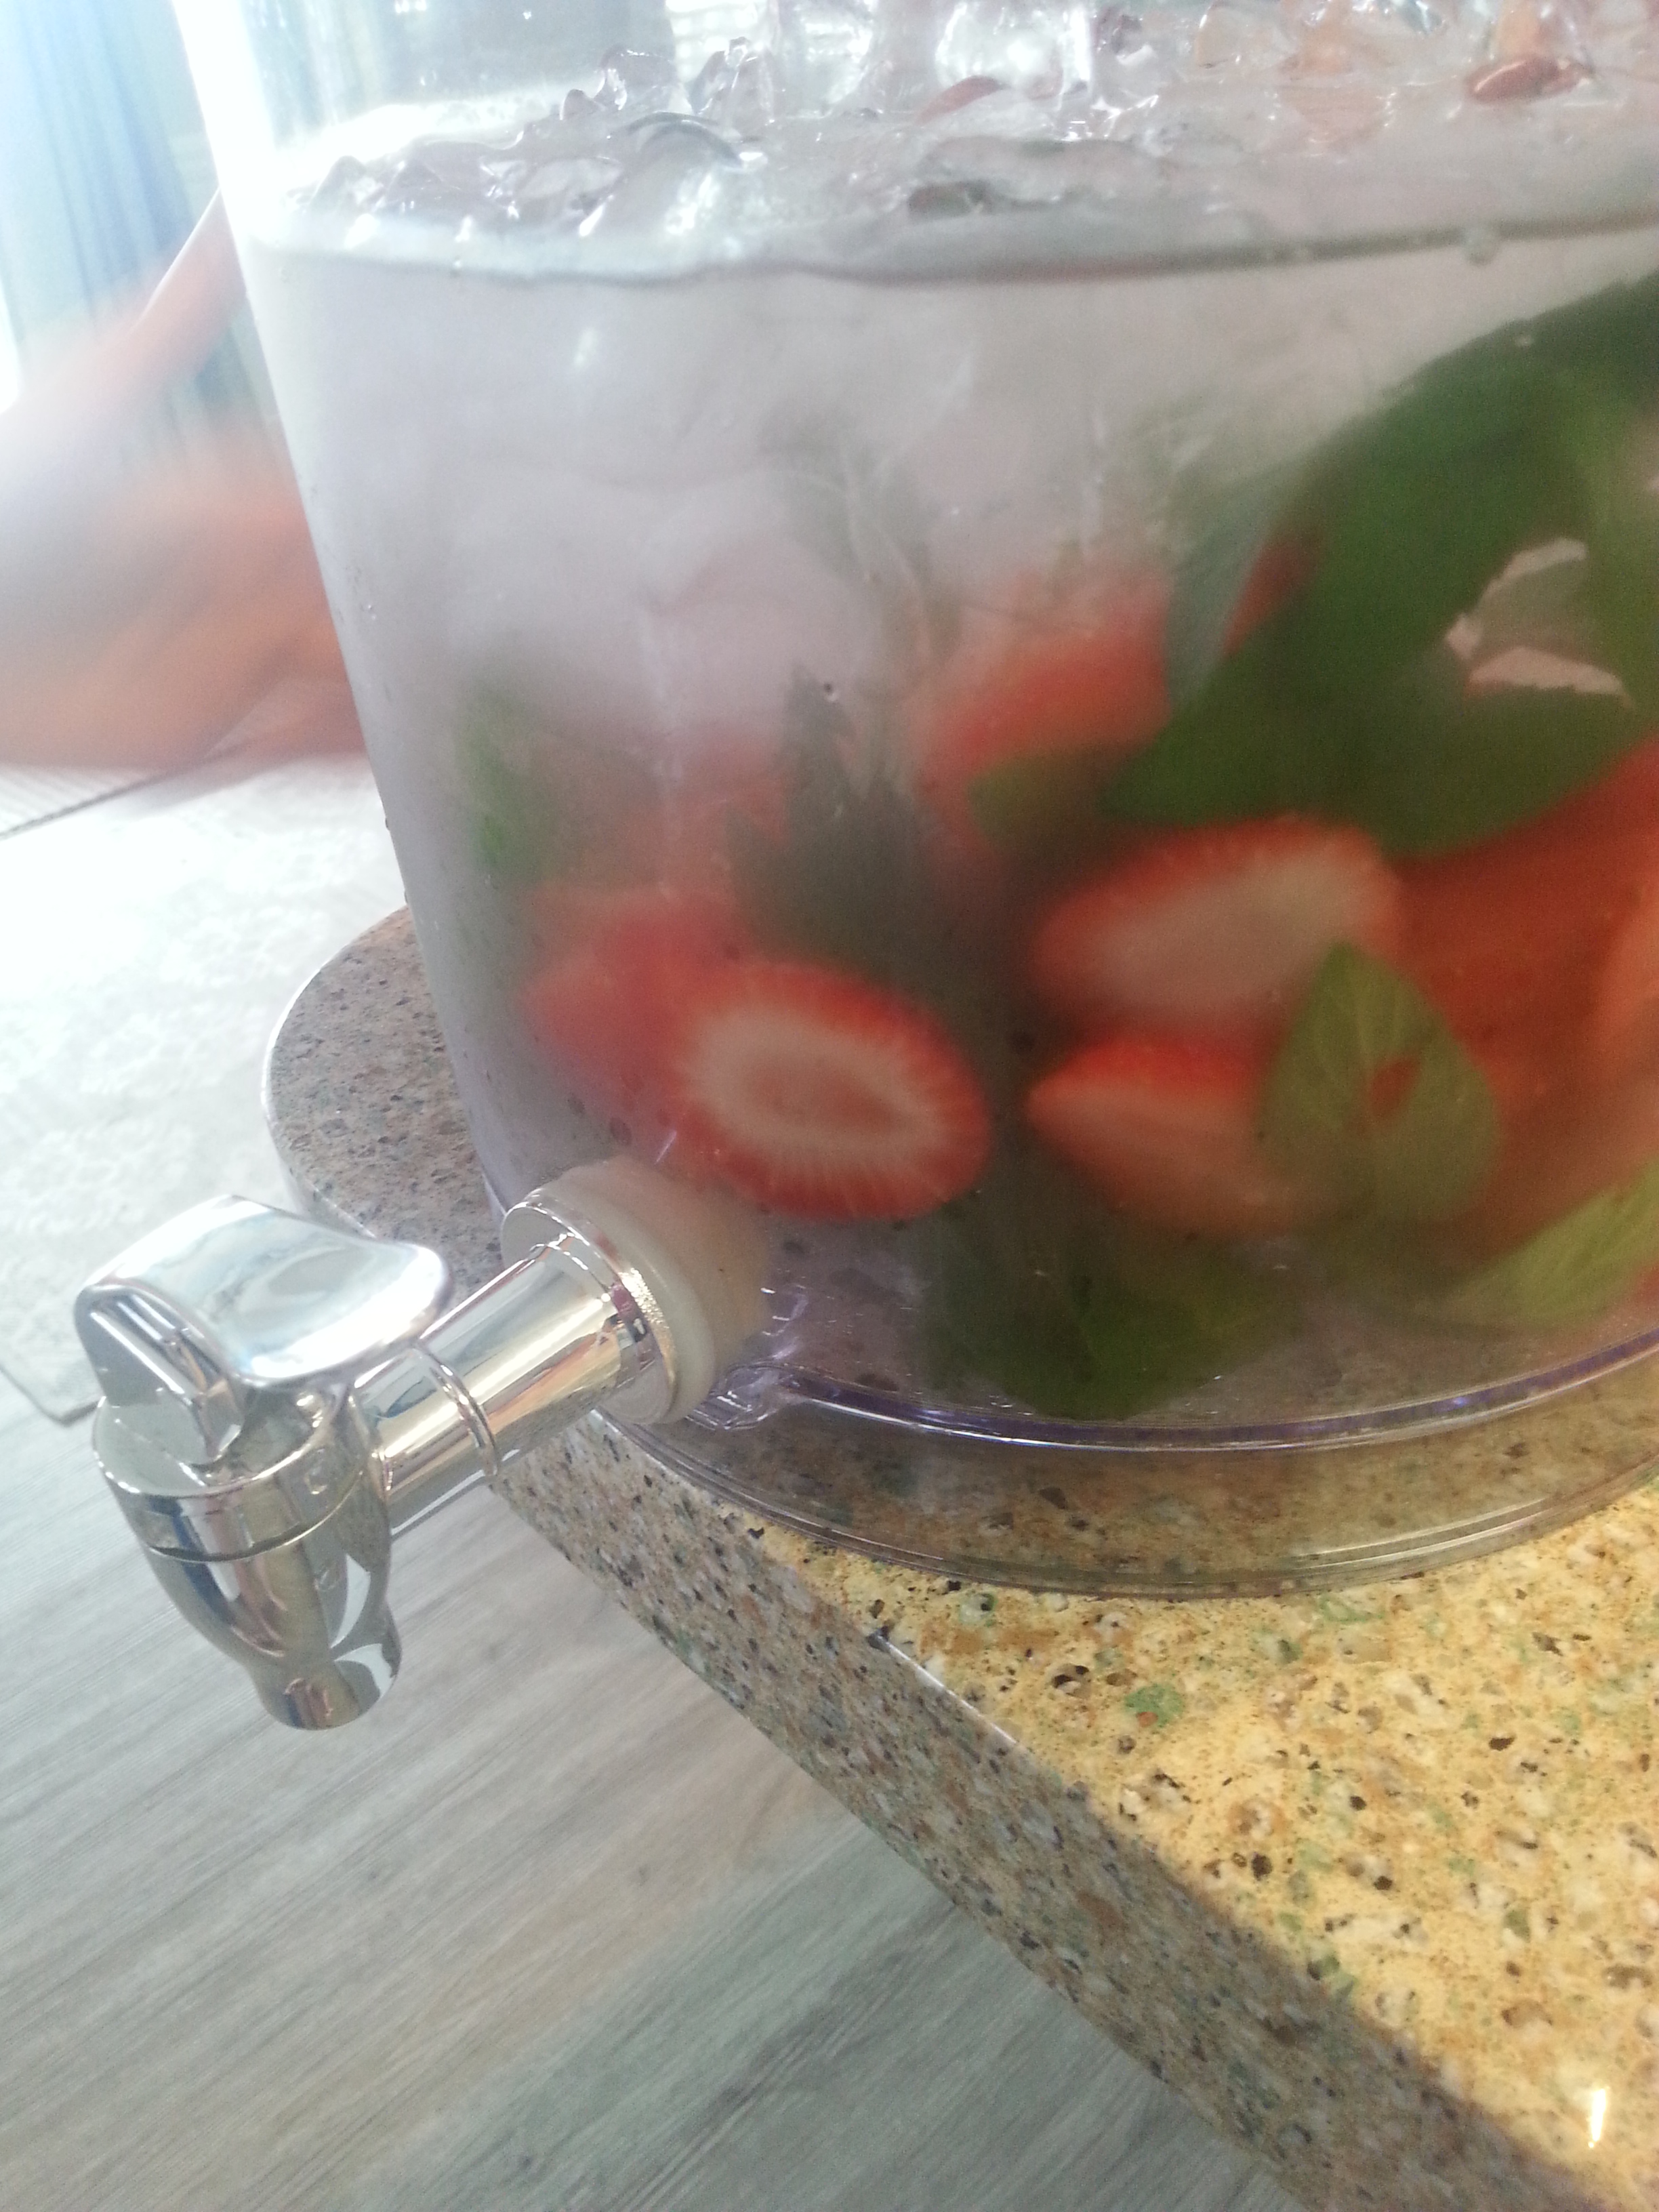
Whether I’m at home or at the office, I keep my water bottle nearby, and sip from that all day. When we go to the beach, I like to set up a dispenser of ice-cold, infused water. As we come and go throughout the day, we can re-fill our water bottles. This idea is fun for parties and cookouts as well.
Infused water at a grocery store we recently visited.
Vegetables: Cucumber, Carrot, Ginger Root (I’ve seen celery in spa water recipes, but I haven’t tried it. I would use sparingly.)
Herbs: Mint, Basil, Rosemary, Thyme
Spice: Cinnamon sticks
The perfect use for those homegrown herbs!
Thoroughly wash all produce and peel it if necessary. For cucumbers, I remove strips of the peel.
Adjust these amounts to the size of your dispenser. In my 1.5 gallon dispenser, I use: Ice to fill halfway Approximately 2-3 cups of cubed or sliced fruits, berries or vegetables 1 very generous handful of herbs Water (of course!)
Pour ice into the dispenser until it is half full. Place the fruit or veggies on top of the ice. Add a handful of herbs that you have crushed slightly. Crushing the herbs releases the essential oils. Fill the container with water, give it a little stir, and store in the refrigerator. Your infused water is ready to drink!
Here are some combinations that we like: Cantaloupe / Cucumber / Mint Cucumber / Lime Basil Cucumber / Mint Lemon / Lime Lime / Orange / Mint Strawberry / Mint
What do you think? Would you give infused water a try?
Disclosure: In addition to occasional sponsored posts, Arthurized Home uses clickable affiliate links. That means that I may receive a small commission from sales at no extra charge to you. As always, my opinion is 100% my own, and I only recommend things that I truly love or use myself. Thank you for patronizing the brands that support Arthurized Home!
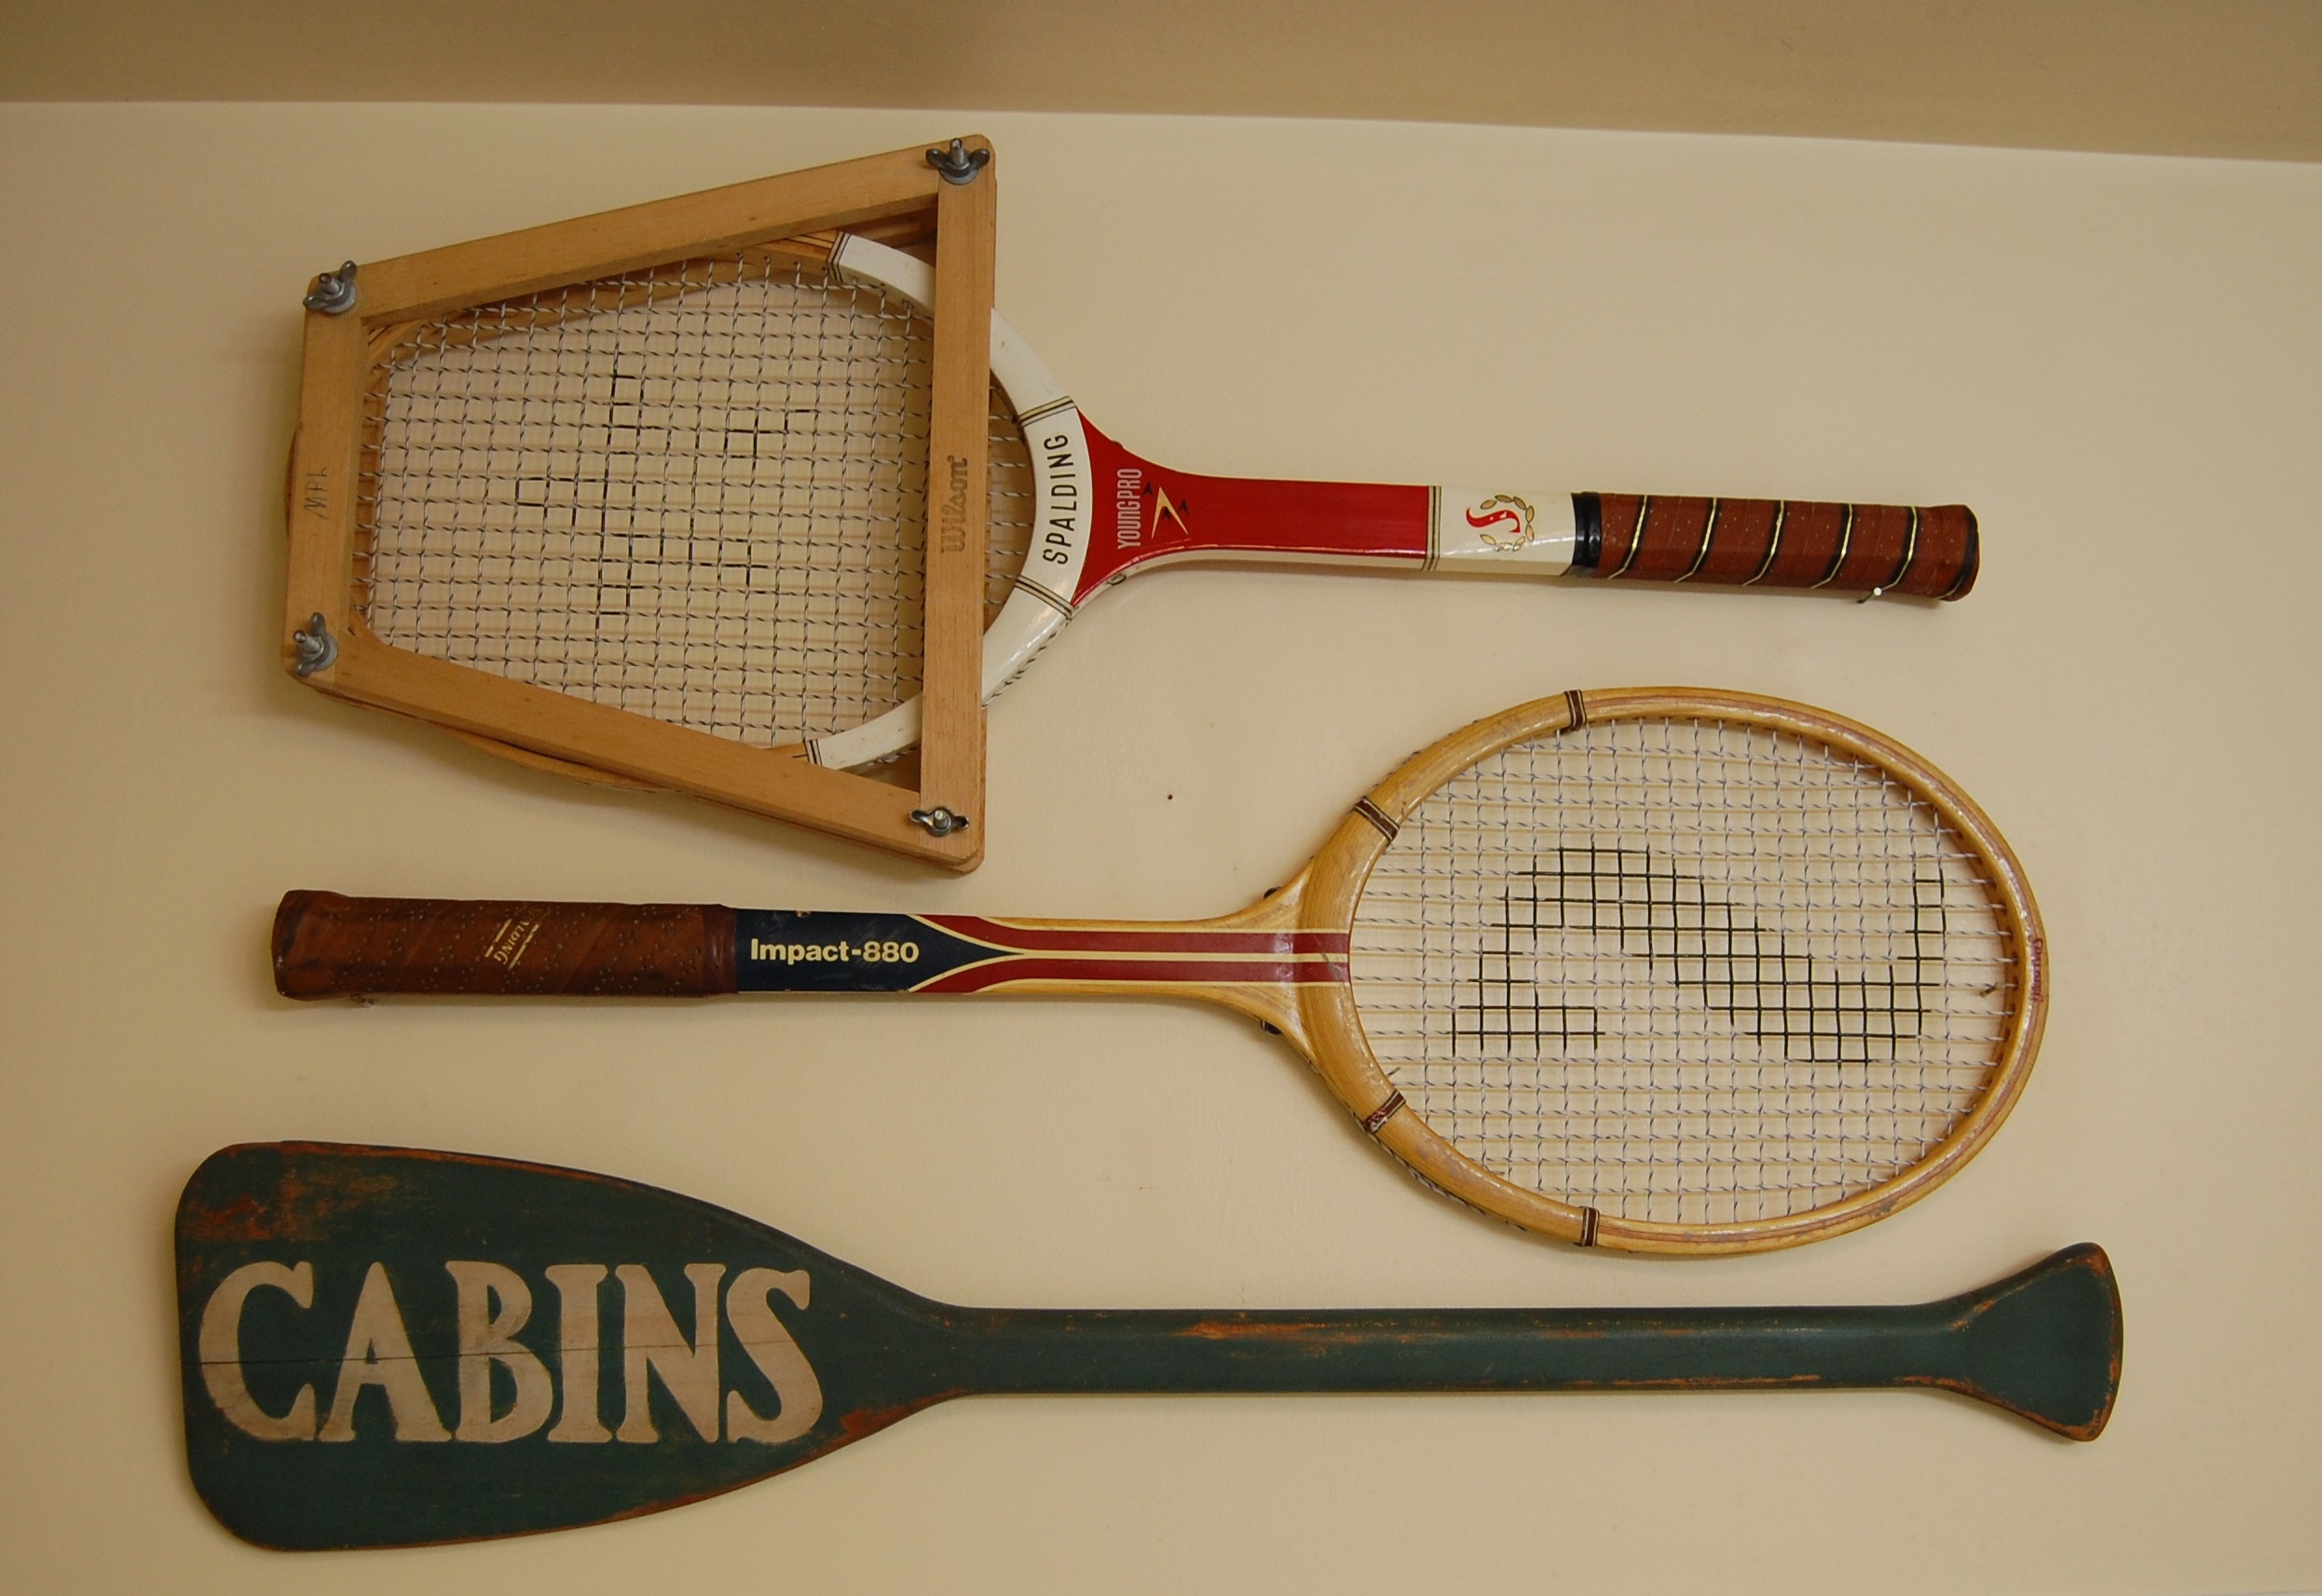
There are a couple of go-to techniques that I use when antiquing a painted wooden item. One of them is the wax resist technique that I used on the race medal holder. Today, I’ll share how to antique a piece using stamping ink.
Materials: Painted wooden item Sandpaper Chocolate brown ink pad – water based, not pigment Small paint brush – use an old one Rag – for wiping excess ink off the piece Spray sealer – optional
It’s important to use water based stamping ink. Because pigment ink is so thick, it will smear over the surface of your project, not soak into the wood.
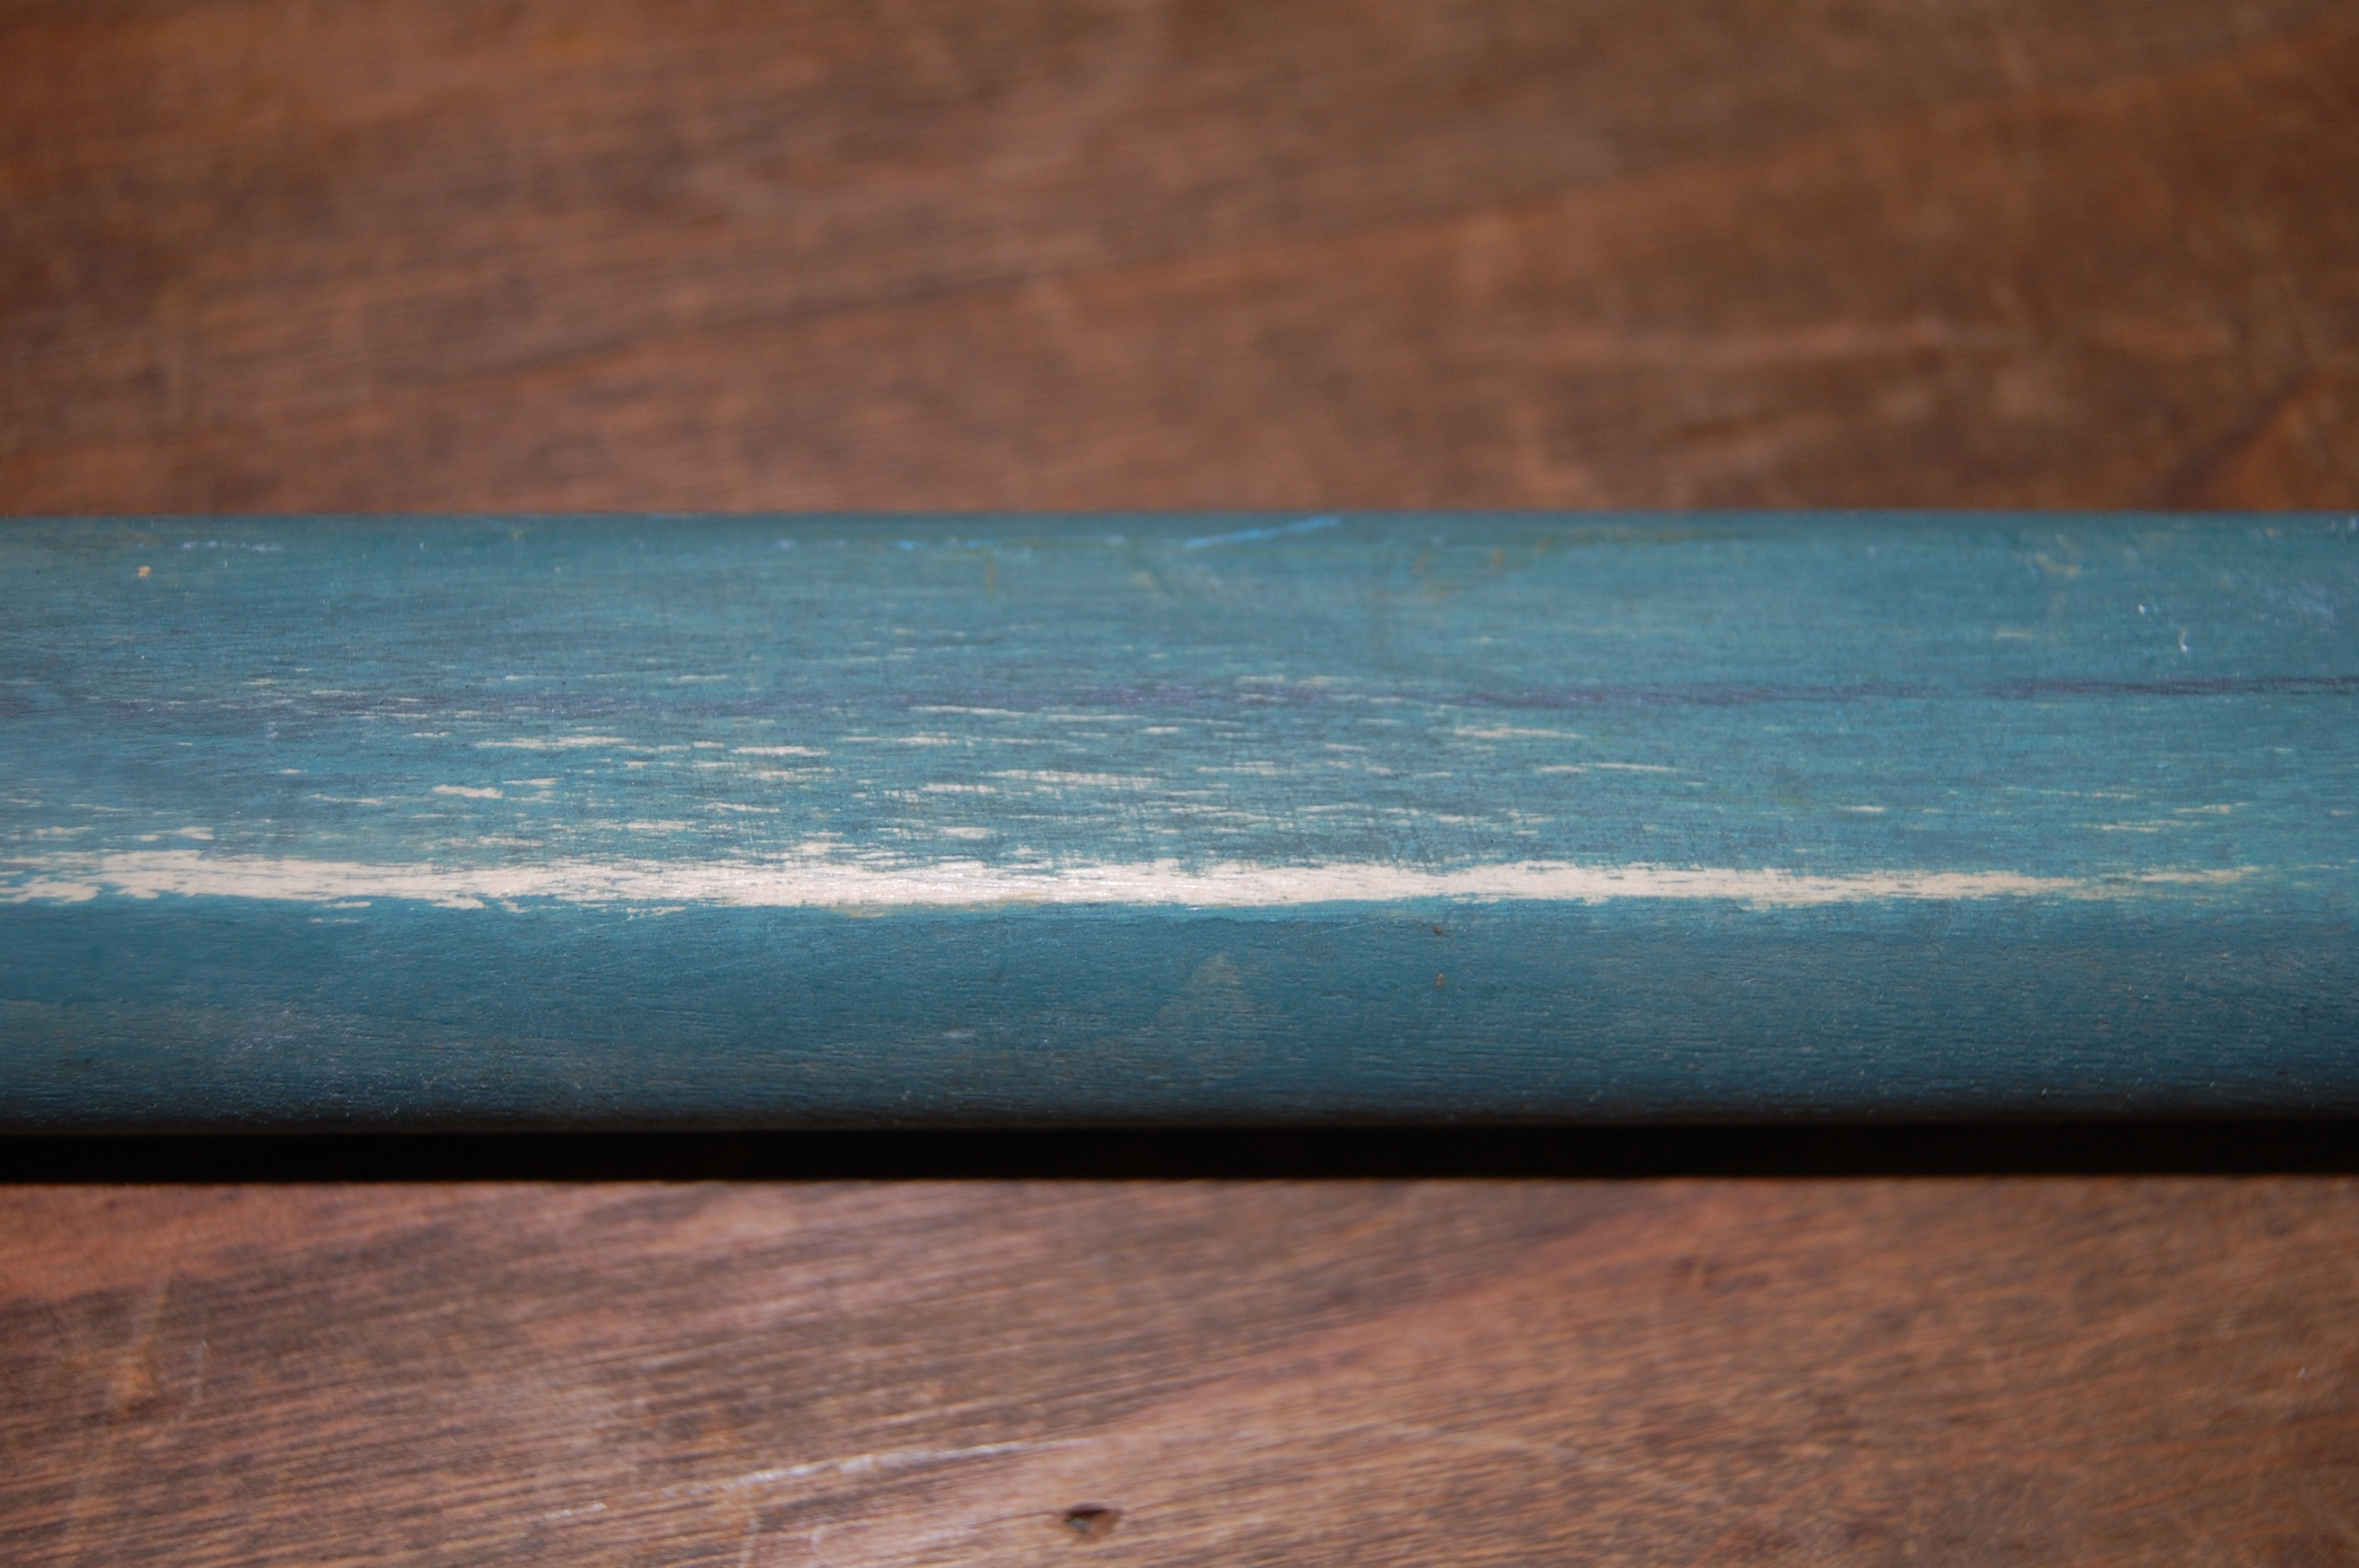
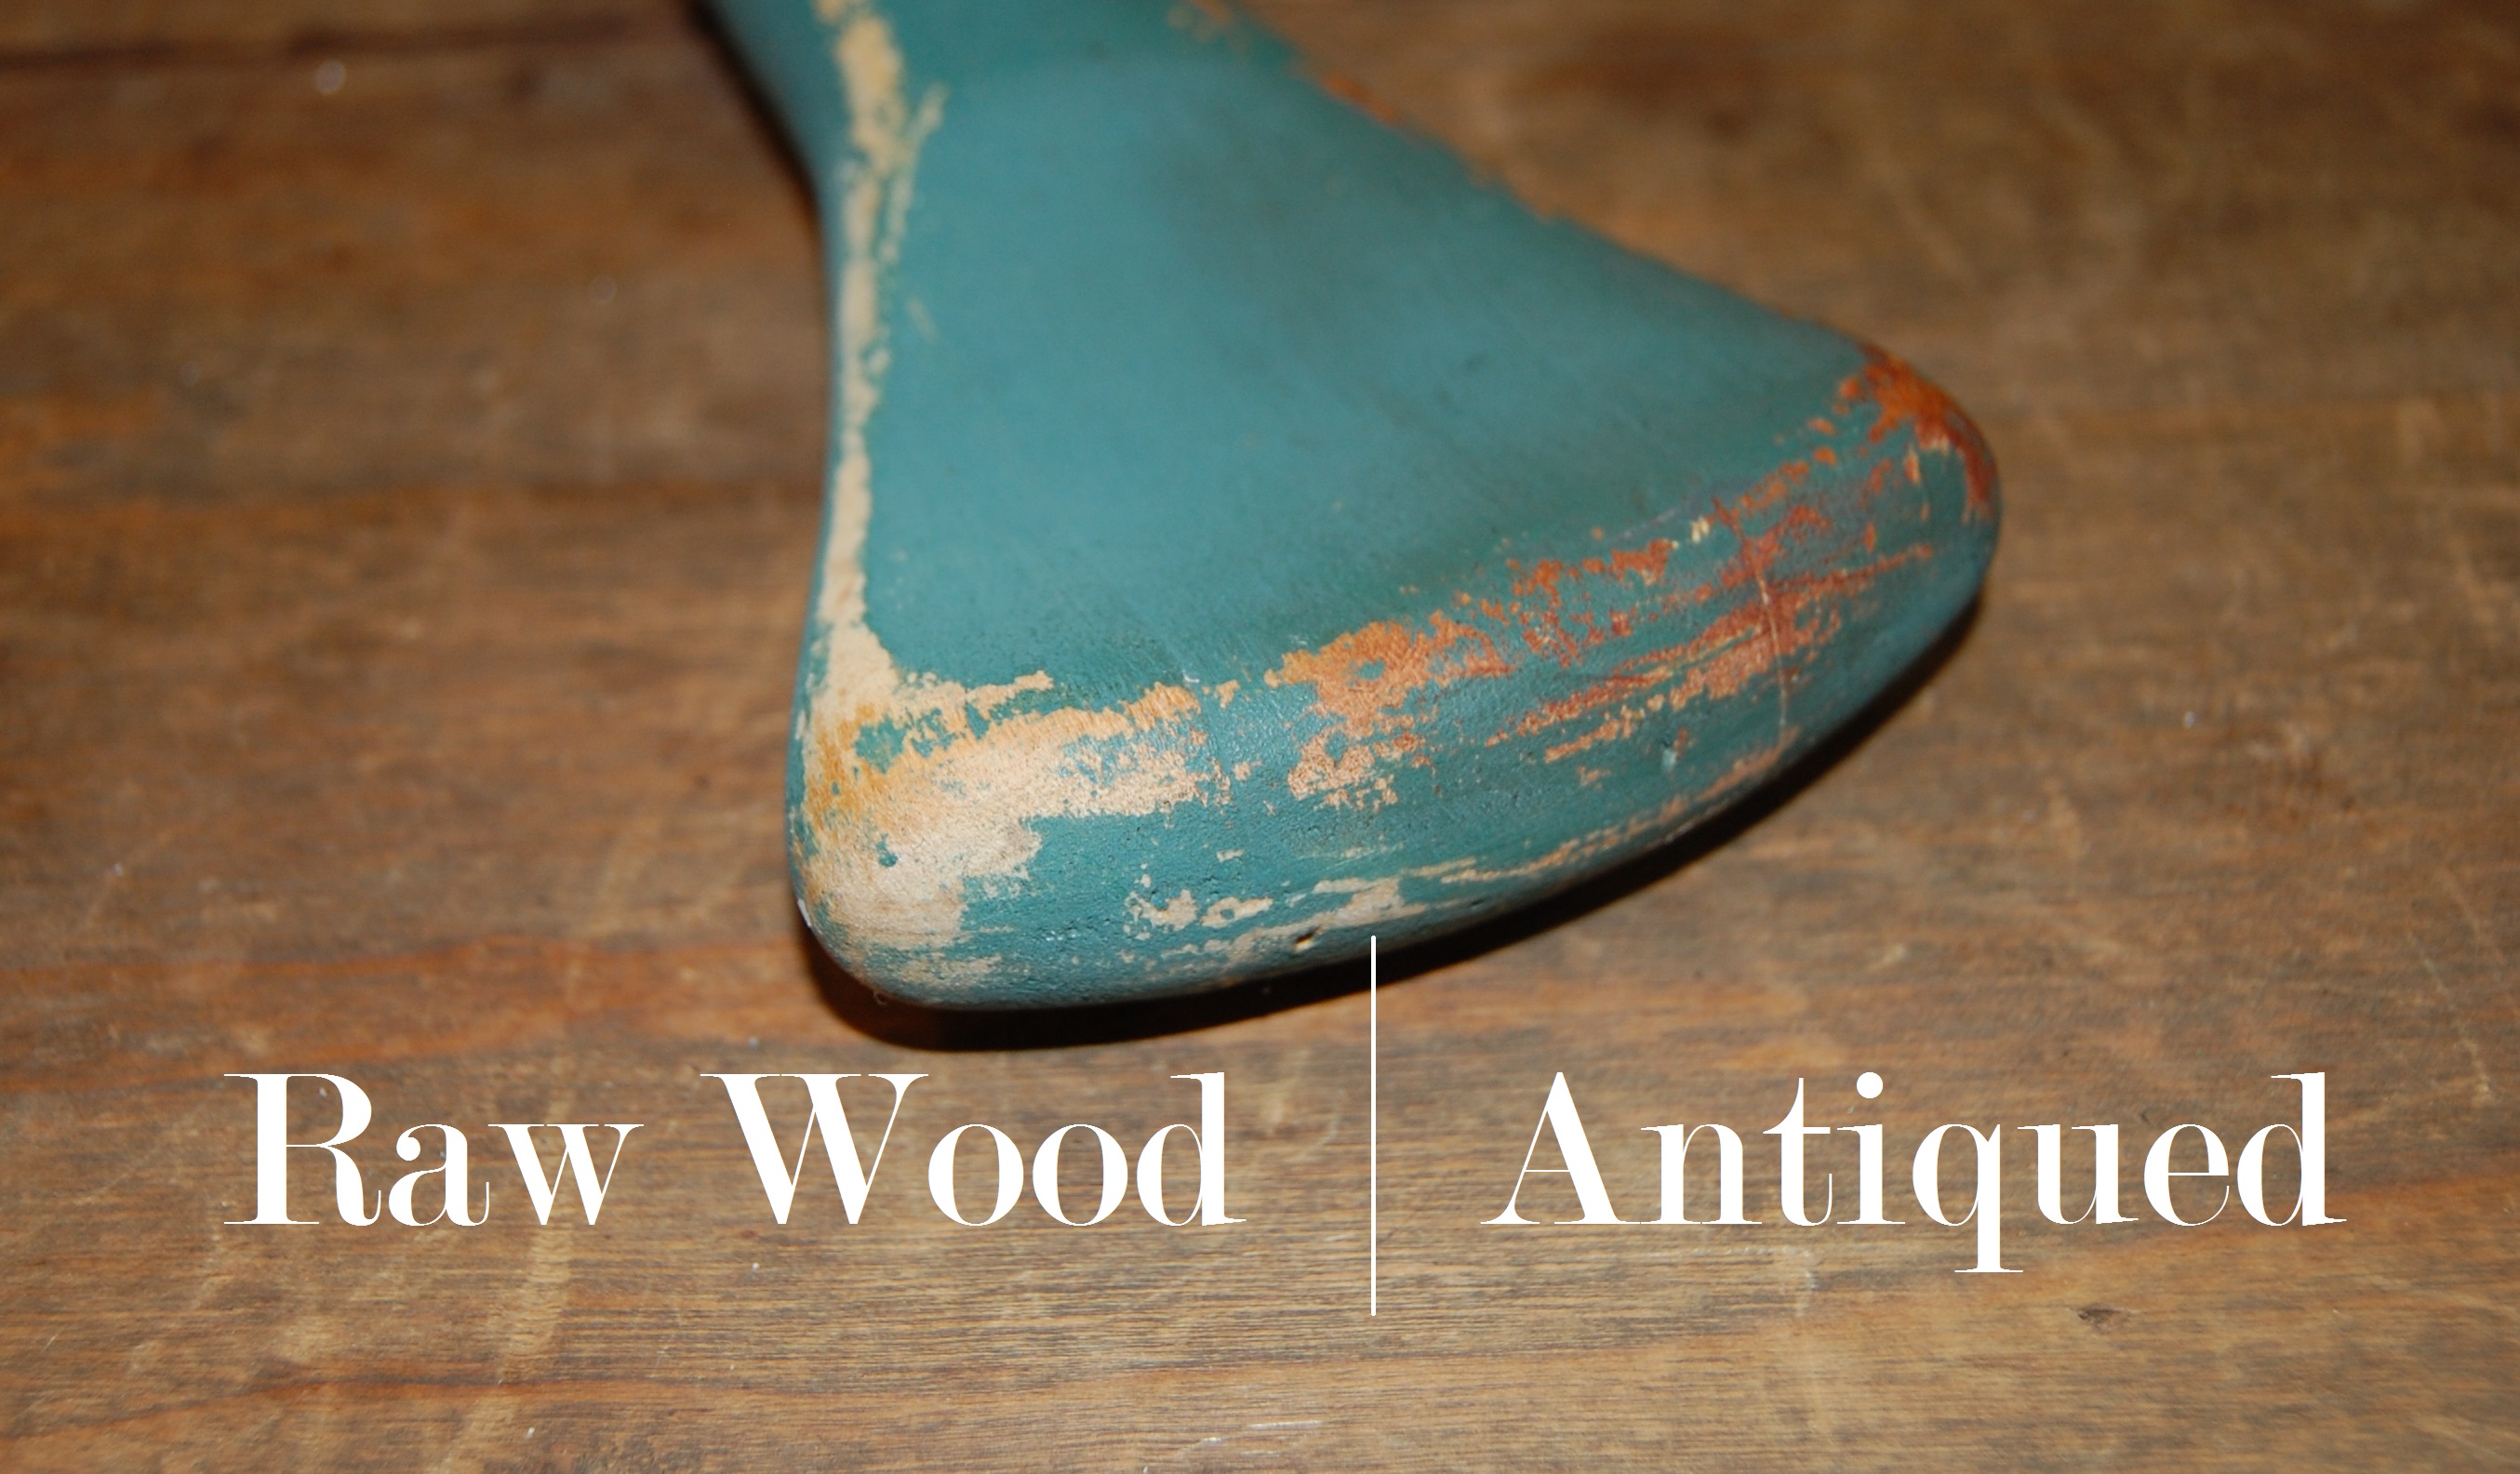
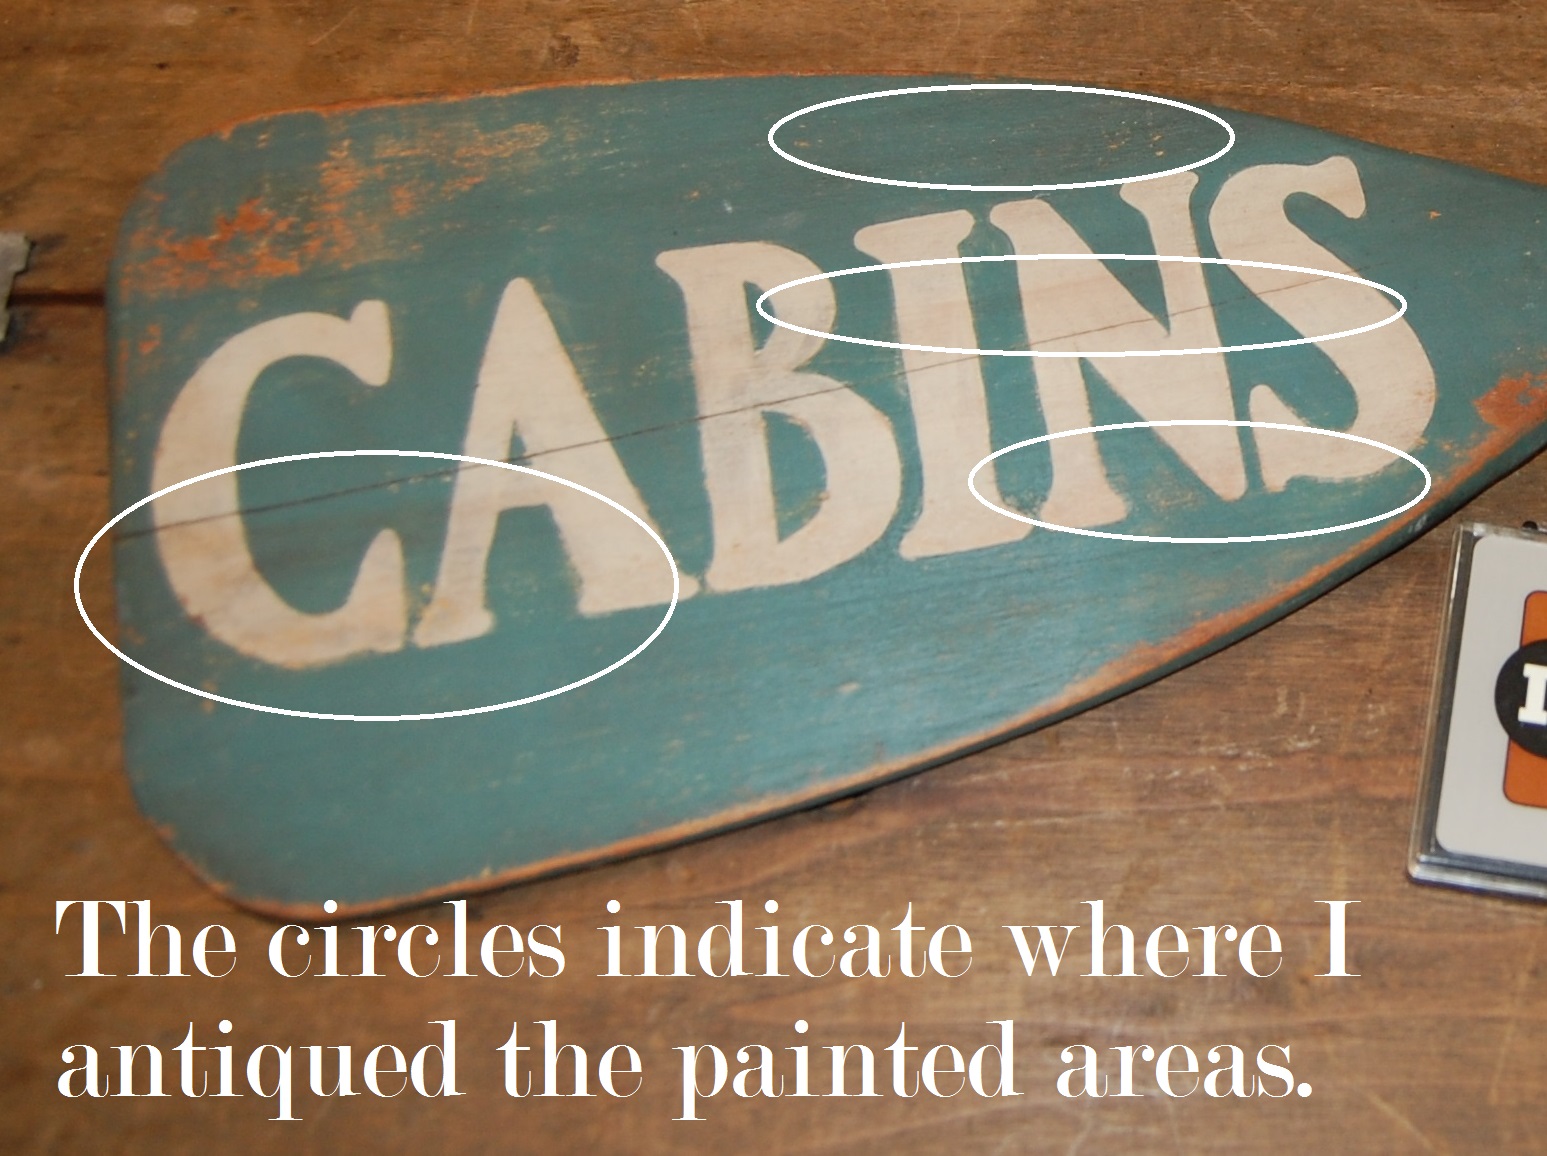
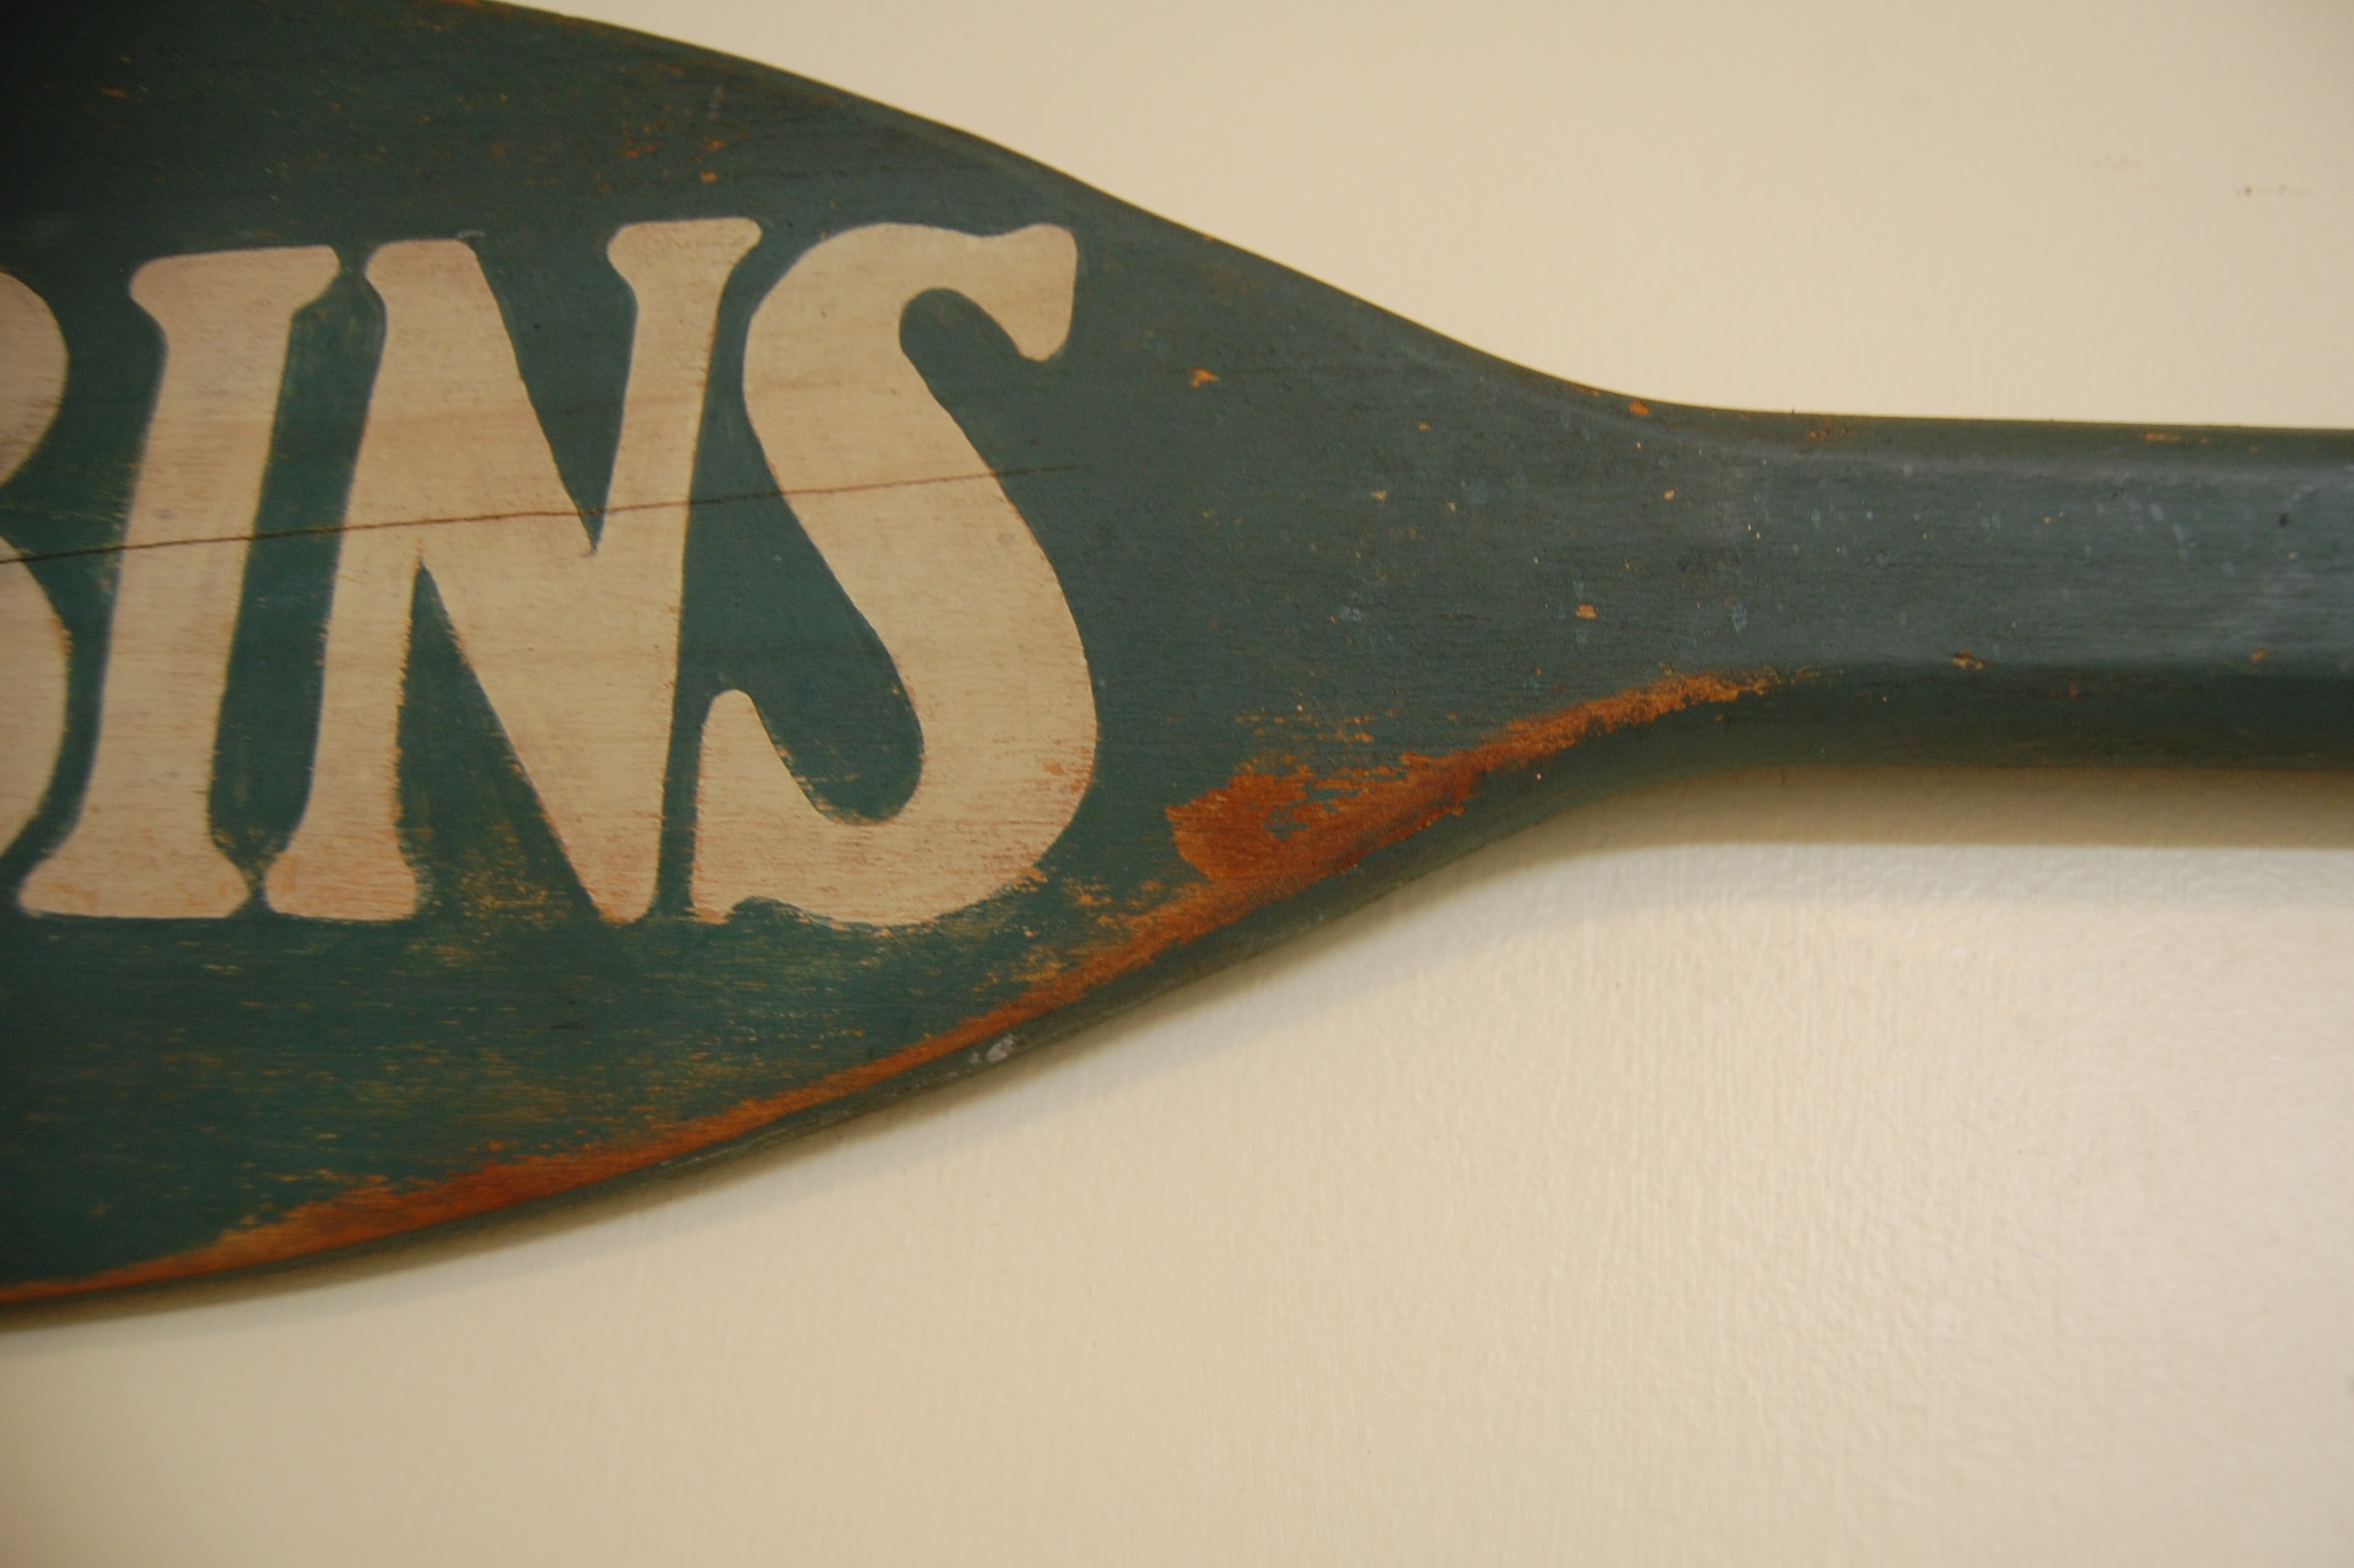
When distressing a painted piece, focus on the areas that would be naturally worn through use. I’m distressing a child’s canoe paddle, so I’ll sand the handle and sides, where the paddle might bump into the canoe. Sand down to the raw wood.
Because you’ll be rubbing the ink into the wood, use a paint brush that you’re okay with ruining. Kid’s craft brushes are perfect for this project. I’m using a foam brush. Dab the brush onto the stamp pad and then onto your project. Make sure to cover the exposed wood completely. Keep a rag handy so that you can wipe excess ink off as you work.
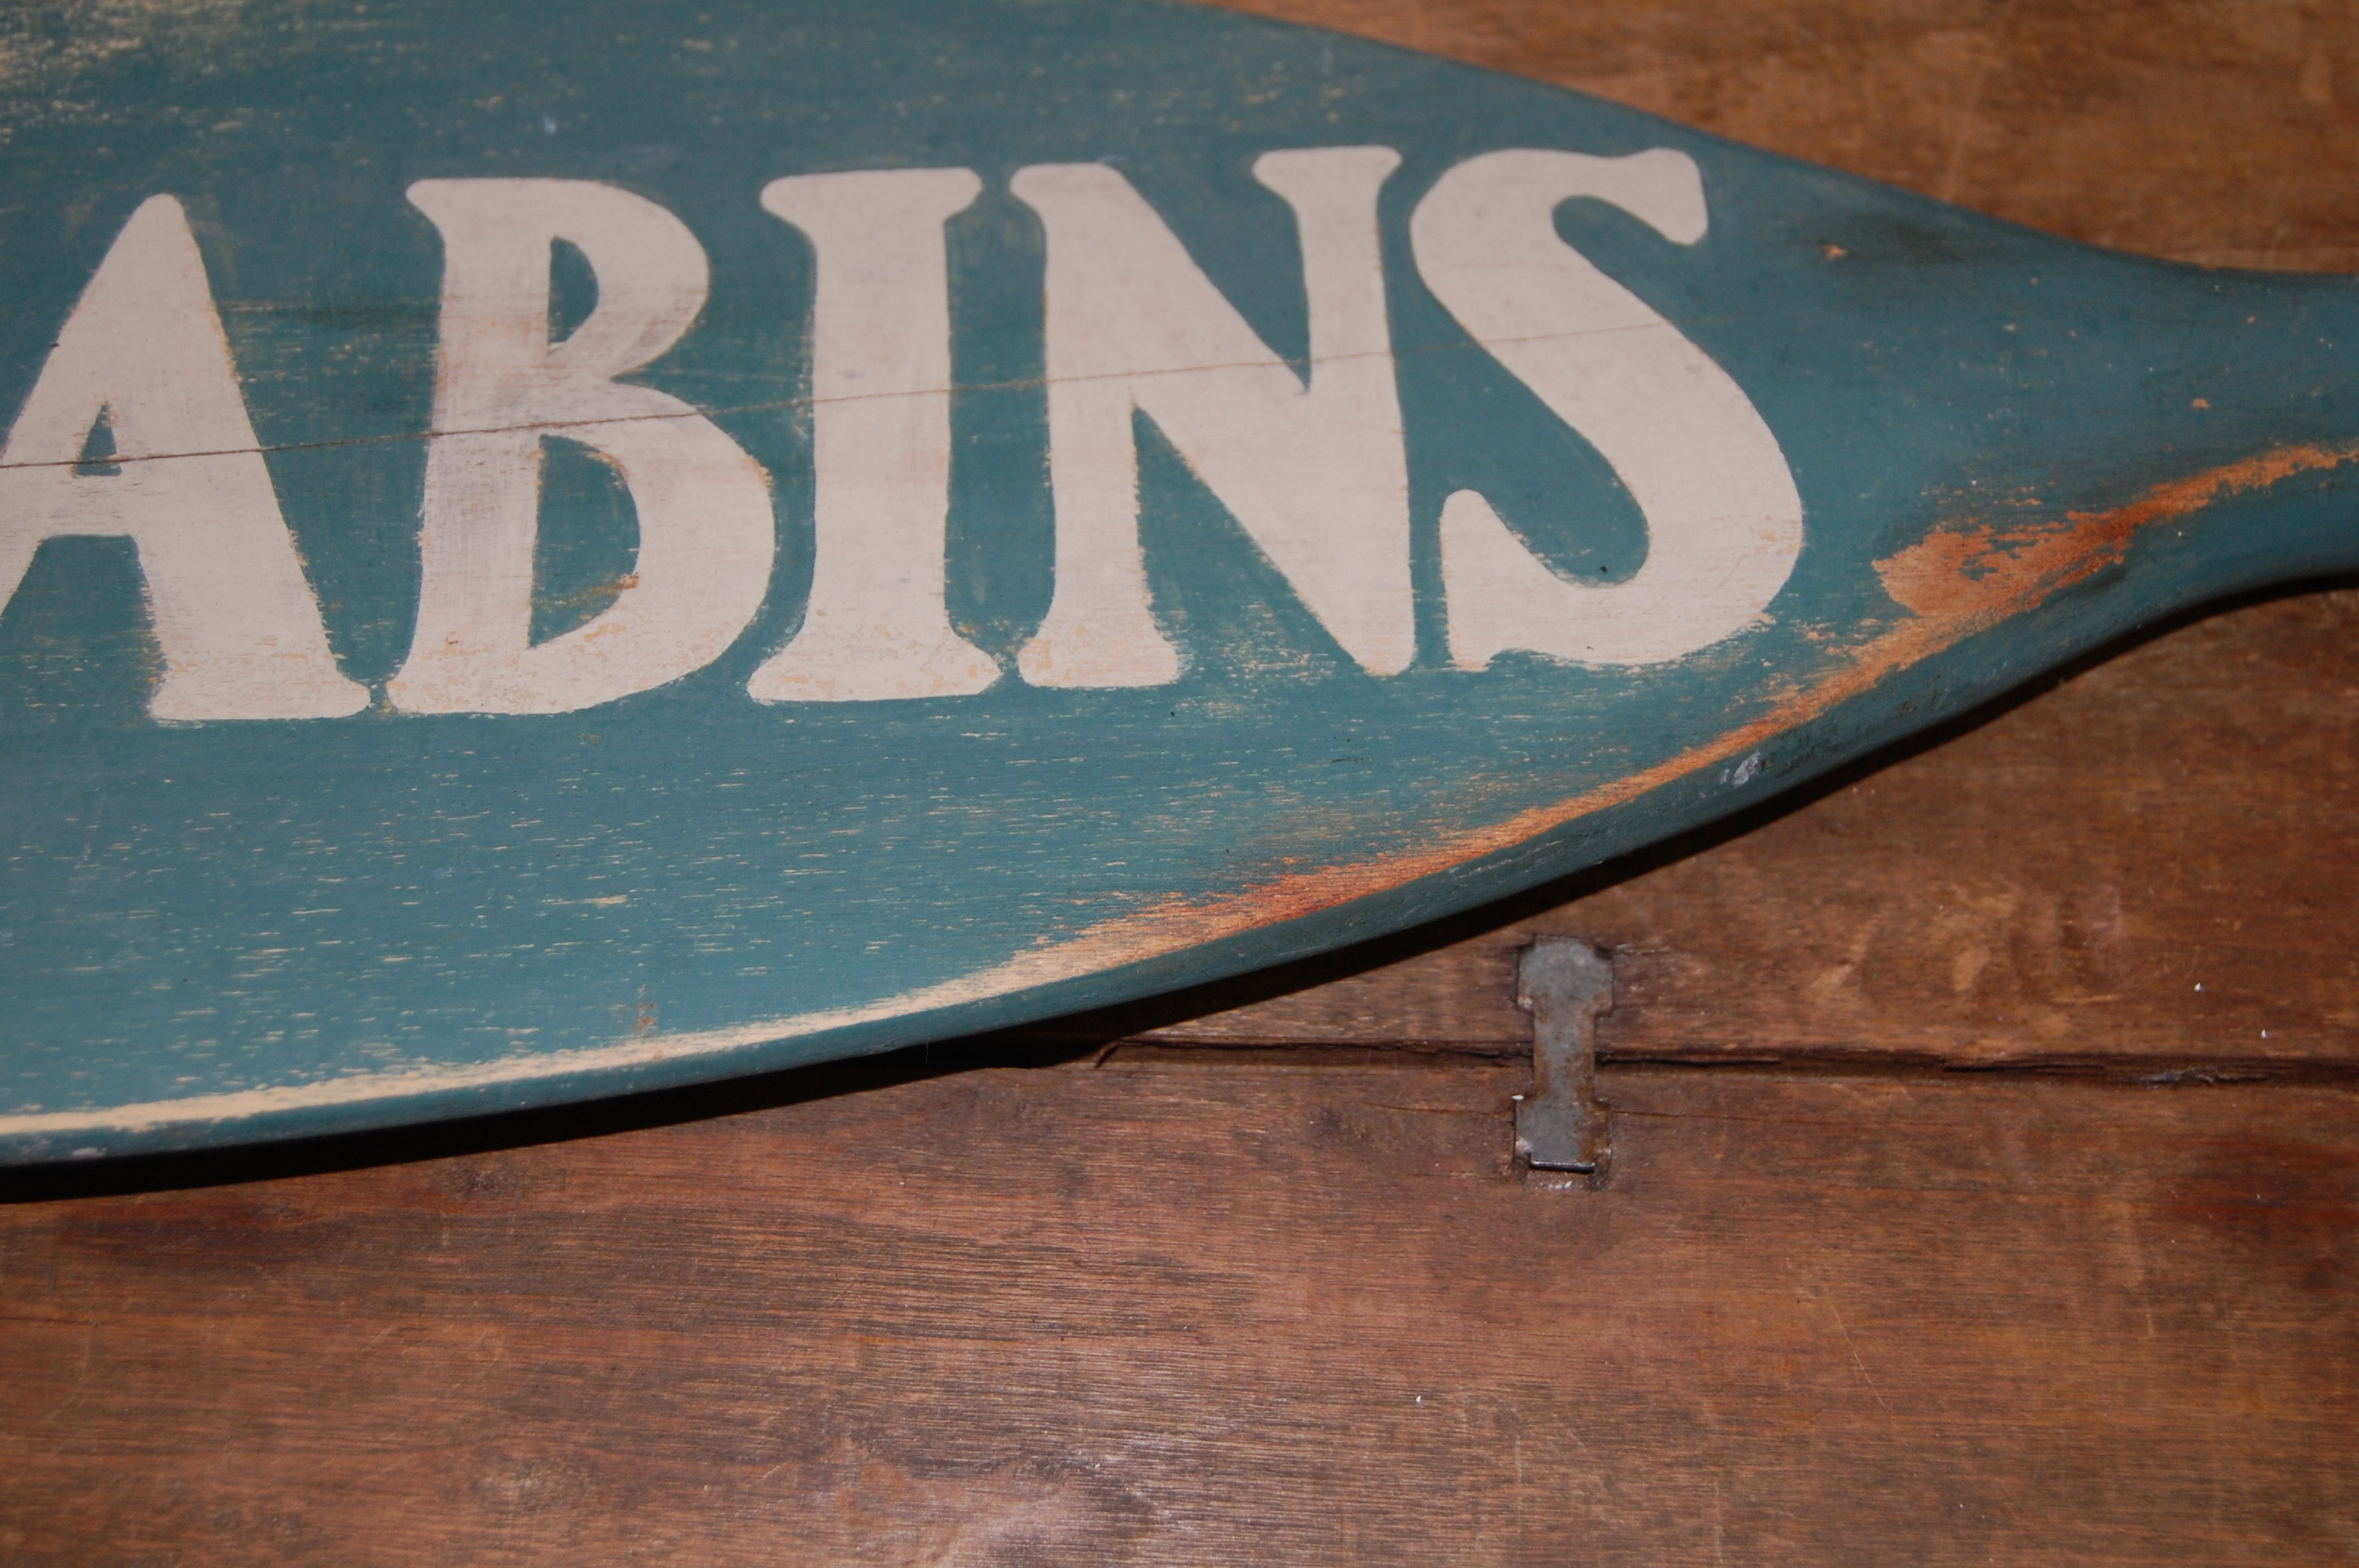
Once you’ve antiqued the raw wood, use the brush to lightly sweep a little ink onto a few of the painted sections of your project. Rather than leaving the painted areas pristine, this gives the piece an overall look of age. I inked a few places on the word “cabins”.
If your project will be handled during use, seal it to protect the finish. I like spray matte sealer.
This antiquing technique can also be used to age paper crafts. For that application, I would use a kid’s craft brush and gently dab the ink on until the desired coverage is reached. I’ve seen this used in dollhouse miniatures to give a time-worn look.
I hope you’ll give this technique a try on your projects!
Disclosure: In addition to occasional sponsored posts, Arthurized Home uses clickable affiliate links. That means that I may receive a small commission from sales at no extra charge to you. As always, my opinion is 100% my own, and I only recommend things that I truly love or use myself. Thank you for patronizing the brands that support Arthurized Home!
What was your favorite thing about going to summer camp as a child? I loved swimming in the lake, doing crafts, visiting the canteen and crushing on the hot lifeguards. They all seemed so wordly to my ten-year-old self. I hope they’re not all bald and paunchy now. I’d be so disappointed. Anywhoo.
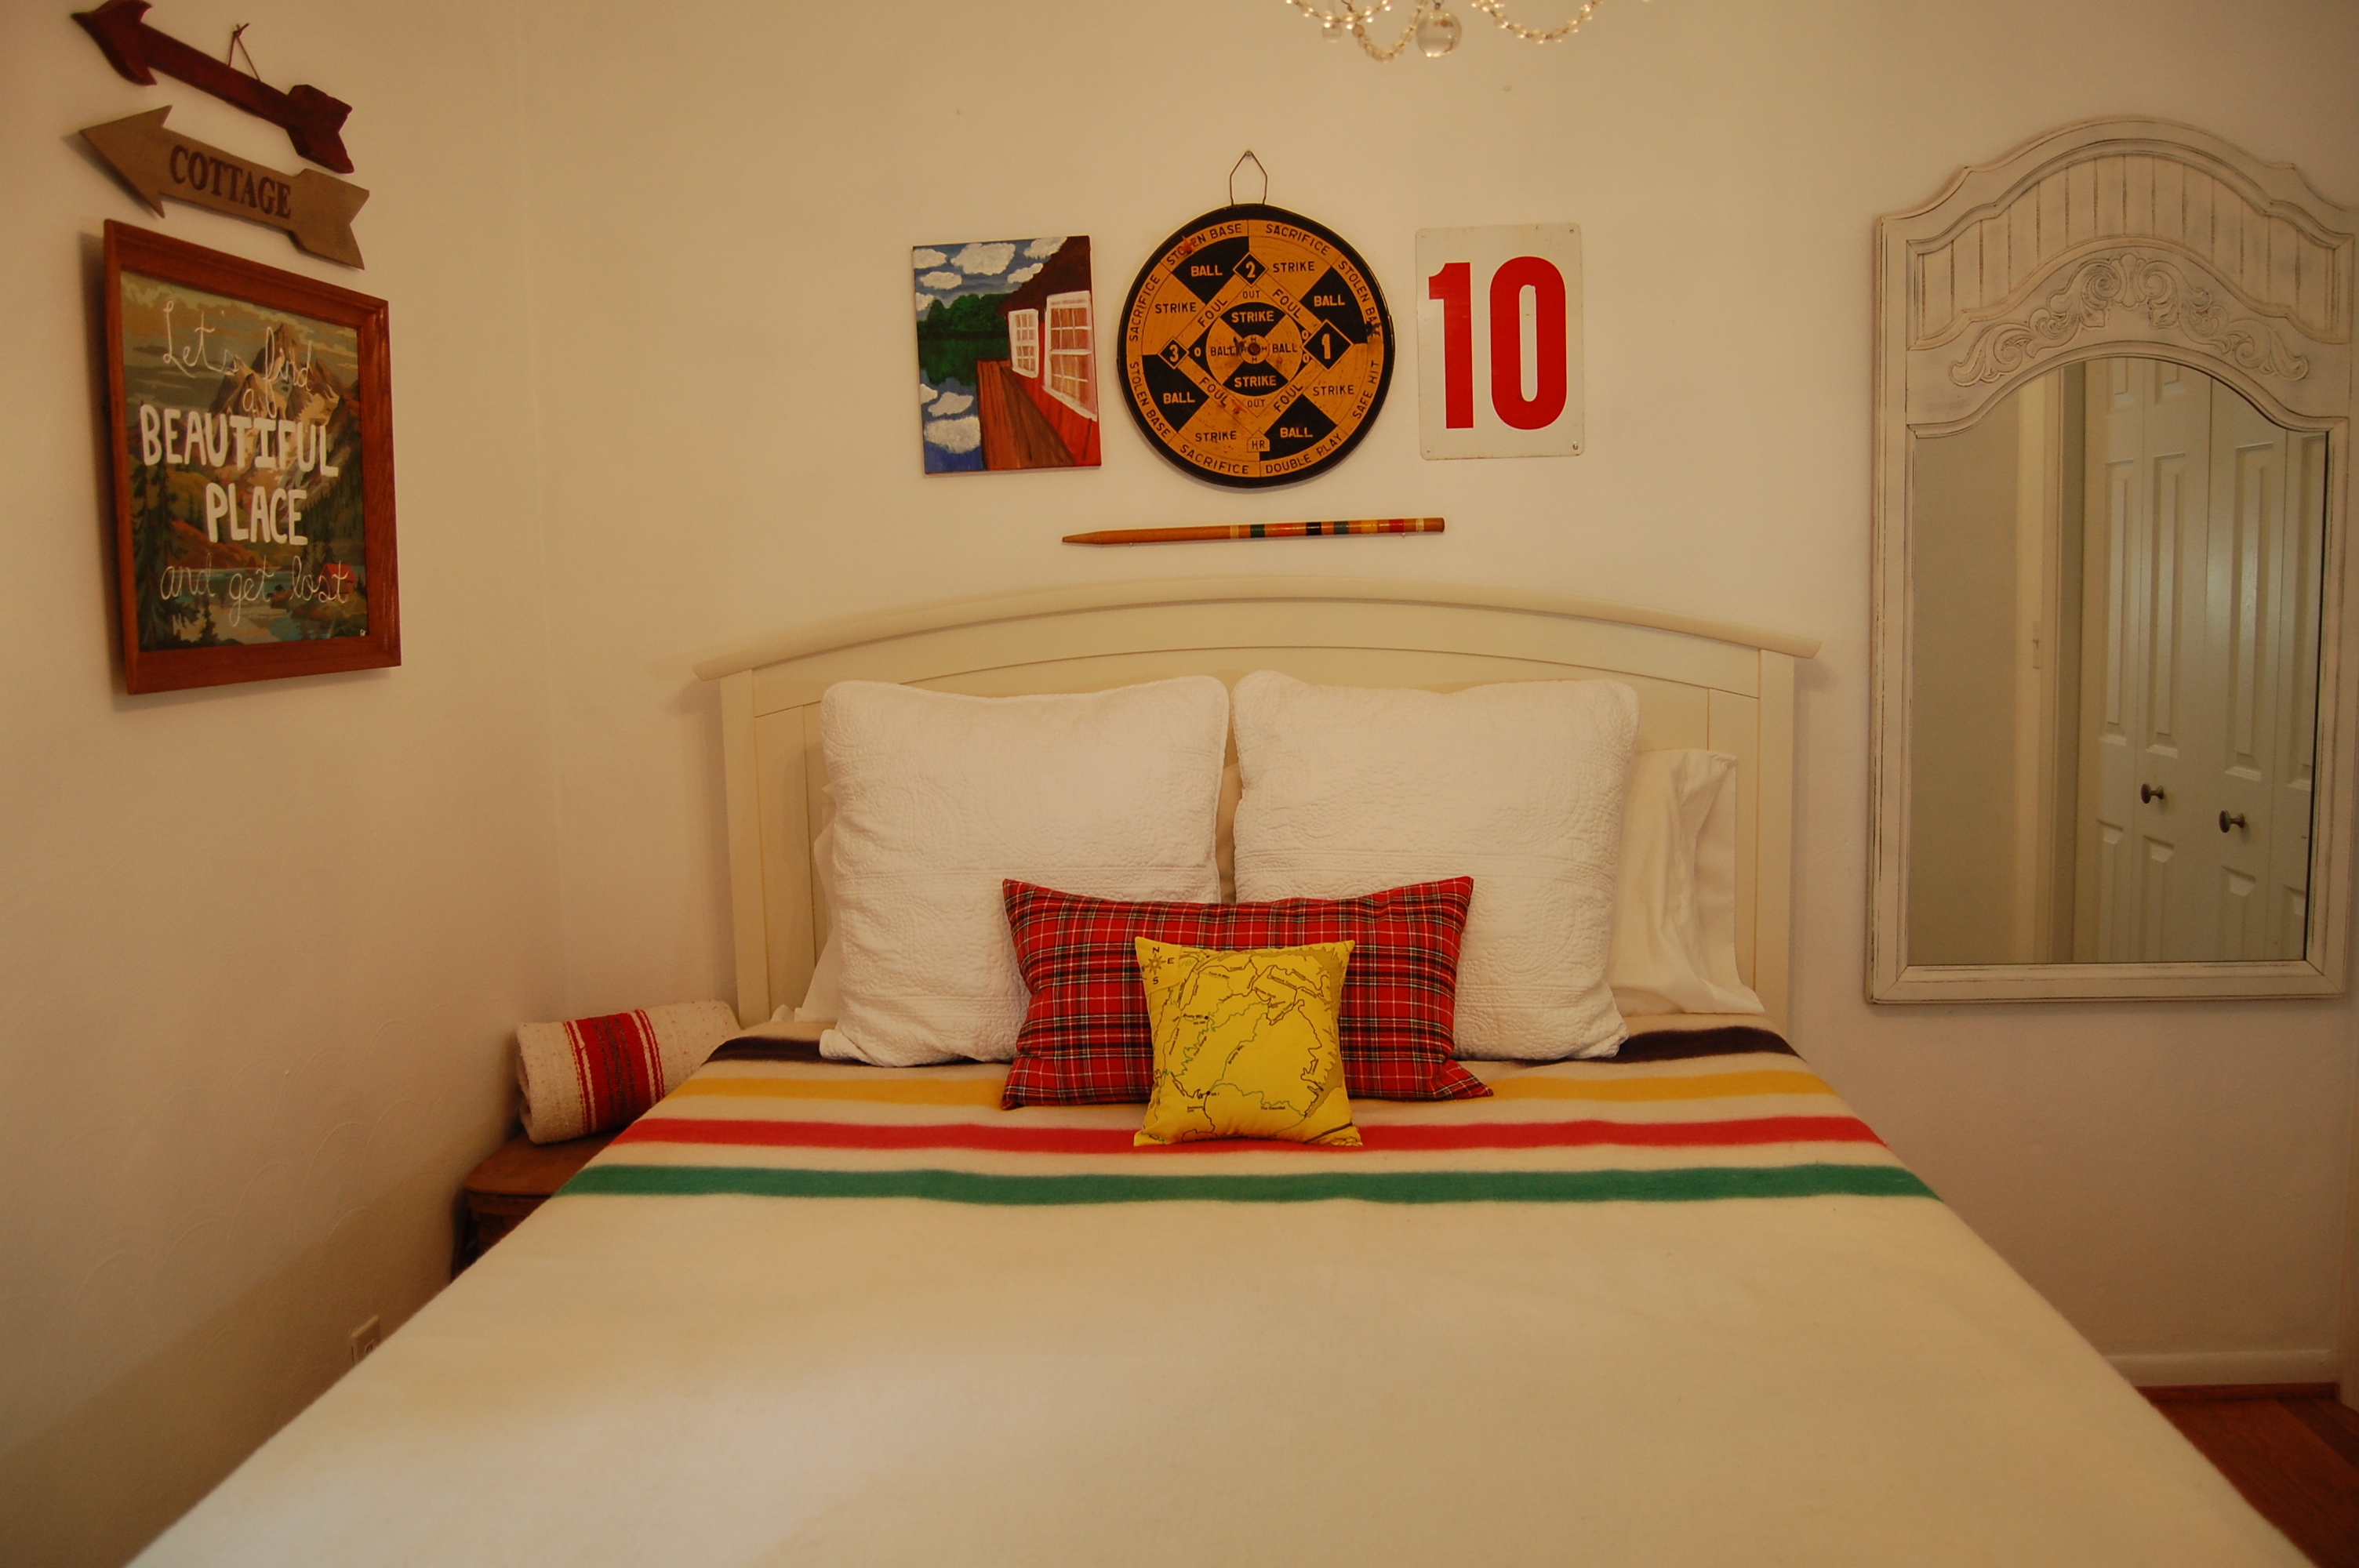
As I decorated the summer Hoosier, I began to realize just how much camp decor we have. I don’t normally do themes, but figured it would be fun to give our bedroom and bathroom a quick and inexpensive refresh for the summer months.
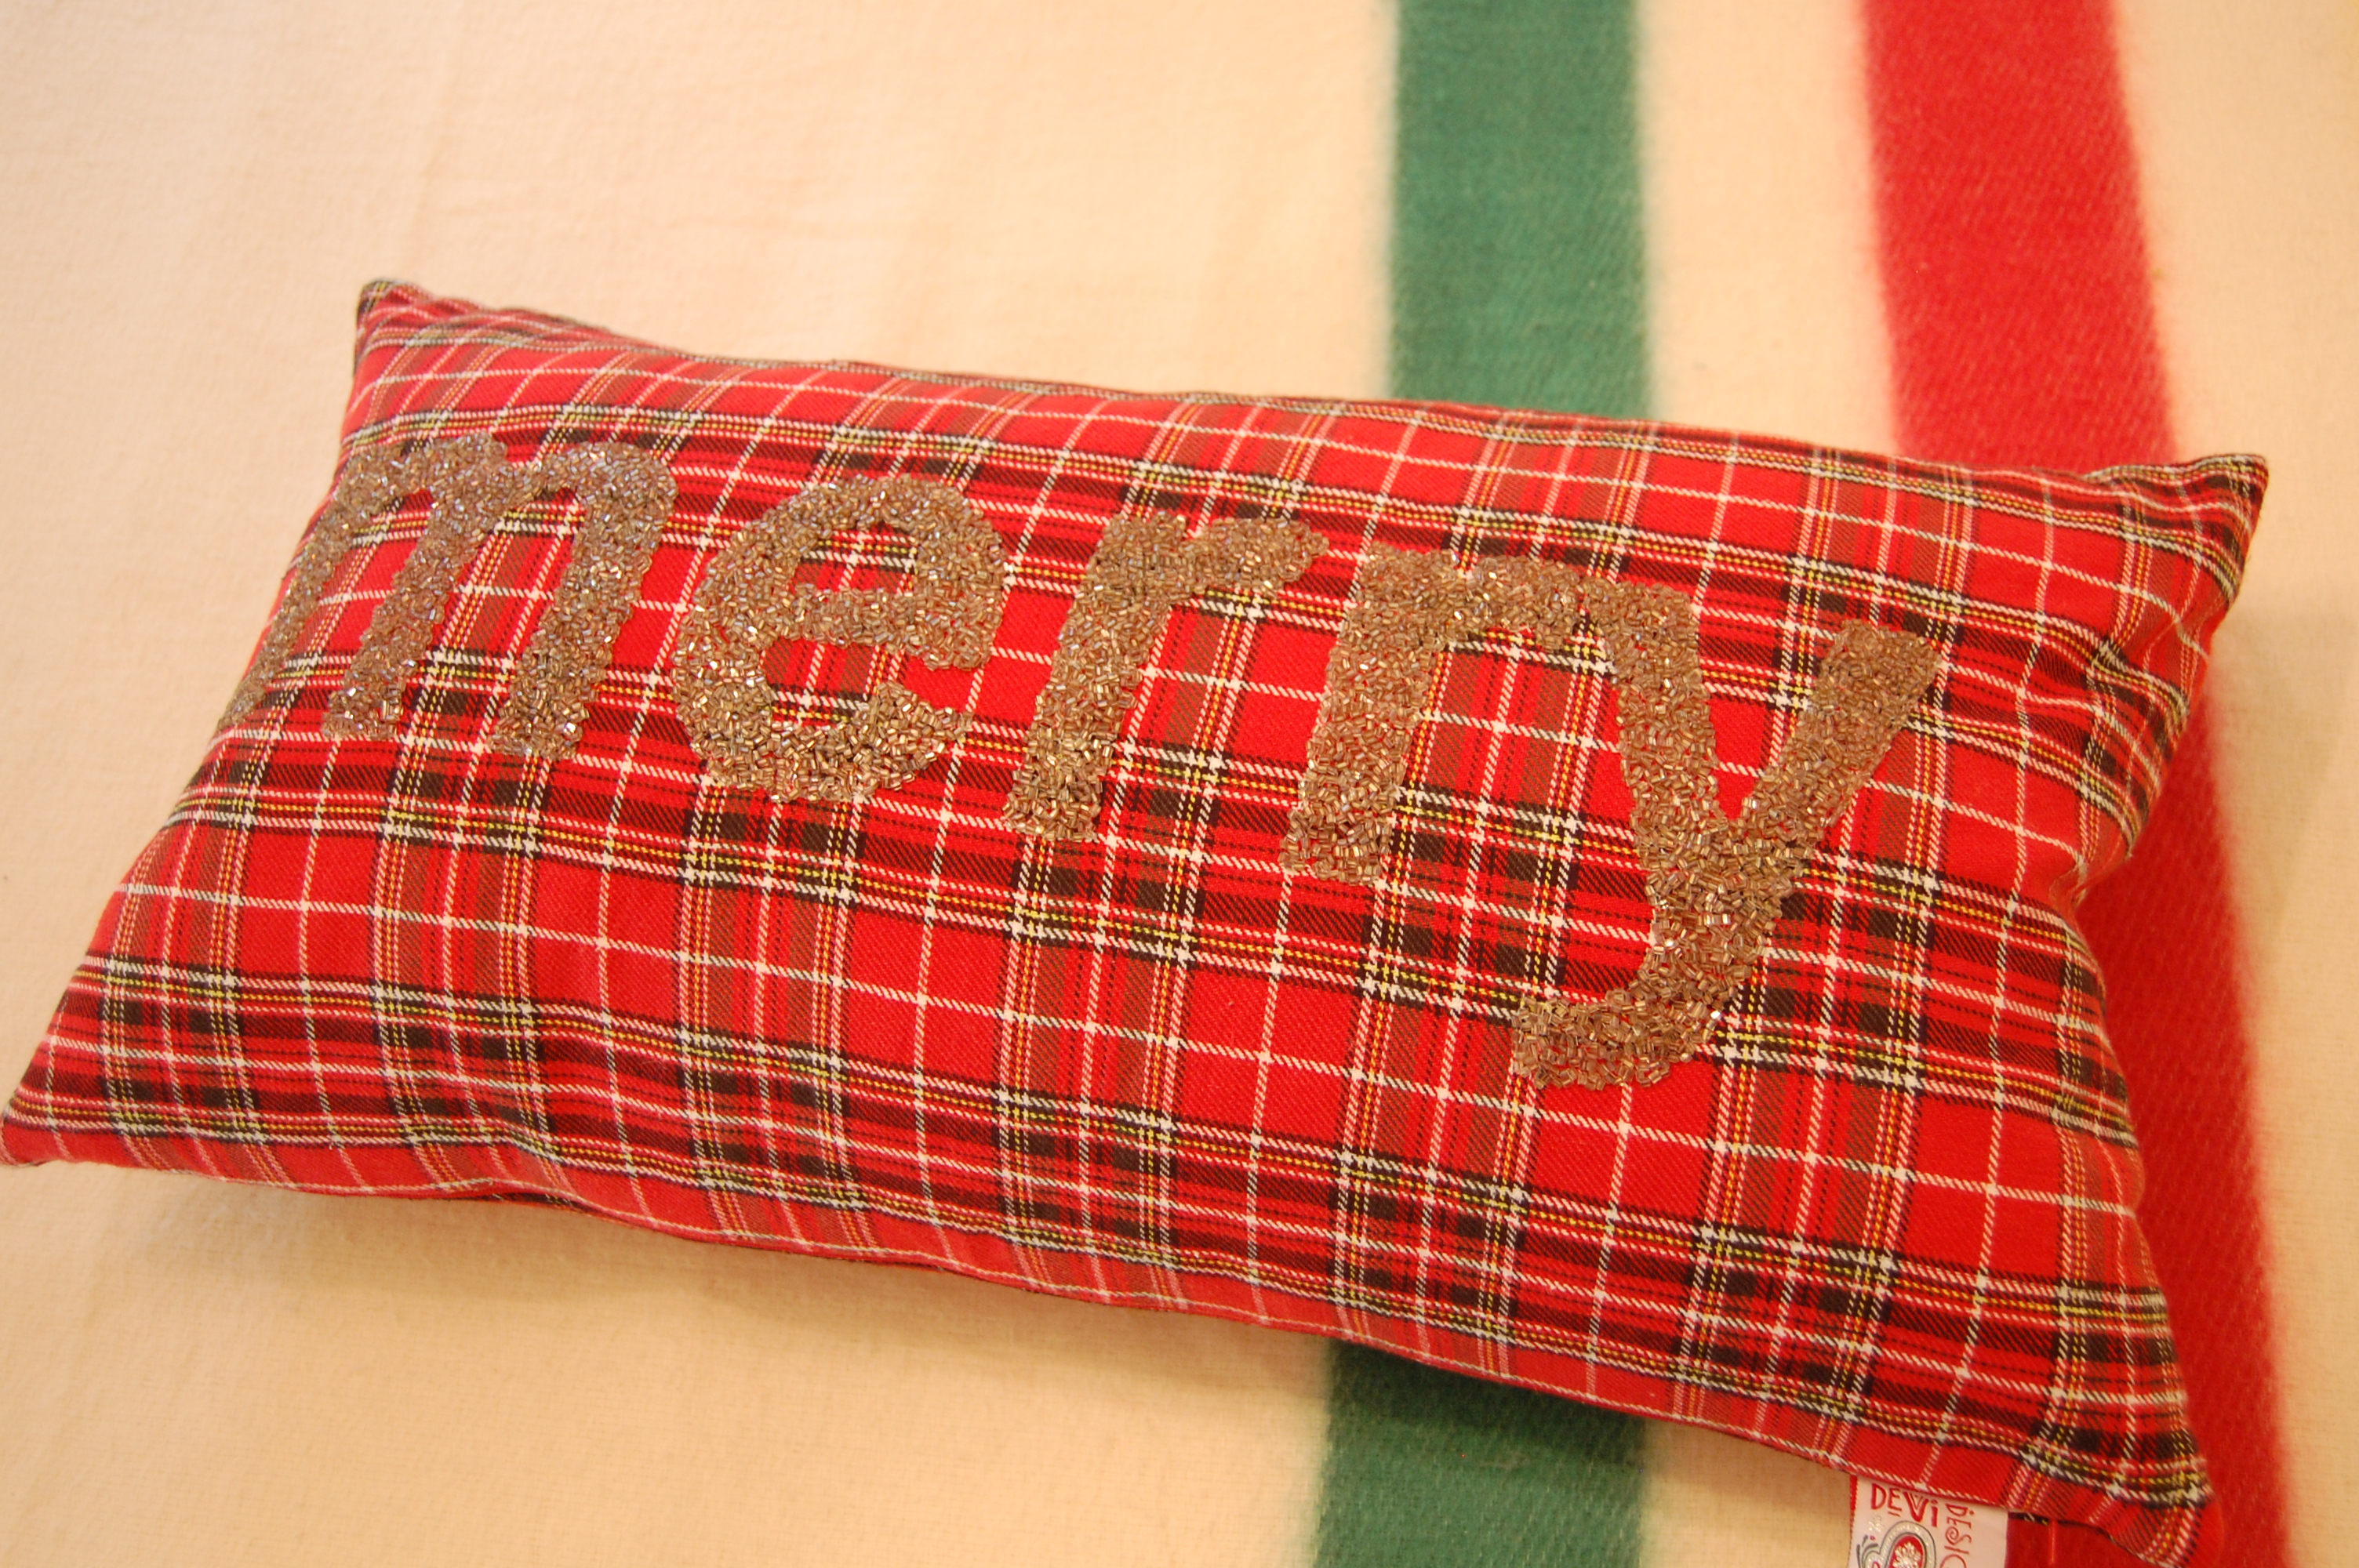
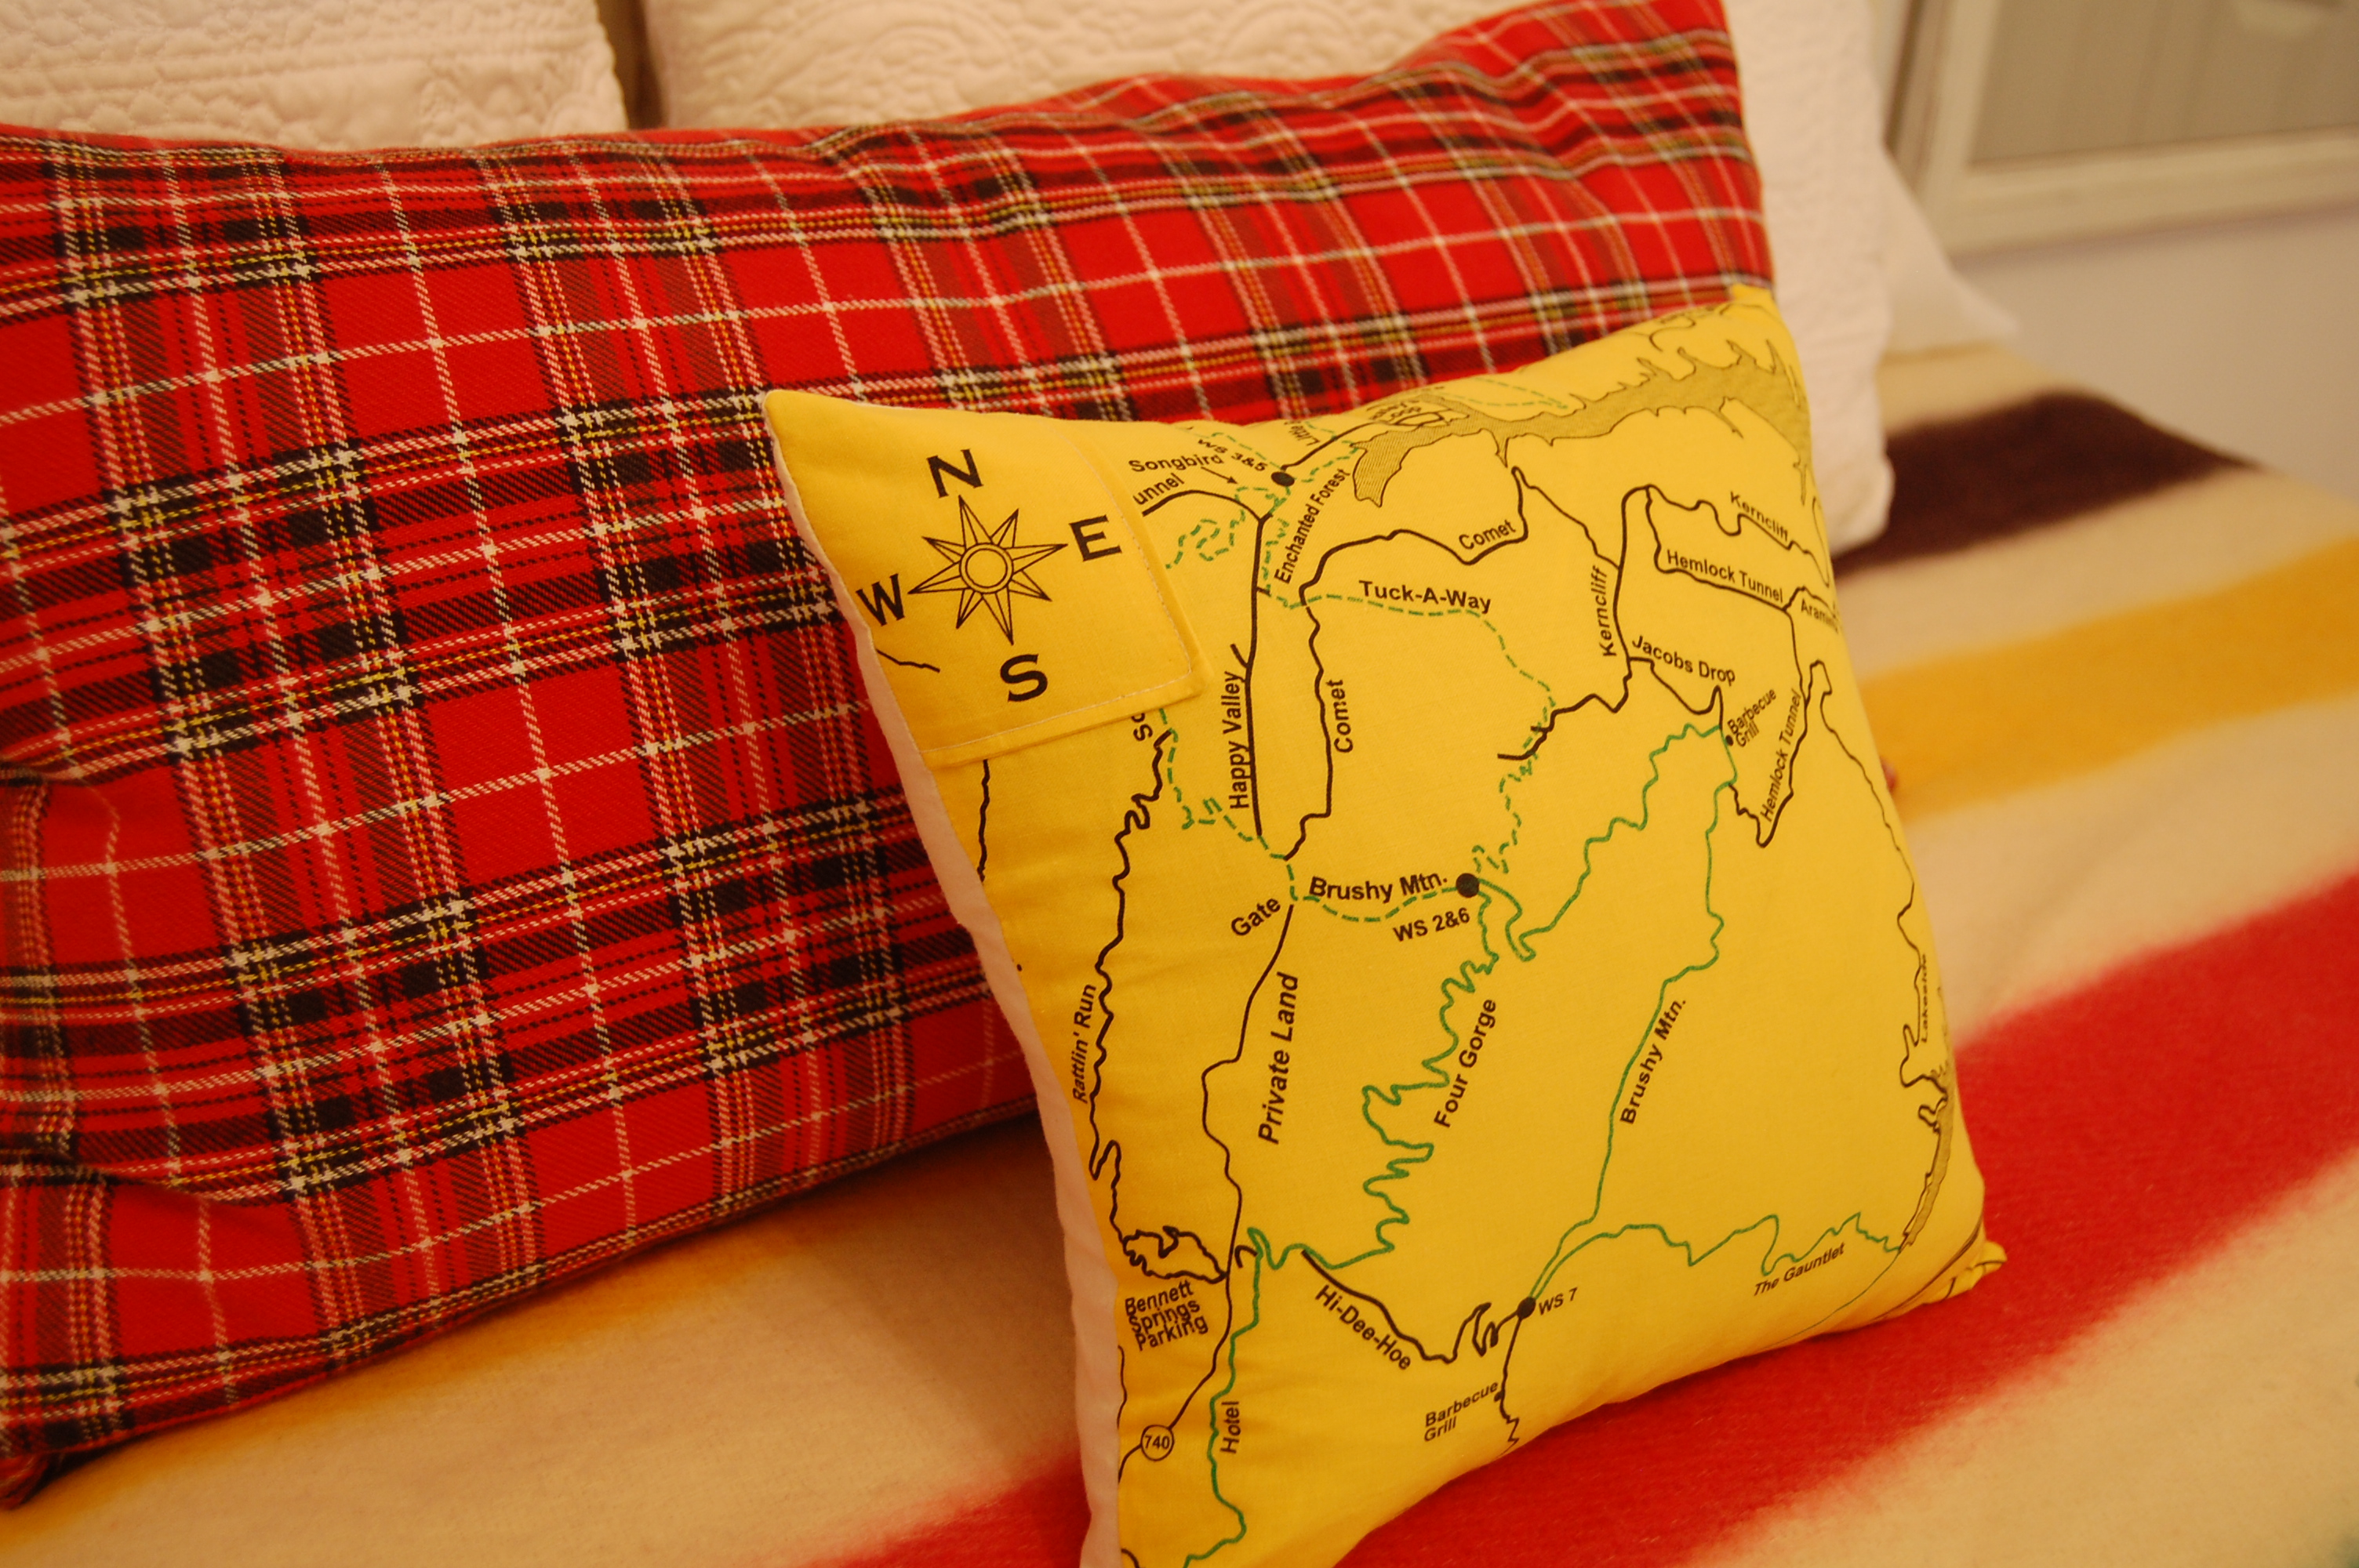
The Hudson’s Bay blanket featured in the fire starters post became the jumping off point for the color scheme. These blankets are traditionally wool, but mine is acrylic and very lightweight. It’s all we need for a bed covering in the summer.
I used the back side of a Christmas pillow for the bolster.
The map pillow is made from a bandana given to my husband at one of his favorite trail races.
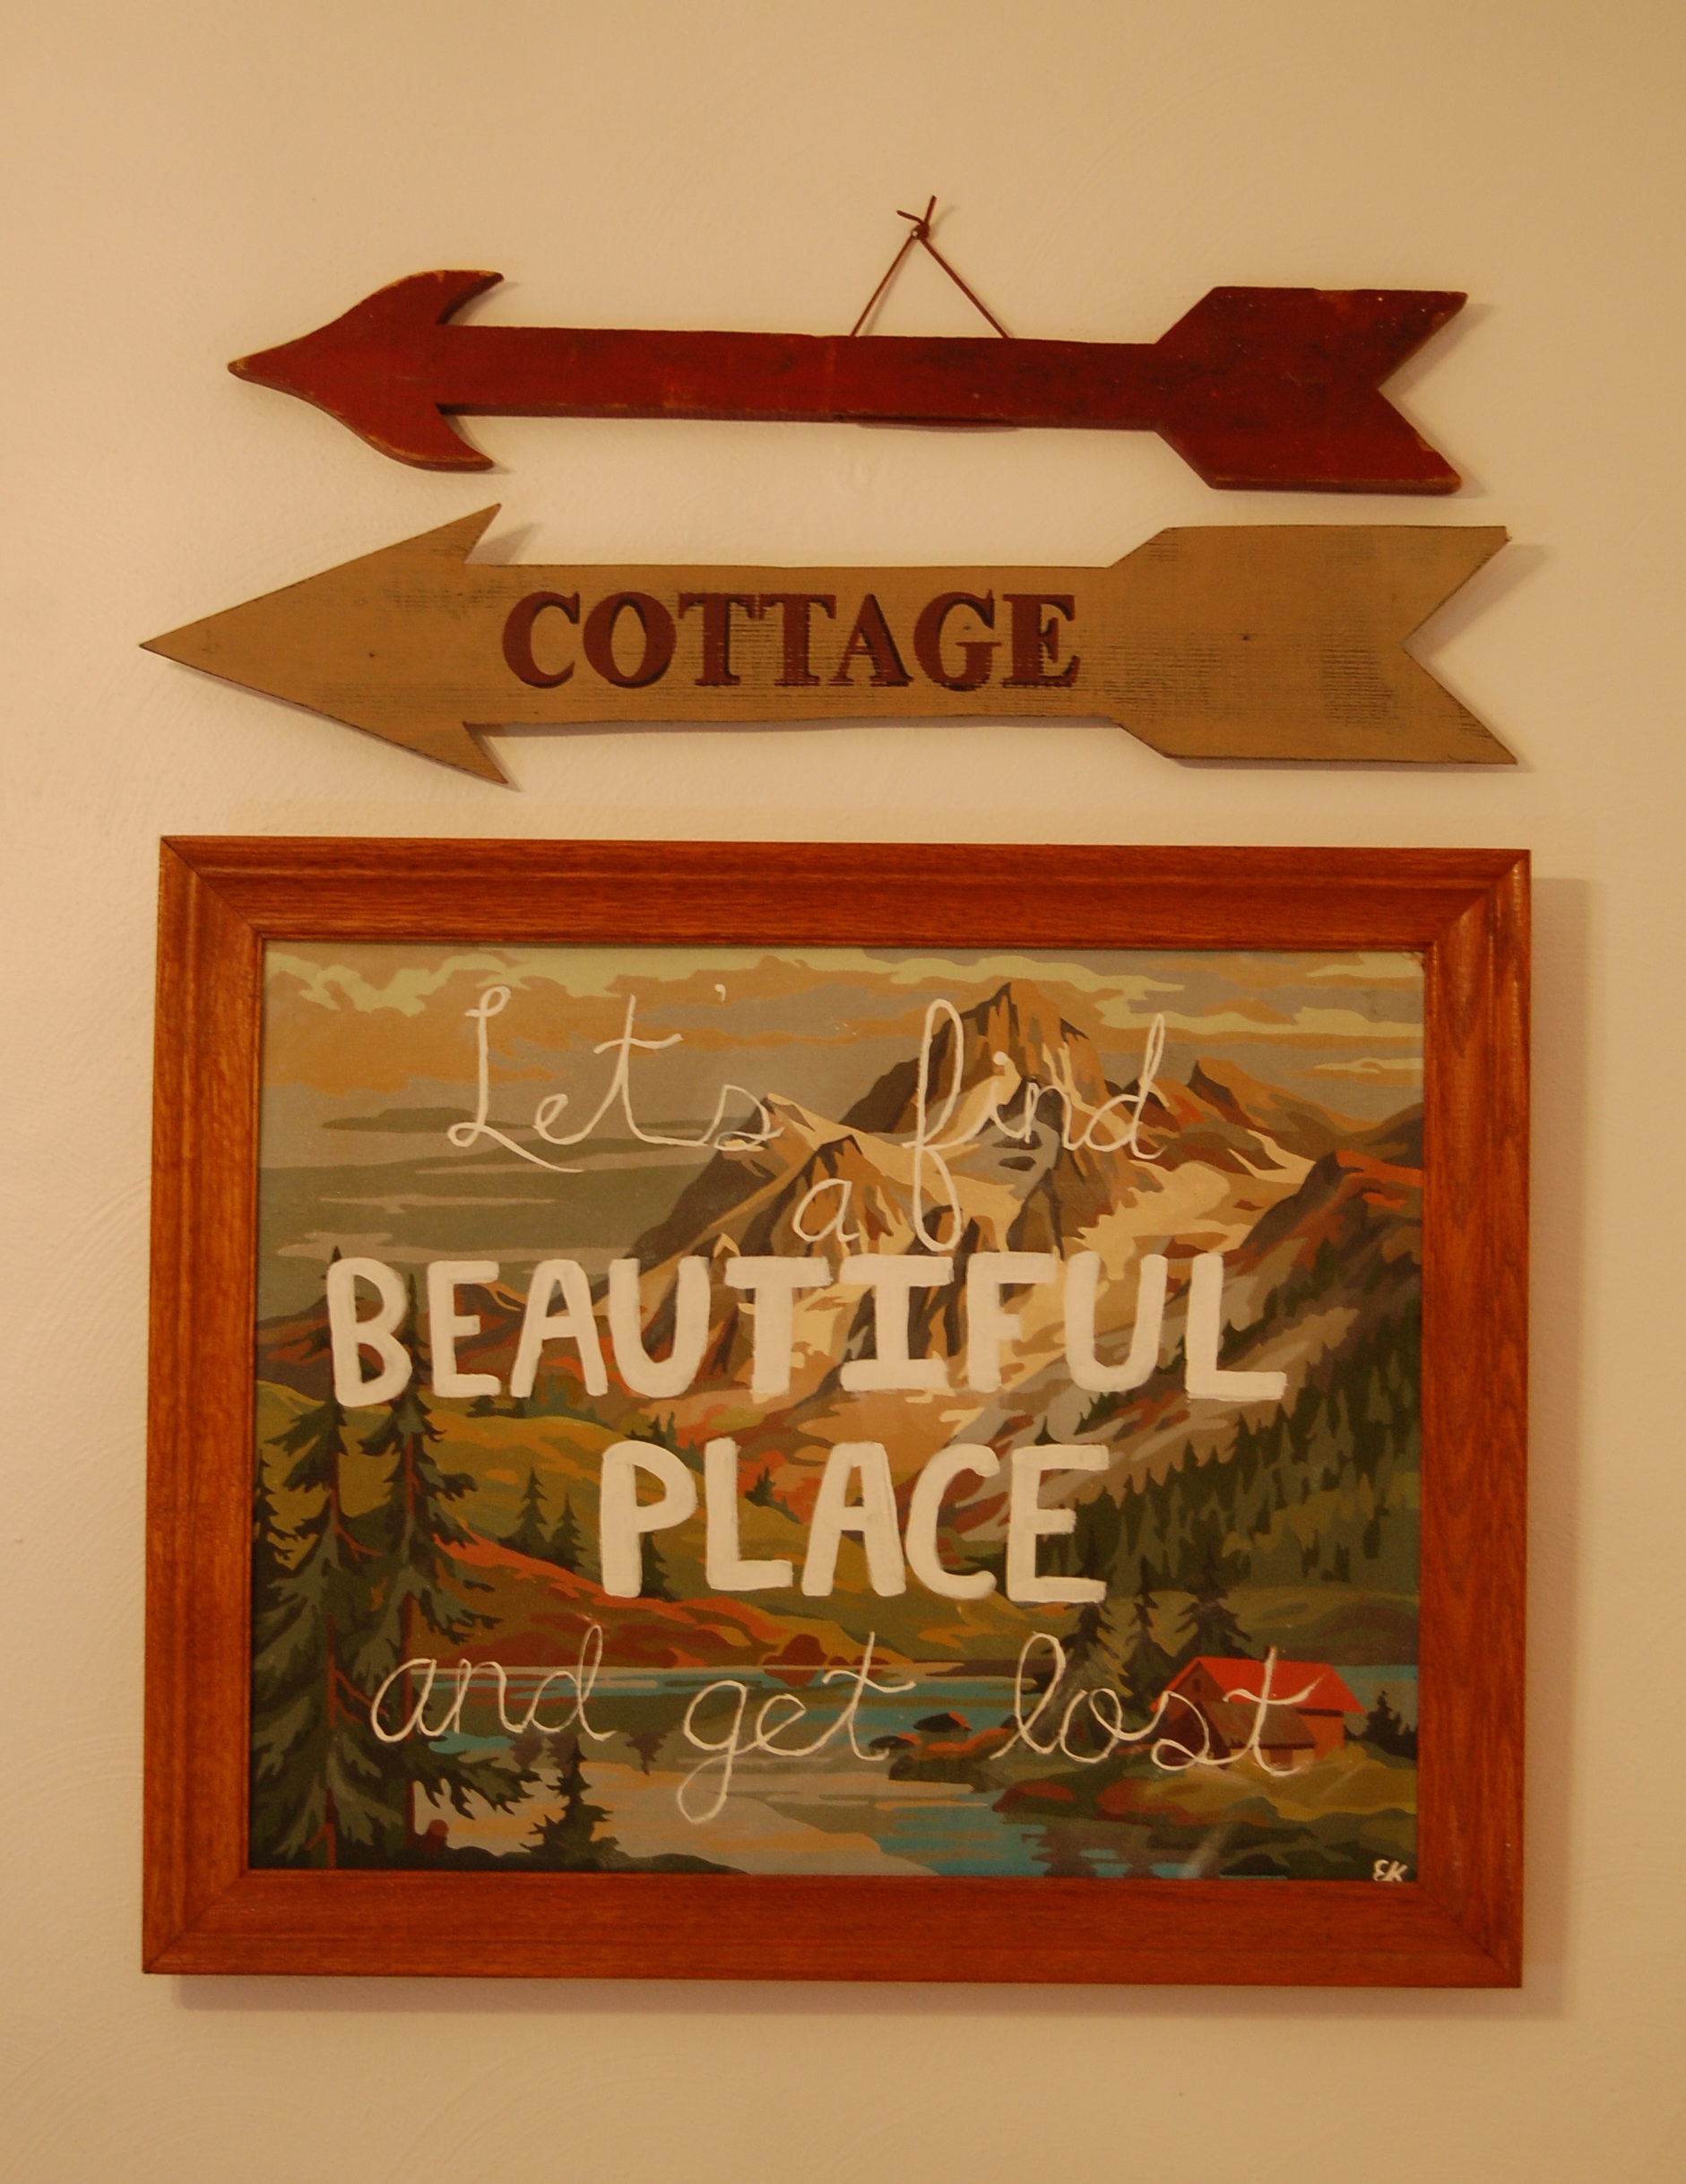
Several years ago, one of our sweet nieces embellished this vintage paint-by-numbers scene with a daring saying. I just love it! I’ve had the cottage arrow for ages, and recently found the red arrow at an antique store.
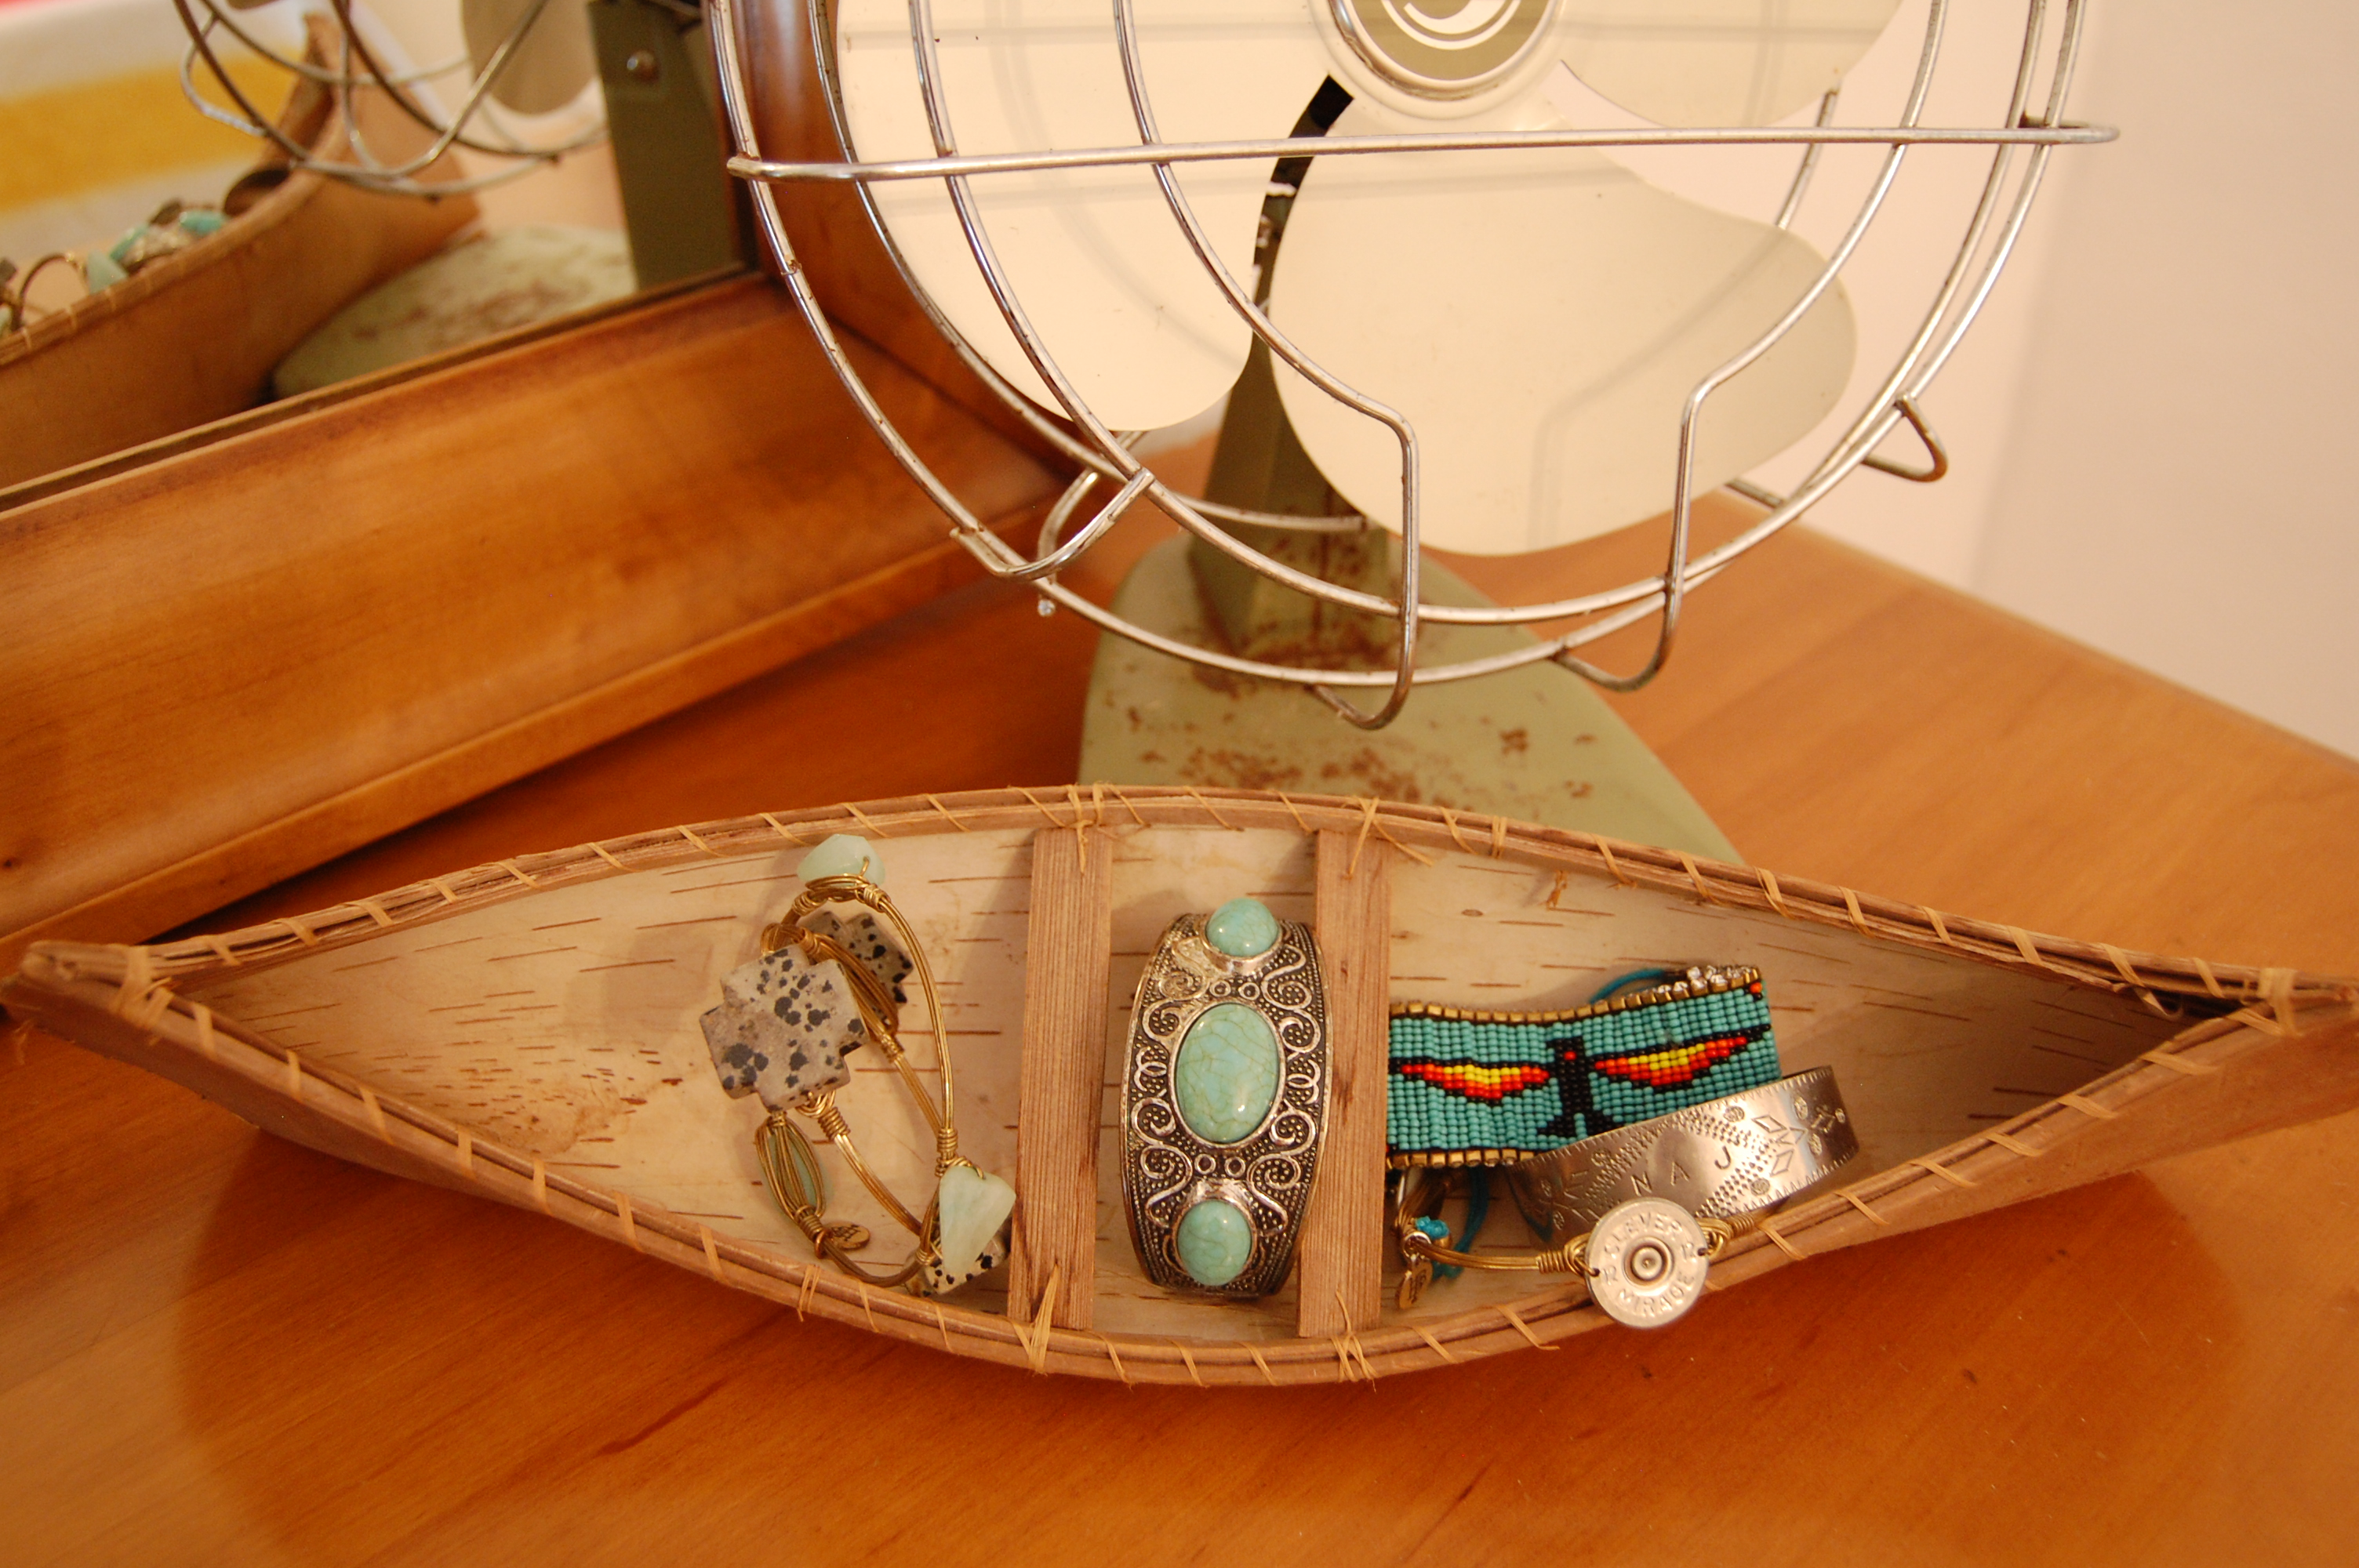
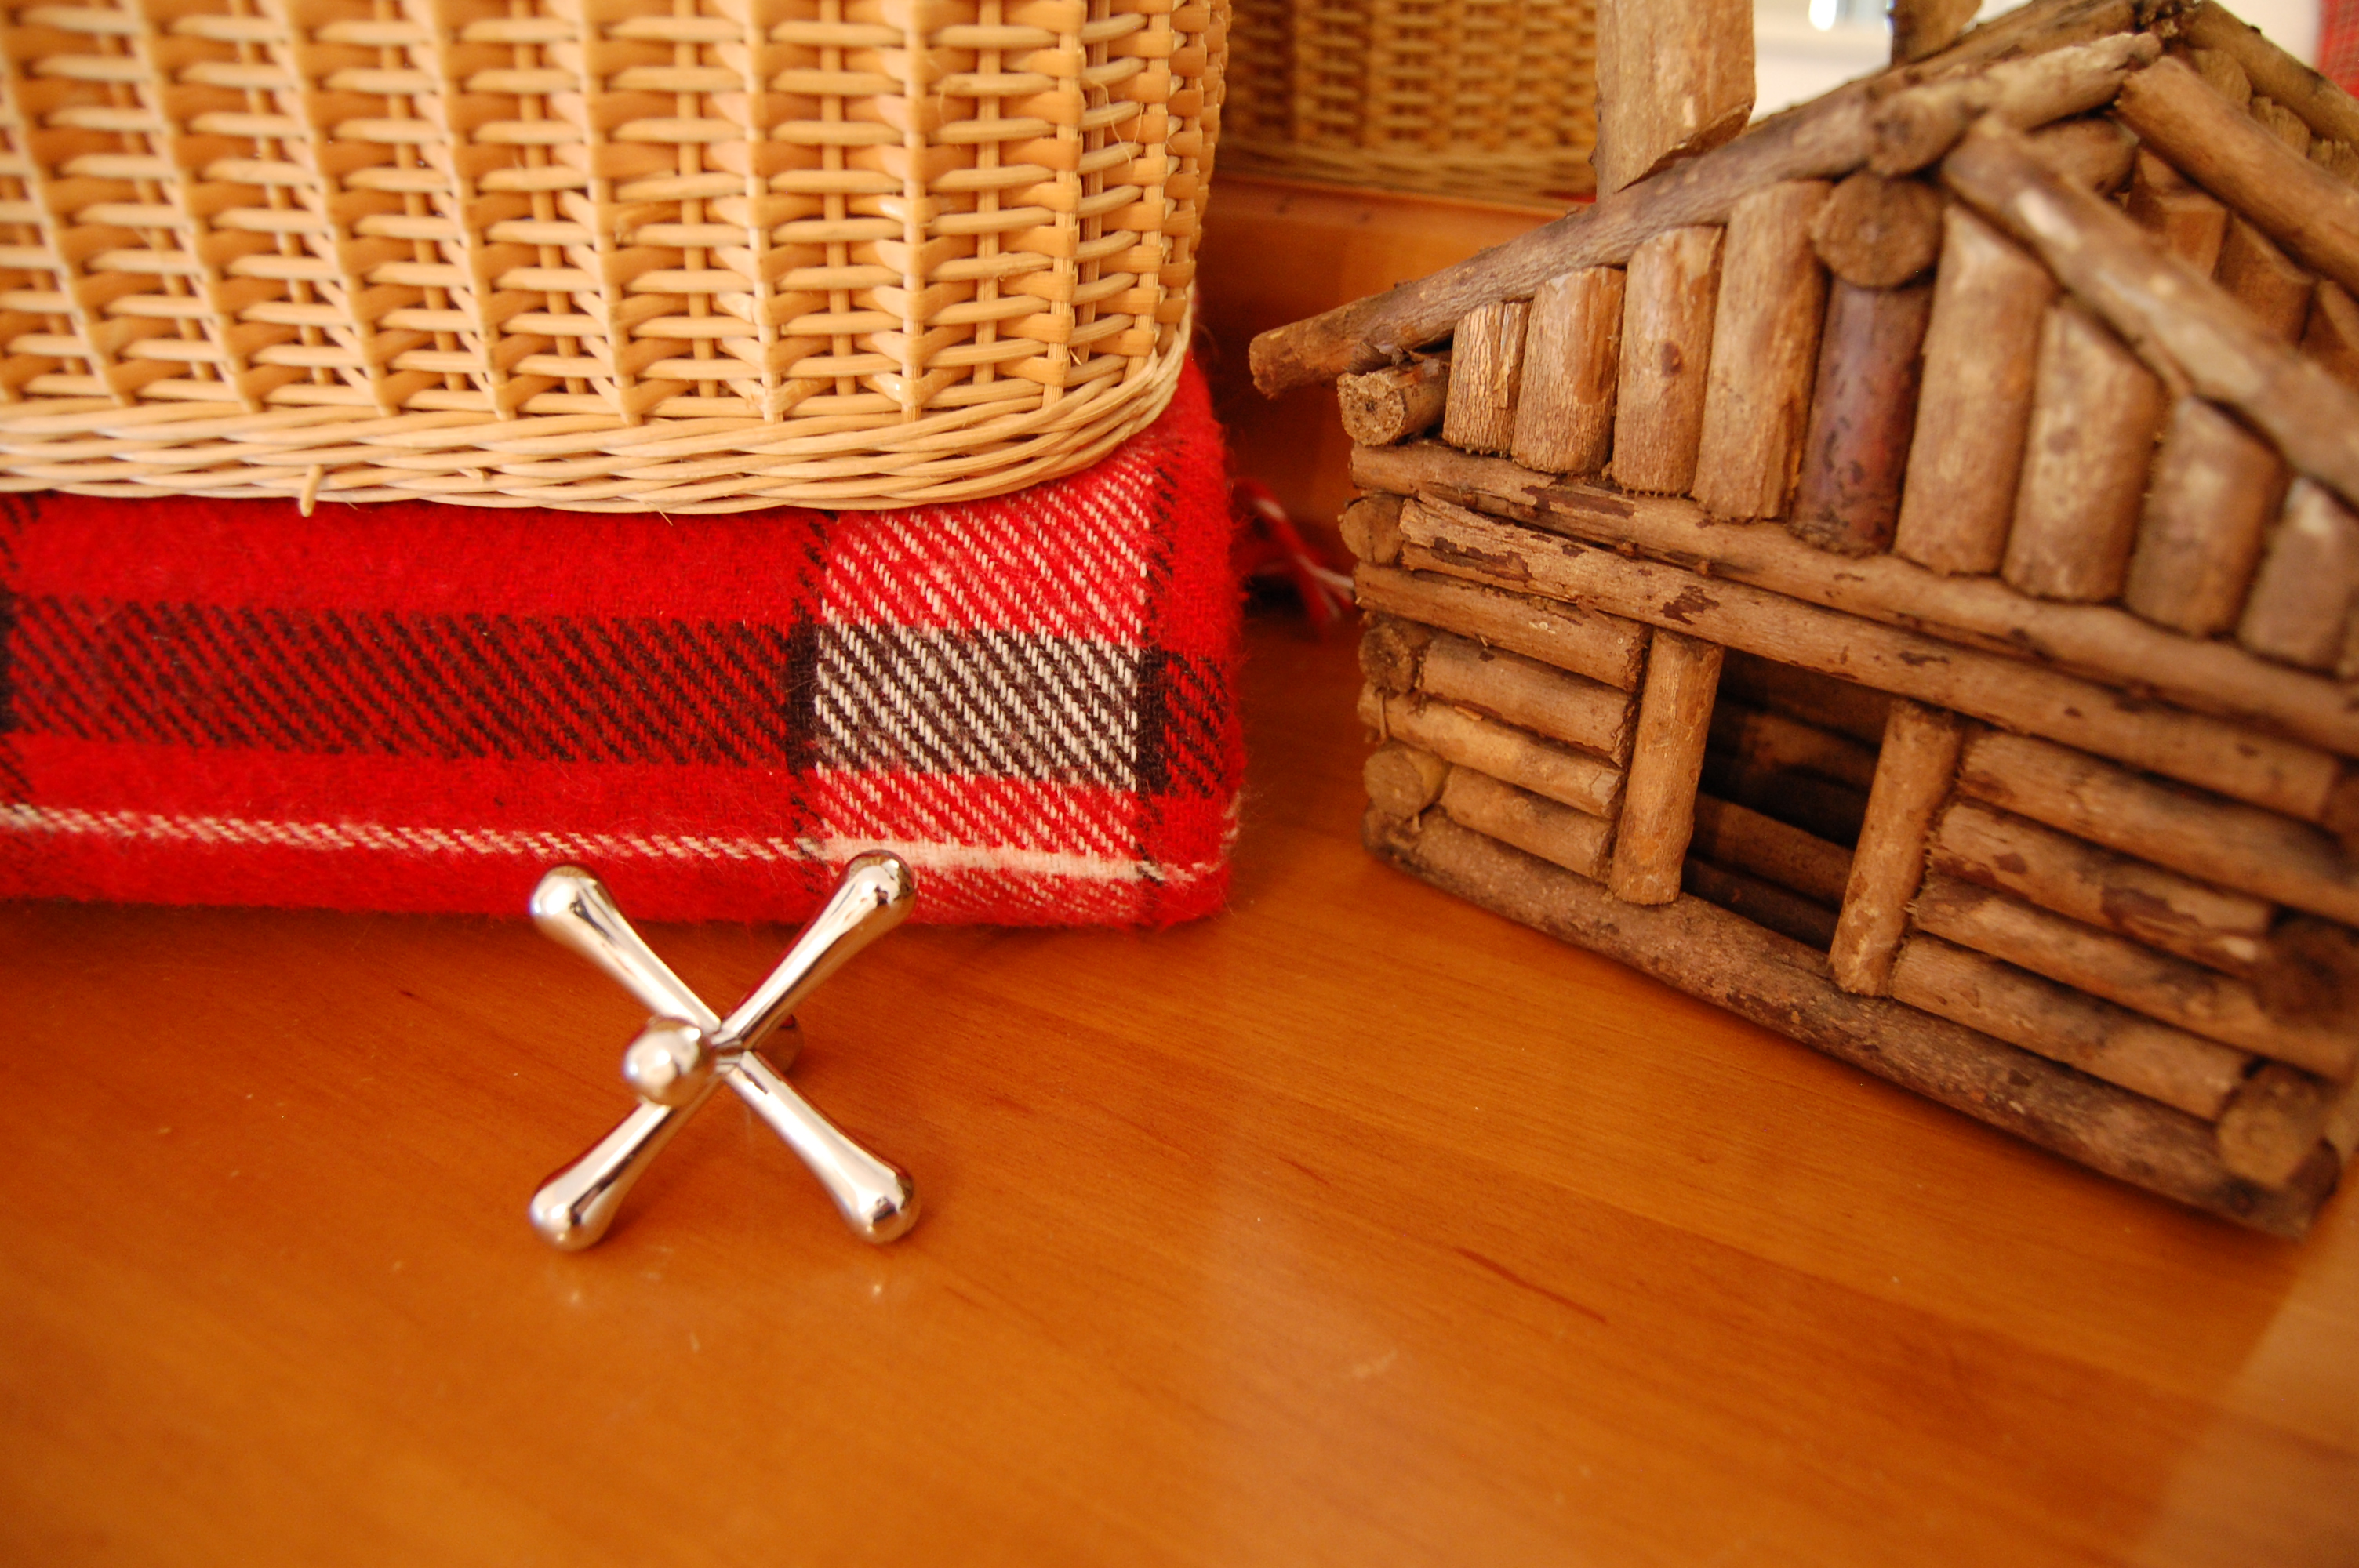
This fan was inherited from my husband’s great aunt, as was the plaid throw under the picnic basket. The fan is not safe to use, so I cut the cord off of it. Don’t want anyone to lose a digit.
I love this birch canoe for displaying bracelets. And yes, I would totally pack all of these for summer camp! #soextra #dontjudge
Did you play jacks as a kid? This decorative jack is a dedicated place to park our rings while doing yard work, sports, working with power tools or other dangerous pursuits. See also: Keep your digits, above.
Now, on to the bathroom: The vanity holds a variety of products for pampering hands. The jar that looks like grey sand is “Man Grit” (bought locally, I couldn’t find this online) an amazing-smelling hand scrub for hubby. The jar with the wooden spoon is “Moonshine“, my favorite “sugah” scrub from Charleston Soap Chef. Their “Sweet Tea” product is fantastic as well. That hunk of turquoise is a SoapRock, one of my gift-giving favorites. Roanokers can find them locally at Present Thyme.
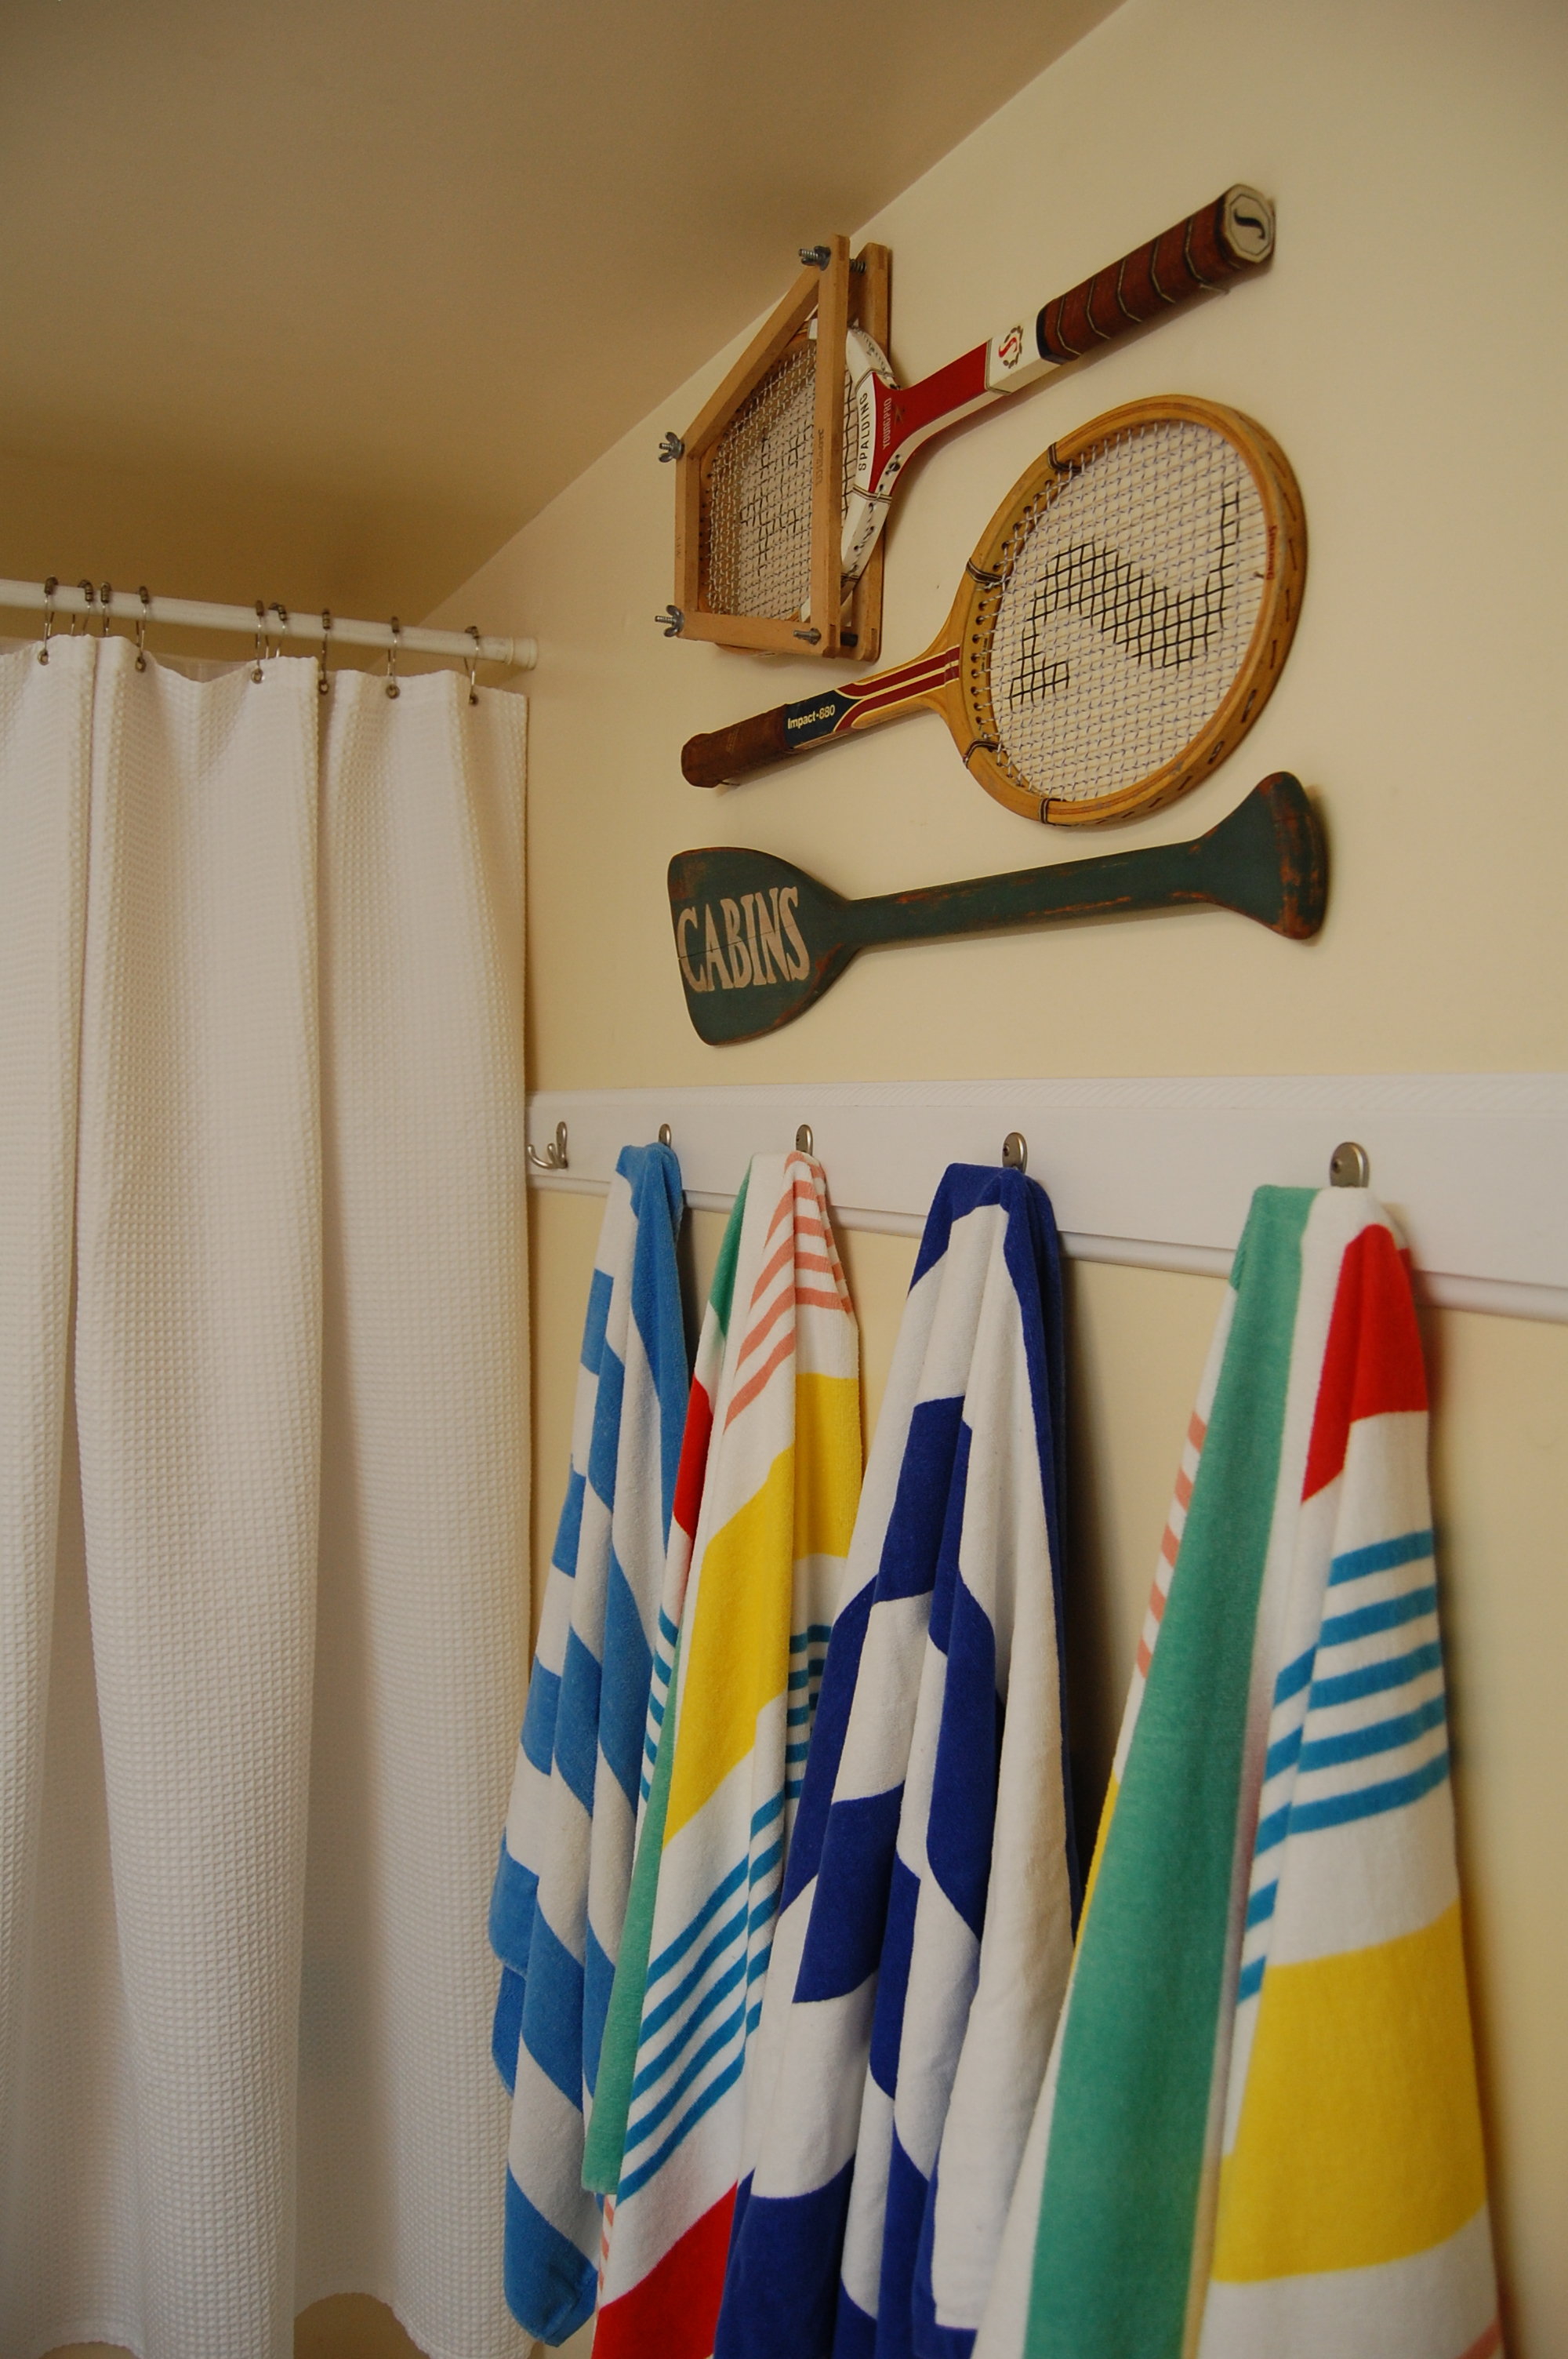
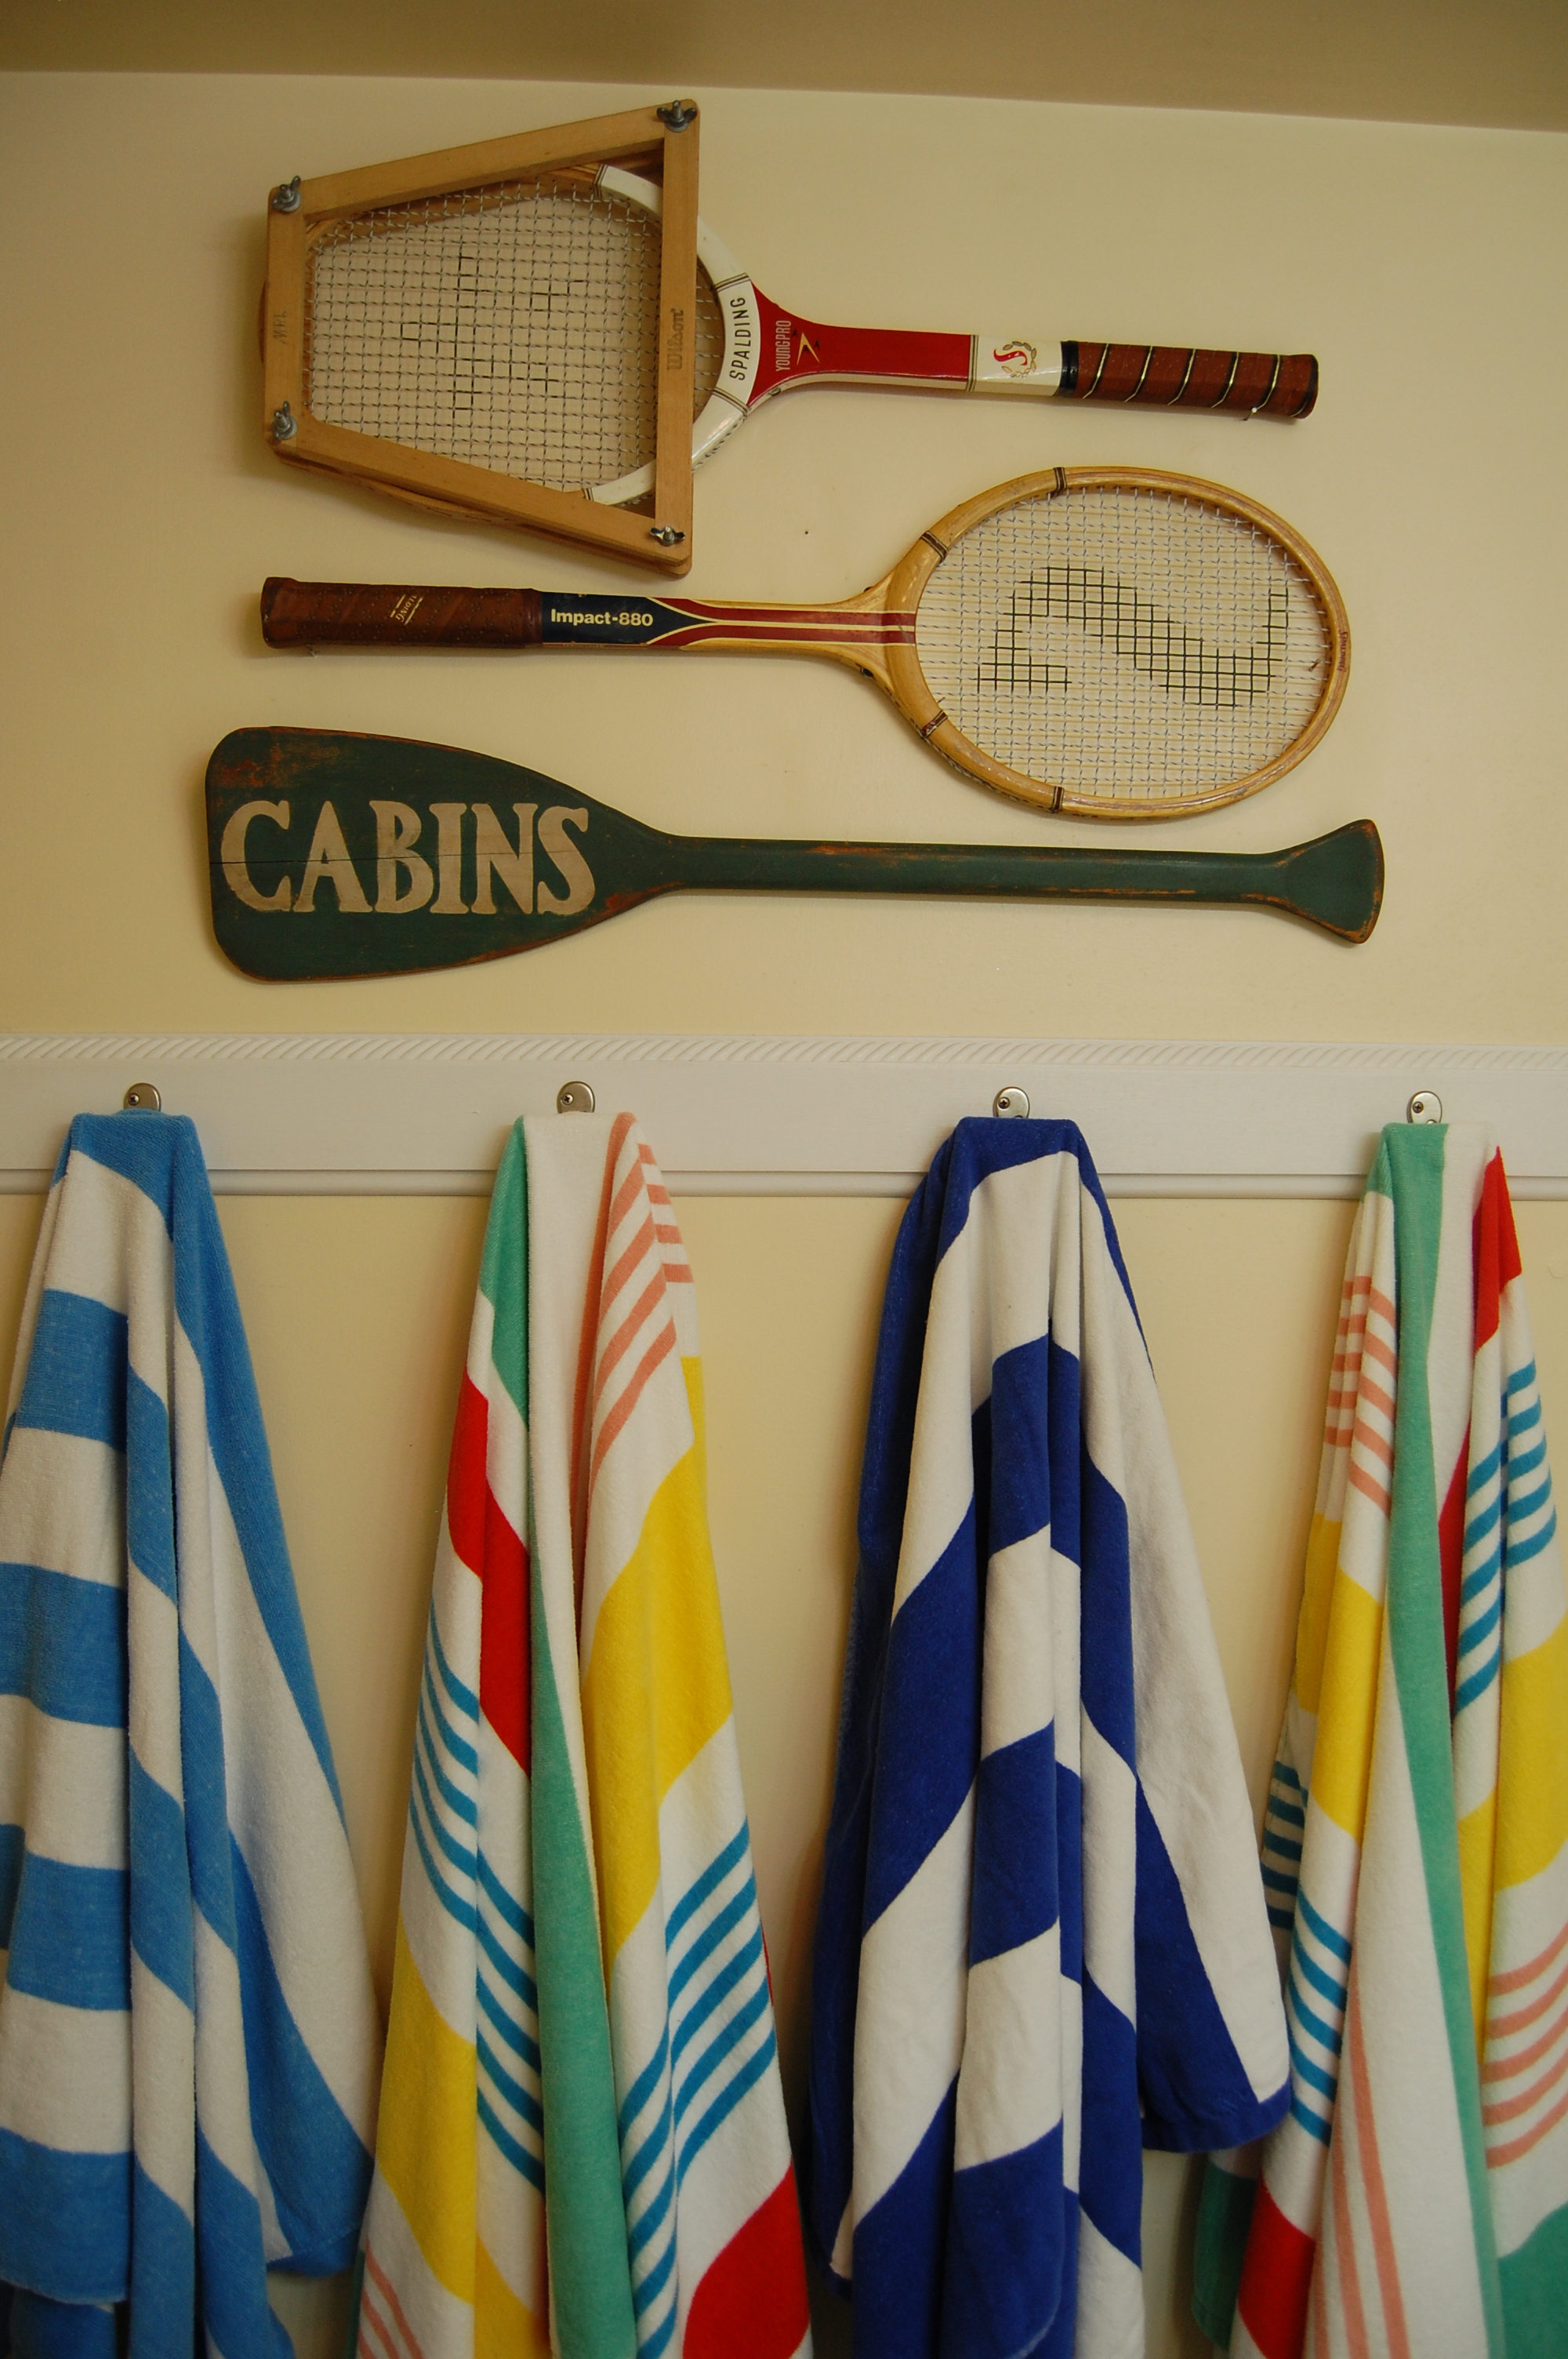
Beach towels hung on hooks lend a bathhouse feel to the bathroom. The green, pink and aqua stripes are a cheerful nod to 1950’s decor. I made the “Cabins” sign from a child’s canoe paddle.
I bought the upper tennis racquet from a thrift store. I noticed the previous owner’s intials written on the frame and thought “It looks like it’s written in pencil, I’ll just erase it.” Later, I decided to keep the initials because it is part of the history of the piece. Then it hit me. They’re the same initials as my brother Matt, who we lost to cystic fibrosis when he was nineteen. I was meant to bring this one home.
Almost all of the decor was on hand in the Arthur Archives, thrifted, gifted, or from the flea market. Pa Kettle loaned me the dart board and croquet balls, which he refers to as “crochet balls”!
Because I’m nosy, and love to know how much things cost, here is a breakdown of what I spent, and where I found the items I purchased for this makeover.
Total spent on the bathroom: $22 $2 vintage tennis racquet – thrifted $20 for two, colorful beach towels SOLD OUT – Tarjay
Total spent on the bedroom: $27 $3 picnic basket – thrifted $9 red arrow – antique store $6 lake cottage painting – antique store $9 ’10’ sign – antique store
I hope you’ve enjoyed this little tour and are inspired to give your own decor a refresh. Now, I just need a cabin in the Adirondacks!
Disclosure: In addition to occasional sponsored posts, Arthurized Home uses clickable affiliate links. That means that I may receive a small commission from sales at no extra charge to you. As always, my opinion is 100% my own, and I only recommend things that I truly love or use myself. Thank you for patronizing the brands that support Arthurized Home!
Much like Peeps marshmallow candy, deviled eggs are polarizing. You either love them or you hate them. We’re in camp Love Them. Deviled eggs that is, not Peeps.
Because they’re are a pain in the butt to make, I usually make a large batch of deviled eggs, 8-10 whole eggs at a time. We eat them until we don’t want to see another one for six months or so.
This deviled egg plate belonged to my husband’s great aunt, Ruth.
To make hard boiled eggs: Bring a large pot of water (mine holds 7 quarts) to a rolling boil. Gently, gently lower 8-10 eggs into the water. Don’t crowd them. Leaving the pot uncovered, lower the heat to a medium simmer. Simmer for 14 minutes and transfer the eggs to an ice bath for five minutes. Peel the eggs.
Once the eggs have cooled enough to handle, slice them in half lengthwise and release the cooked yolk into a mixing bowl.
Classic Deviled Eggs For 8-10 eggs, mix 1/2 cup (or so) of mayonnaise, a little finely ground salt and white pepper into the cooked egg yolks. Add a teaspoon of honey, or other sweetener to taste. Mix until the filling has a smooth texture. Pipe or spoon into egg halves and lightly sprinkle with paprika and chopped flat leaf Italian parsley (optional).
Classic Deviled Eggs with Bacon Because bacon makes everything better! Mix bacon crumbles into the classic filling, spoon into whites and sprinkle more crumbled bacon on top.
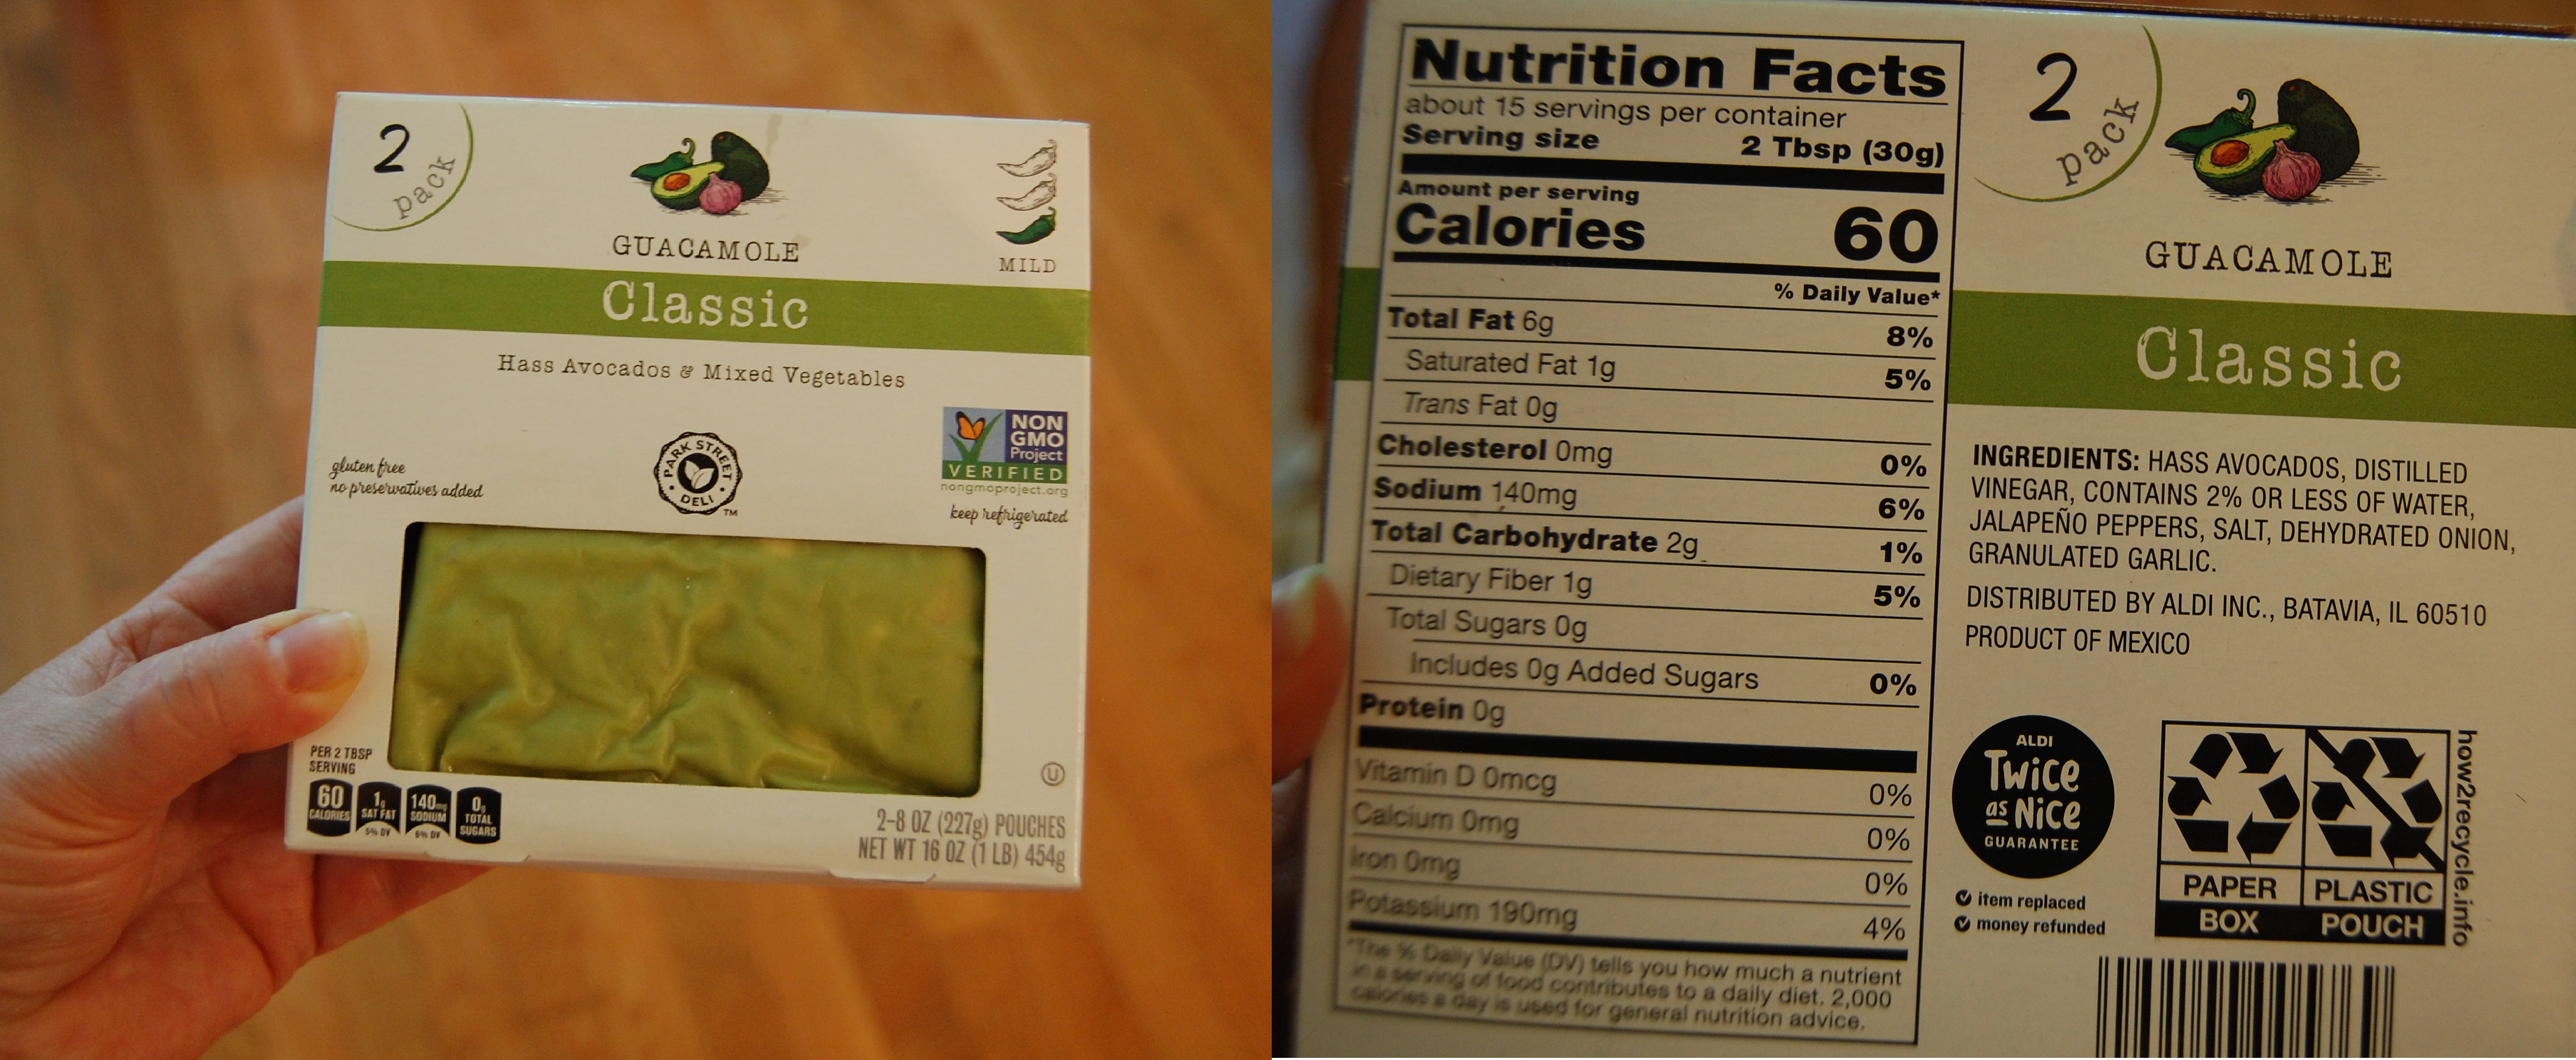
Guacamole Bacon Deviled Eggs: Not the prettiest deviled egg, but dang, they’re tasty! Serve these babies immediately so that the avocado doesn’t oxidize. My version is loosely based on this one. Instead of making my own guacamole, I take some help from the store and use pre-made. I like the classic guacamole from Aldi.
For 8-10 eggs, I use 6 – 8 oz. of guac. I substitute Cholula hot sauce for the jalapenos, because I never remember to take my contacts out before chopping jalapenos and things get ugly from there. Mix bacon into the filling, sprinkle more on top.
Bring literal deviled eggs to your next Halloween party with little slivers of red bell pepper for horns. So cute! The horns would work well with any of these variations, with or without other garnishes.
Now, go throw that bacon around like confetti!
Disclosure: In addition to occasional sponsored posts, Arthurized Home uses clickable affiliate links. That means that I may receive a small commission from sales at no extra charge to you. As always, my opinion is 100% my own, and I only recommend things that I truly love or use myself. Thank you for patronizing the brands that support Arthurized Home!
Happy First Day of Summer! This post is brought to you by ALL the gluten and sugar. Yes, this is quite a departure from my usual low carb posts, but I have co-workers and family who are willing to taste-test! These cupcakes and cookies are perfect for those summer birthday parties, cookouts and pool parties.
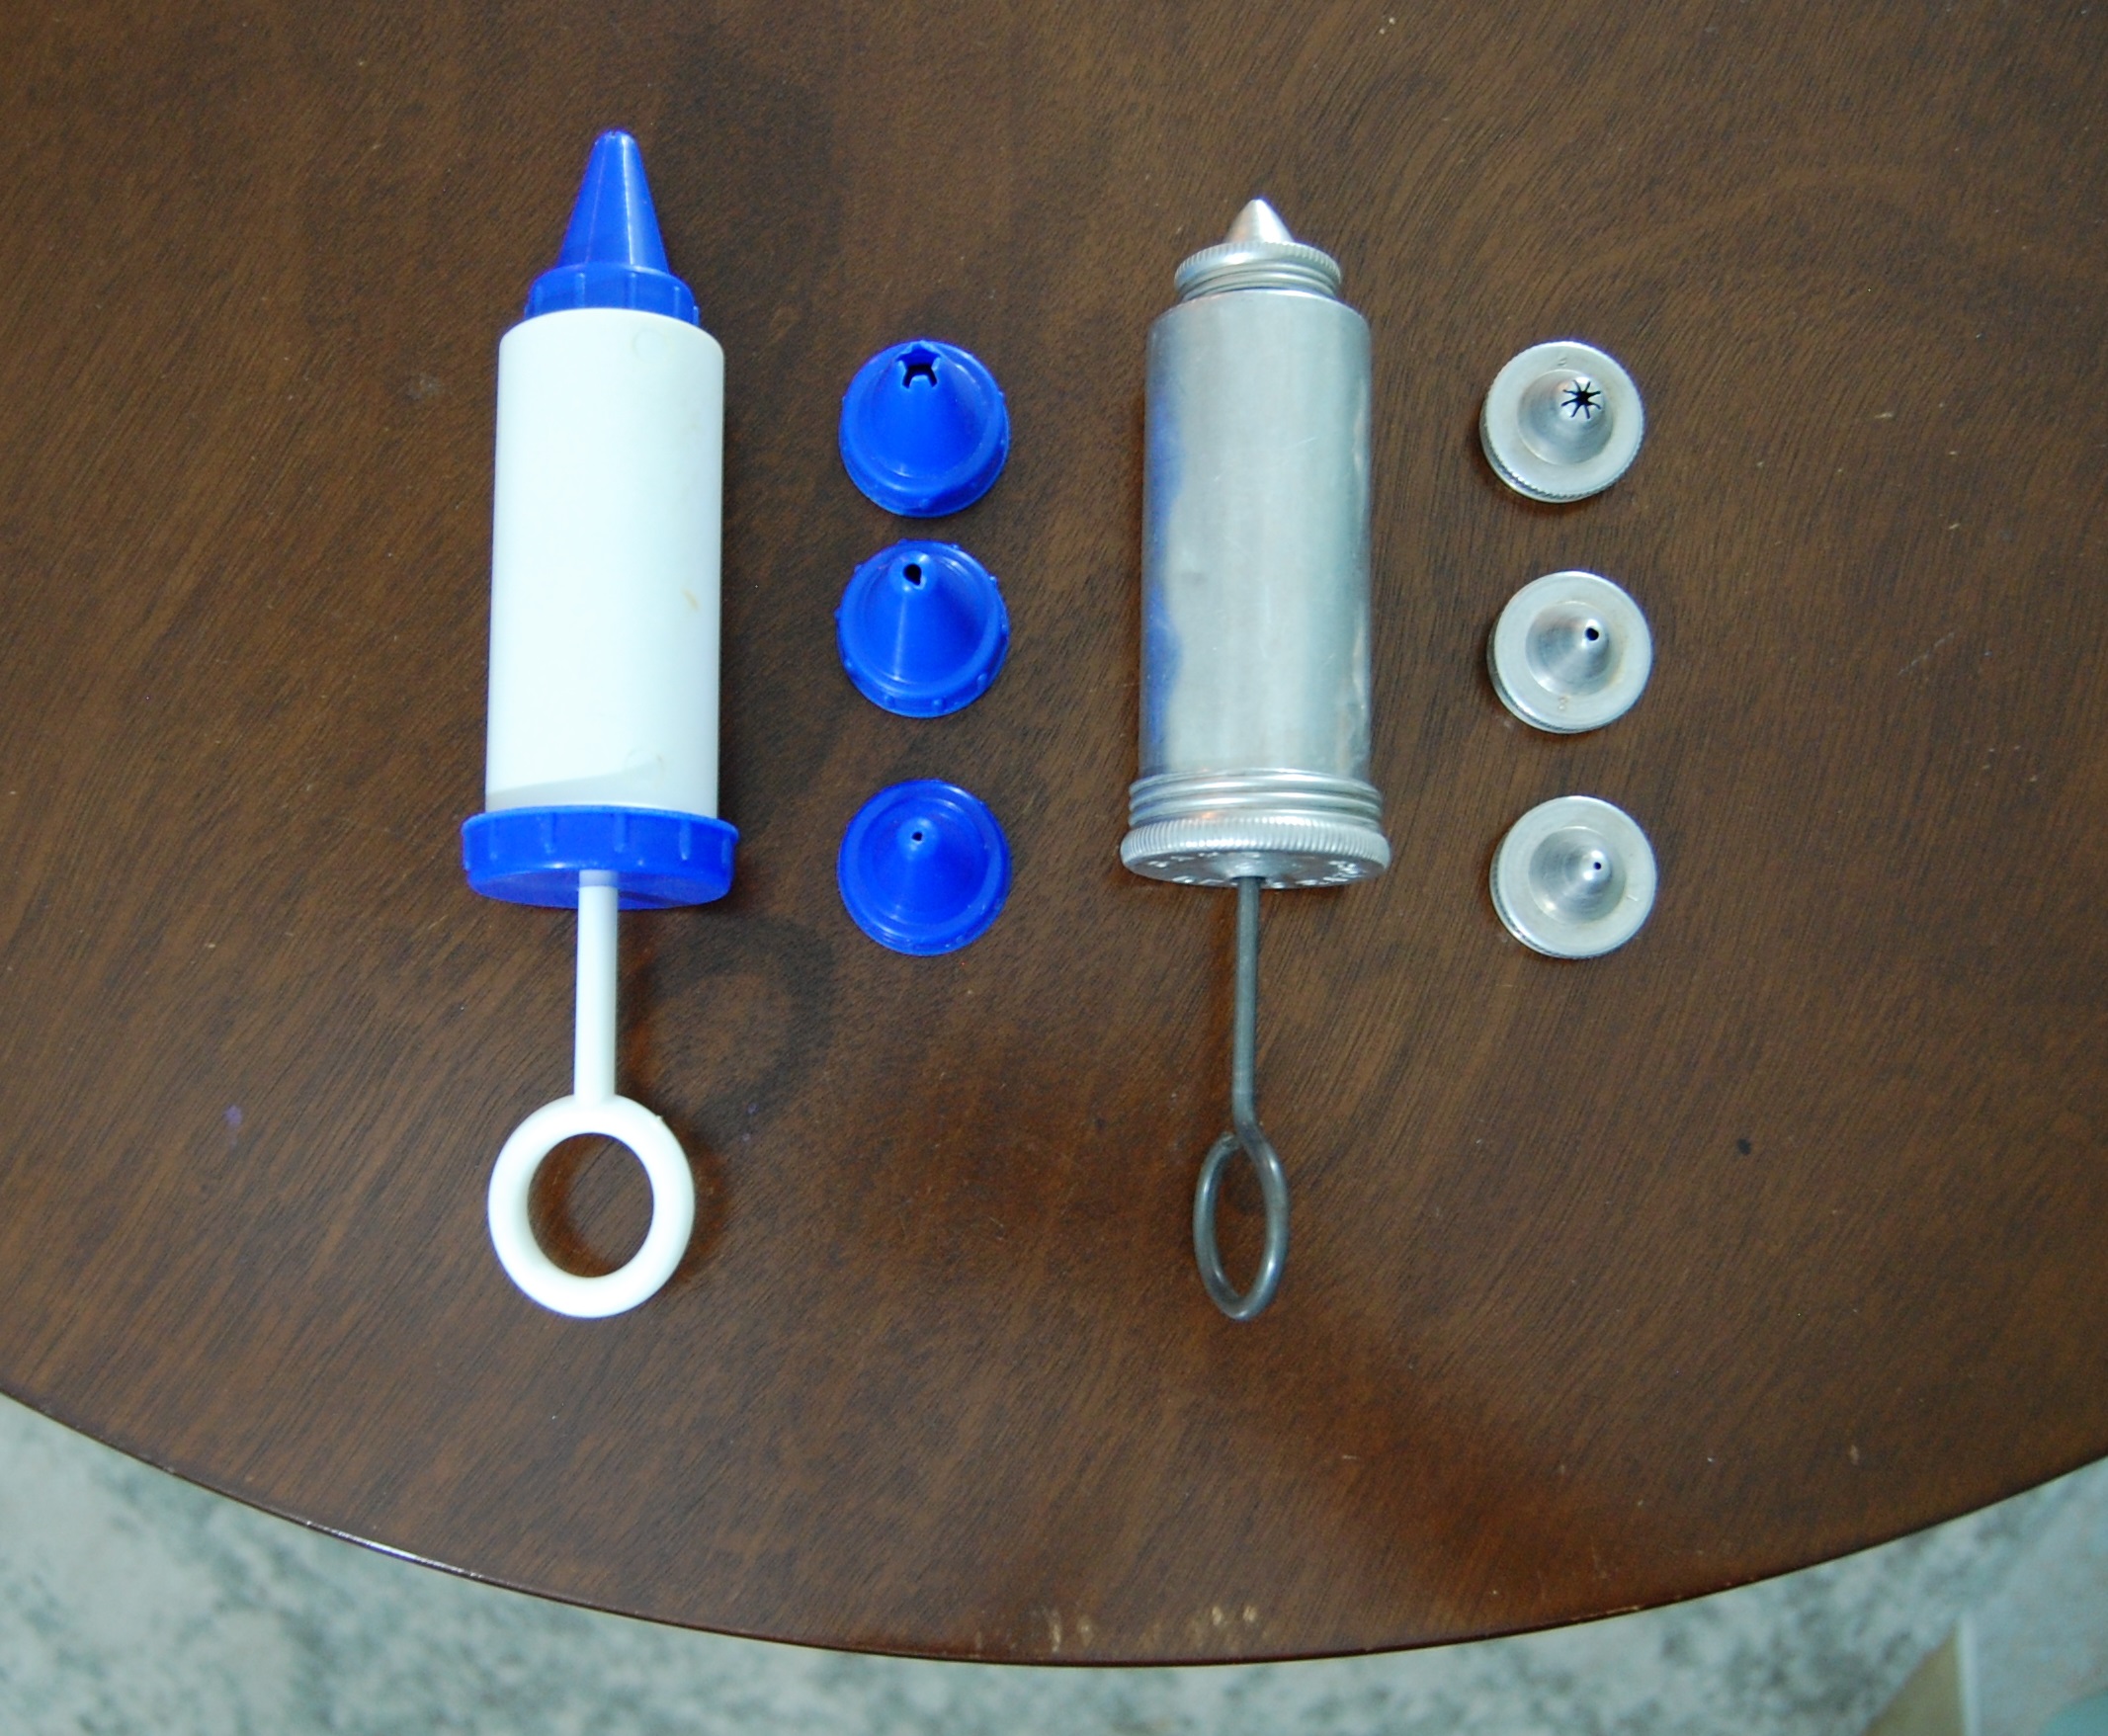
These are the pastry decorators and tips that I used. I prefer the plastic decorator over the vintage, aluminum one, because the plastic handle plunges more smoothly.
See those tiny teeth marks on the table? They were made by my niece when she was three and the perfect height for table-gnawing. She turned this piece of furniture into a family heirloom!
Clam Shell Cookies Did you know that clams can make pearls? They are not as prolific as oysters, but they make them as well!
Is it just me, or do these pearls look like tongue piercings to you, too?
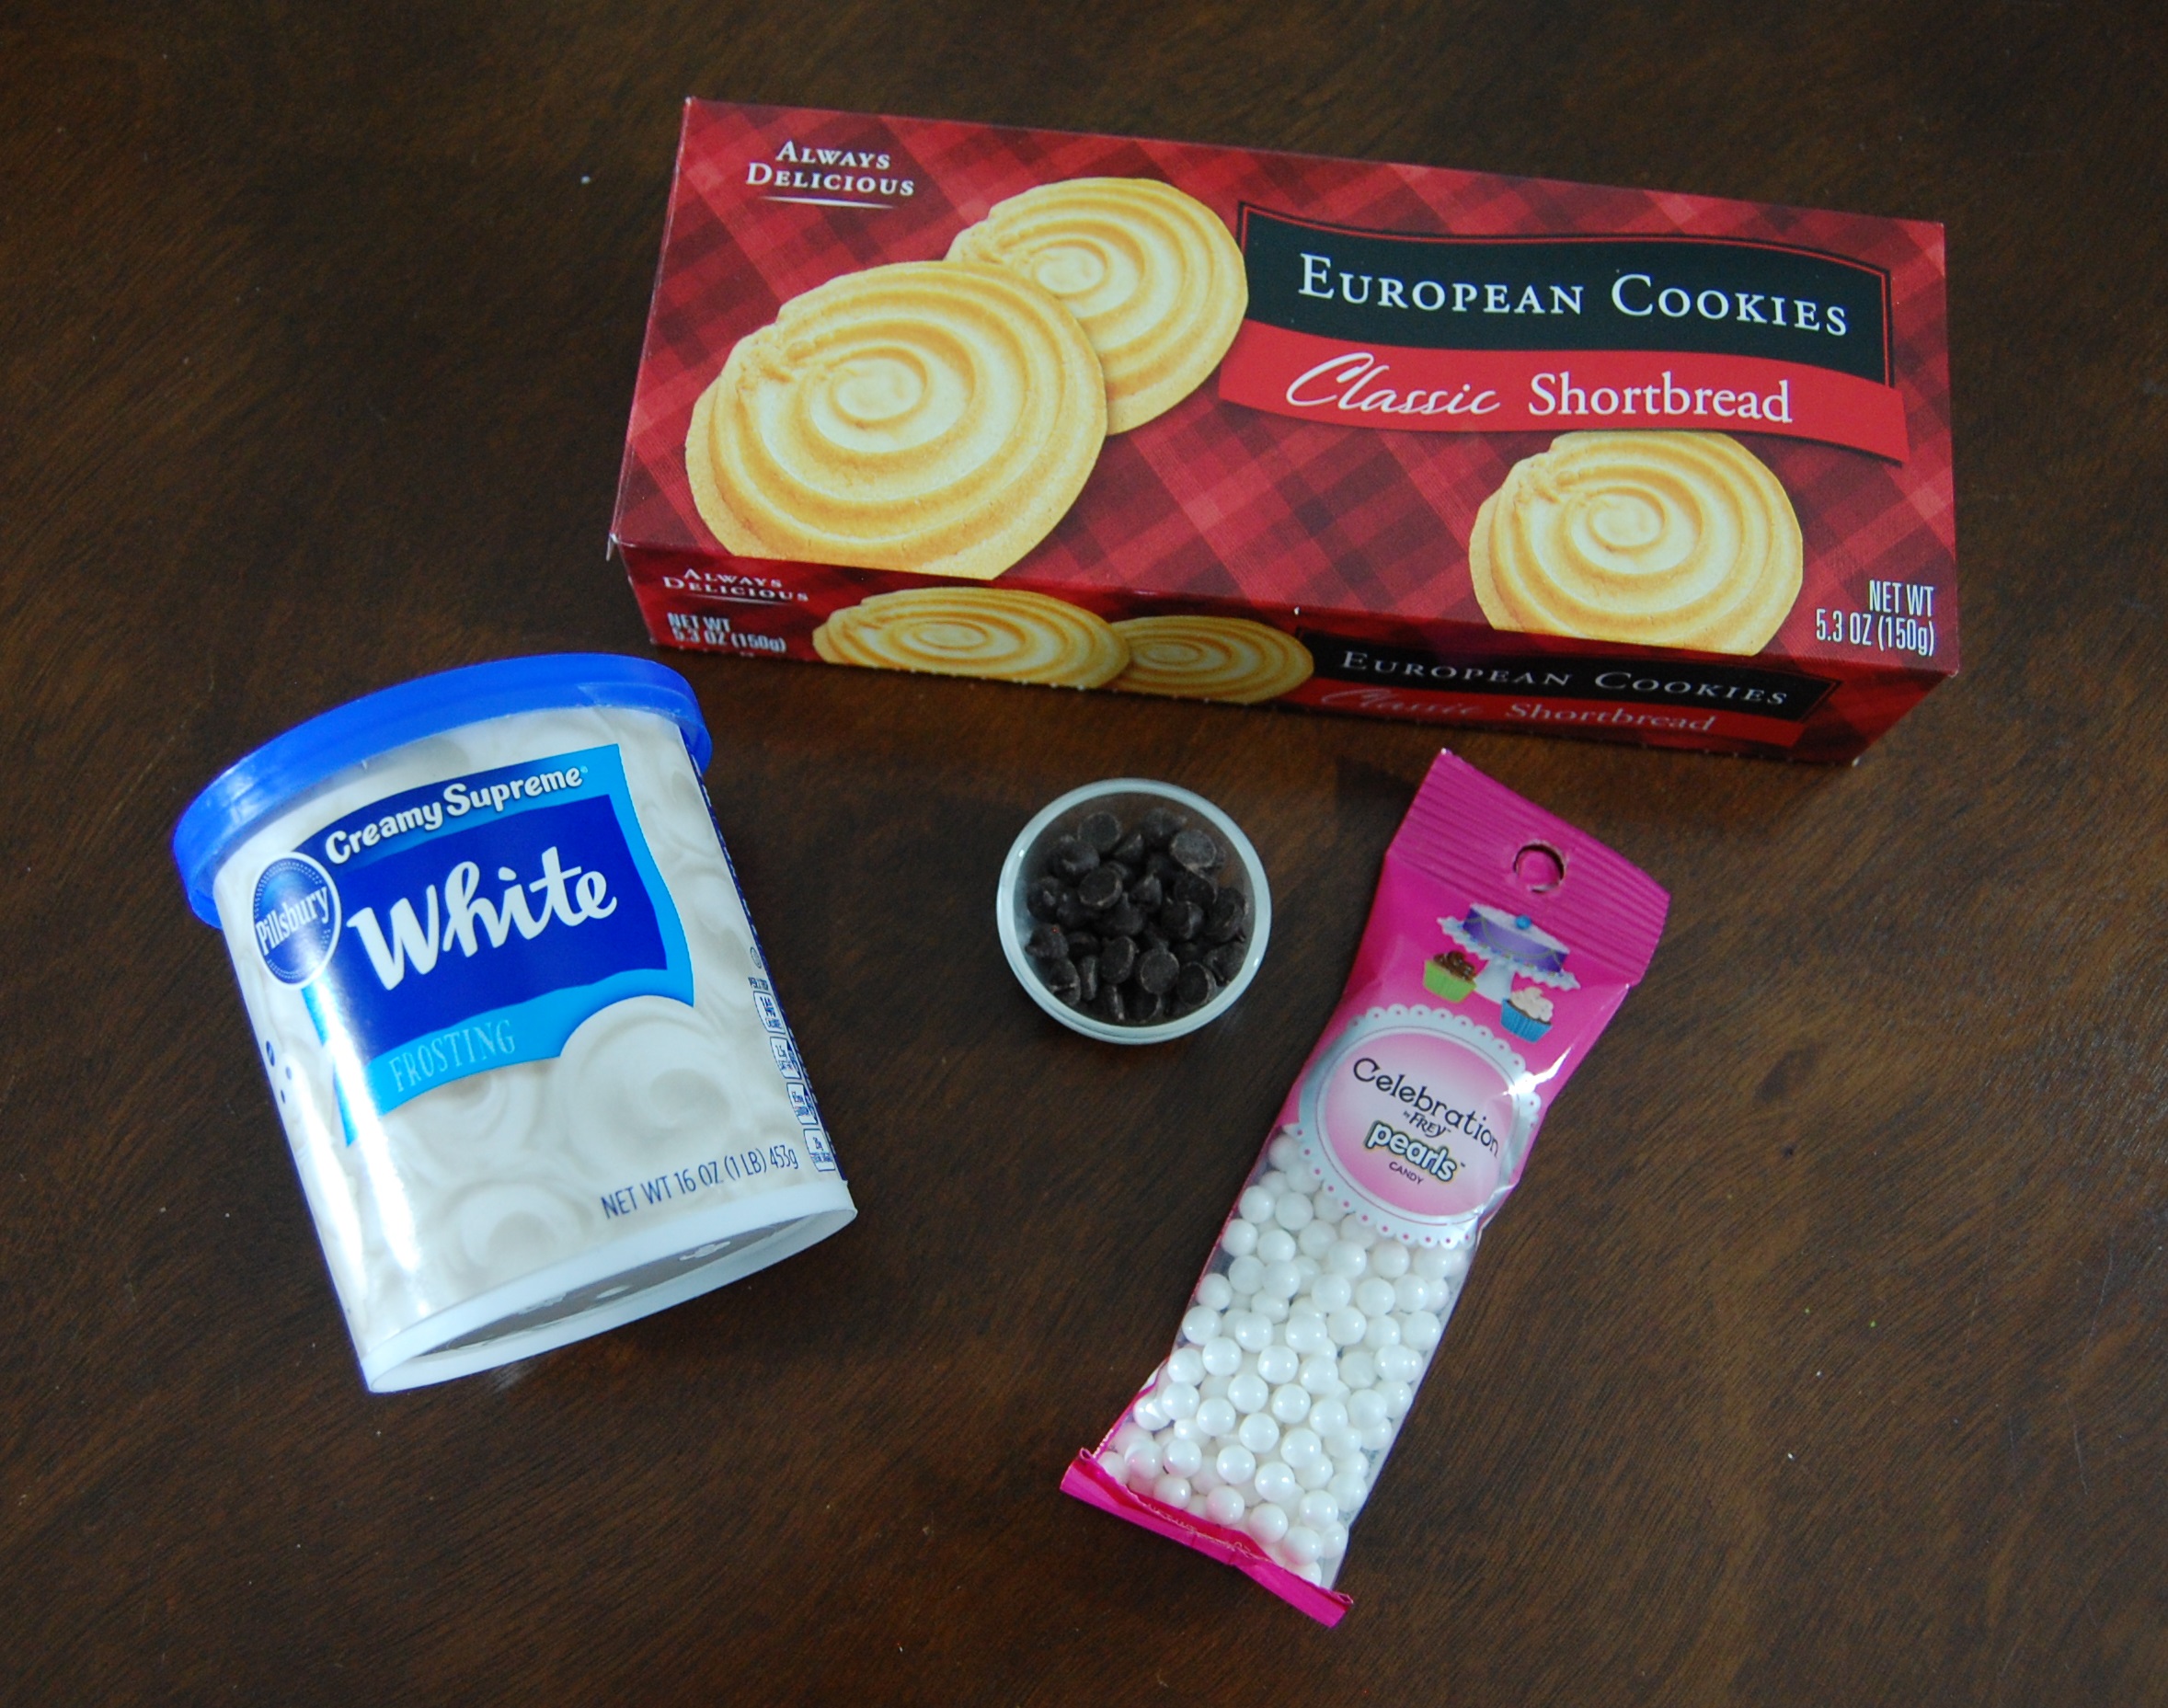
Materials: Shell shaped cookies (two for each completed clam shell), white frosting, candy pearls, blue food color, mini chocolate chips, pastry decorating kit with star tip and medium round tip
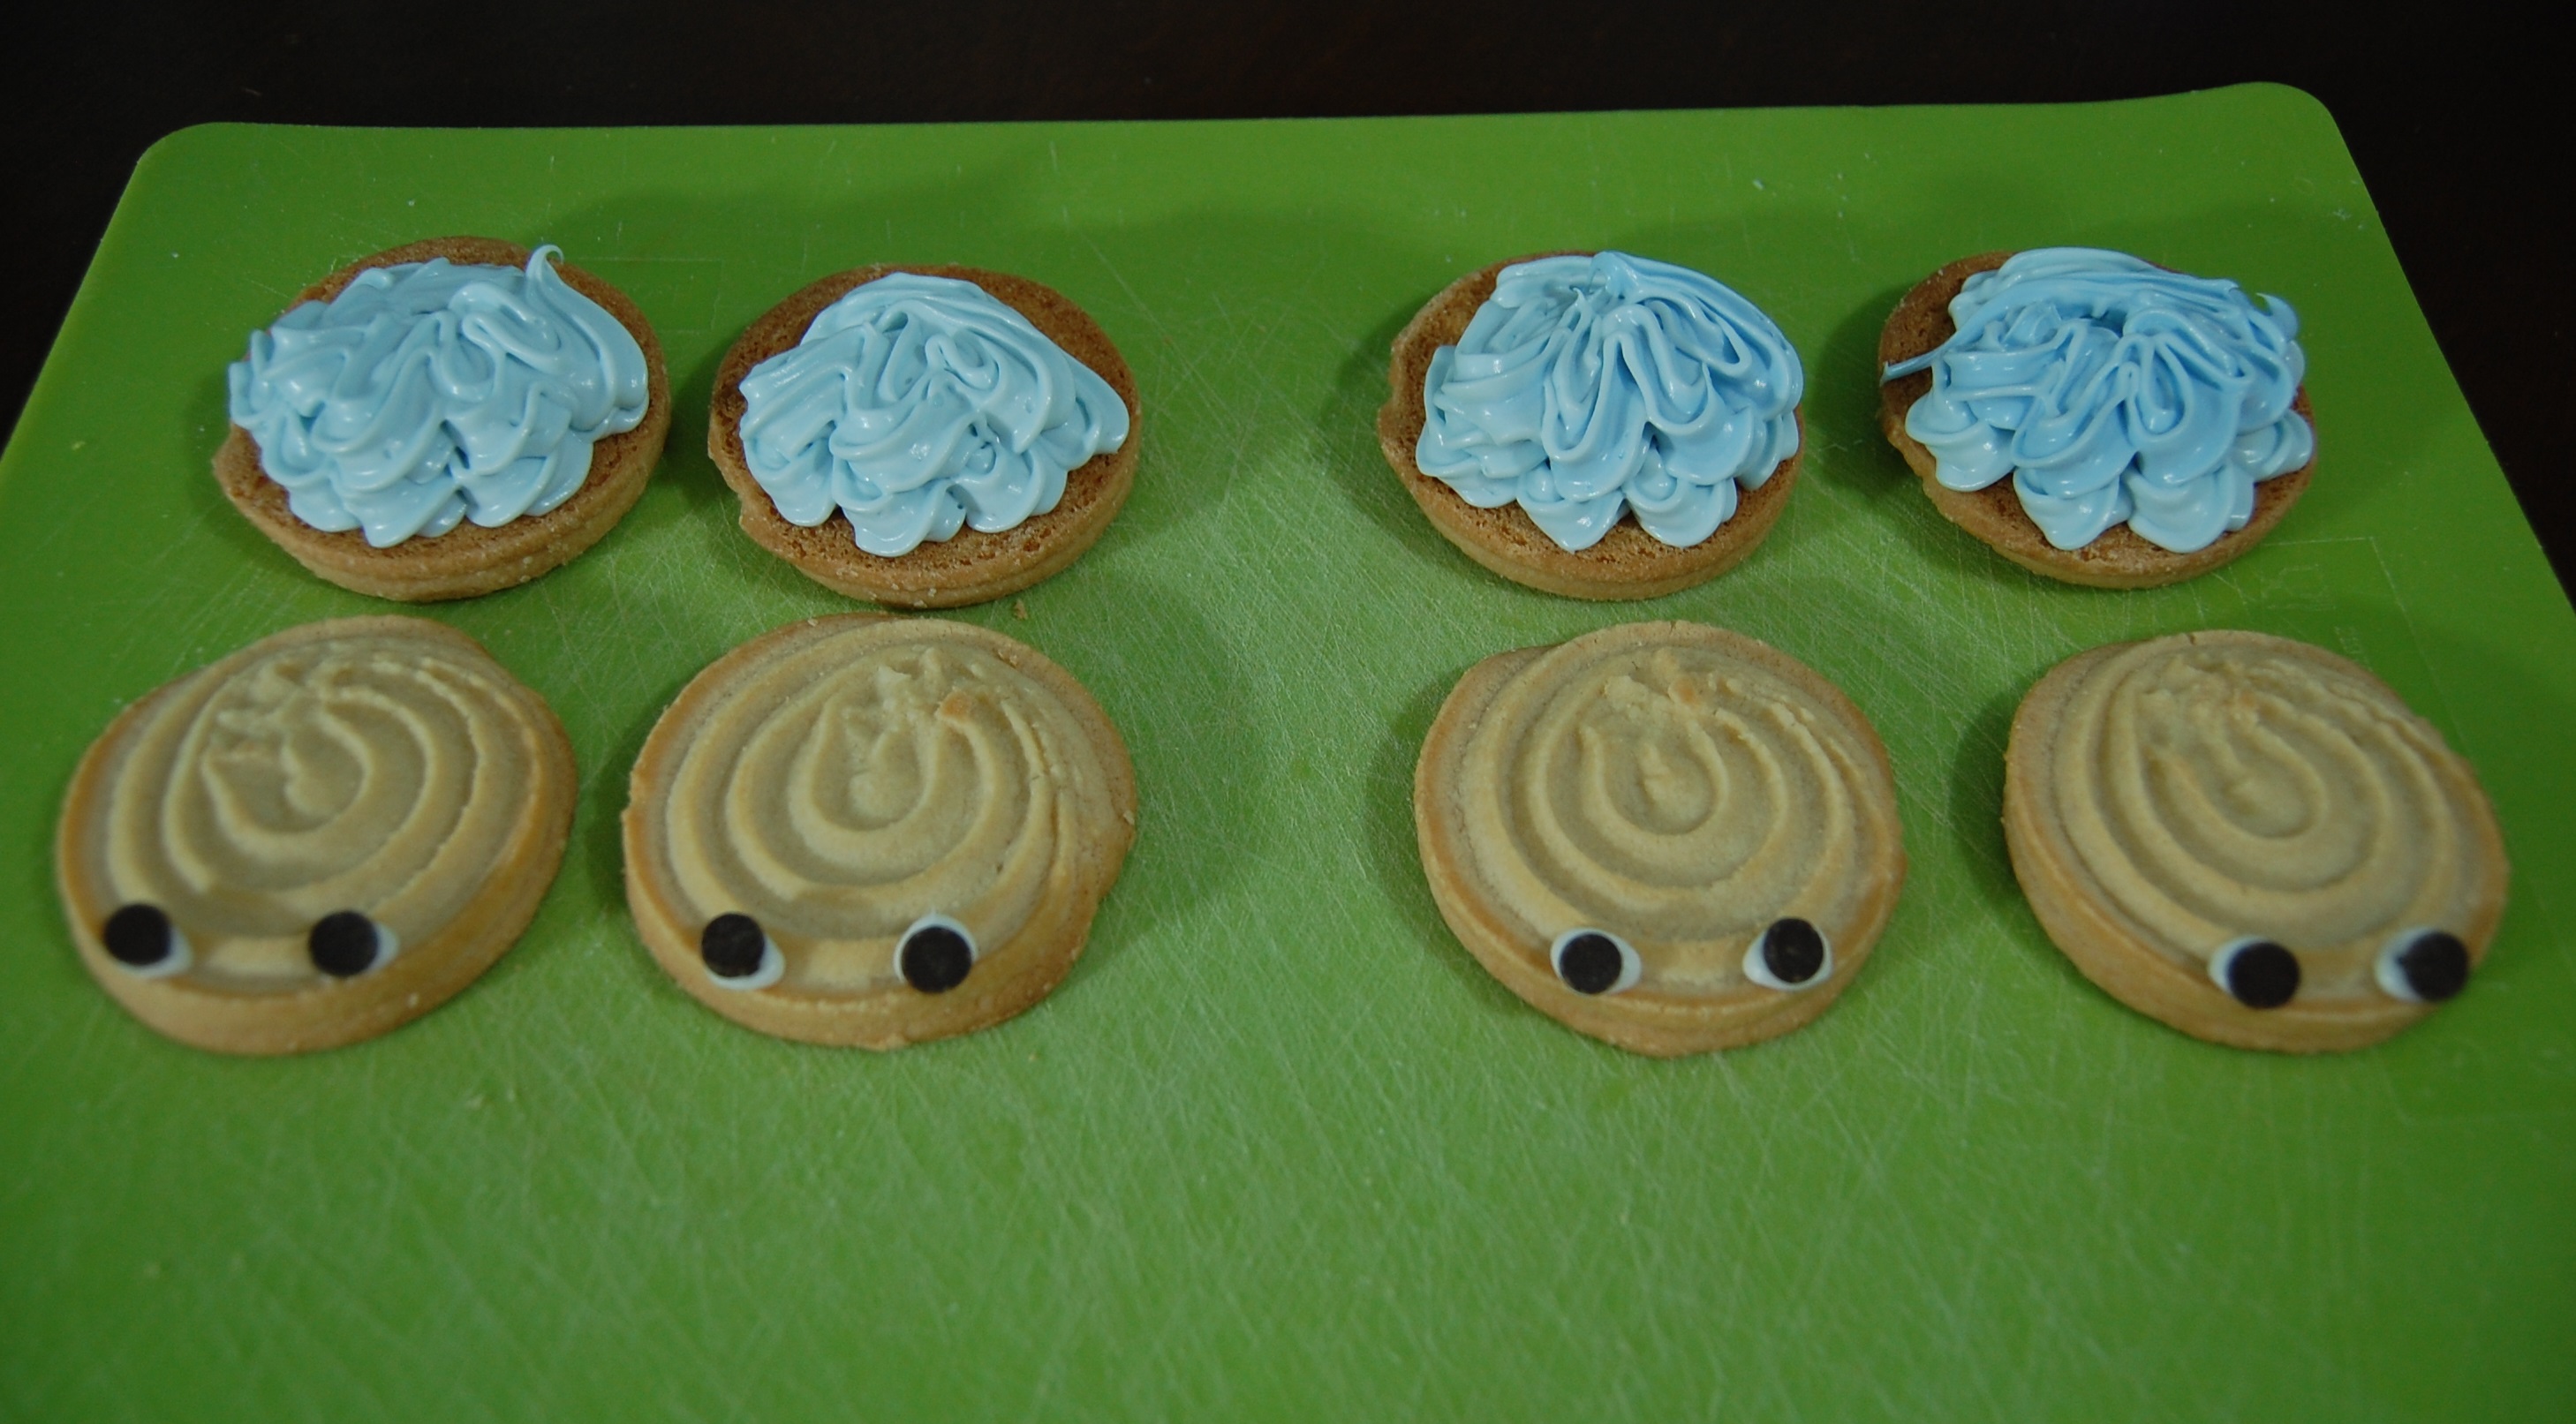
Divide the cookies into tops and bottoms. The tops will face up, and the bottoms will face down. Using white frosting and the round tip, pipe dots for eyes onto the top cookies. Press a mini chocolate chip into the frosting circles. Tint the remaining frosting pale blue. With a star tip, pipe the frosting onto the bottom cookie in waves. Pipe a second row of waves on top and a thin row of frosting along the back of the cookie.
Top with the upper cookie, positioning it so that the clam shell appears to be hinged in the back. Place the pearl candy in the frosting on the front of the cookie.
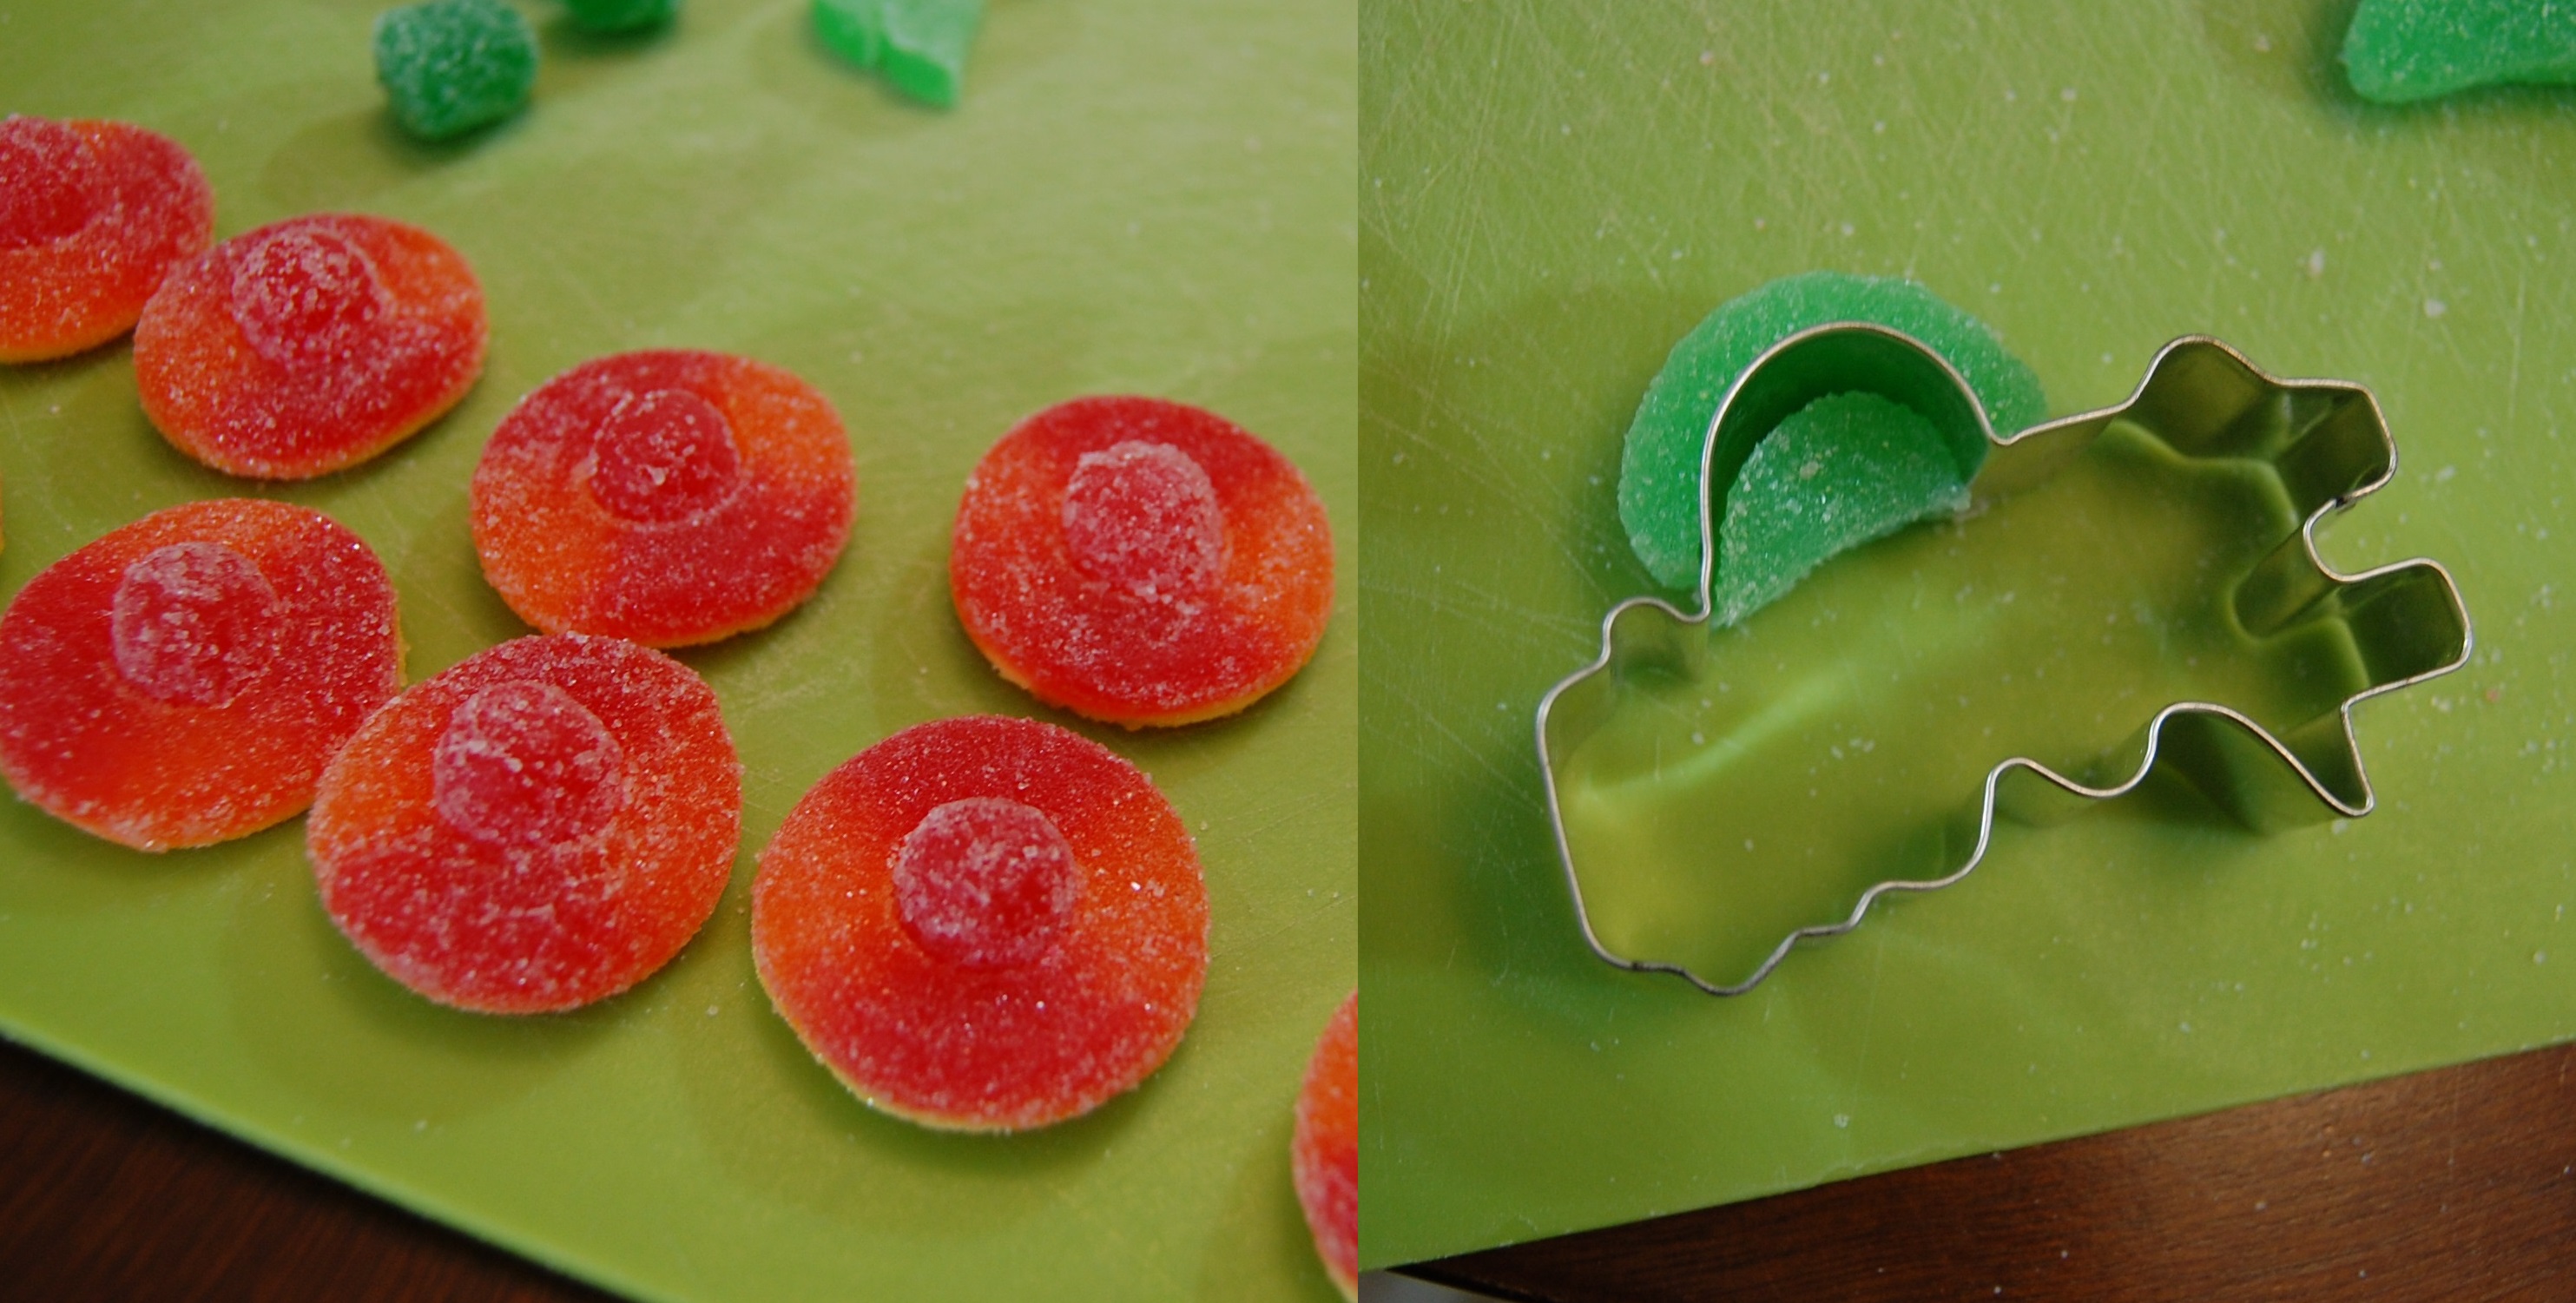
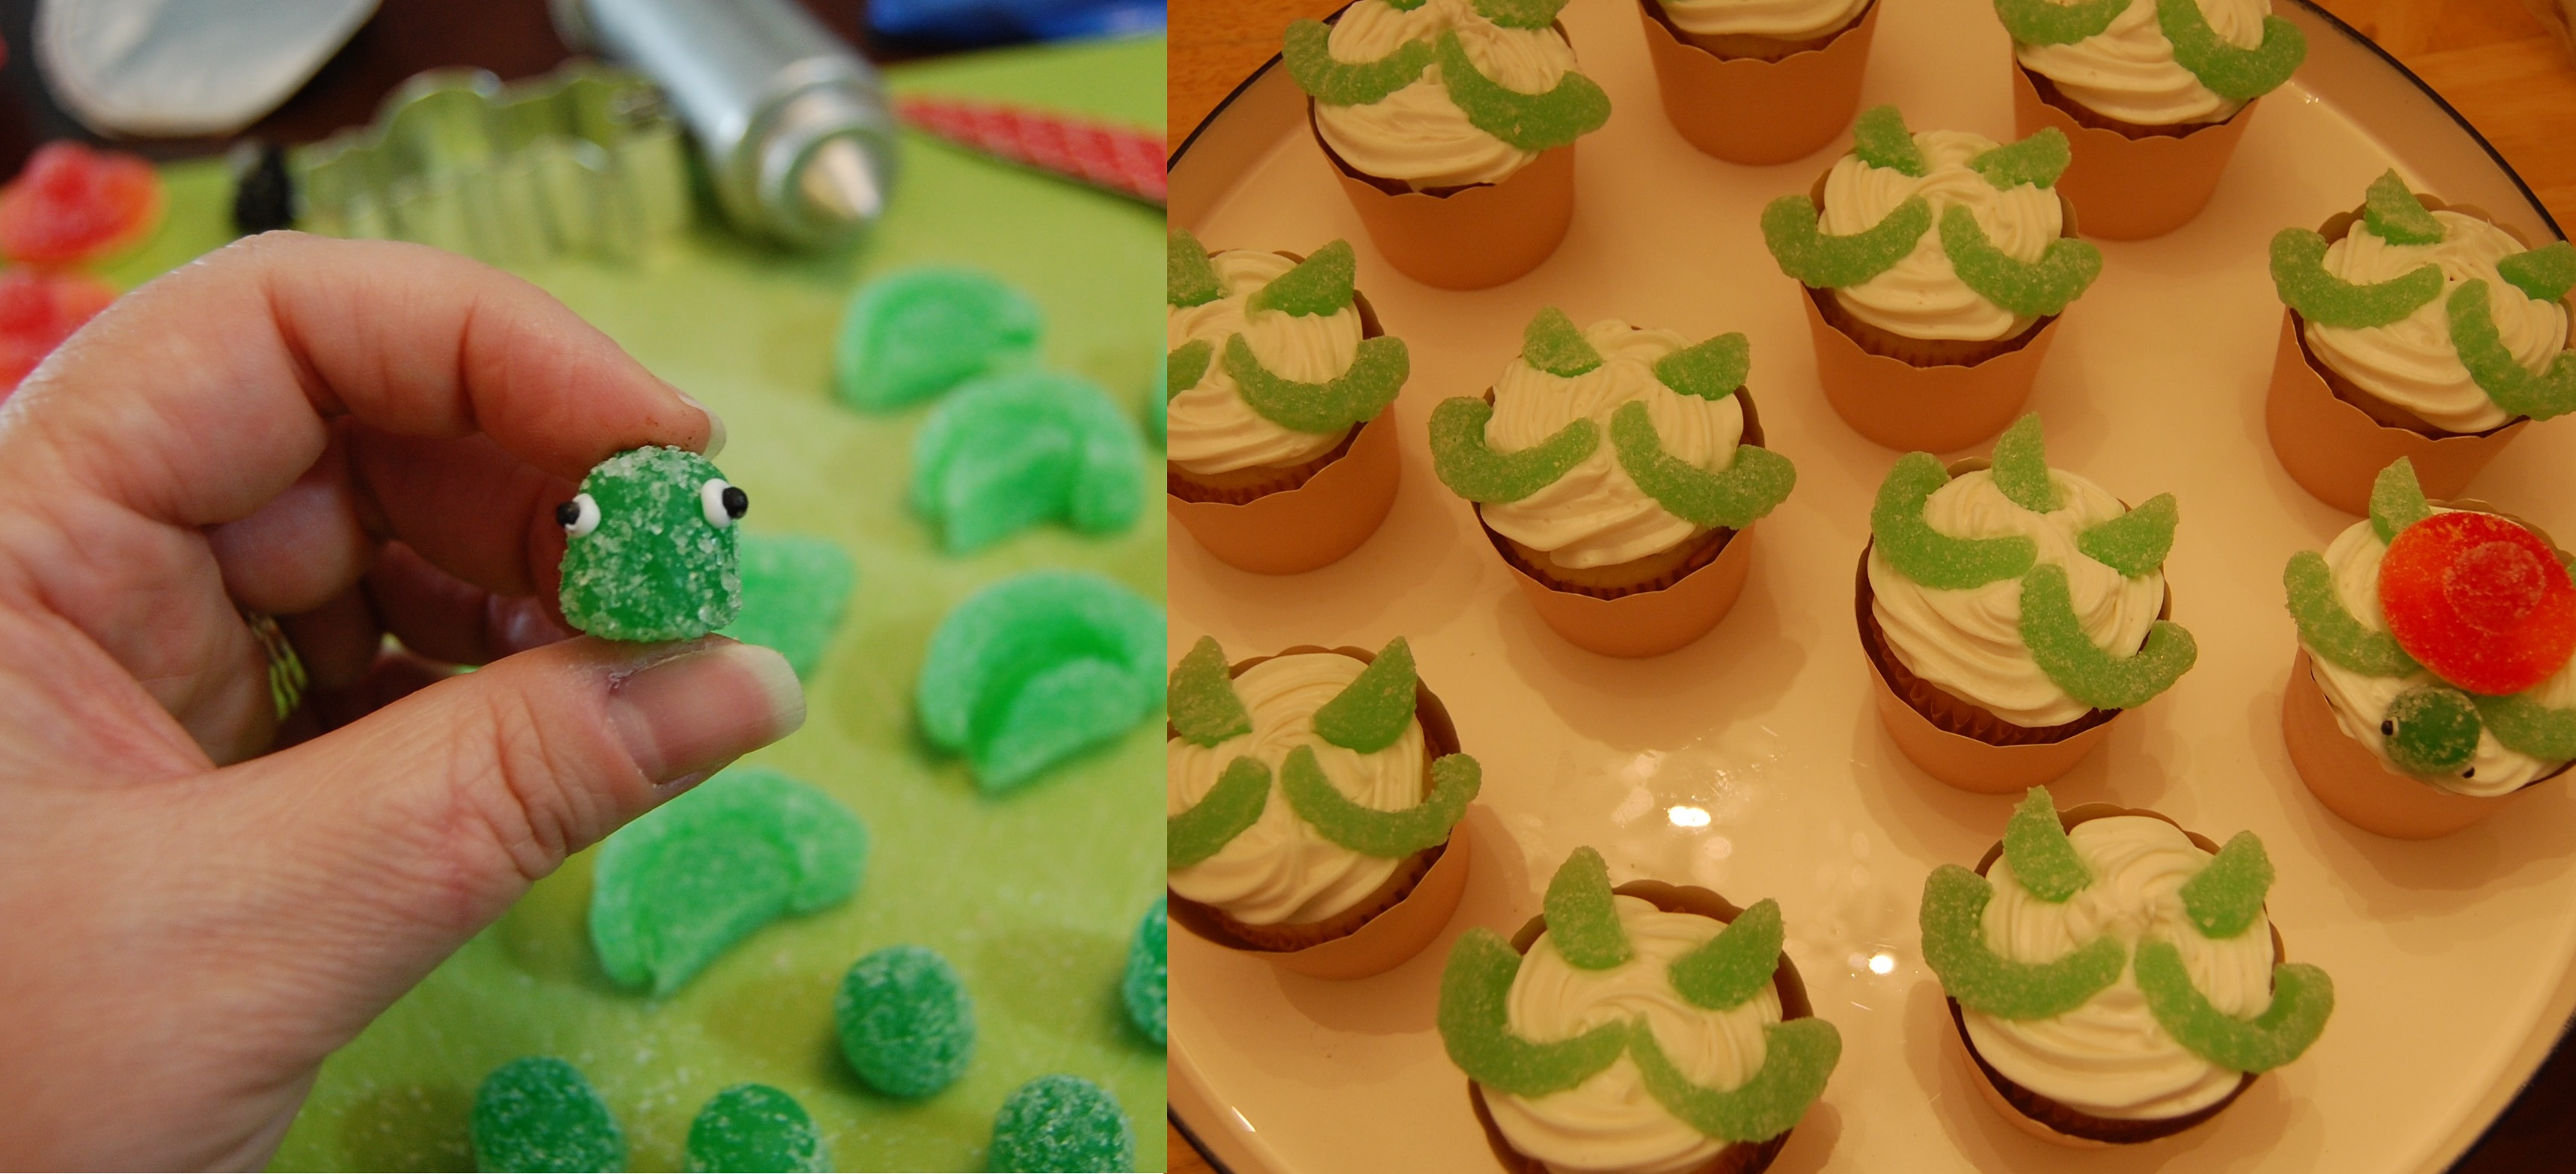
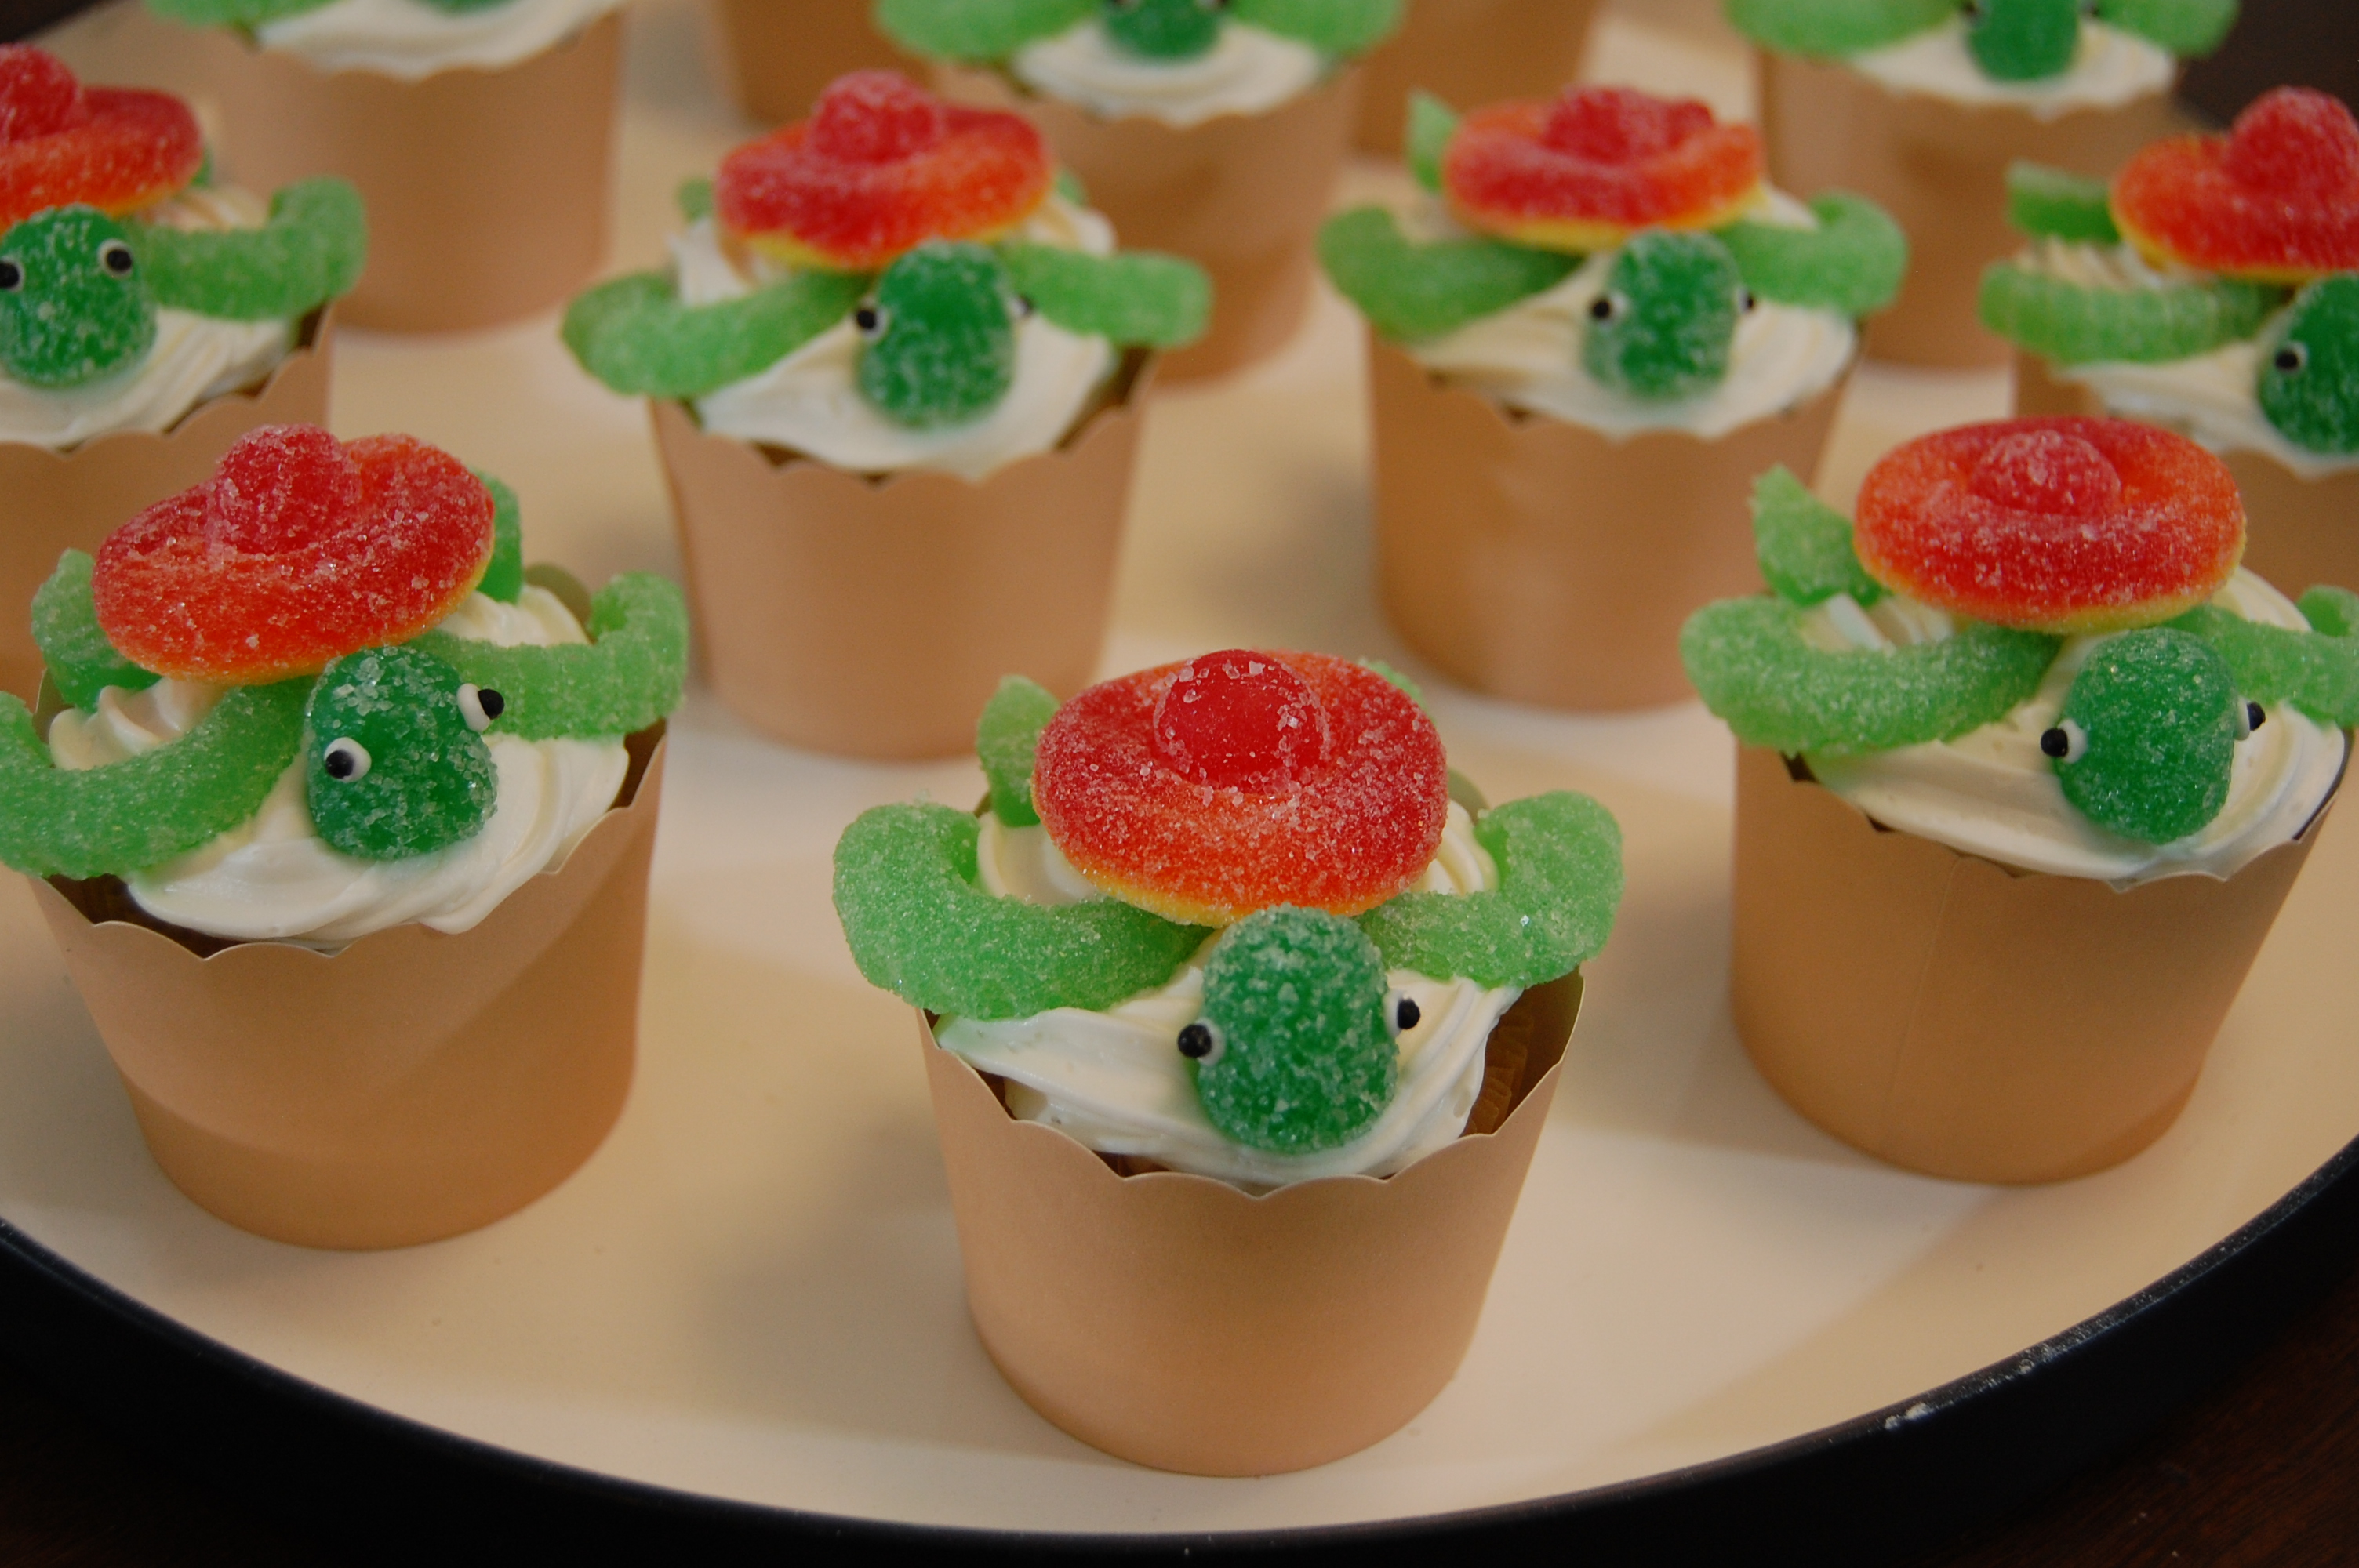
Sea Turtles Materials: Cupcakes in tan papers or sleeves (unbleached parchment papers would be great), white frosting, peach ring candies, assorted gumdrops, candy fruit slices, mini chocolate chips or gummy blackberries, pastry decorating kit with star tip and small round tip
I followed the instructions linked here, except that I do not have a fondant cutter. Any cookie cutter with a small, rounded shape will do. Santa’s sack worked just fine. For eyes, I piped the tiniest dot of white frosting onto each side of the head. Then I pressed on a drupelet (learned a new word!) from a gummy blackberry. https://family.disney.com/recipe/squirt-happy-turtlecakes/
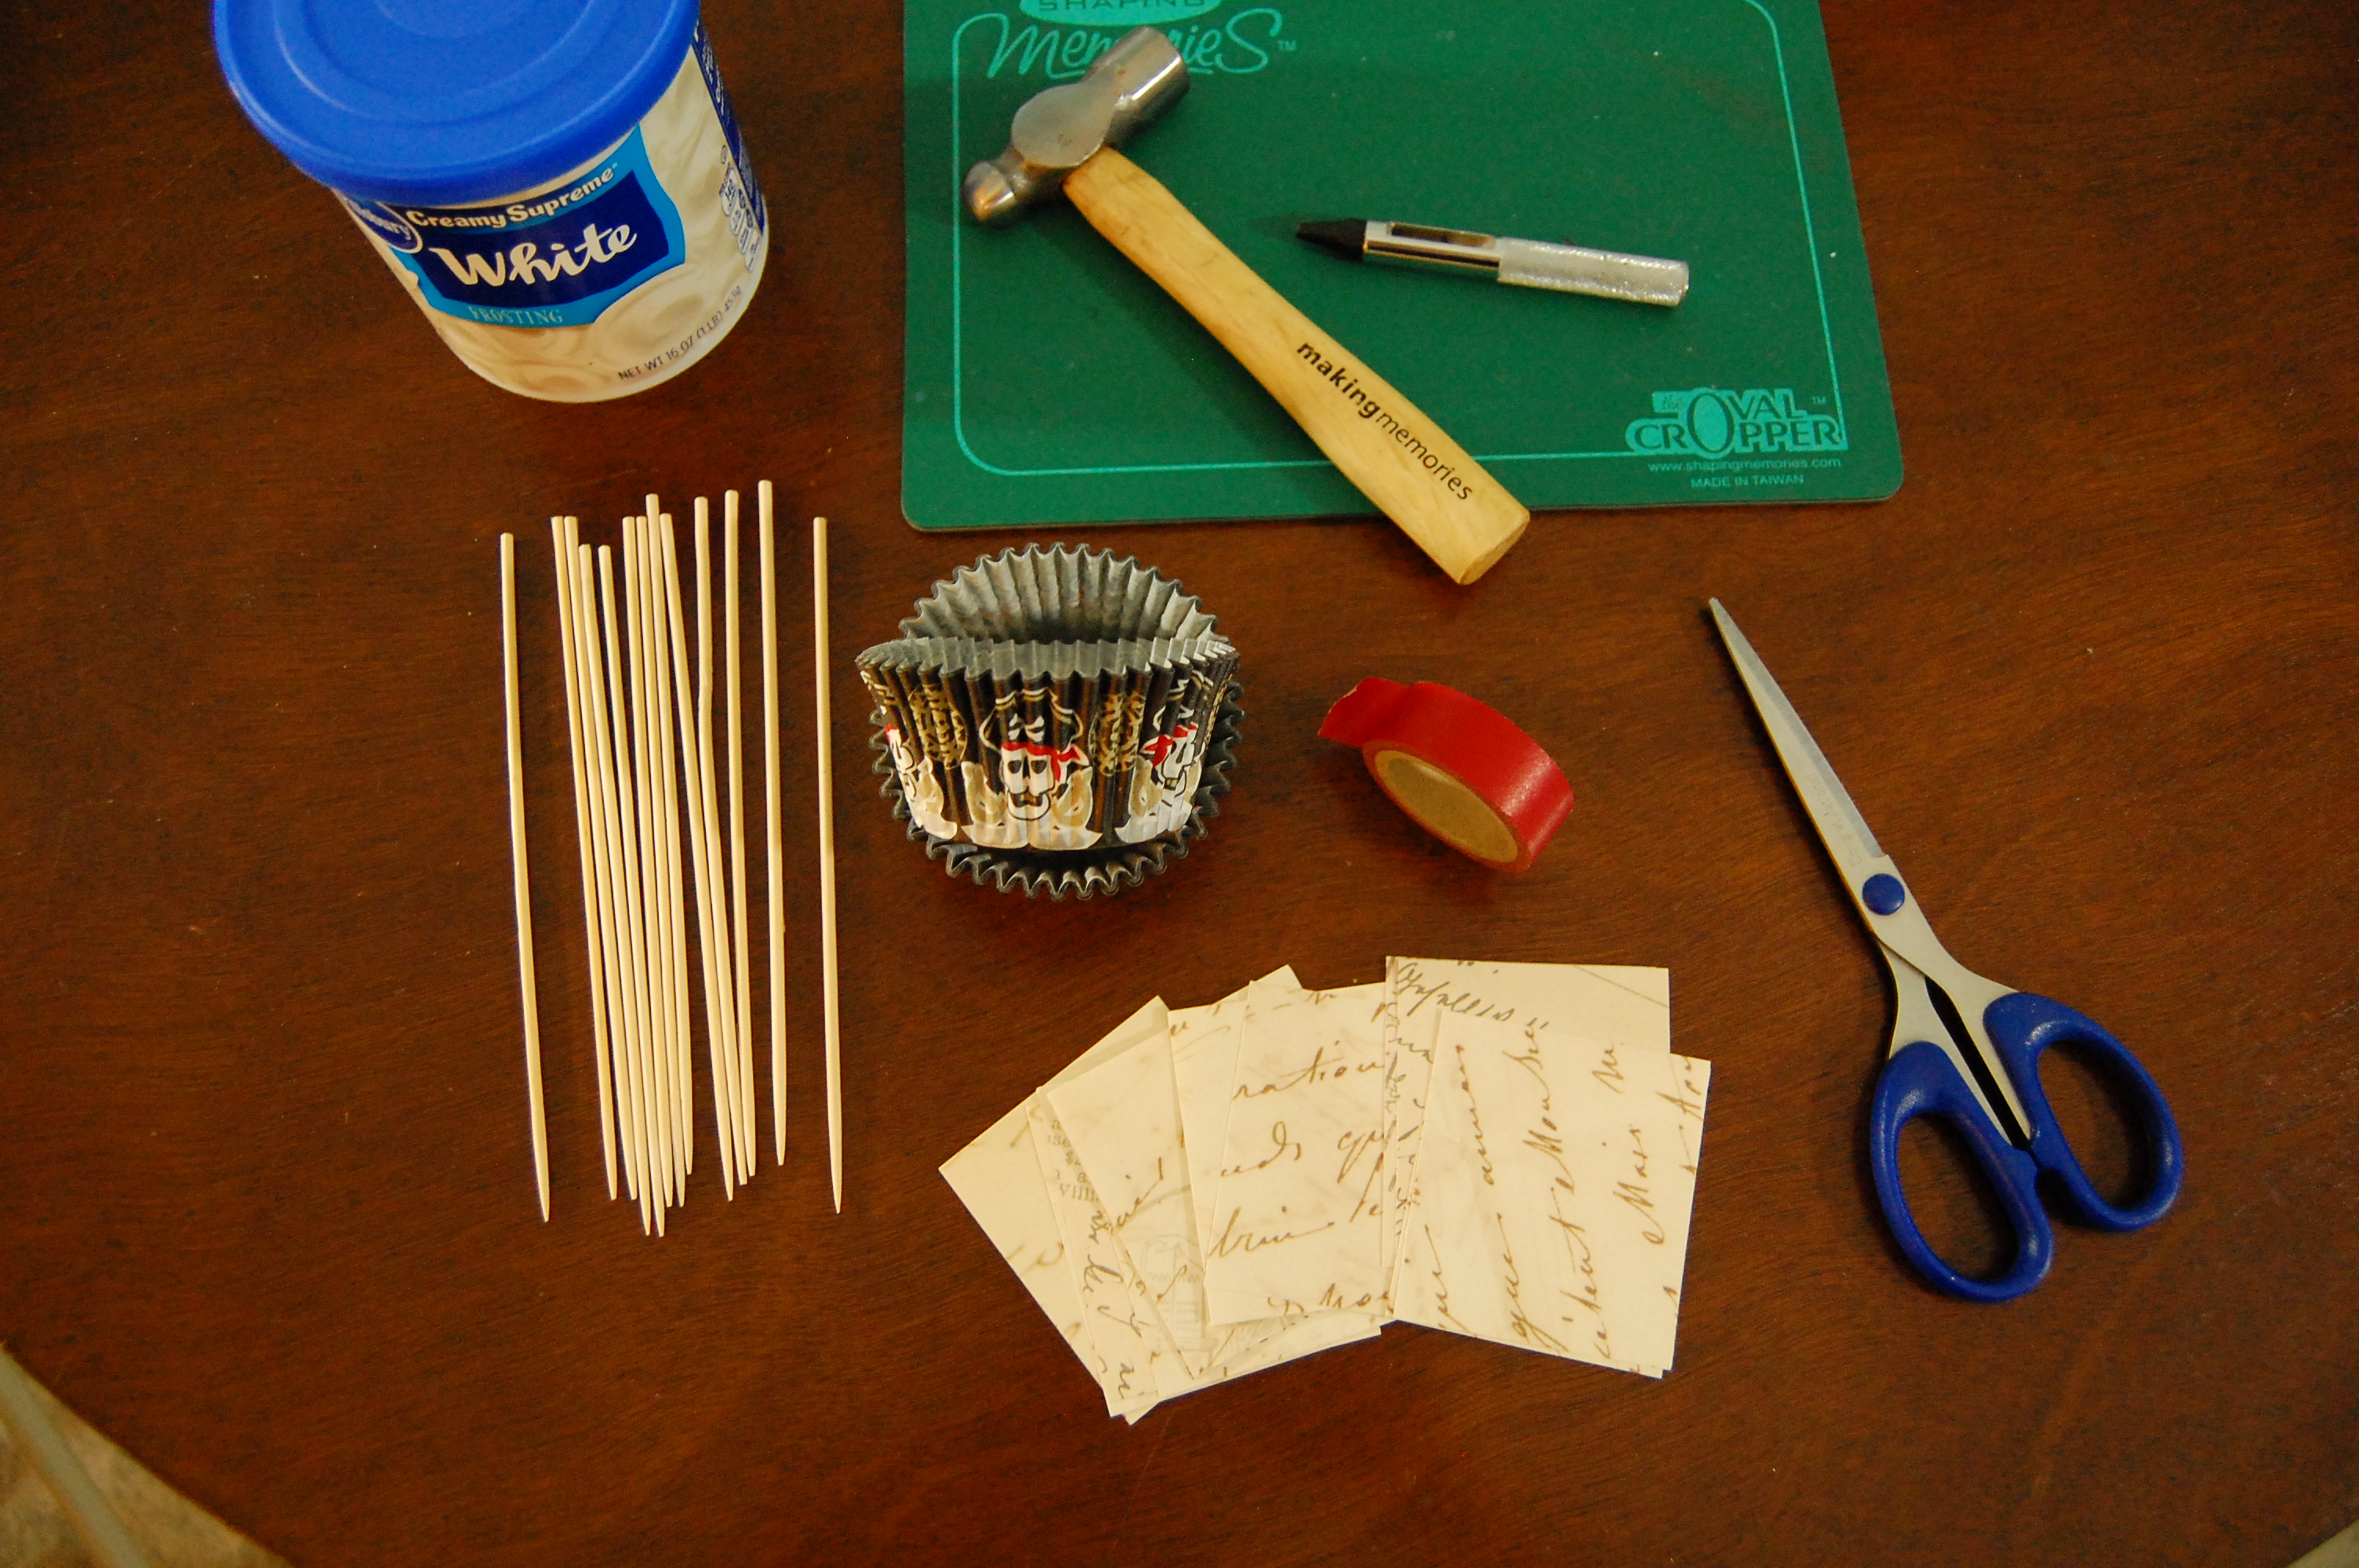
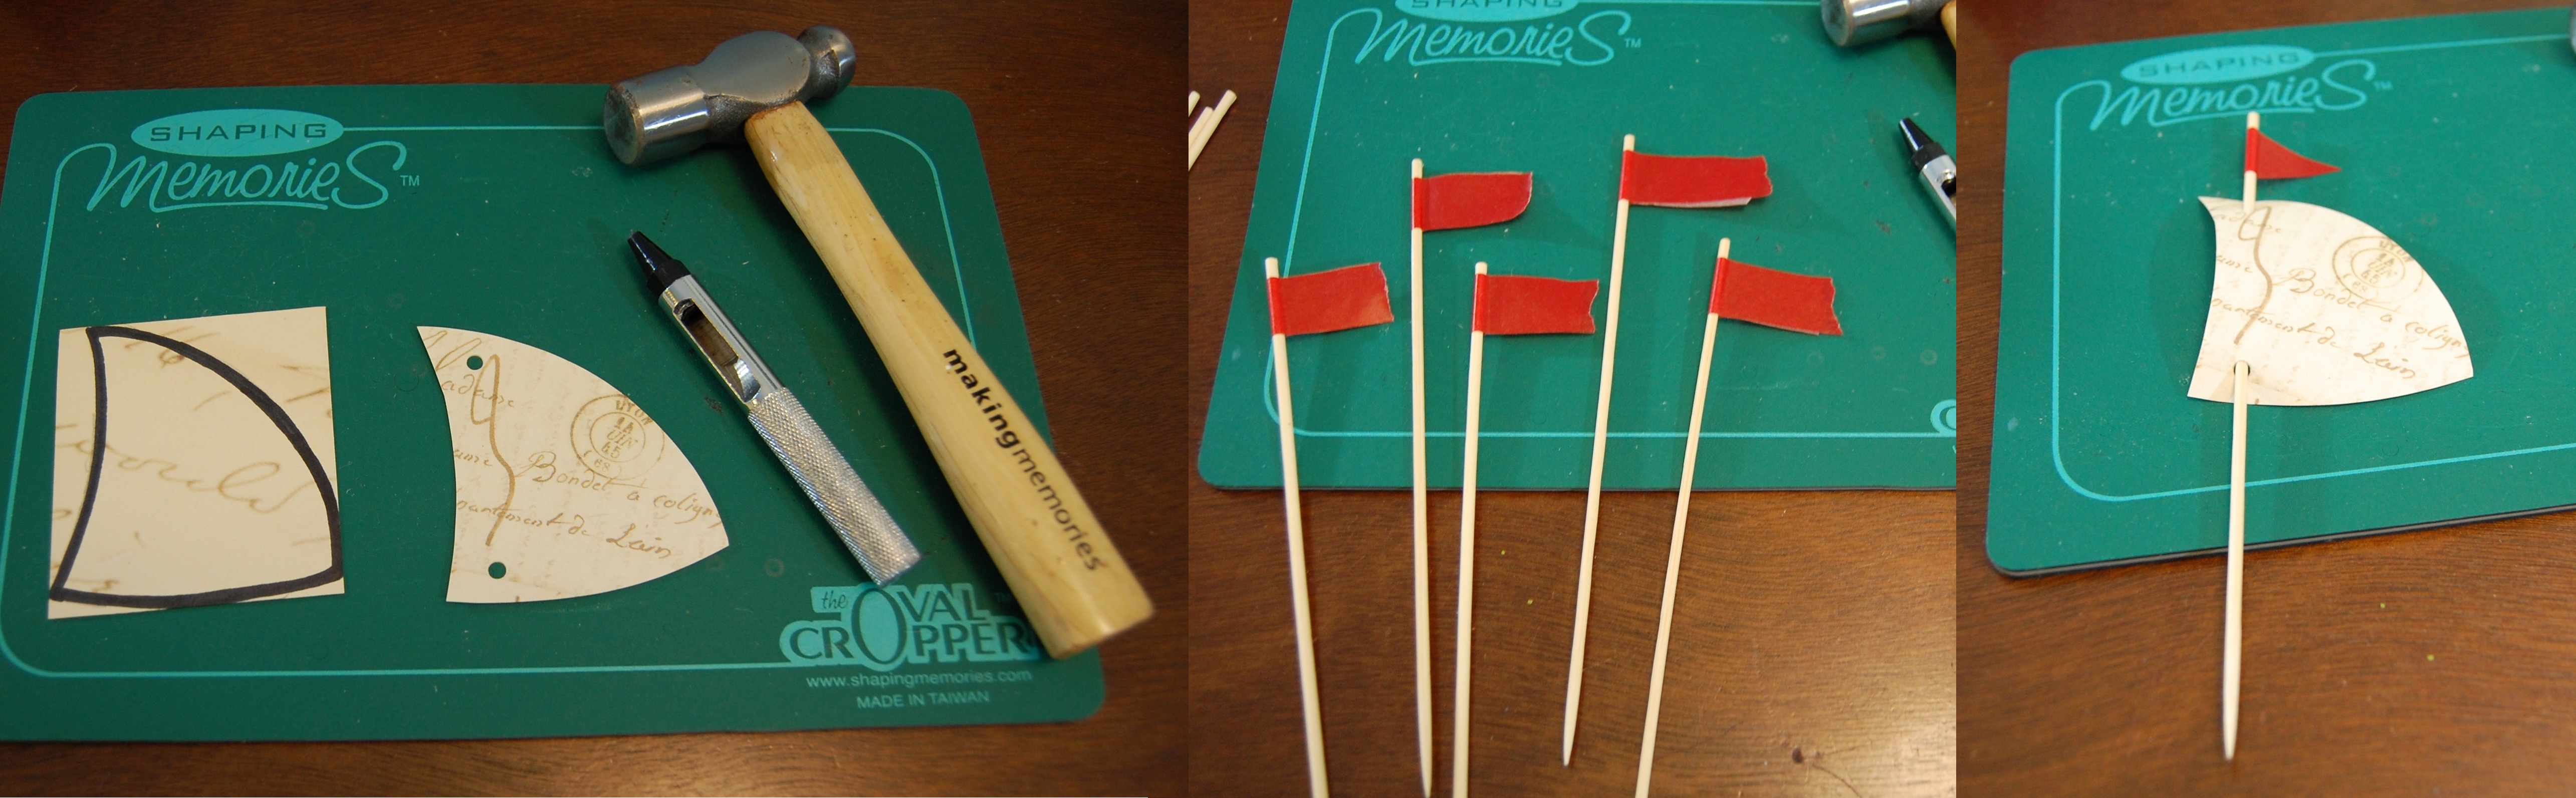
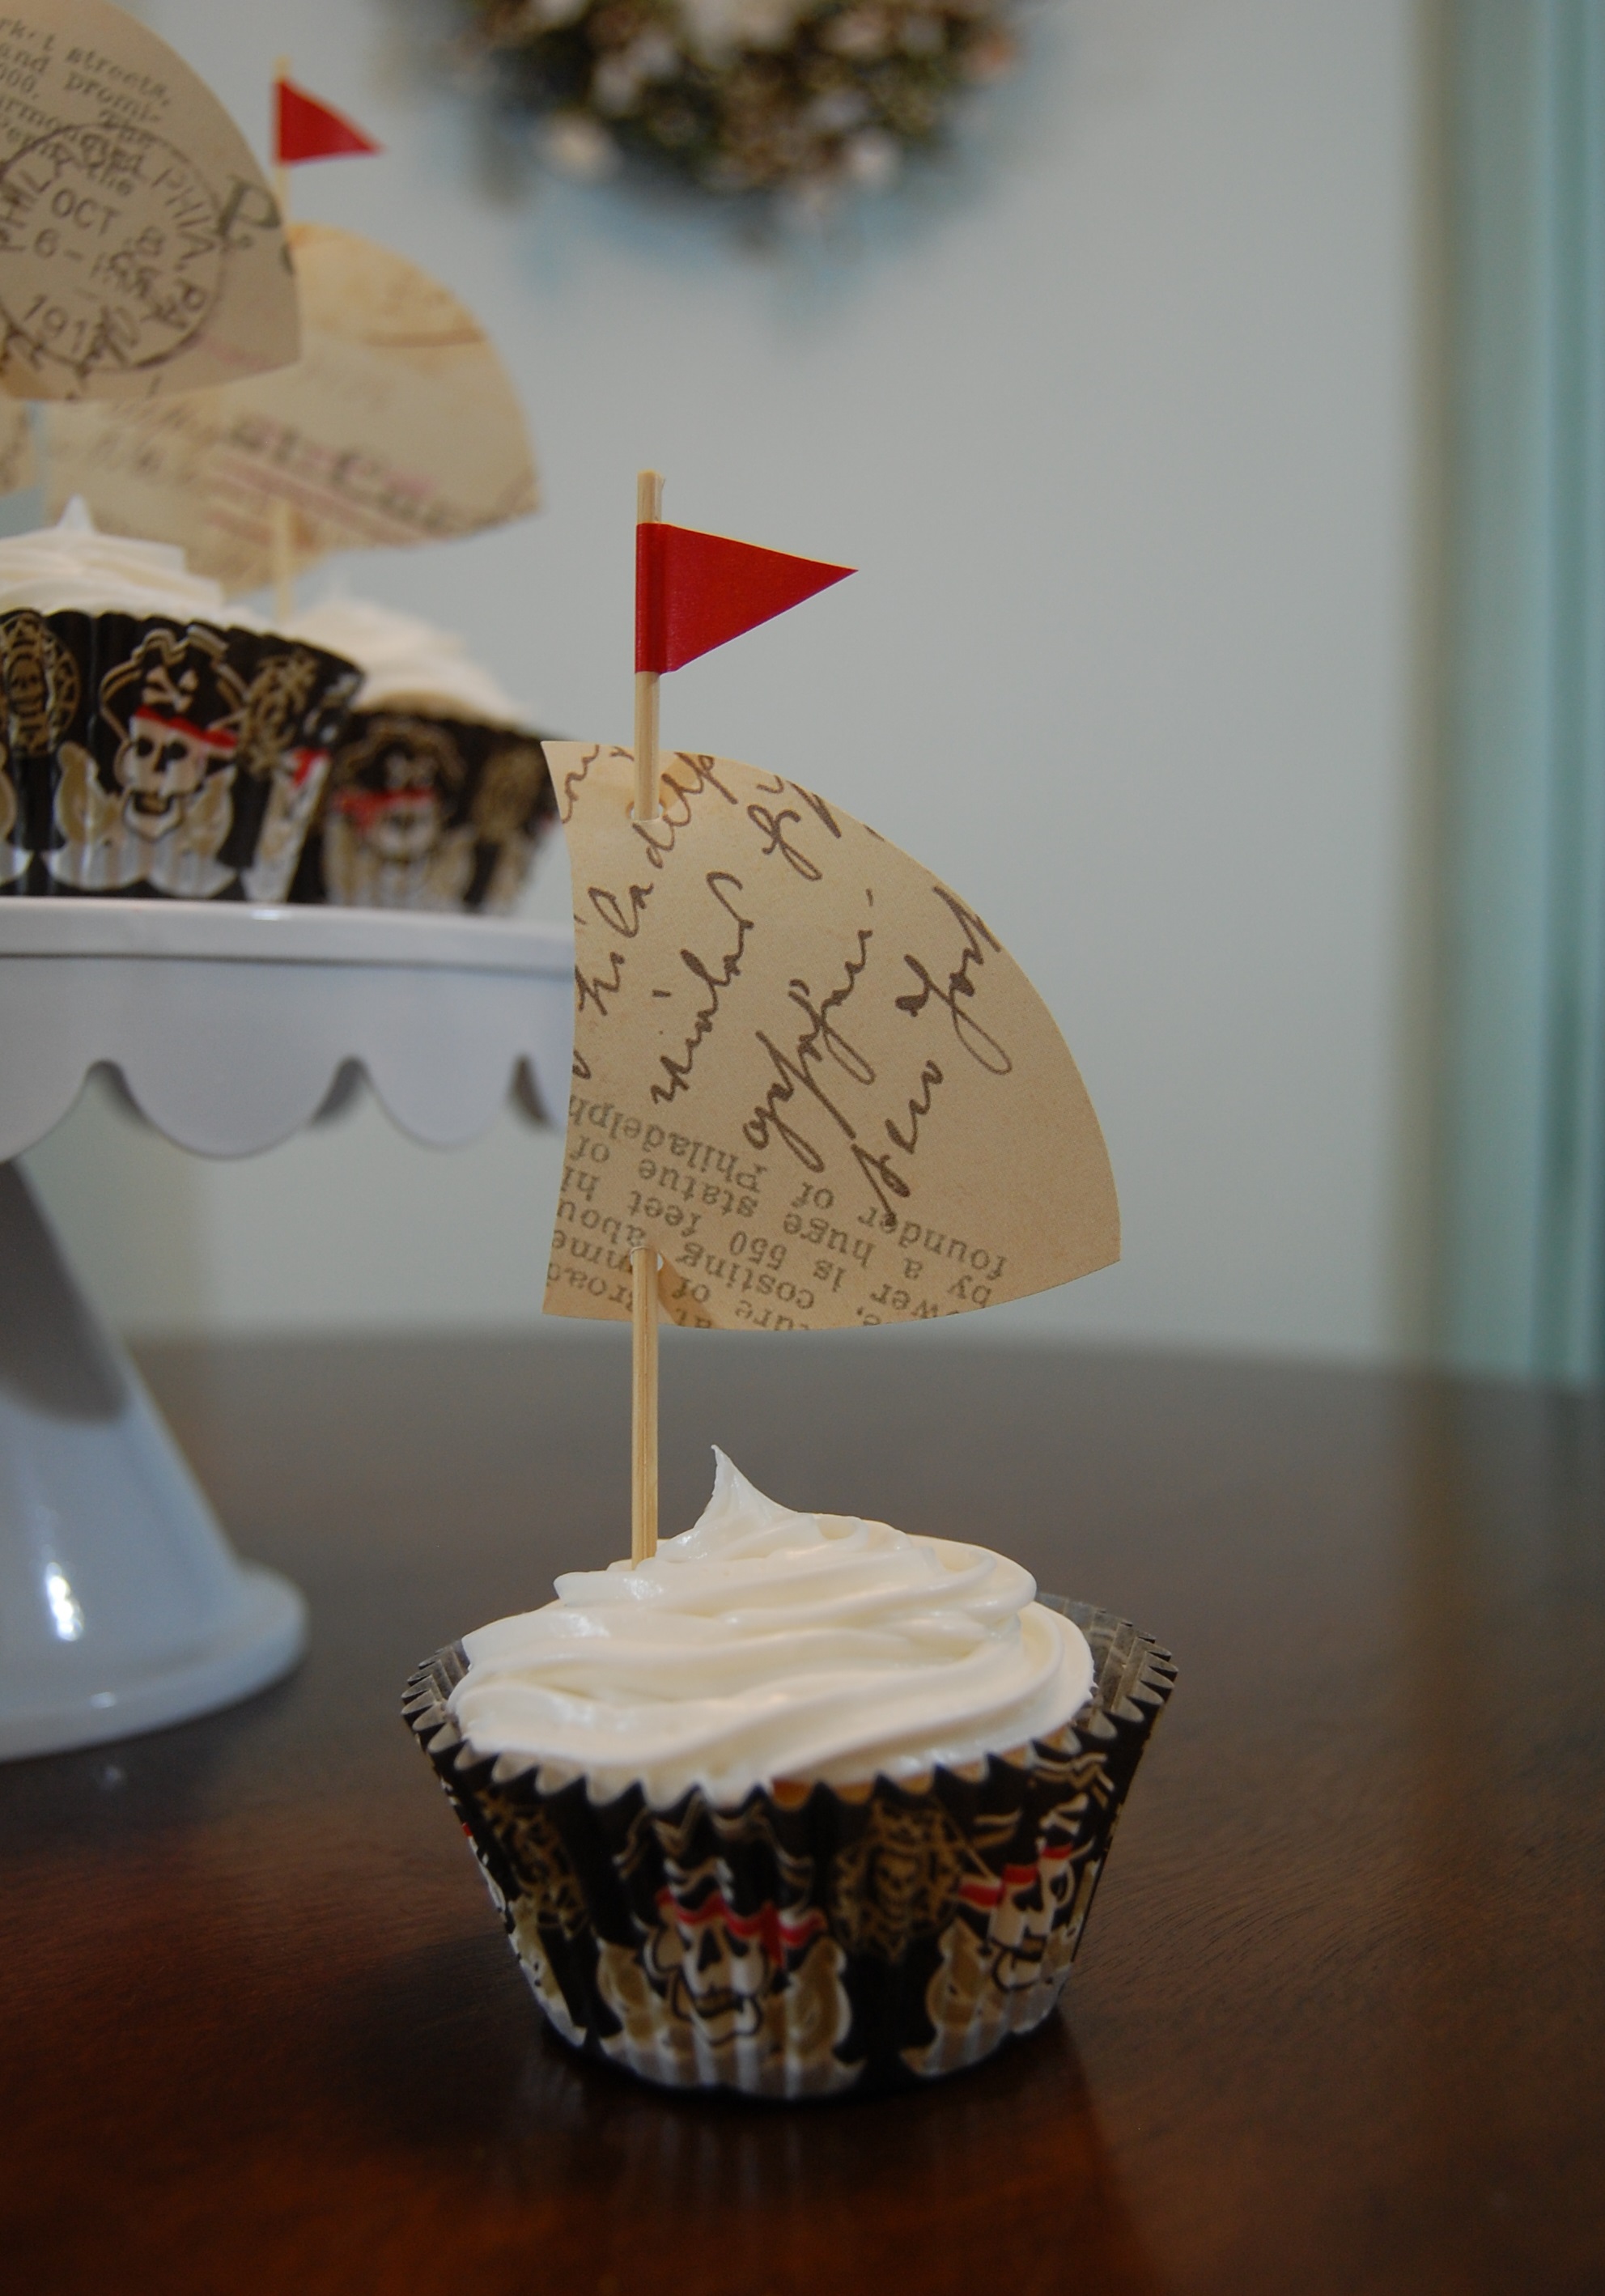
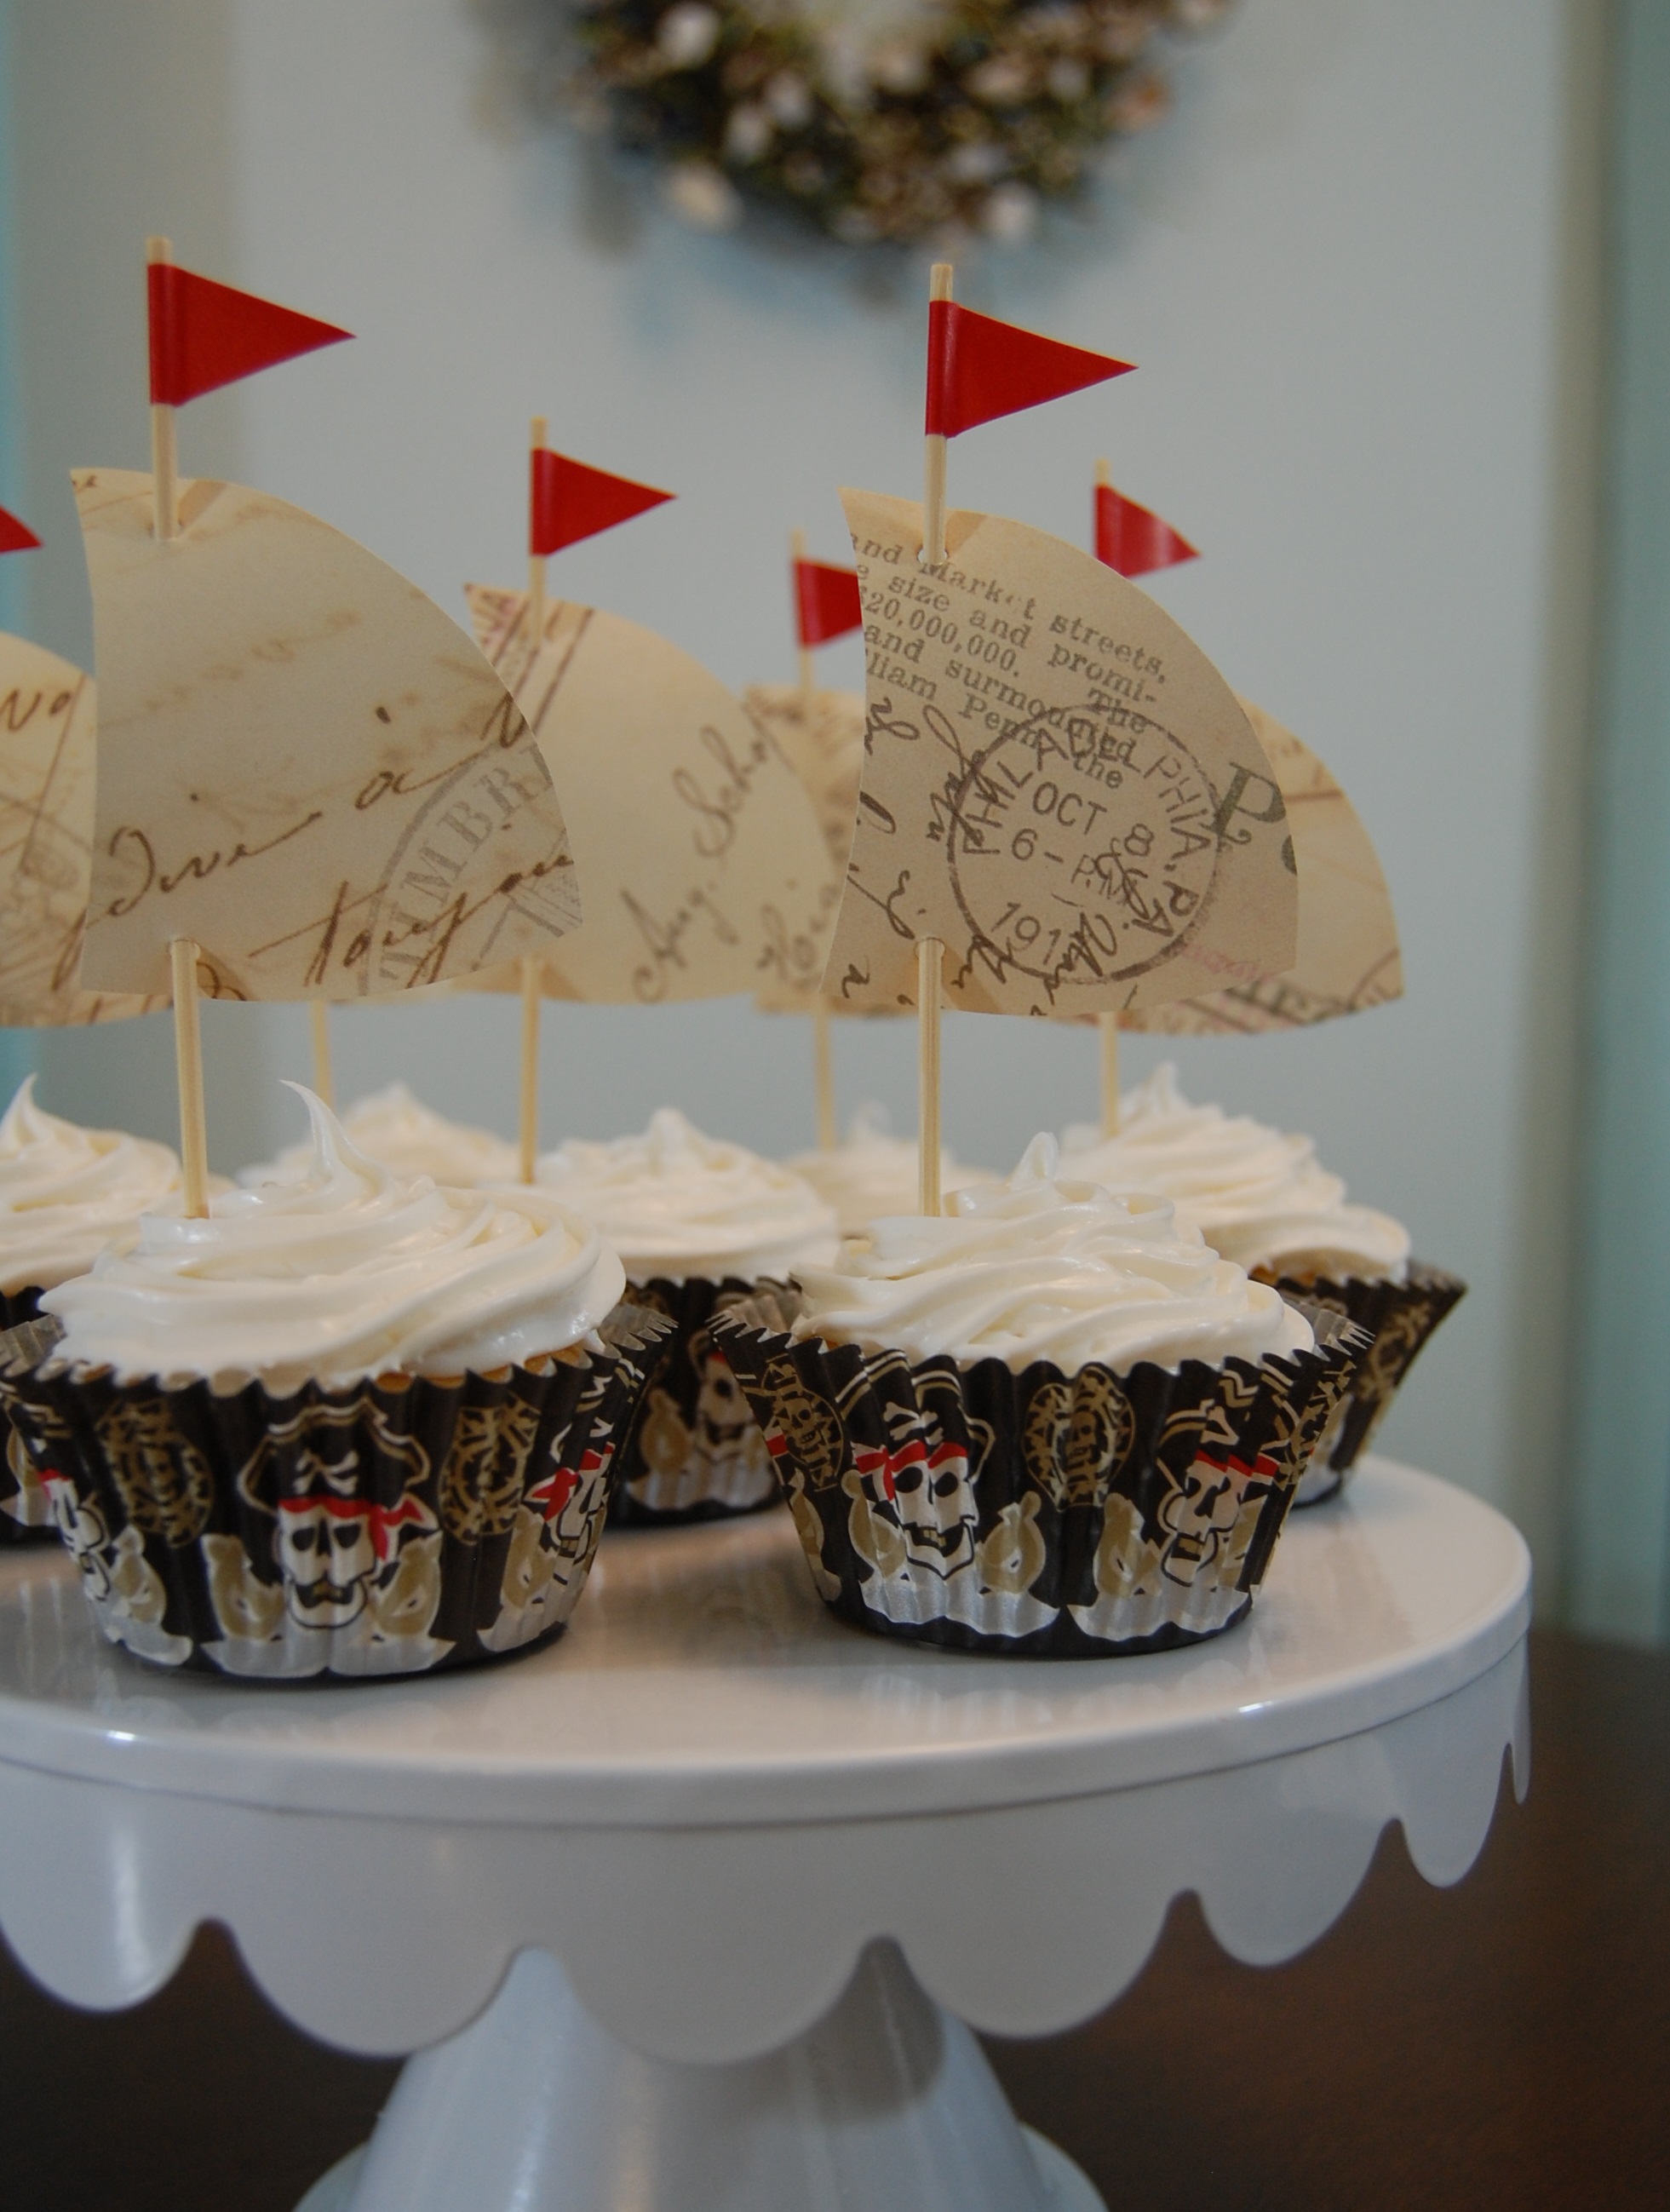
Pirate Ships Materials: Cupcakes in pirate themed papers, 6″ wooden skewers, decorative paper of your choosing, washi tape, scissors, small hole punch, (I found that a regular size hole punch was too large. If you don’t have a small hole punch, you could carefully cut slits in the sail using an x-acto knife.) pastry decorating kit with star tip
Cut scrapbook paper to 2.5″H x 2.25″W. Trim into sail shapes as pictured. Punch small holes into the sails, top and bottom. Fold washi tape over the skewer at the blunt end and press to seal. Trim the tape into triangle flags. Slide the sail onto the skewer below the flag.
Using the star tip, frost the cupcakes. Skewer the ships with the sails toward the front of the cupcake.
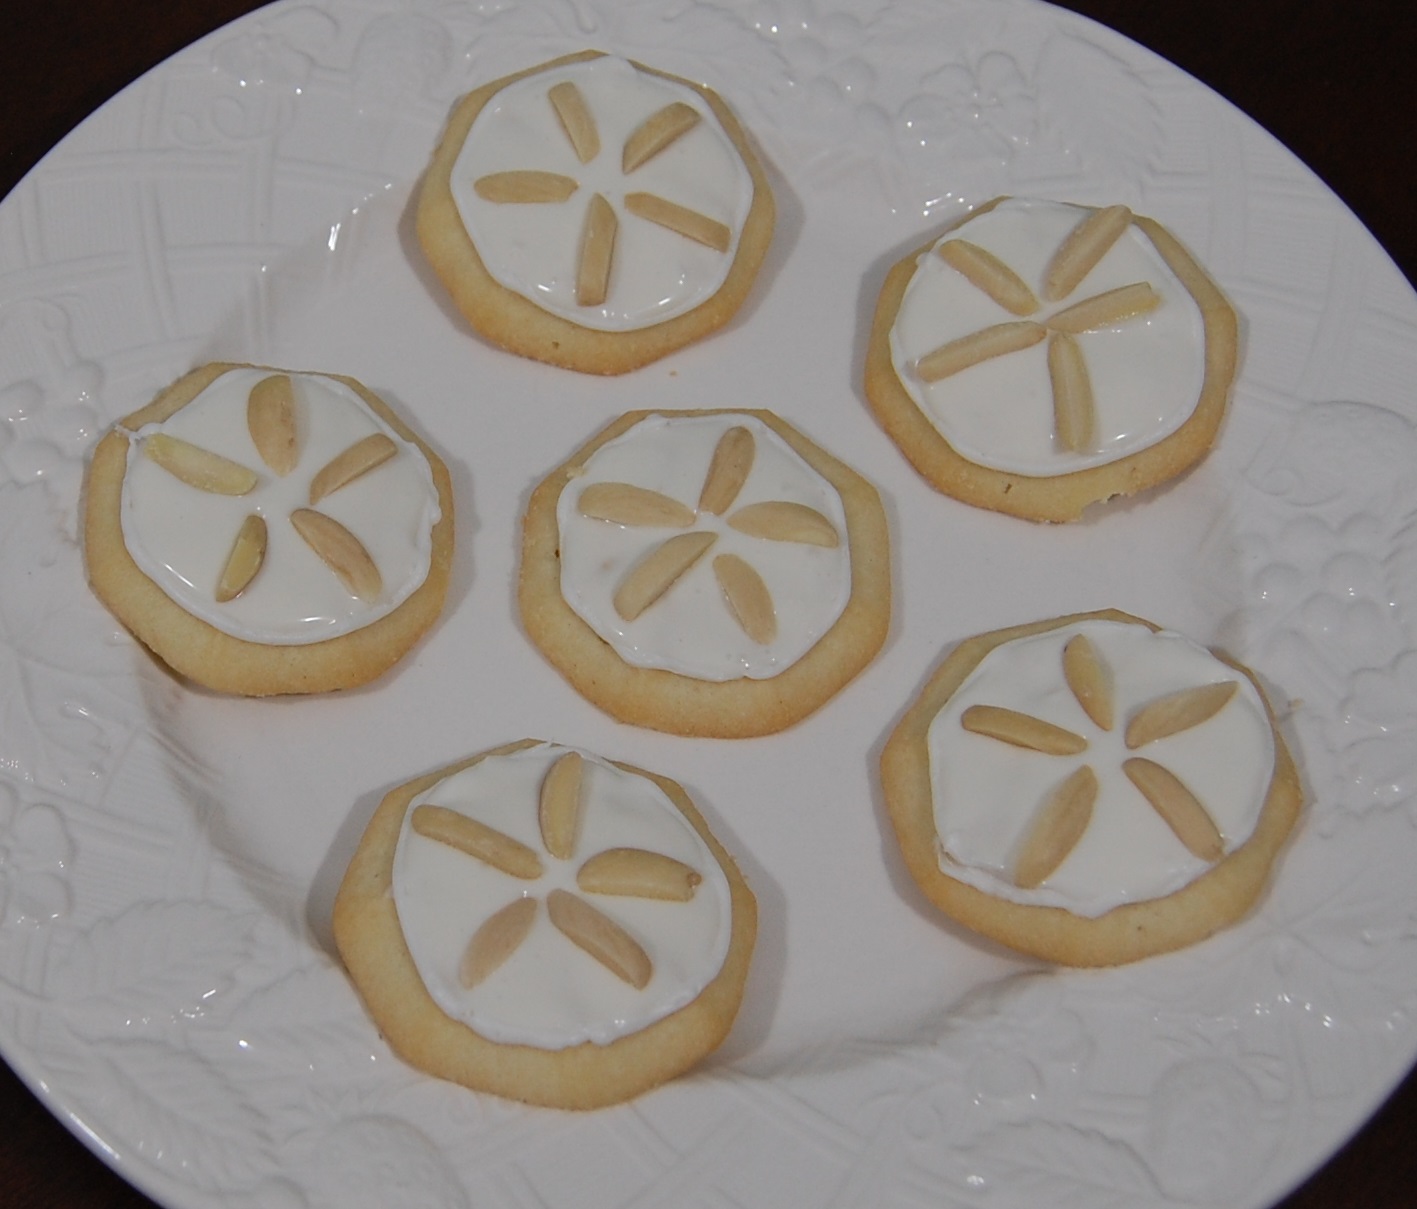
Sand Dollars Materials: Round cookies, white frosting, slivered almonds, pastry decorating kit with medium round tip, milk or cream for thinning frosting
A note about the frosting: If you are thinning this type of pre-made frosting, it will not set up firmly. That was fine with me, because I did not plan on stacking the cookies. If you need to stack or transport your sand dollars, use royal icing instead. https://www.foodnetwork.com/recipes/alton-brown/royal-icing-recipe-1941917
If you’re pressed for time, make these! I piped frosting in a circle to create a border edge. Then I mixed whipping cream into the frosting, one teaspoon at a time, until the frosting flowed smoothly.
Fill the center of the cookie, and add the almonds in a star shape.
Here’s your homework: Go fix some sweet treats, and see how often you can insert the word ‘drupelet’ into casual conversation! Have a great weekend!
Disclosure: In addition to occasional sponsored posts, Arthurized Home uses clickable affiliate links. That means that I may receive a small commission from sales at no extra charge to you. As always, my opinion is 100% my own, and I only recommend things that I truly love or use myself. Thank you for patronizing the brands that support Arthurized Home!
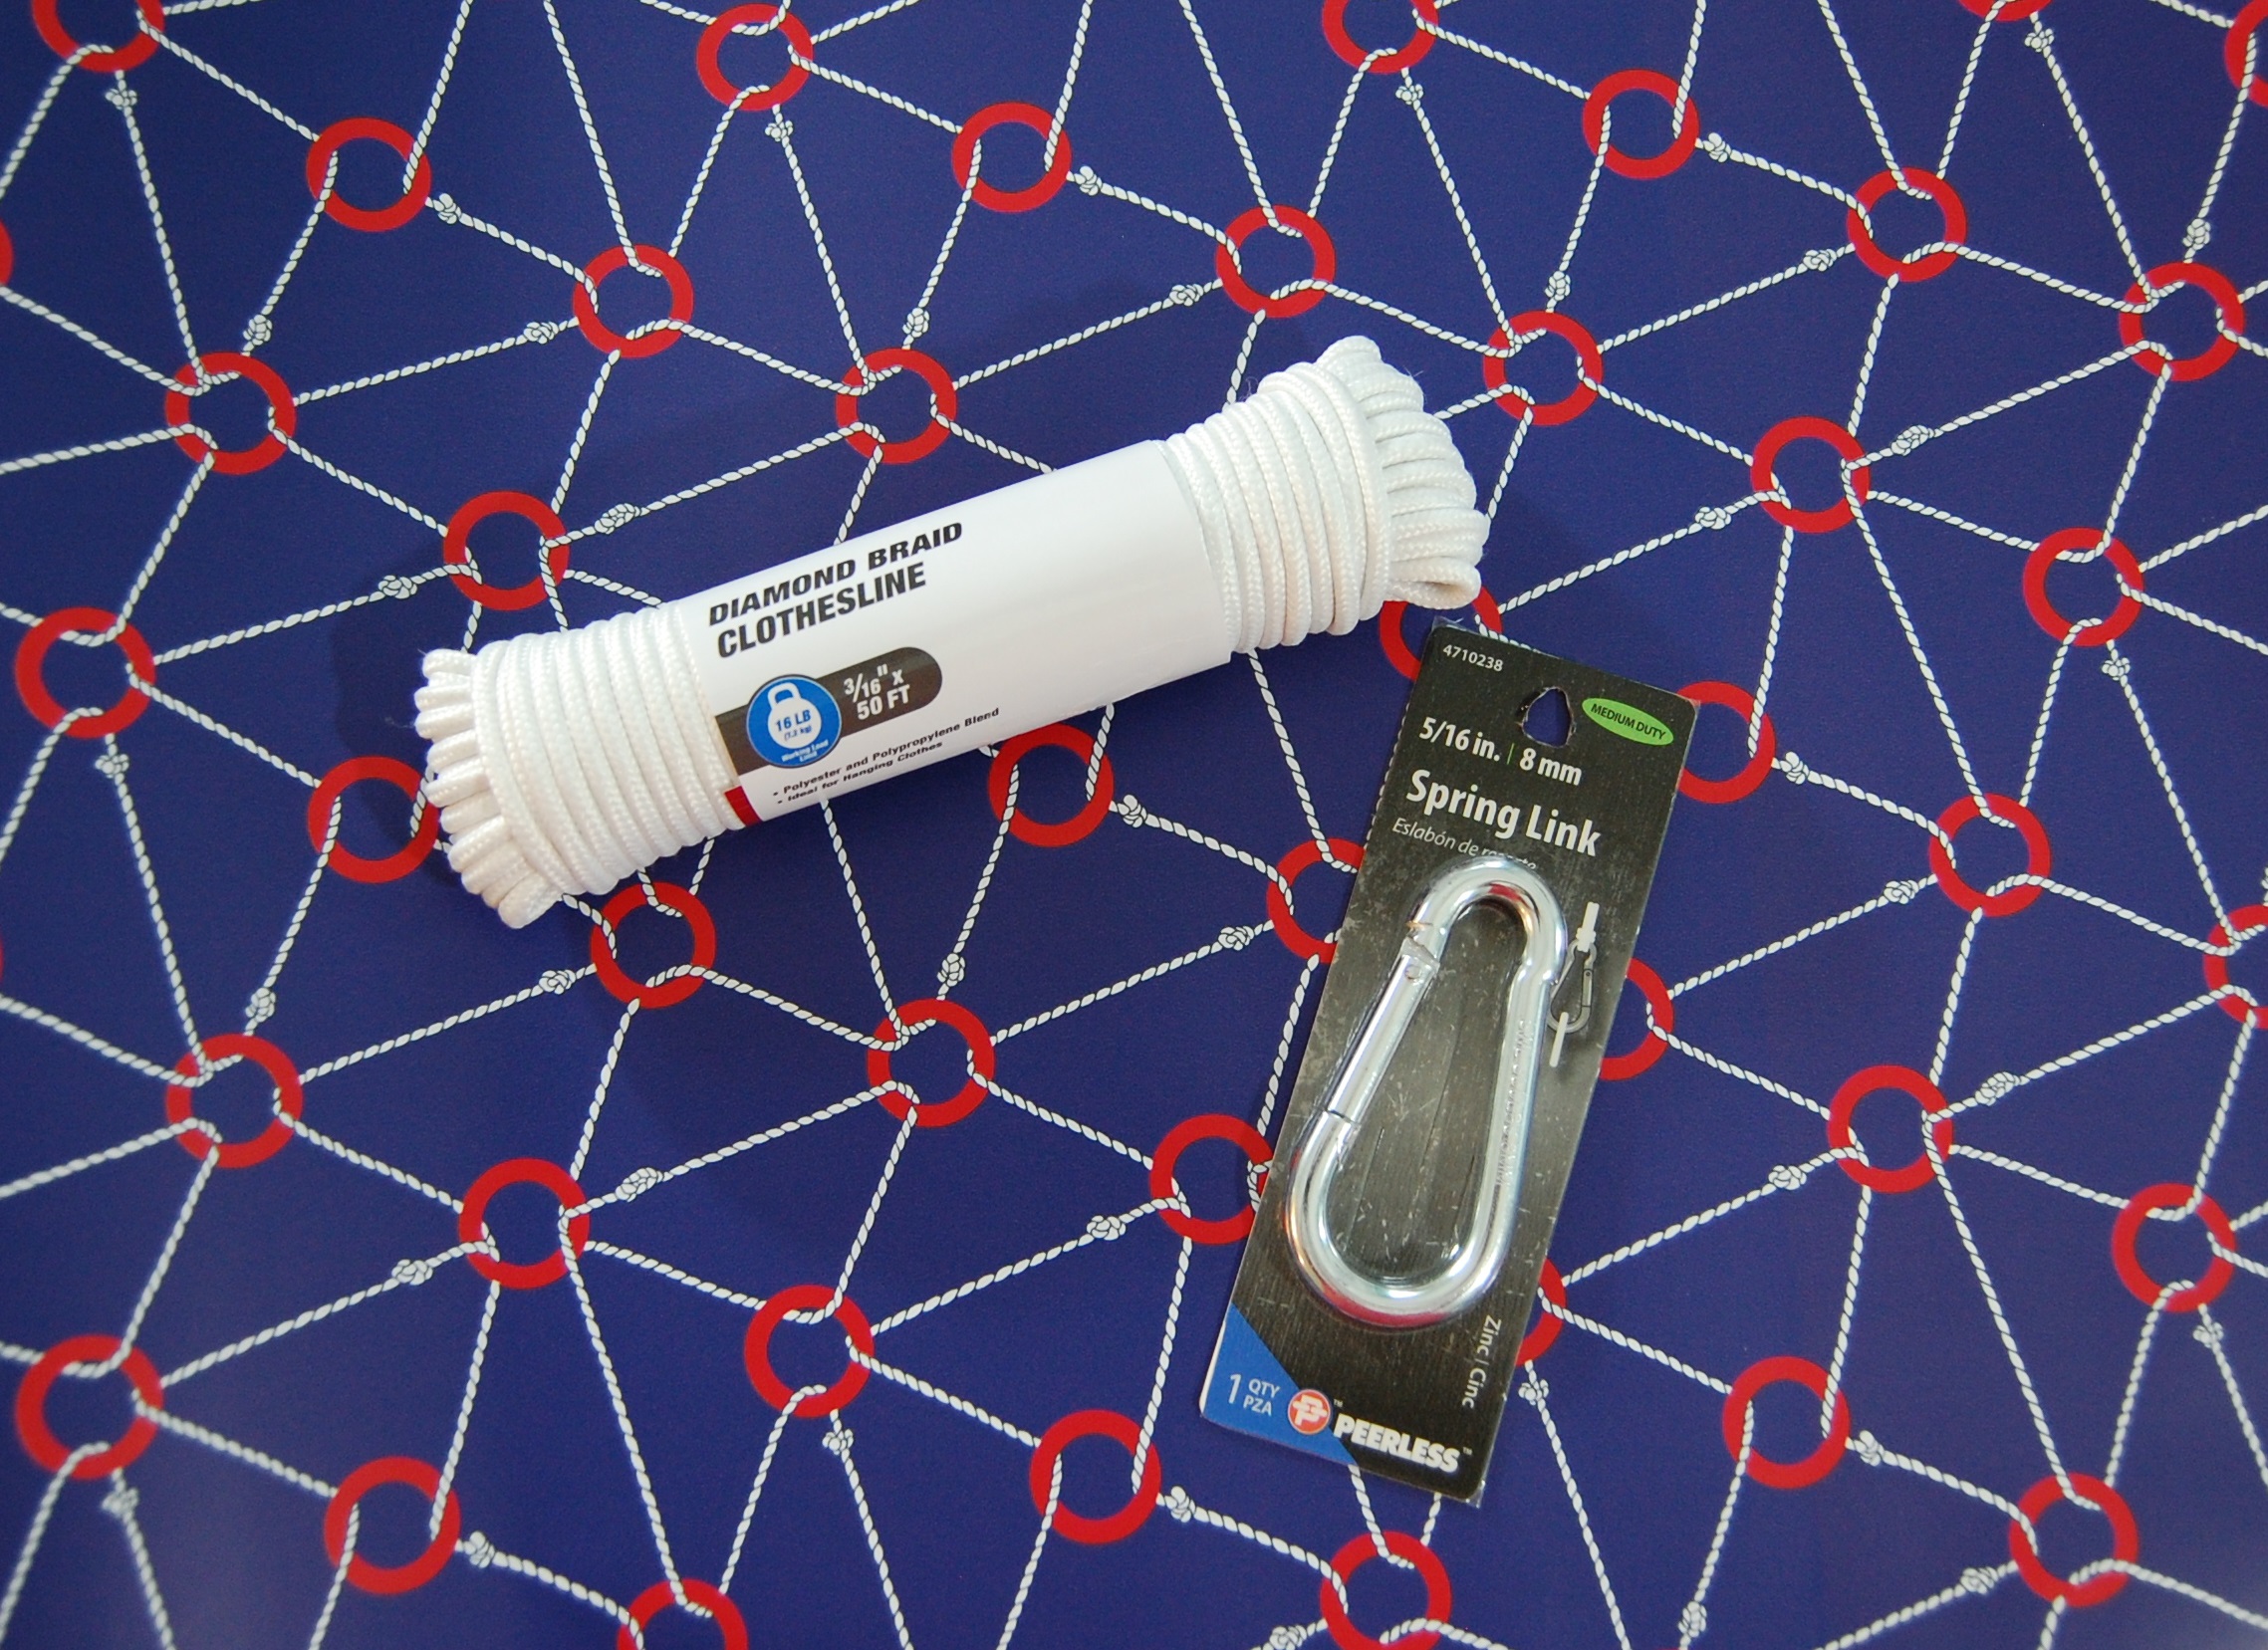
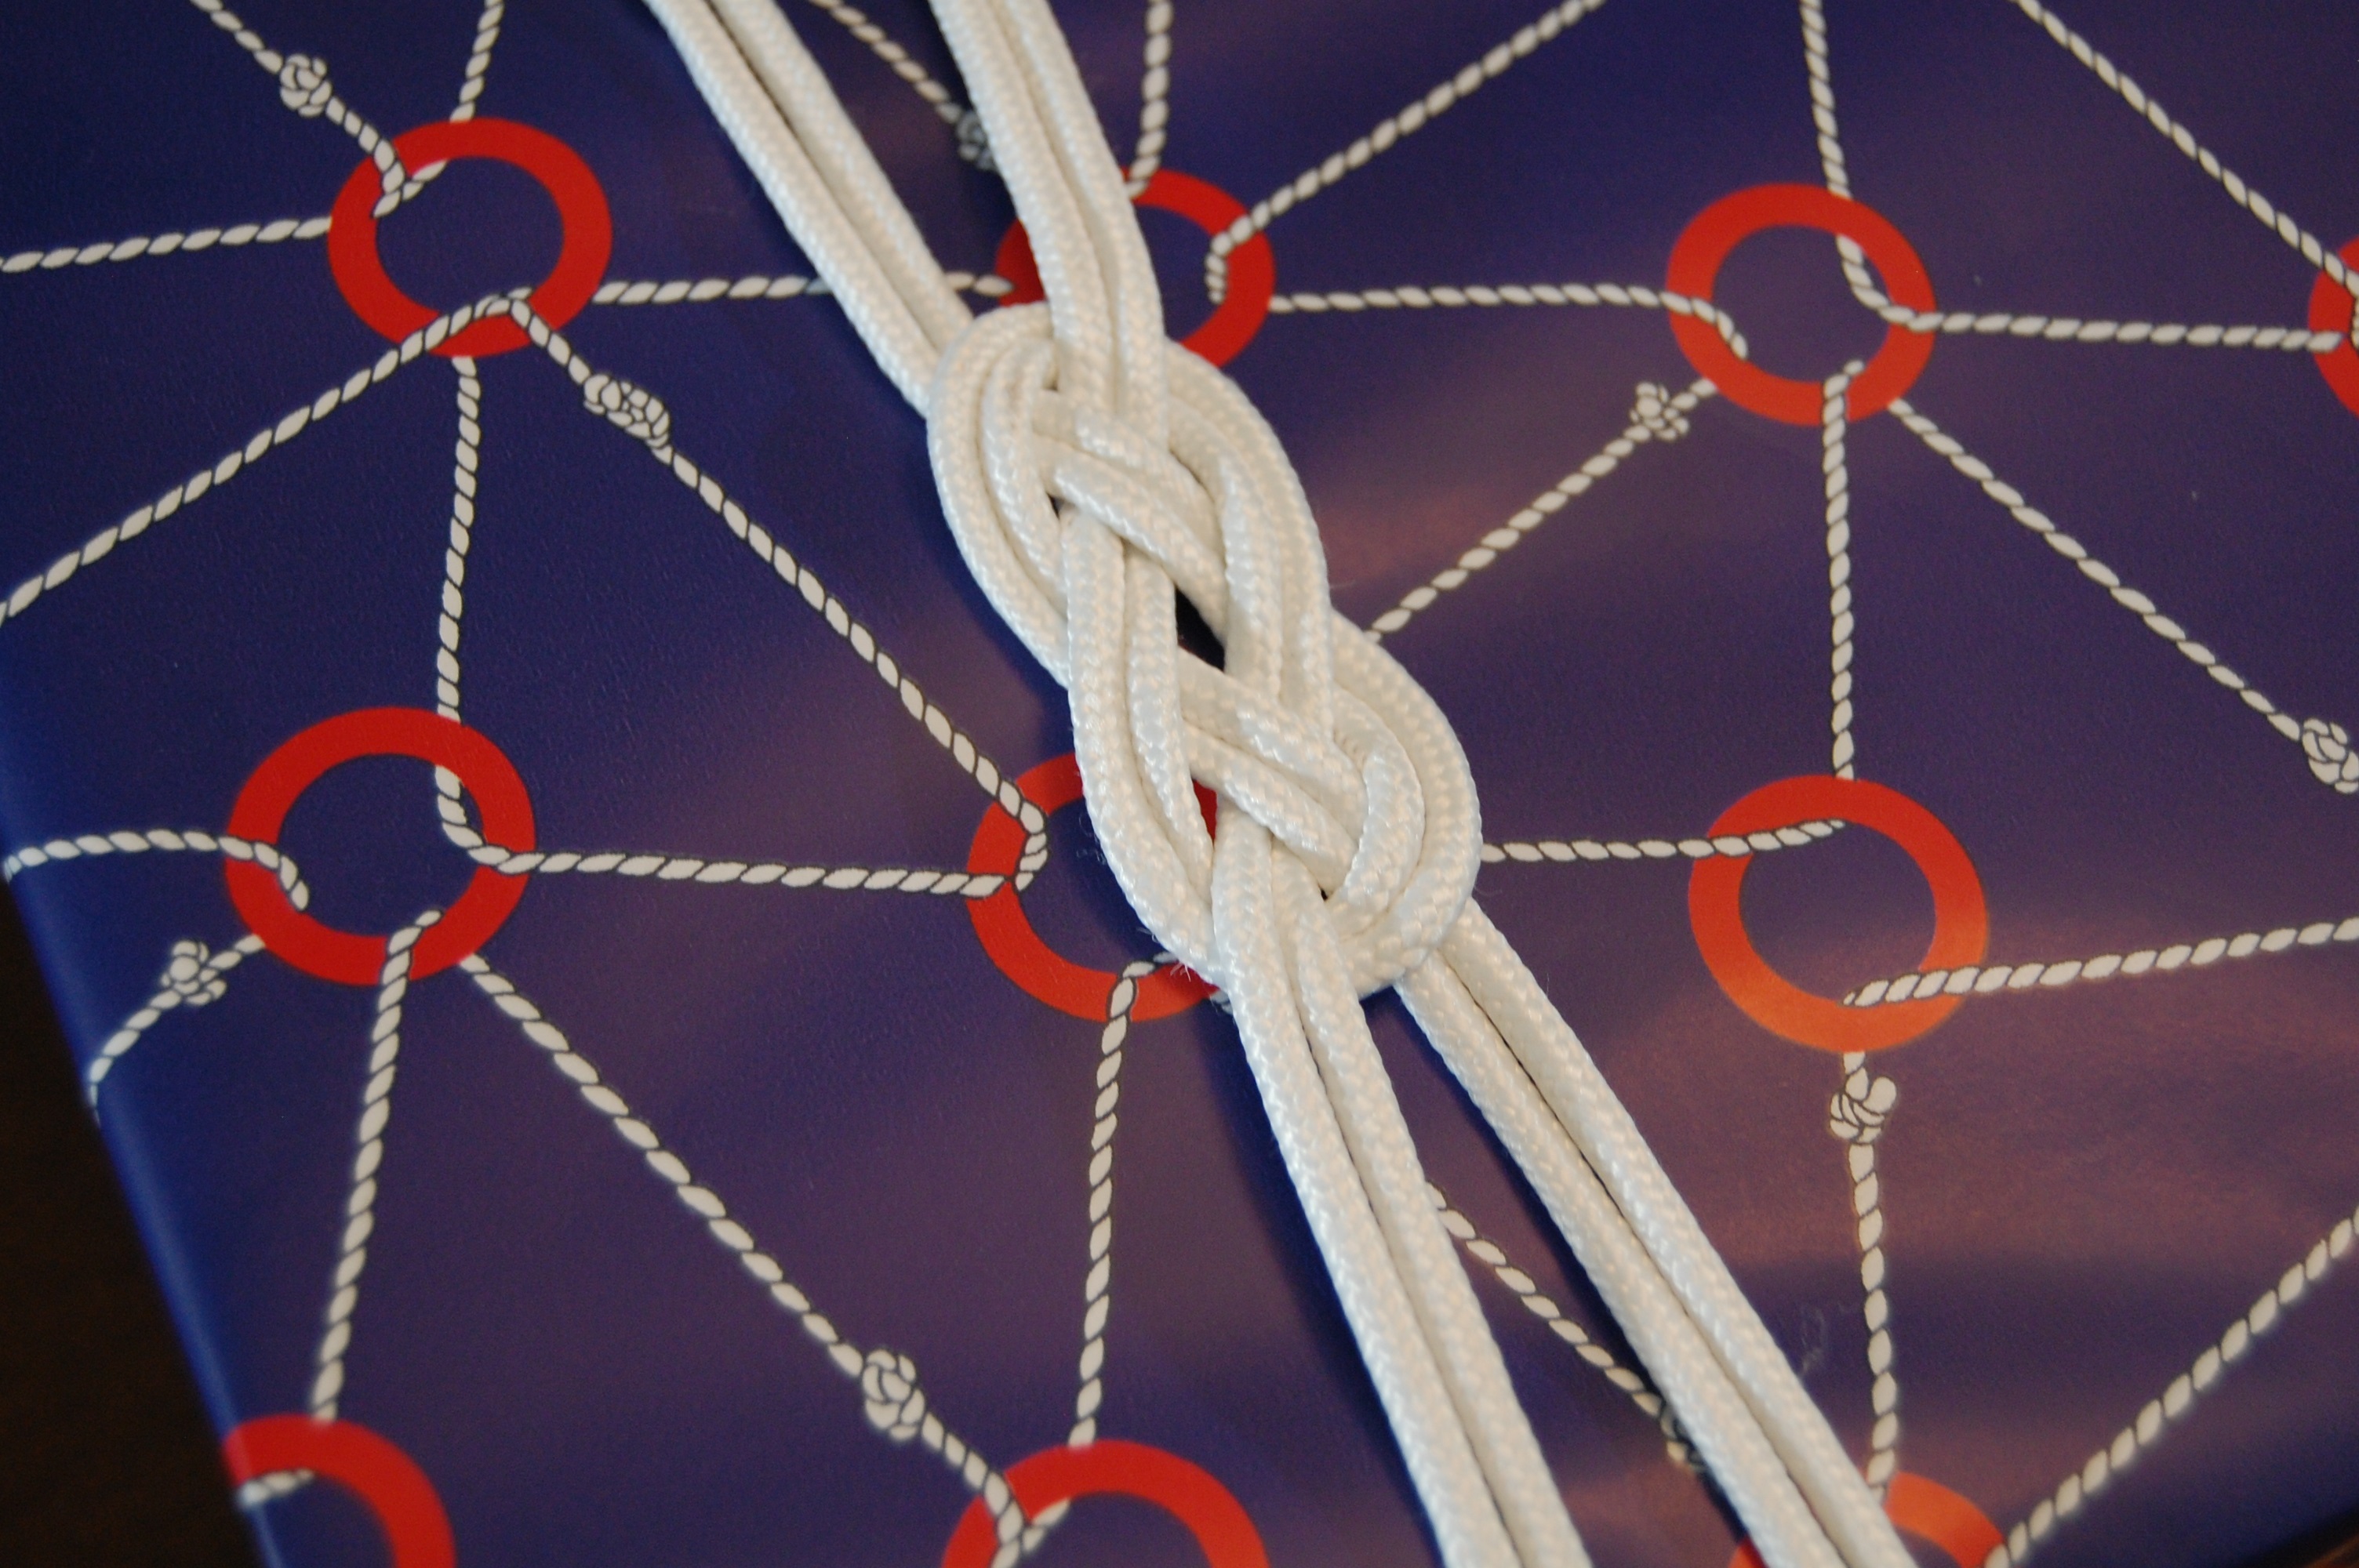
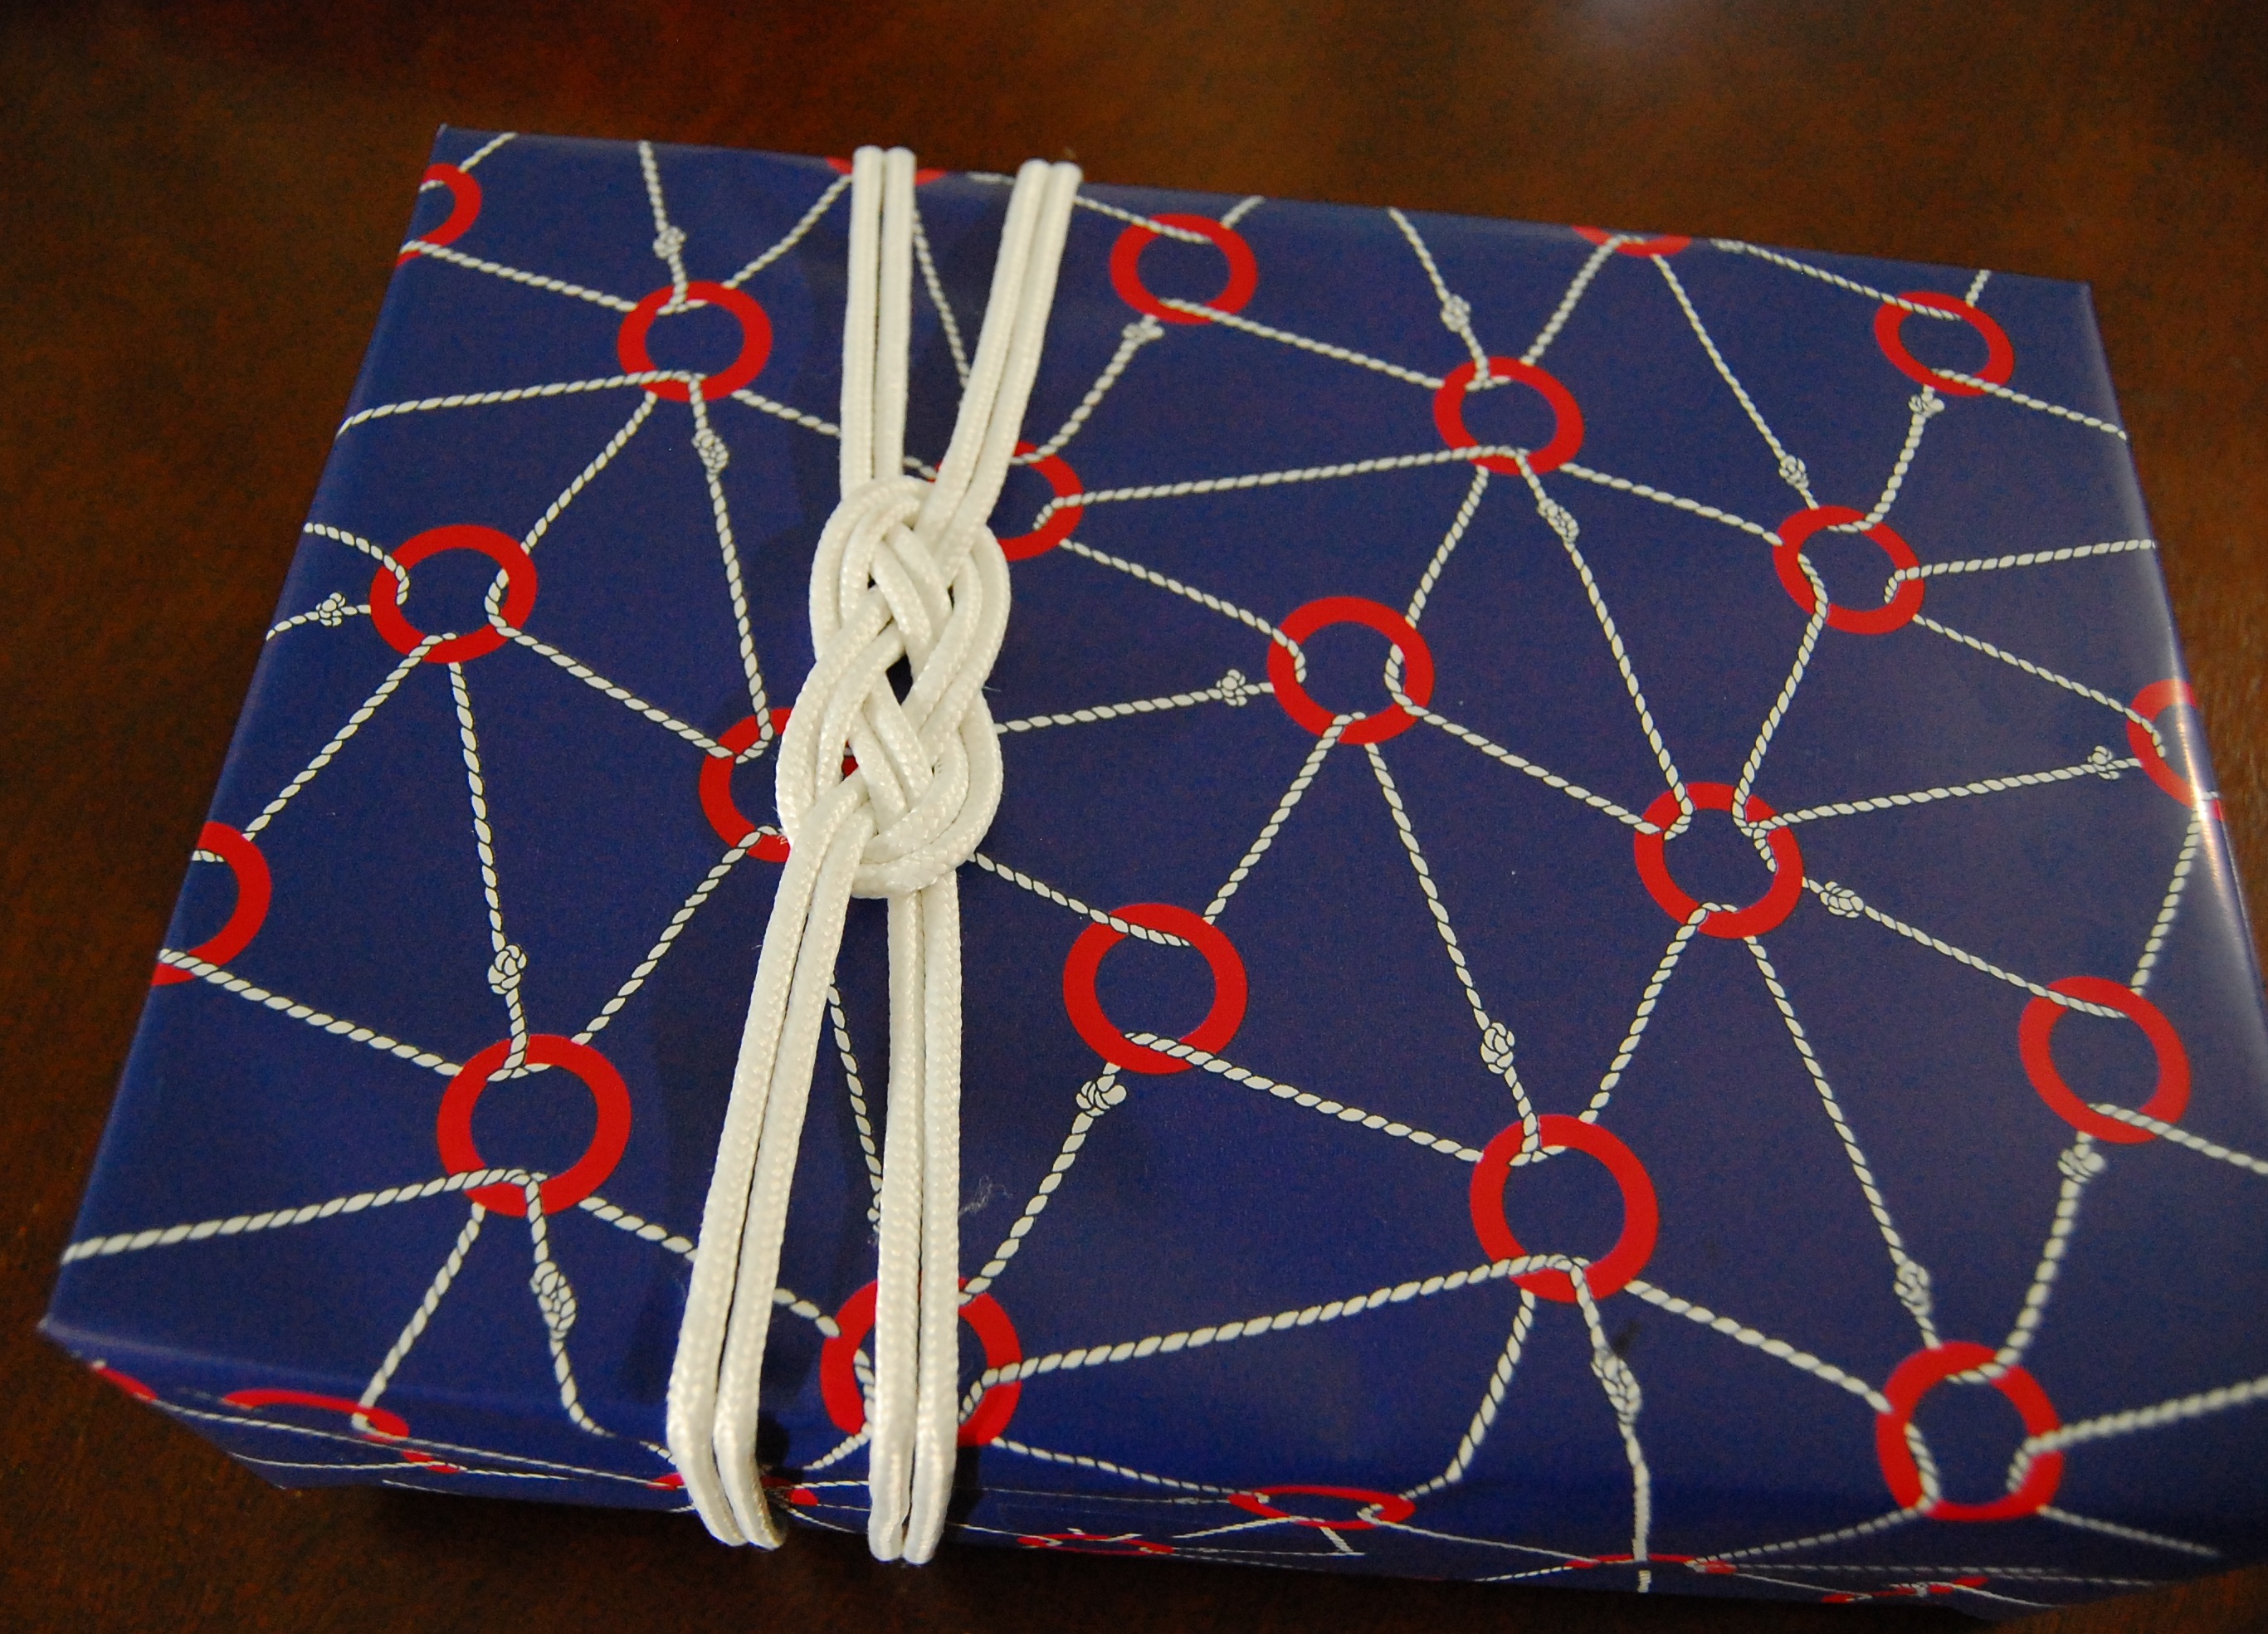
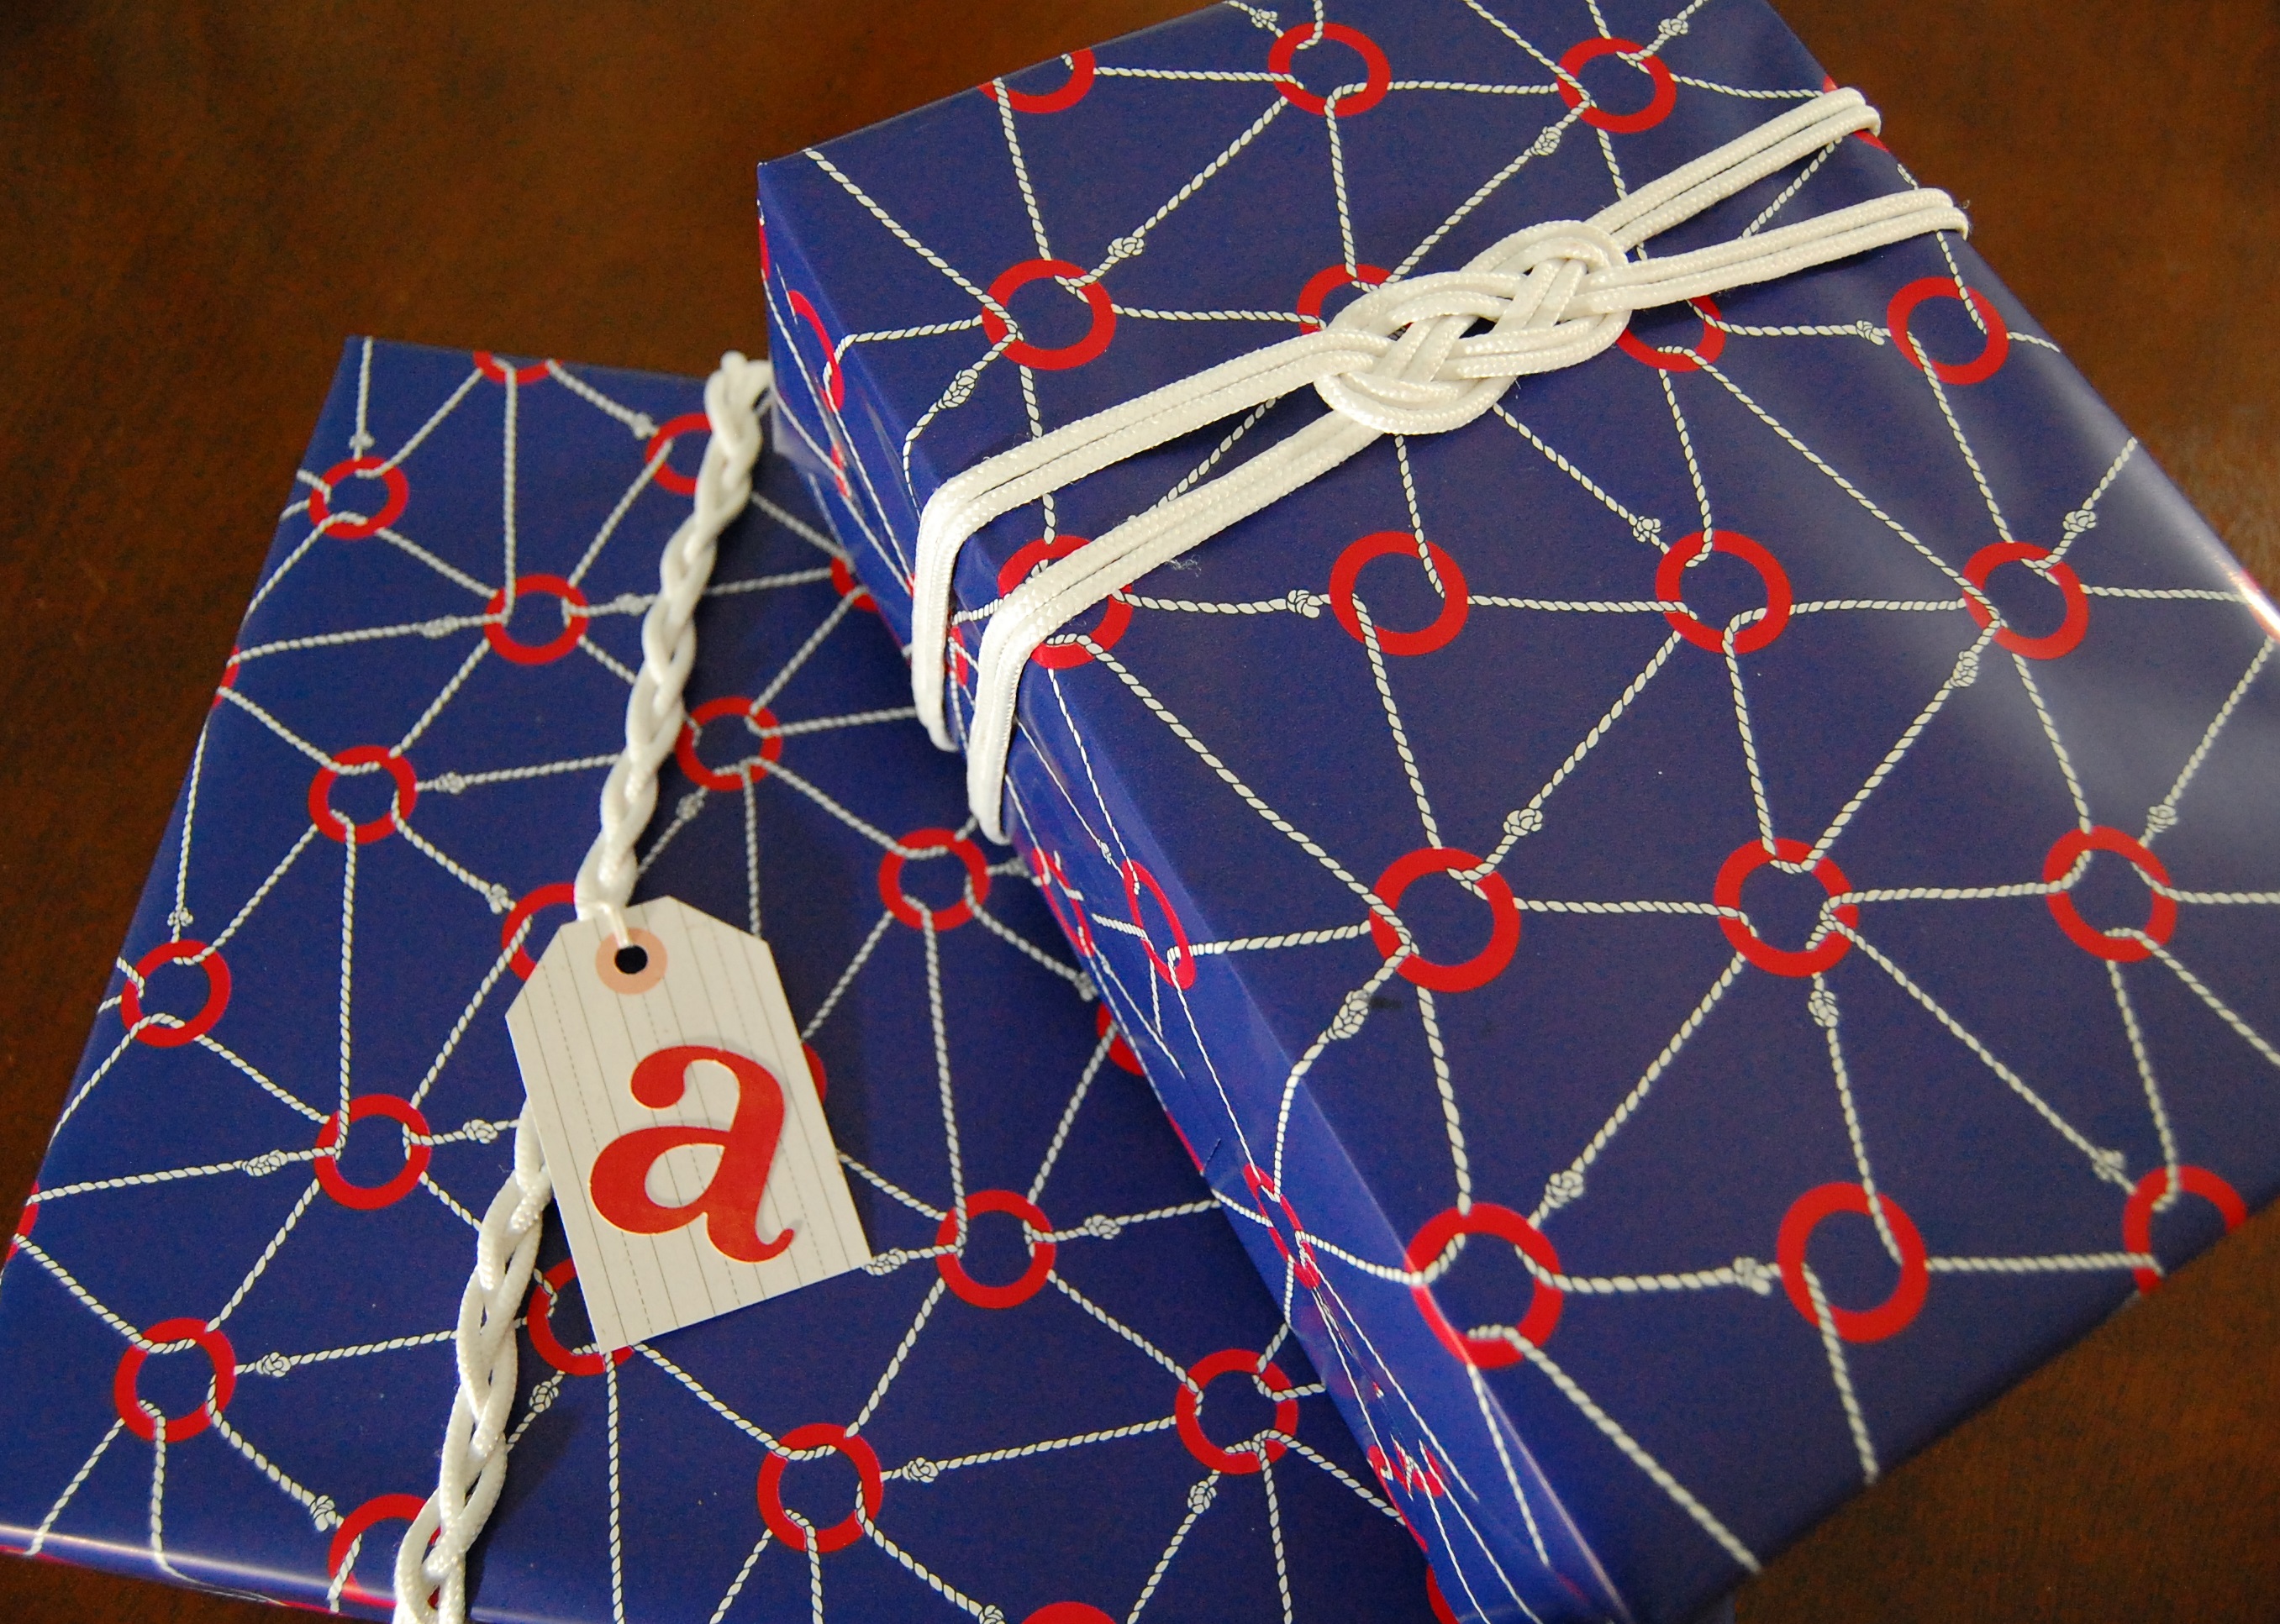
Here’s a quick and inexpensive way to add some interest to gift packages. Tie varied knots using lightweight rope instead of ribbon. In addition to being unusual, these embellishments are practical because they will not flatten during transport.
You will need: Nautical theme gift wrap (Maritime designs, maps, paper in beachy, bright colors would work as well) Gift Wrapping Tape Scissors Nylon clothesline or other rope – $2 Spring Link – optional – I call them caribiners – $2 Lighter – optional Large letter stickers and tags – optional
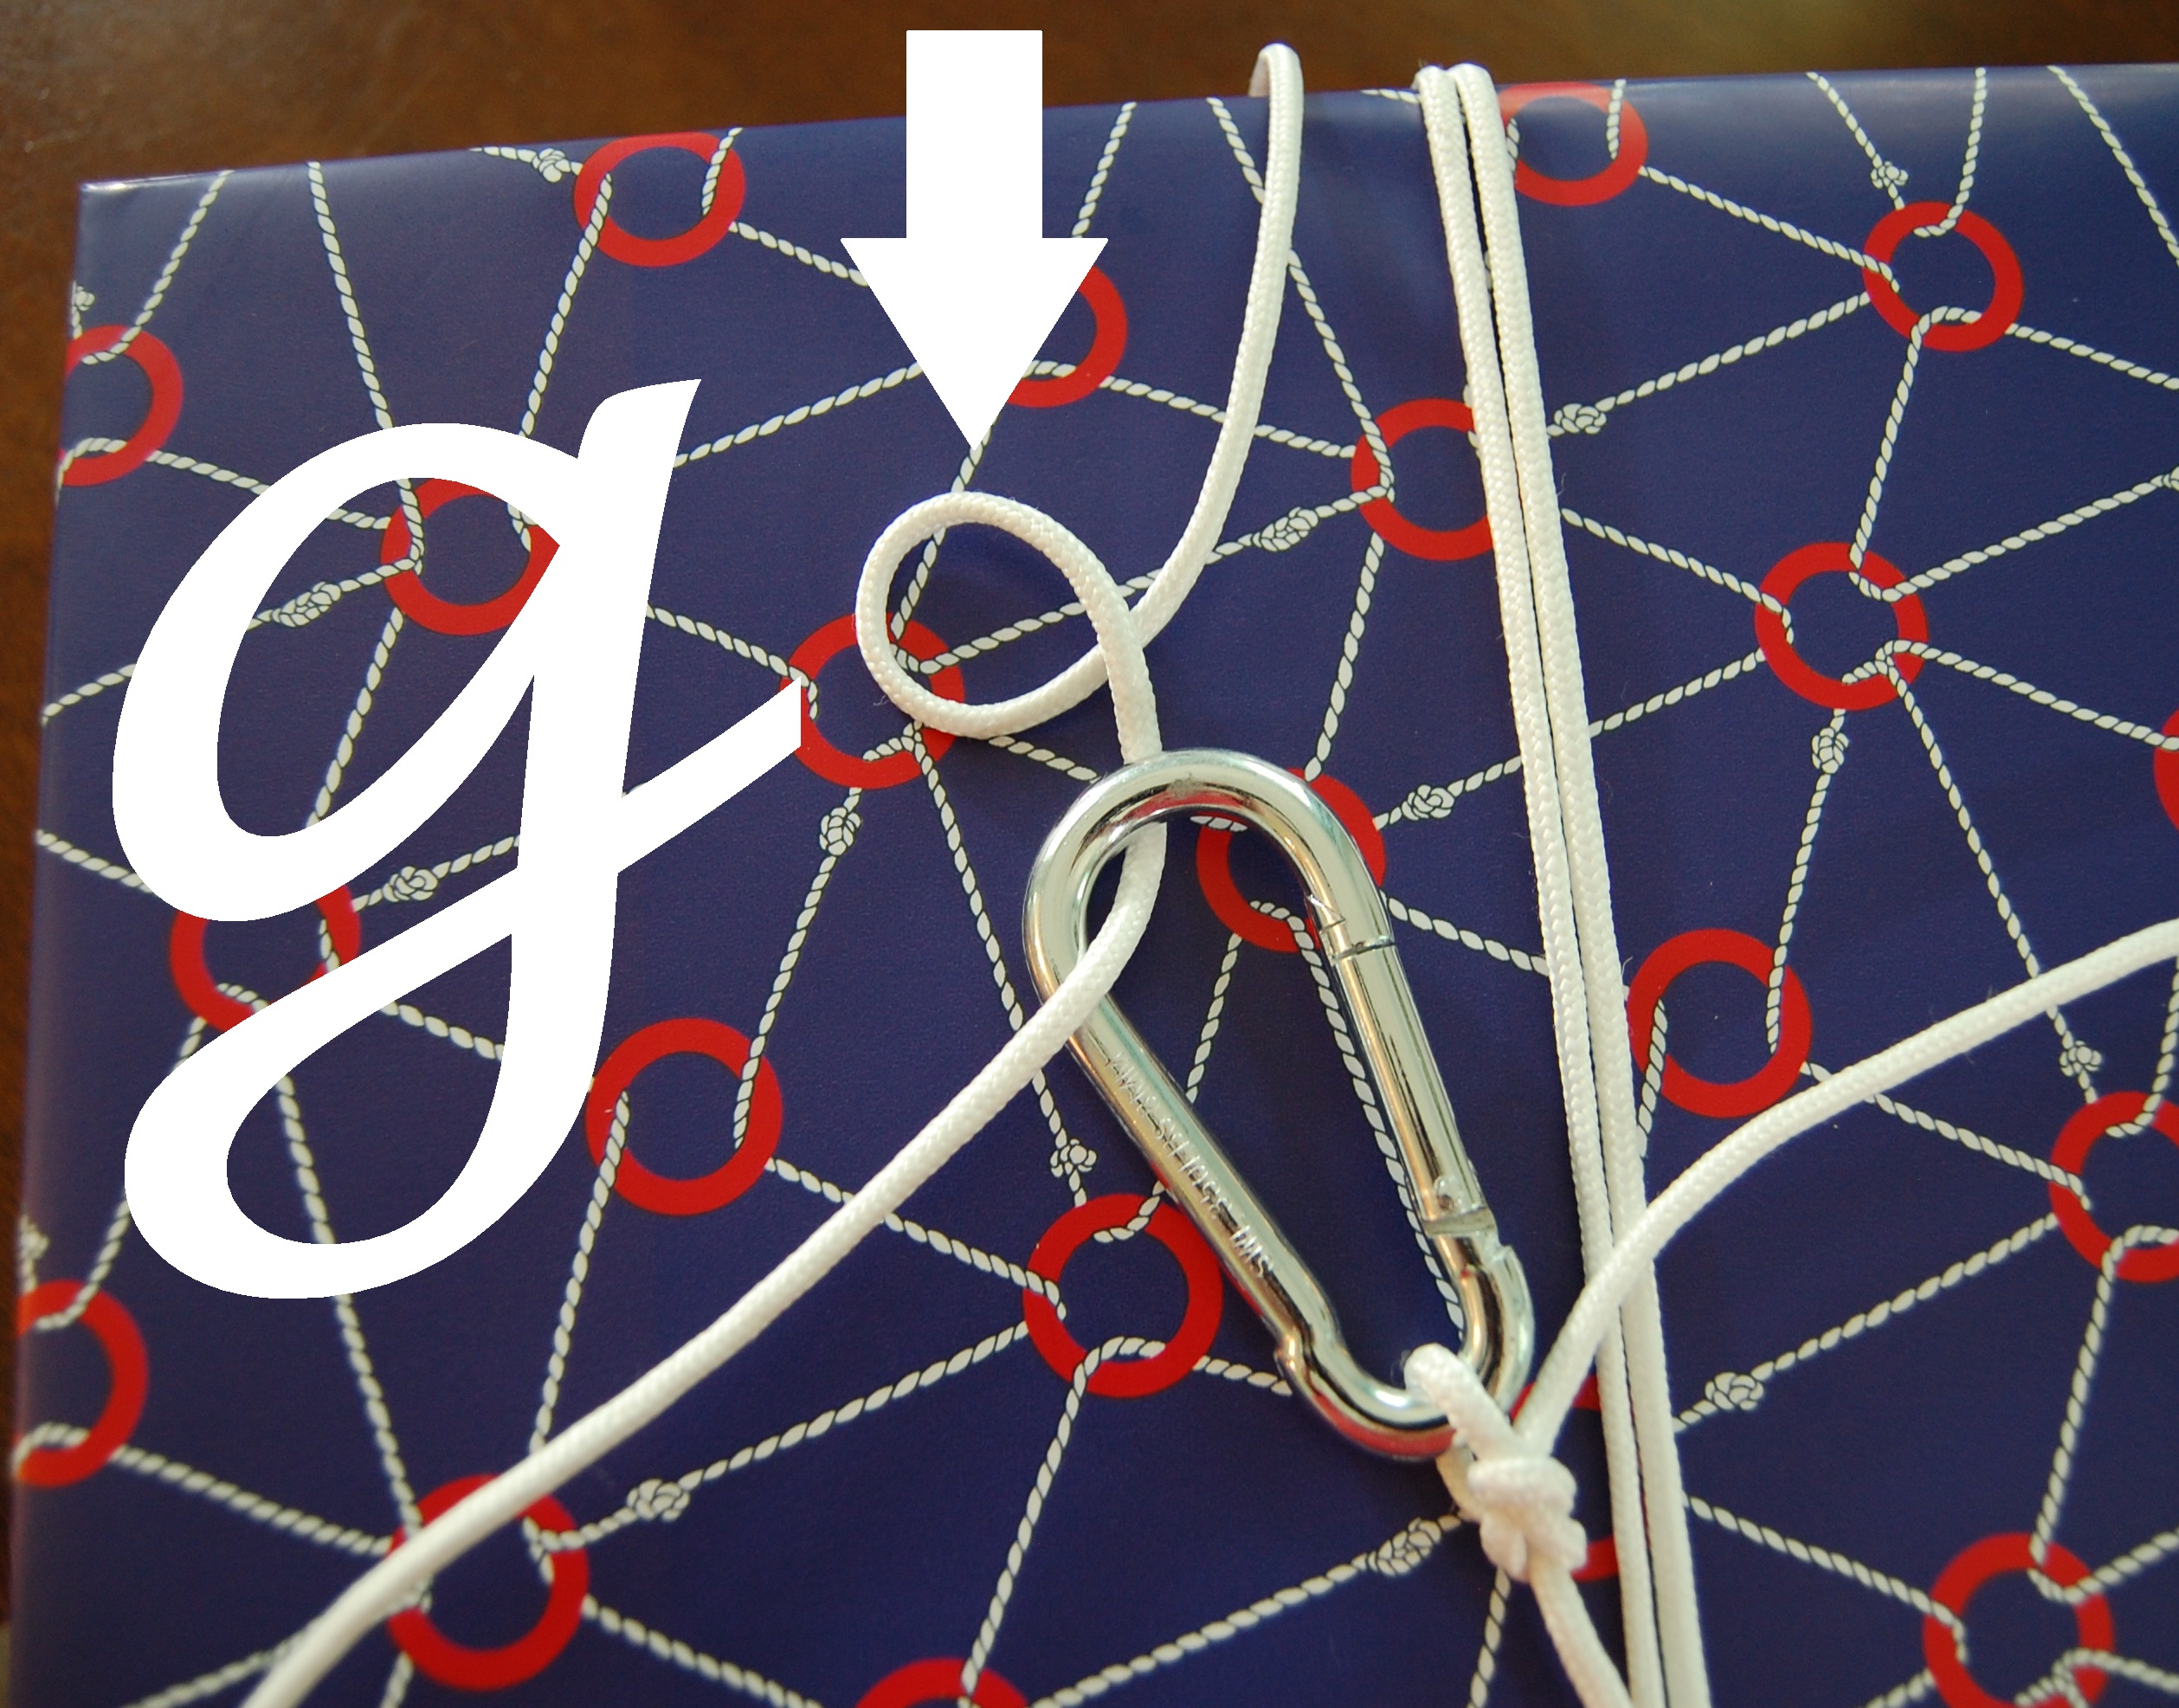
Unless you’re a knot-tying expert, (I’m knot! Get it? Heh.) watch the videos that I’ve linked below. You can play the video and pause when you needed, or click the right or left arrows to see one step at a time.
I struggled with this knot until I realized that the loop looked like a lowercase “g”. Do you see it?
After I tied the bowline knot on one end of the caribiner, I wrapped the rope snugly around the package a few times. Then I tied another bowline knot at the other end of the caribiner. Push the knot close to the caribiner before tightening, so that the rope stays fairly tight around the package.
Careful adults only step: I sealed the cut ends of the rope by melting them with a lighter. If you do this, please don’t set yourself (or anything else) on fire, and take care not to breathe fumes from melting plastic. Don’t attempt to seal the ends of cotton rope. We call those ‘candle wicks’.
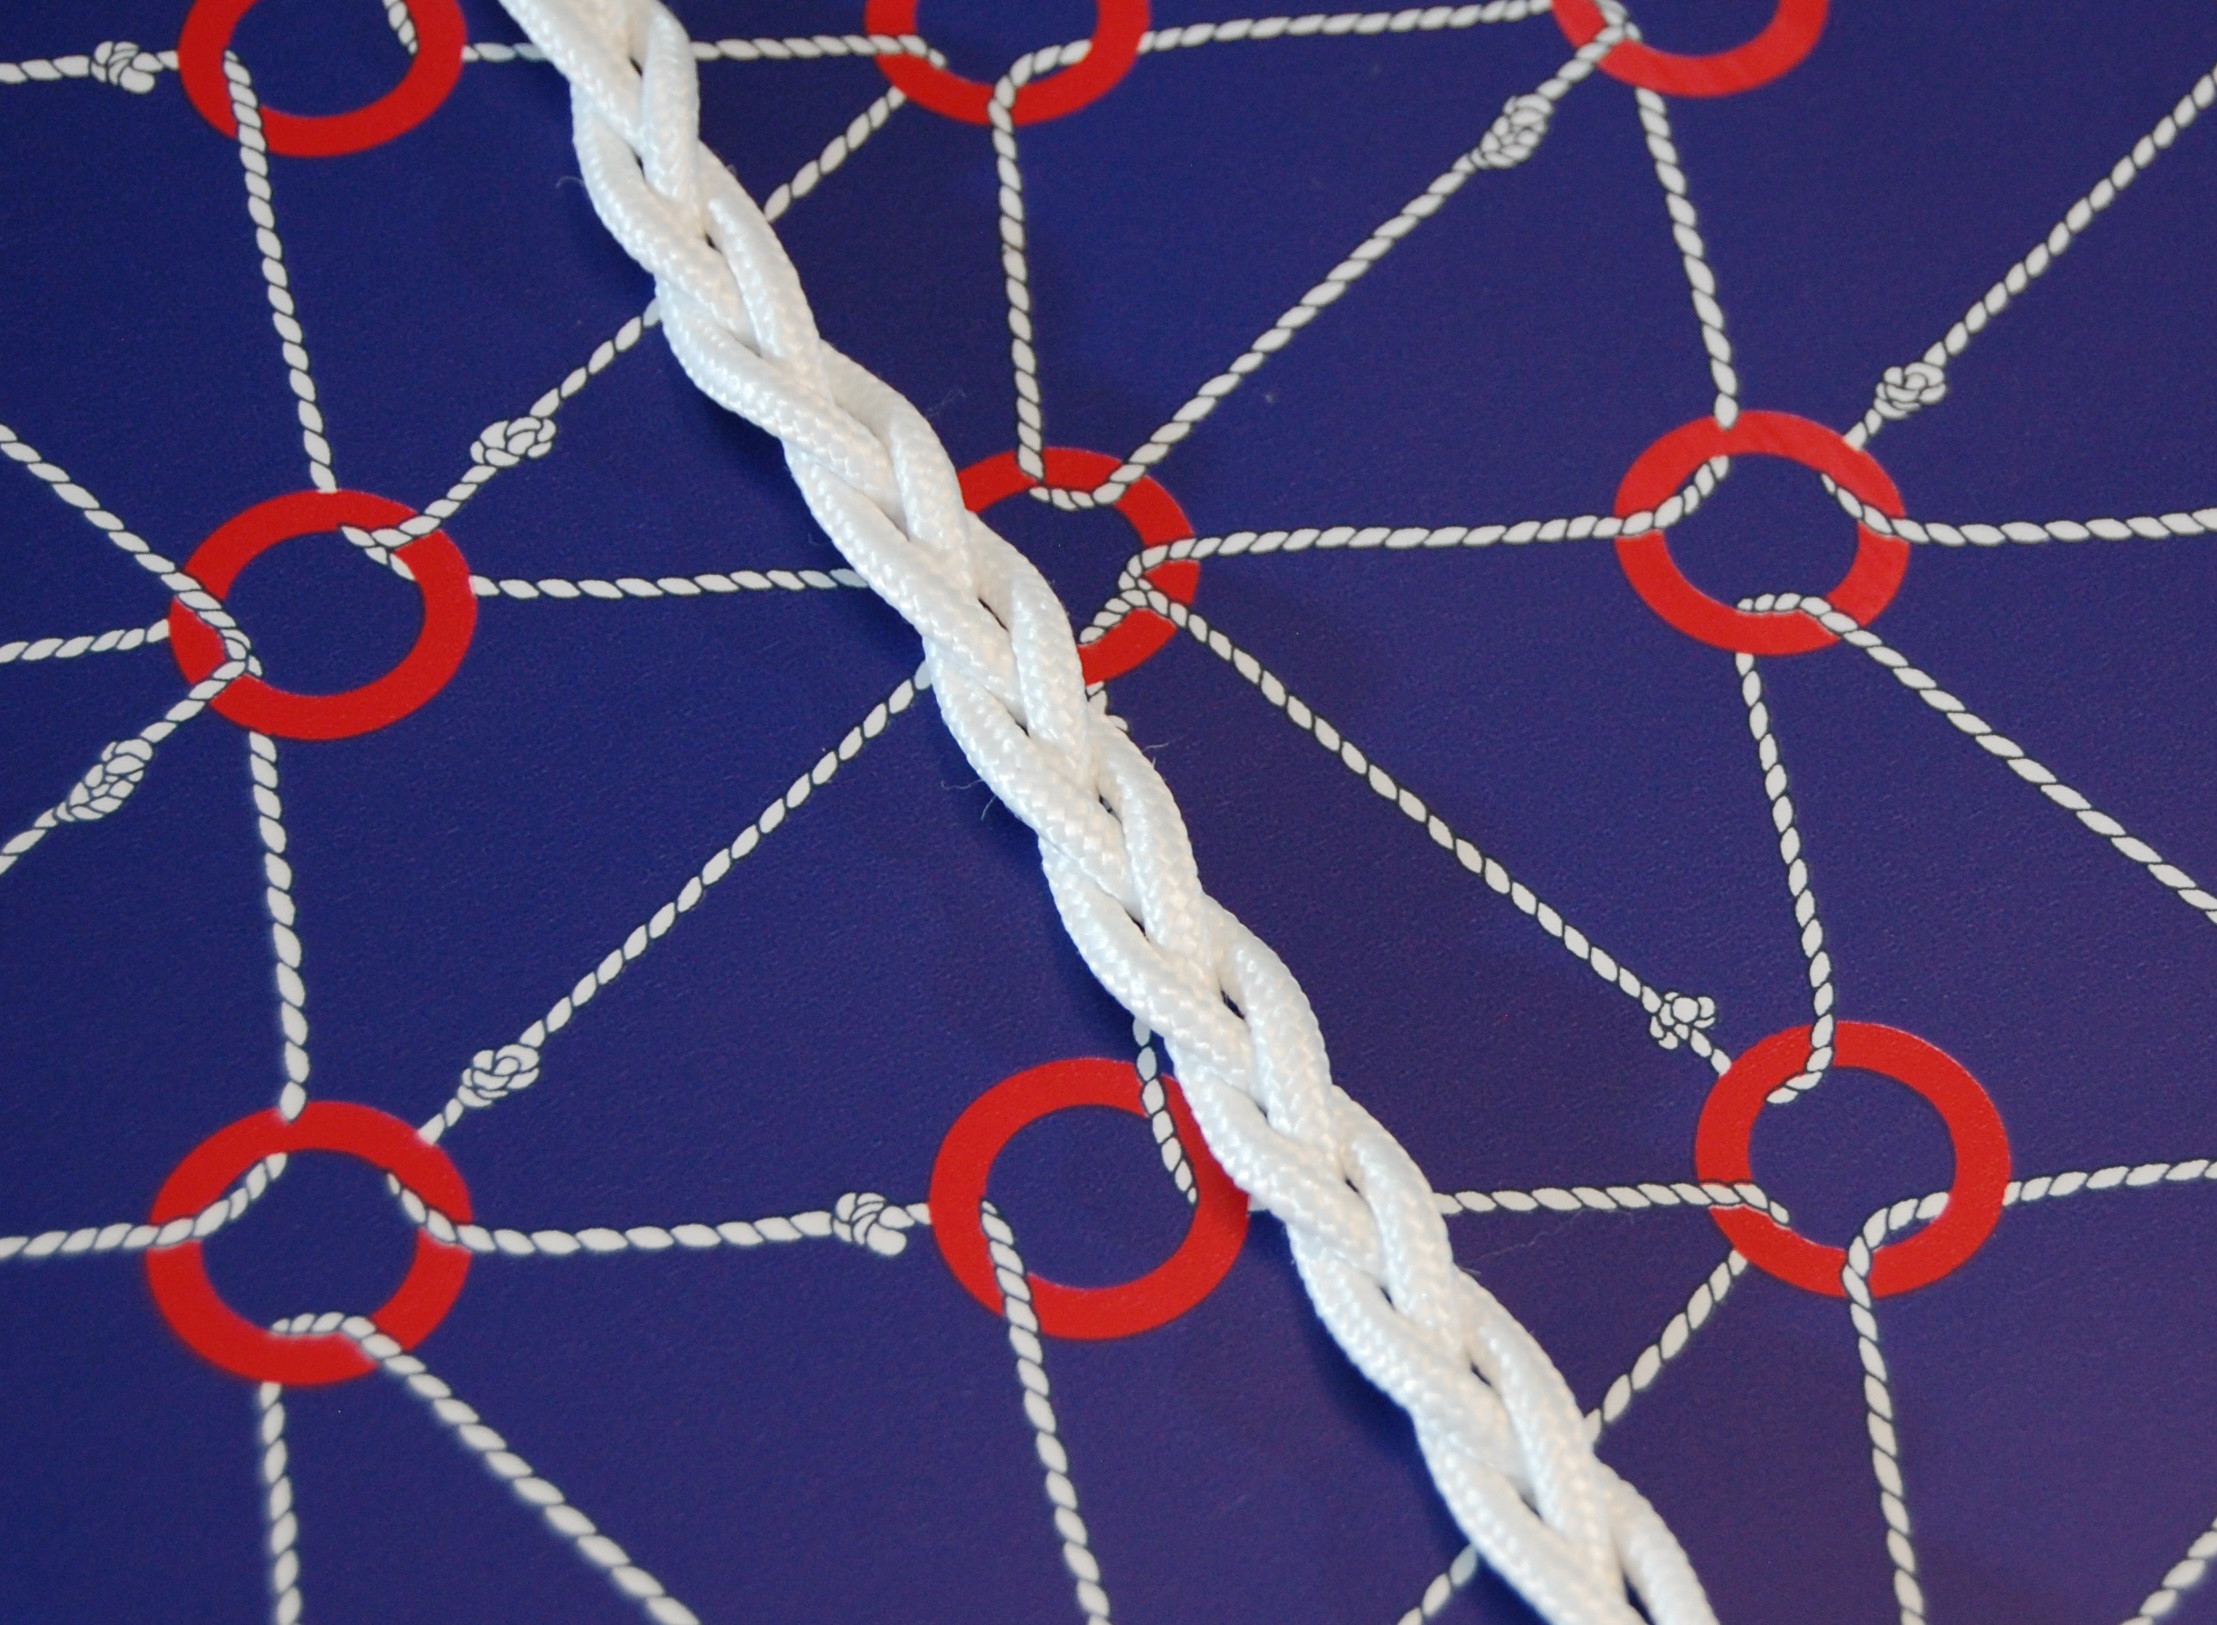
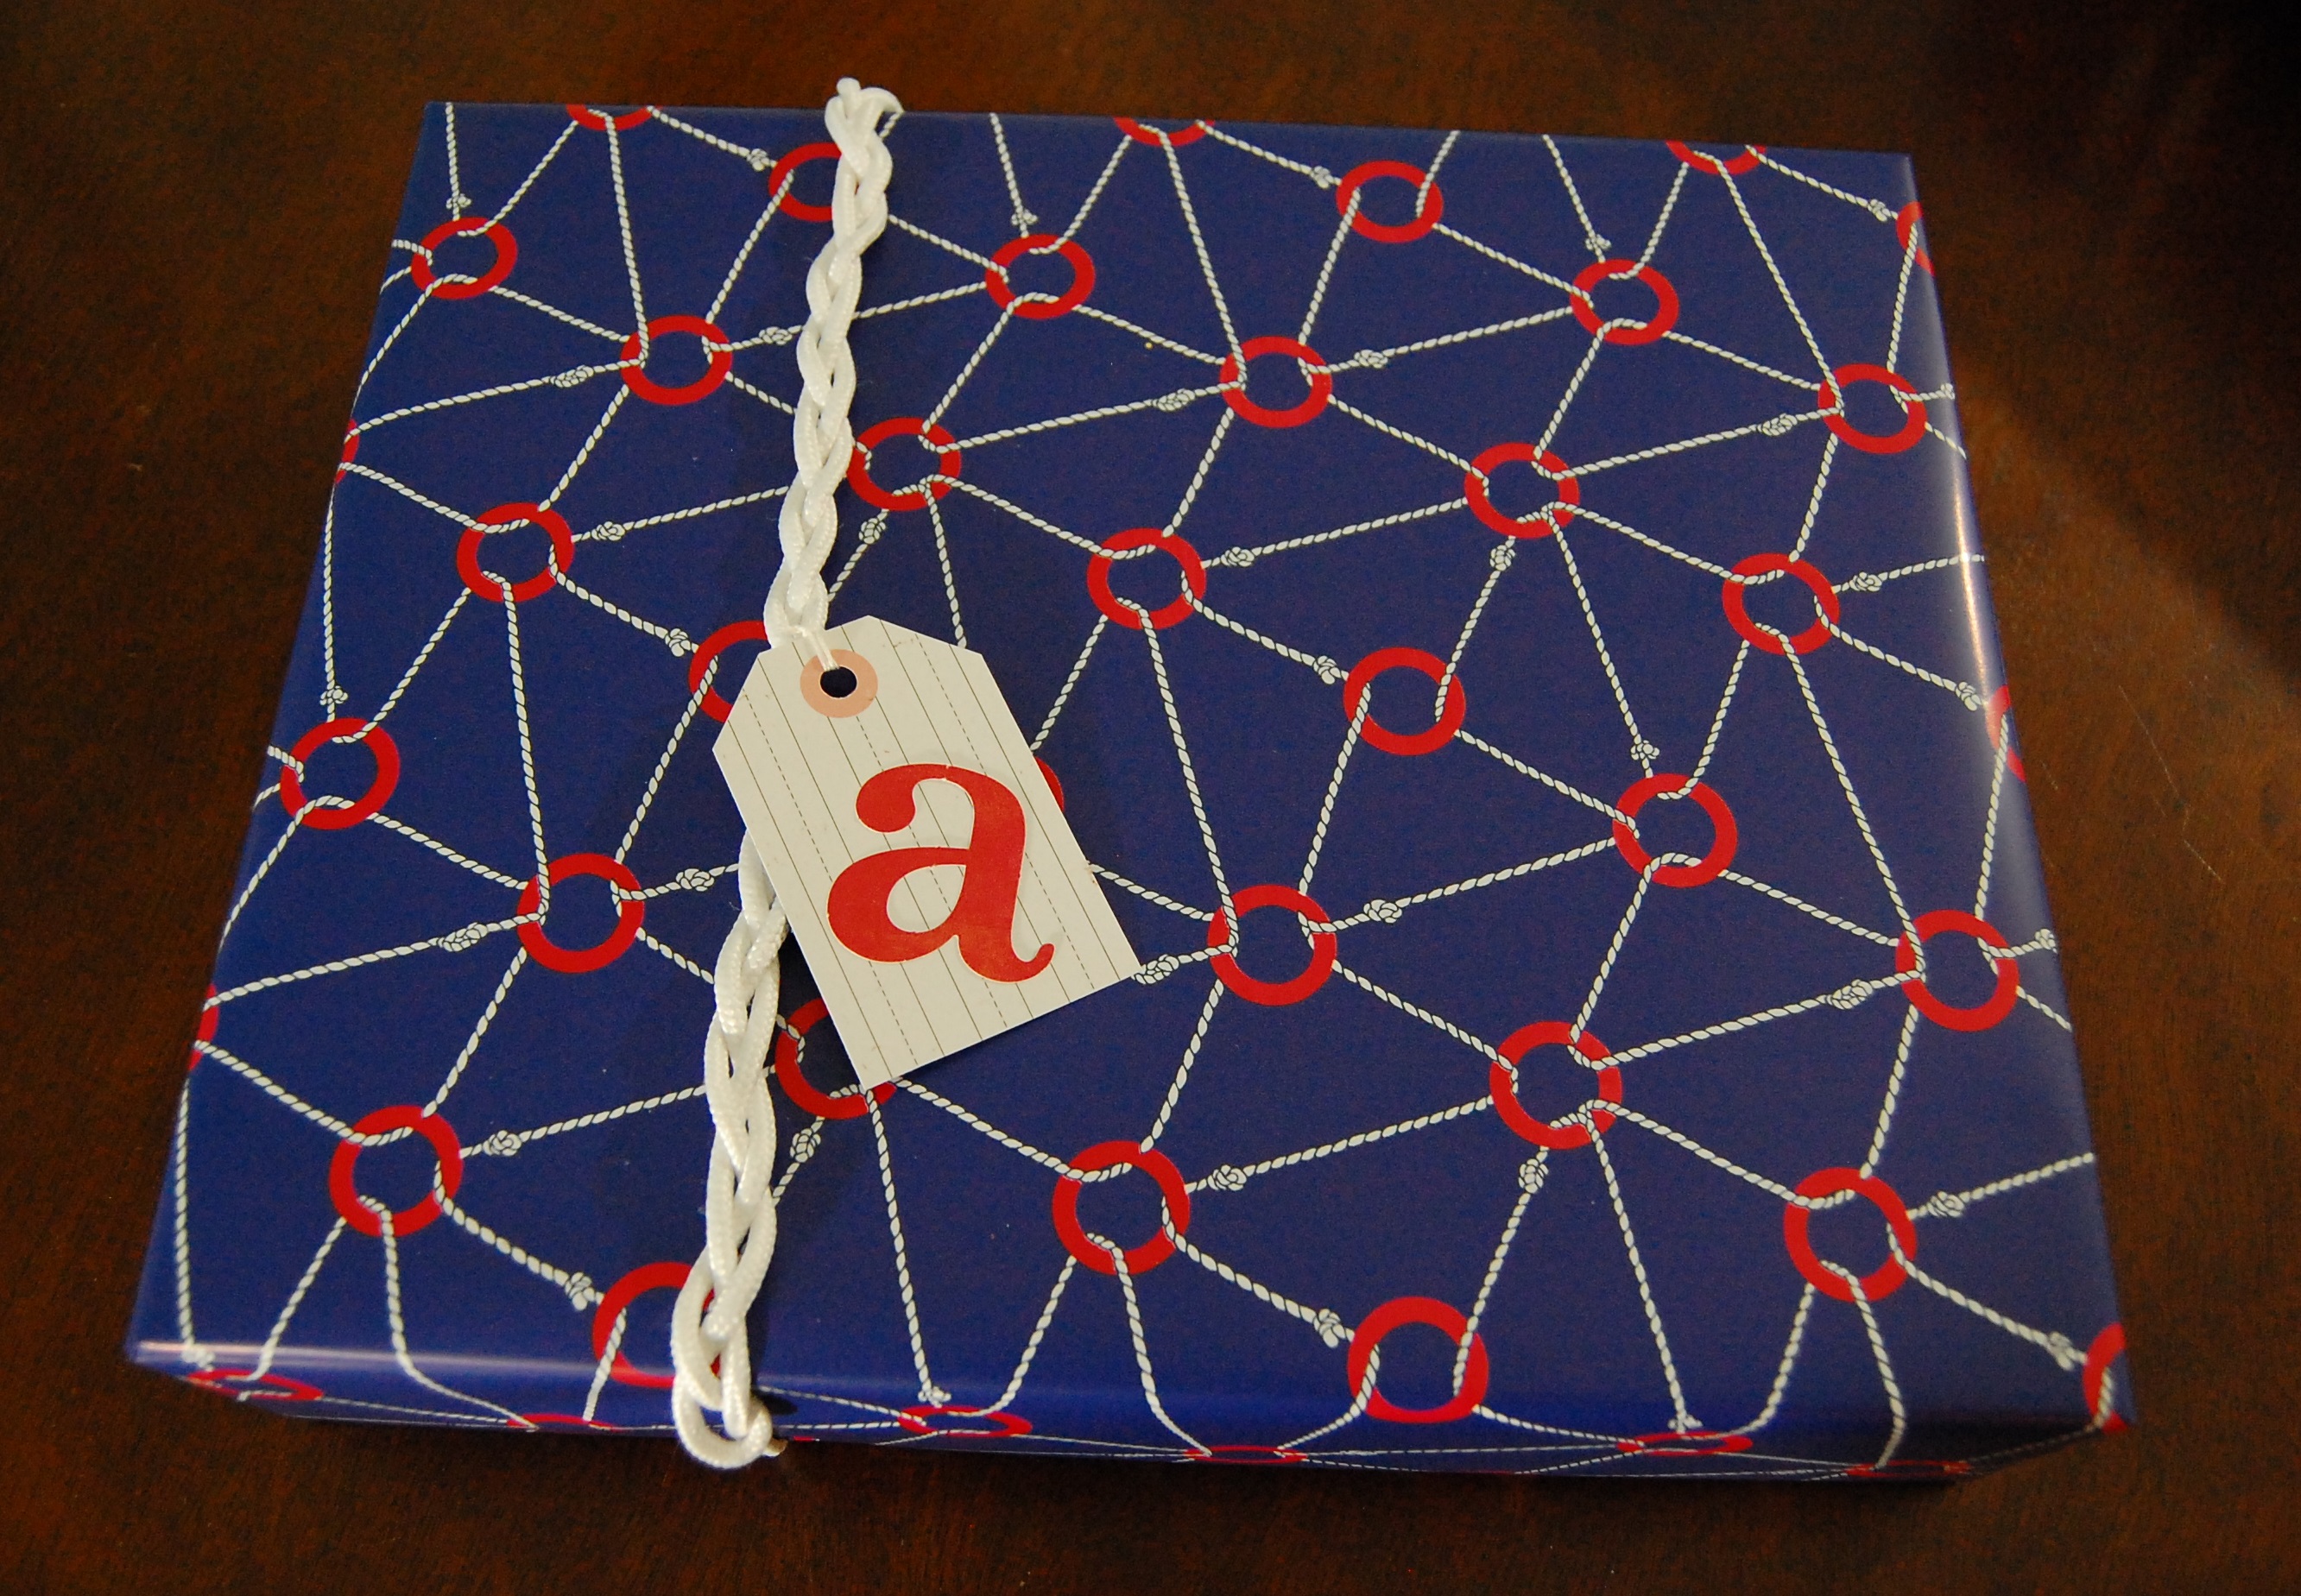
Single Rope Braid – I didn’t know that you could form a braid like this with a single piece of rope. This braid is simple, so I added a paper tag with the recipient’s initial. https://www.animatedknots.com/single-rope-braid-knot
And there you have it! Simple nautical (knot-ical?) gift packages. I hope you will try this out. If you do, I’d love to hear from you in the comments or via email: arthurized dot home at gmail dot com
Disclosure: In addition to occasional sponsored posts, Arthurized Home uses clickable affiliate links. That means that I may receive a small commission from sales at no extra charge to you. As always, my opinion is 100% my own, and I only recommend things that I truly love or use myself. Thank you for patronizing the brands that support Arthurized Home!
One of my goals is to eat real foods as much as possible. I define real food as “made in nature, not in a factory”. If you define it differently, that’s great! Do what works best for your health, lifestyle and budget. We shoot for 90% natural foods and less than 10% factory foods. The products in this post are some of our favorites, and run the gamut from barely processed to very processed.
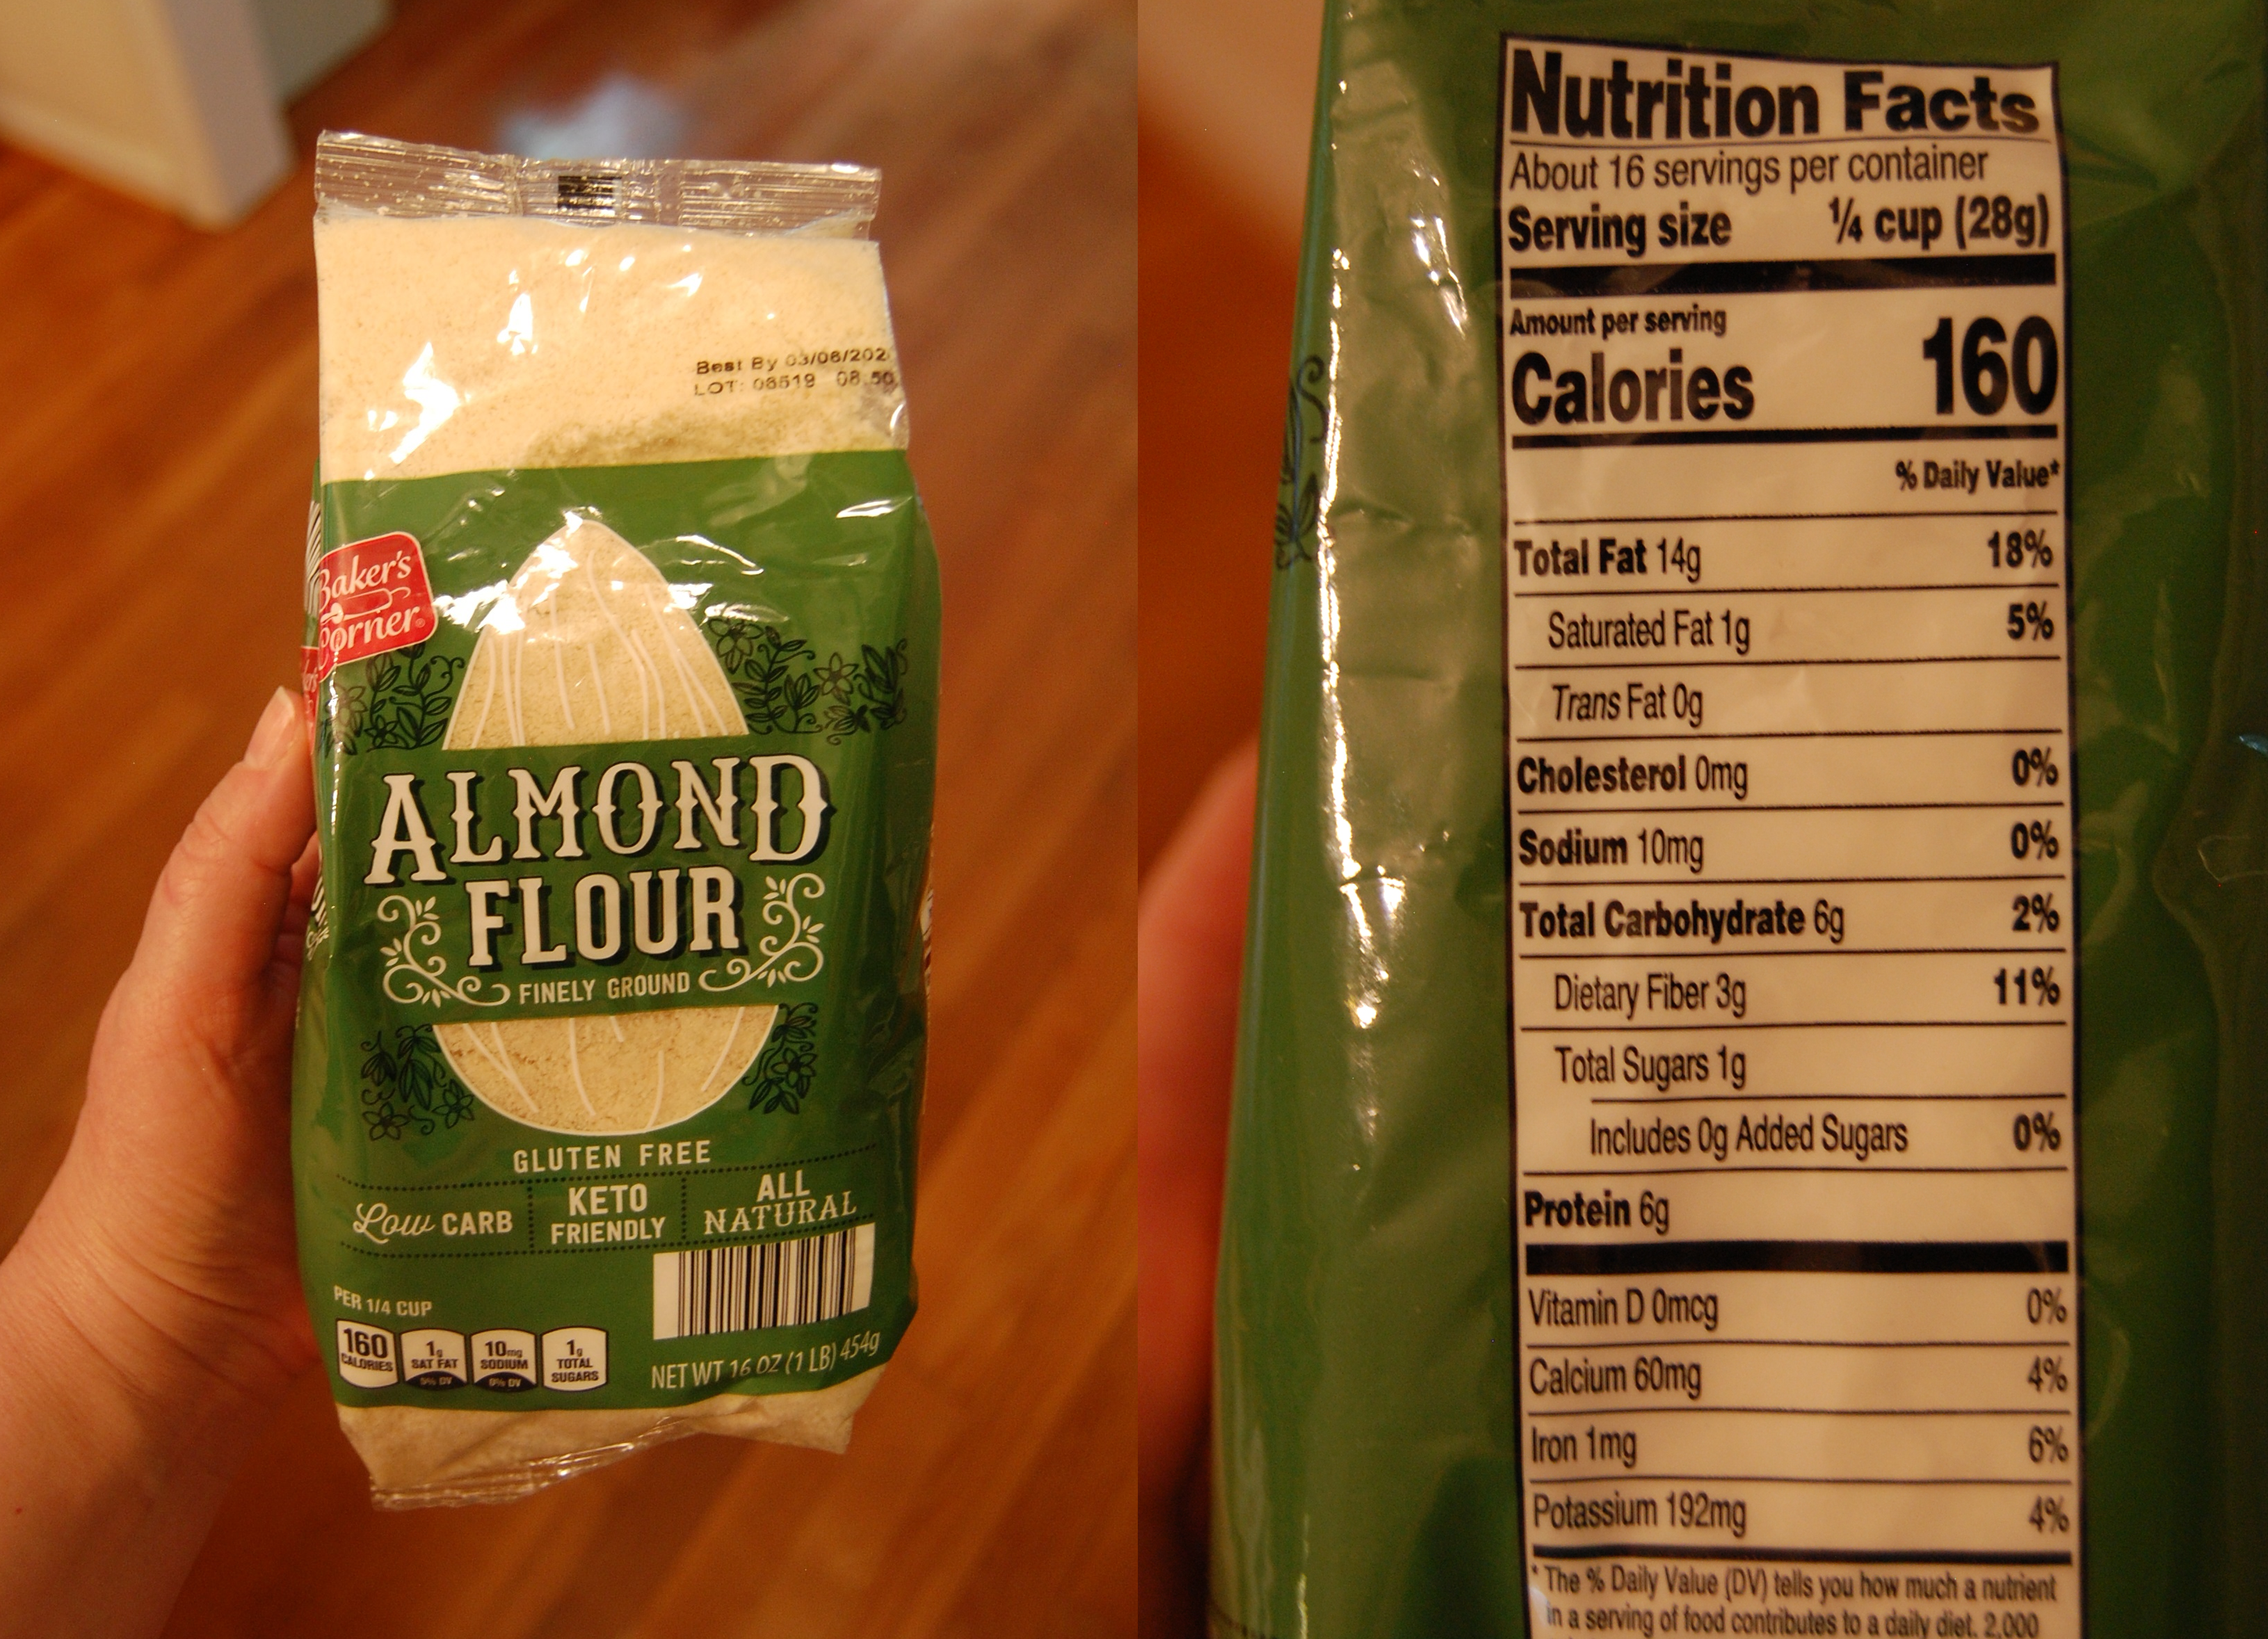
Almond Flour (Aldi) – Almond flour is our go-to for gluten-free and now keto baking. We use it for muffins, pancakes, biscuits and breads. It’s pricey compared to wheat flour, but very nutrient dense.
Elmhurst Milked Almonds – Simple ingredients; almond and water. This is a good all-purpose milk substitute. We found the flavor to be very mild.
Grass Fed Cheddar (Aldi) – I think that grass-fed cheddar is a hilarious word picture. I imagine little chunks of free-range cheddar just roaming the hills, filling their little bellies with all the grass they can stand! This cheddar is tasty and a great value.
Guacamole (Classic from Aldi) – Purists would turn their noses up at factory guac when it’s so easy to make. But this works in a pinch, and contains only ingredients you would use at home.
Hormel Natural Pepperoni – We love this stuff! No hormones, MSG, nitrates or nitrites added except those naturally occurring in the celery and cherry.
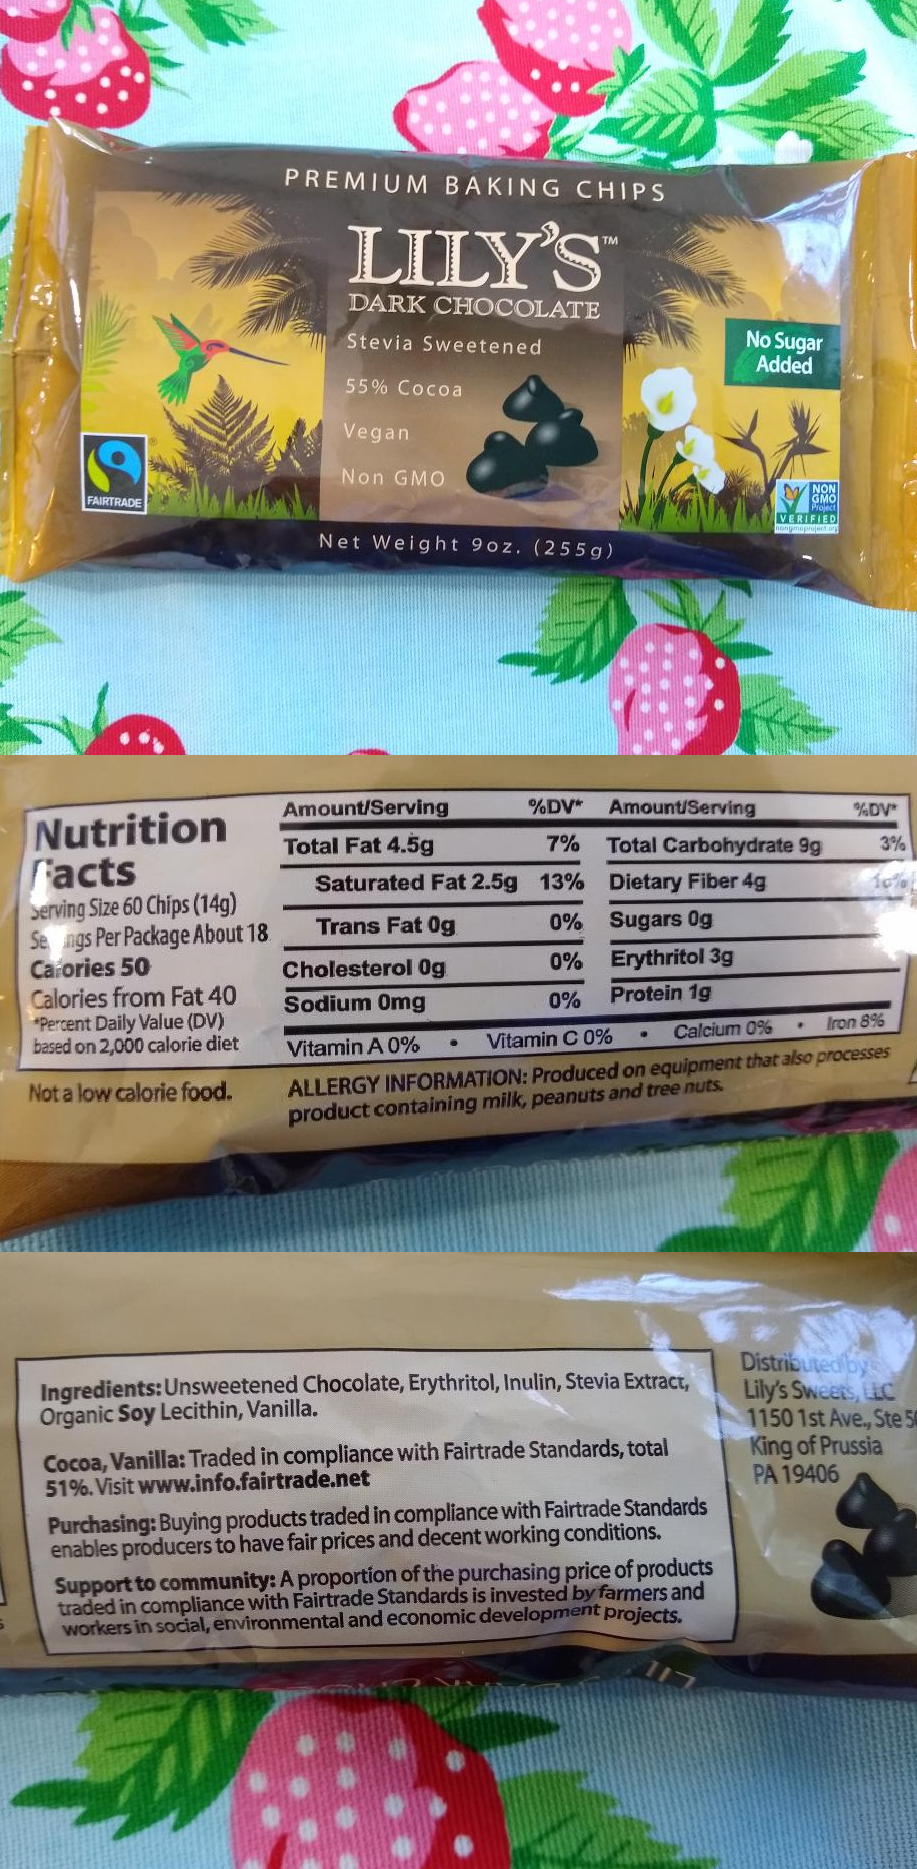
Lily’s Chocolate Chips – Mmmm, Lily’s. Not 100% clean, but pretty darn good. These are tiny, and pack a lot of chocolate flavor without the sugar buzz.
Portofino Yellowfin Tuna in Extra Virgin Olive Oil – We’re late converts to tuna packed in oil, but it’s great for the light, summer salads we’ve been fixing lately.
Sir Kensington’s Mayonnaise – We like the original, avocado oil and organic varieties. The original has a slight tang from the lemon juice, but it’s not overpowering. This is great in homemade dips and dressings. The avocado oil mayonnaise can be a little strong, so use it in dishes with bold flavors.
Tolerant Lentil Pasta – Two ingredient pasta is about as unprocessed as you can get for a factory noodle. When cooked to al dente, the pasta retain their shape and don’t get mushy.
Whole Earth Sweetener – We call this the “Green Stuff”. Low carb without the stevia aftertaste. Dissolves really well in cold drinks. One packet sweetens a 20-32 oz. beverage.
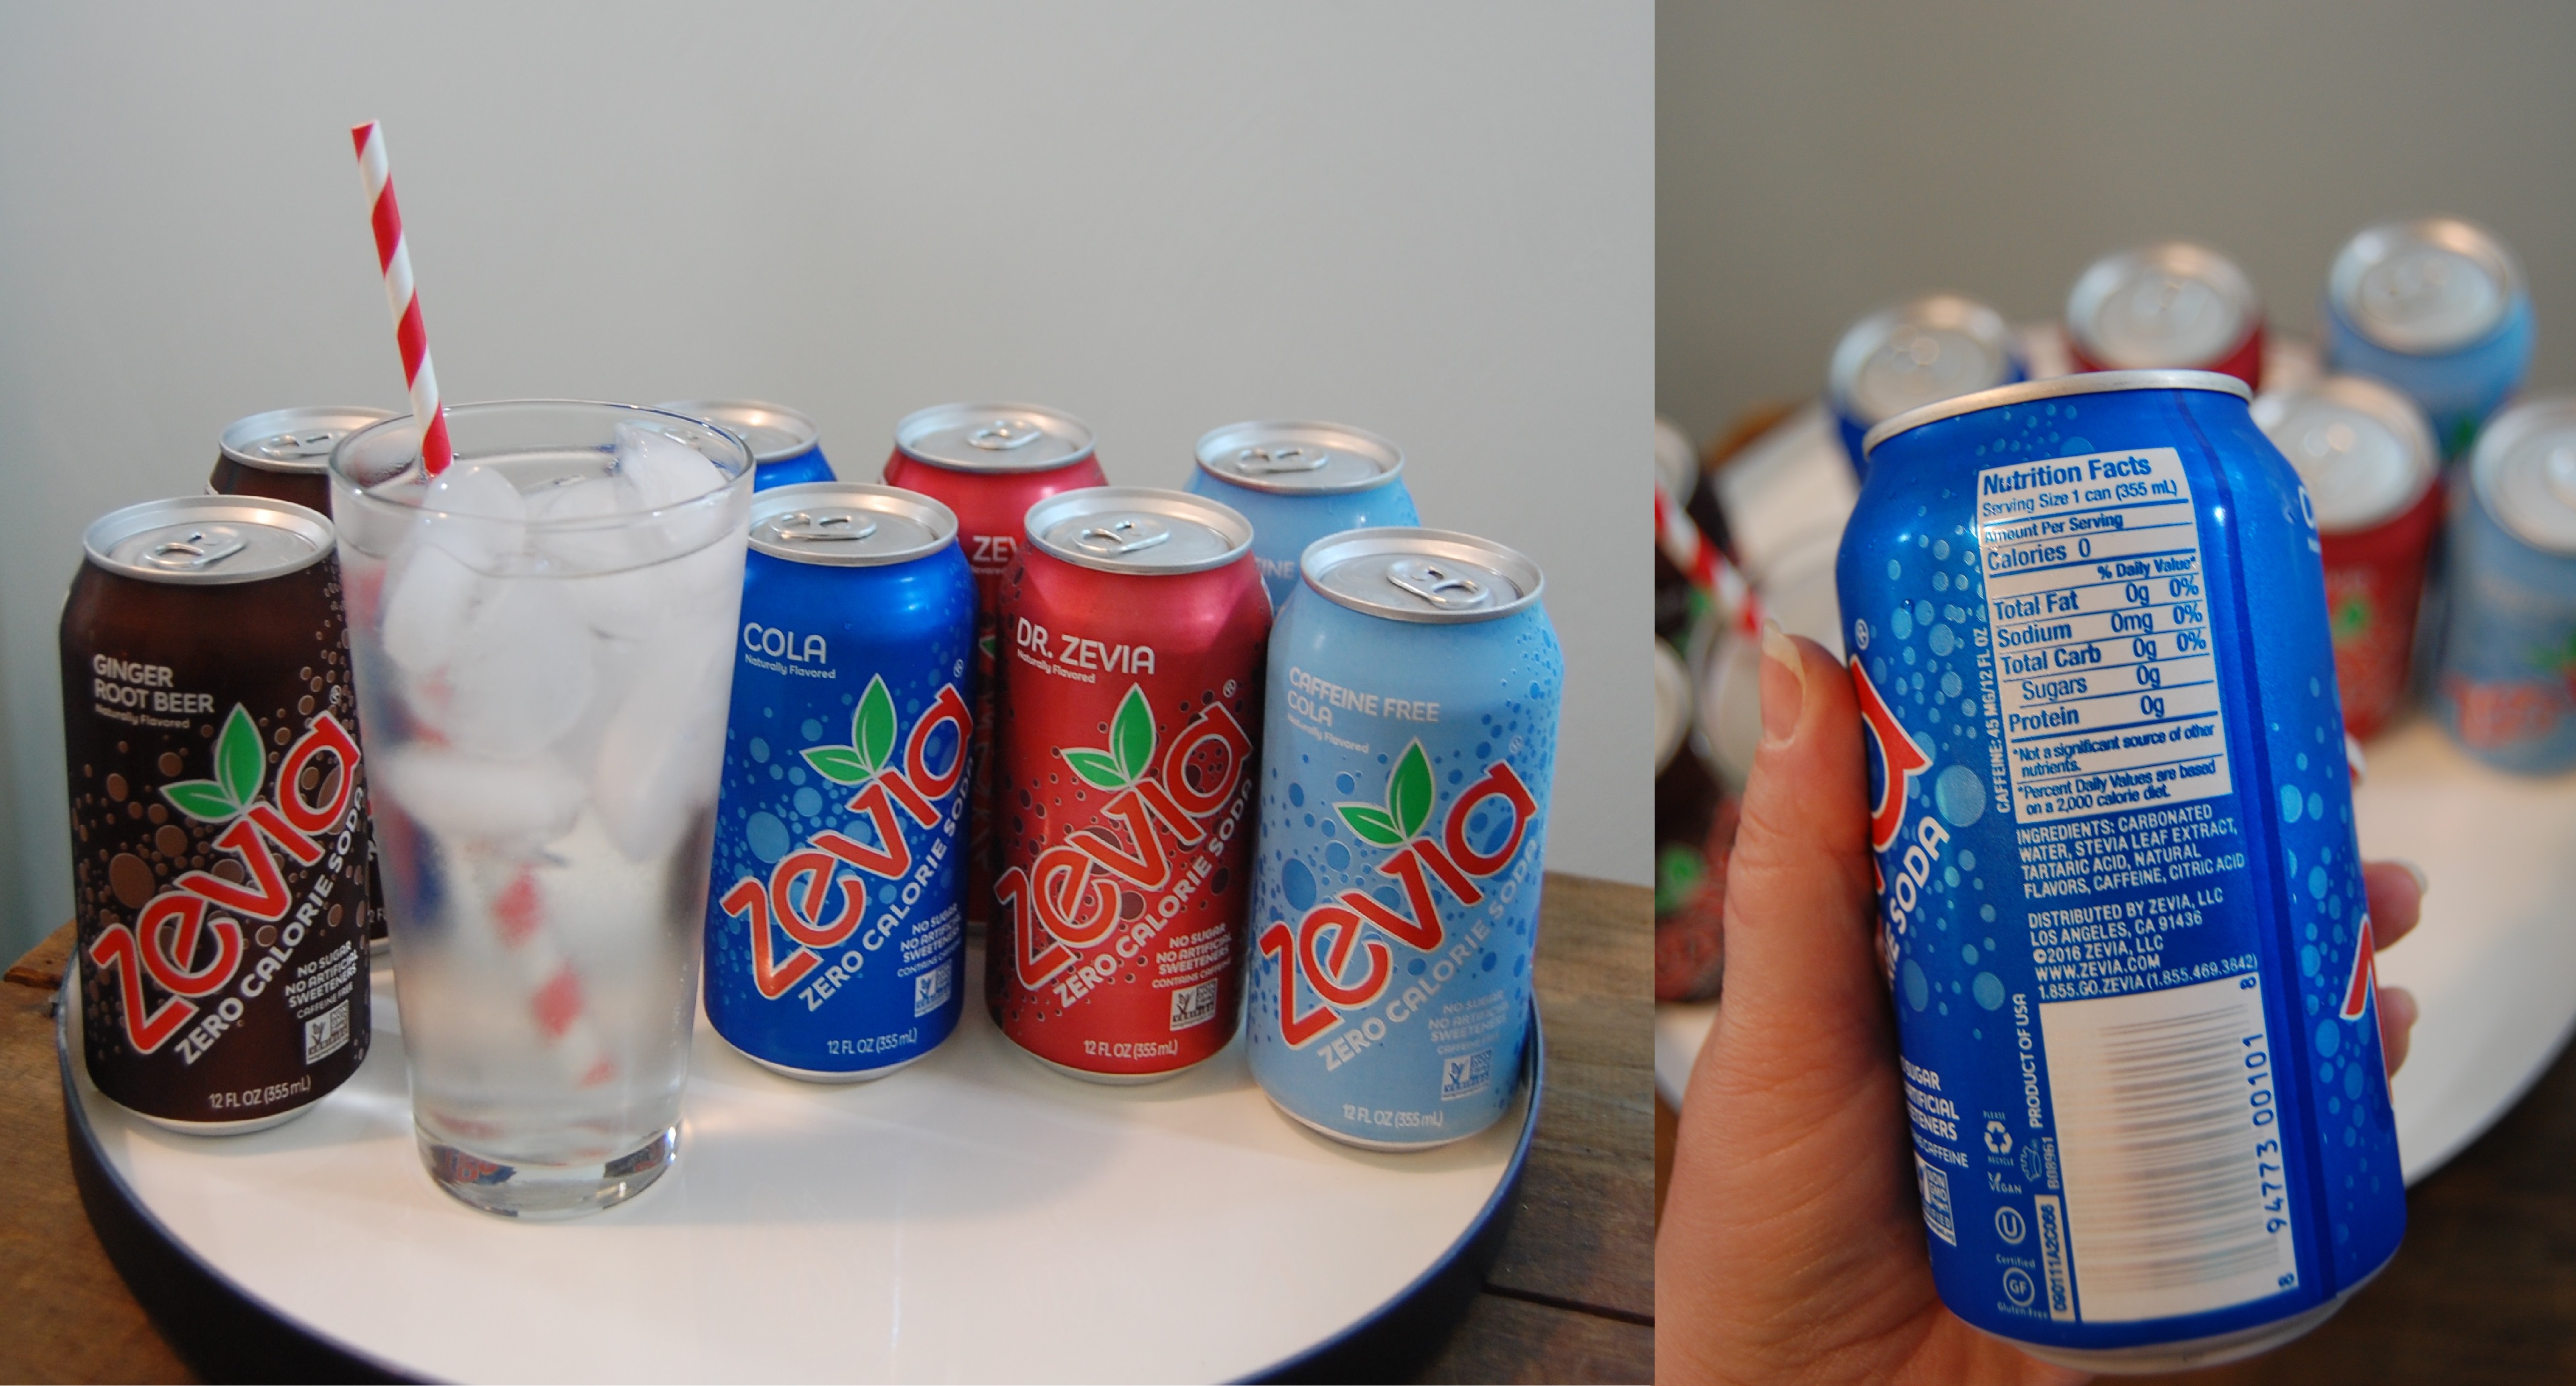
Zevia – We love Zevia because it scratches the soda itch without resorting to zero calorie drinks containing aspartame. Some flavors are caffeinated and some are decaf, but all of the flavors are free of food dyes.
I hope you’ll give some of these products a try. What are your favorite 10% products? Let me know in the comments or via email at: arthurized dot home at gmail dot com
I’m not in partnership with any brands referenced in this post. I’m simply sharing products that I use and enjoy, and I hope you will like them too!
Disclosure: In addition to occasional sponsored posts, Arthurized Home uses clickable affiliate links. That means that I may receive a small commission from sales at no extra charge to you. As always, my opinion is 100% my own, and I only recommend things that I truly love or use myself. Thank you for patronizing the brands that support Arthurized Home!
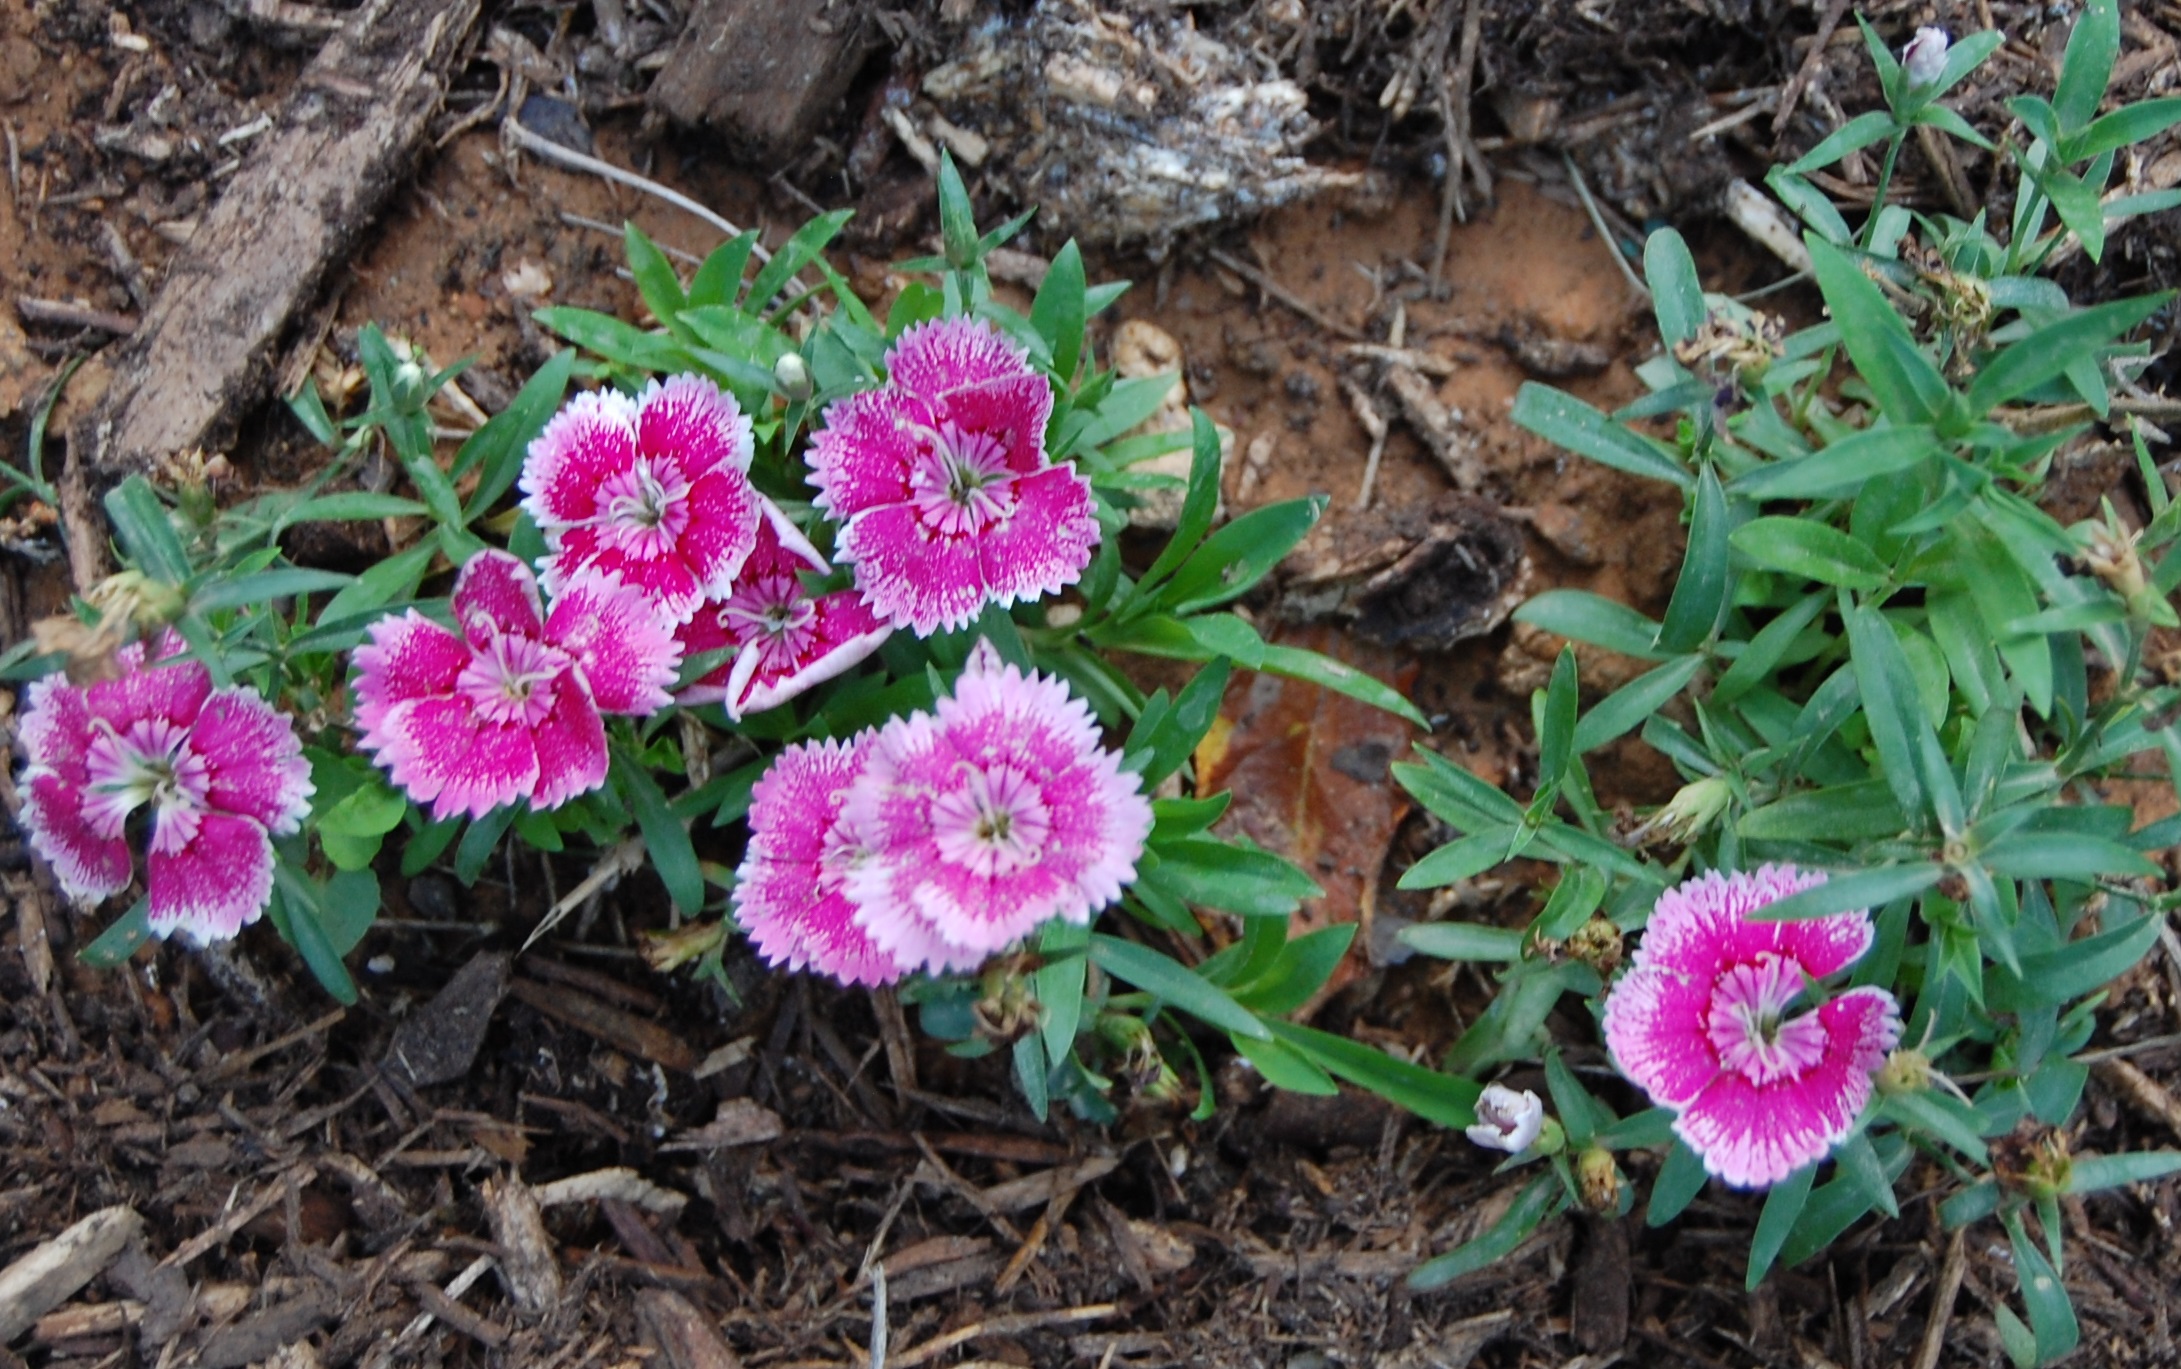
I’ve recently learned that so many of the blooms in my yard are edible: Dianthus, Impatiens, Scented Geraniums, Dandelions (of course!), Apple Blossoms, Lavender, Cherry Blossoms. The list goes on and on.
Scented geranium
Edible blooms can be used to simply to brighten up a visually uninteresting meal, like these dianthus flowers in Paleo Egg Roll in a Bowl. It’s been said that we eat with our eyes first, which is a good thing. When taste tested, my husband and I decided the dianthus tastes vaguely like grass!
My lavender plant was battered by recent storms, so I purchased organic culinary lavender and dried hibiscus blooms from a natural foods store (Roanoke Co+op, if you’re local) and began experimenting with them.
The butterflies and bees have finally found the herb garden! I love watching them there.
“Experimenting” is probably a poor choice of words to describe what I’m doing. I feel very comfortable eating organically grown blooms from my own yard. I’m certain of what they are, and I know they have been grown in a manner that will not poison me.
Plants that have been sprayed with pesticides or other chemicals
Commercial, non-organic and florist flowers
Plants grown near a roadway
No blooms of your own to harvest? You can purchase edible flowers from the produce section of your grocery store or online. Now, let’s get to the recipes!
If you’re concerned that lavender foods will remind you of soap, start by following recipes exactly as written. Most recipes require 1 tablespoon of lavender, or less. Once you’ve determined your own flavor preferences, you can adjust the recipe if needed.
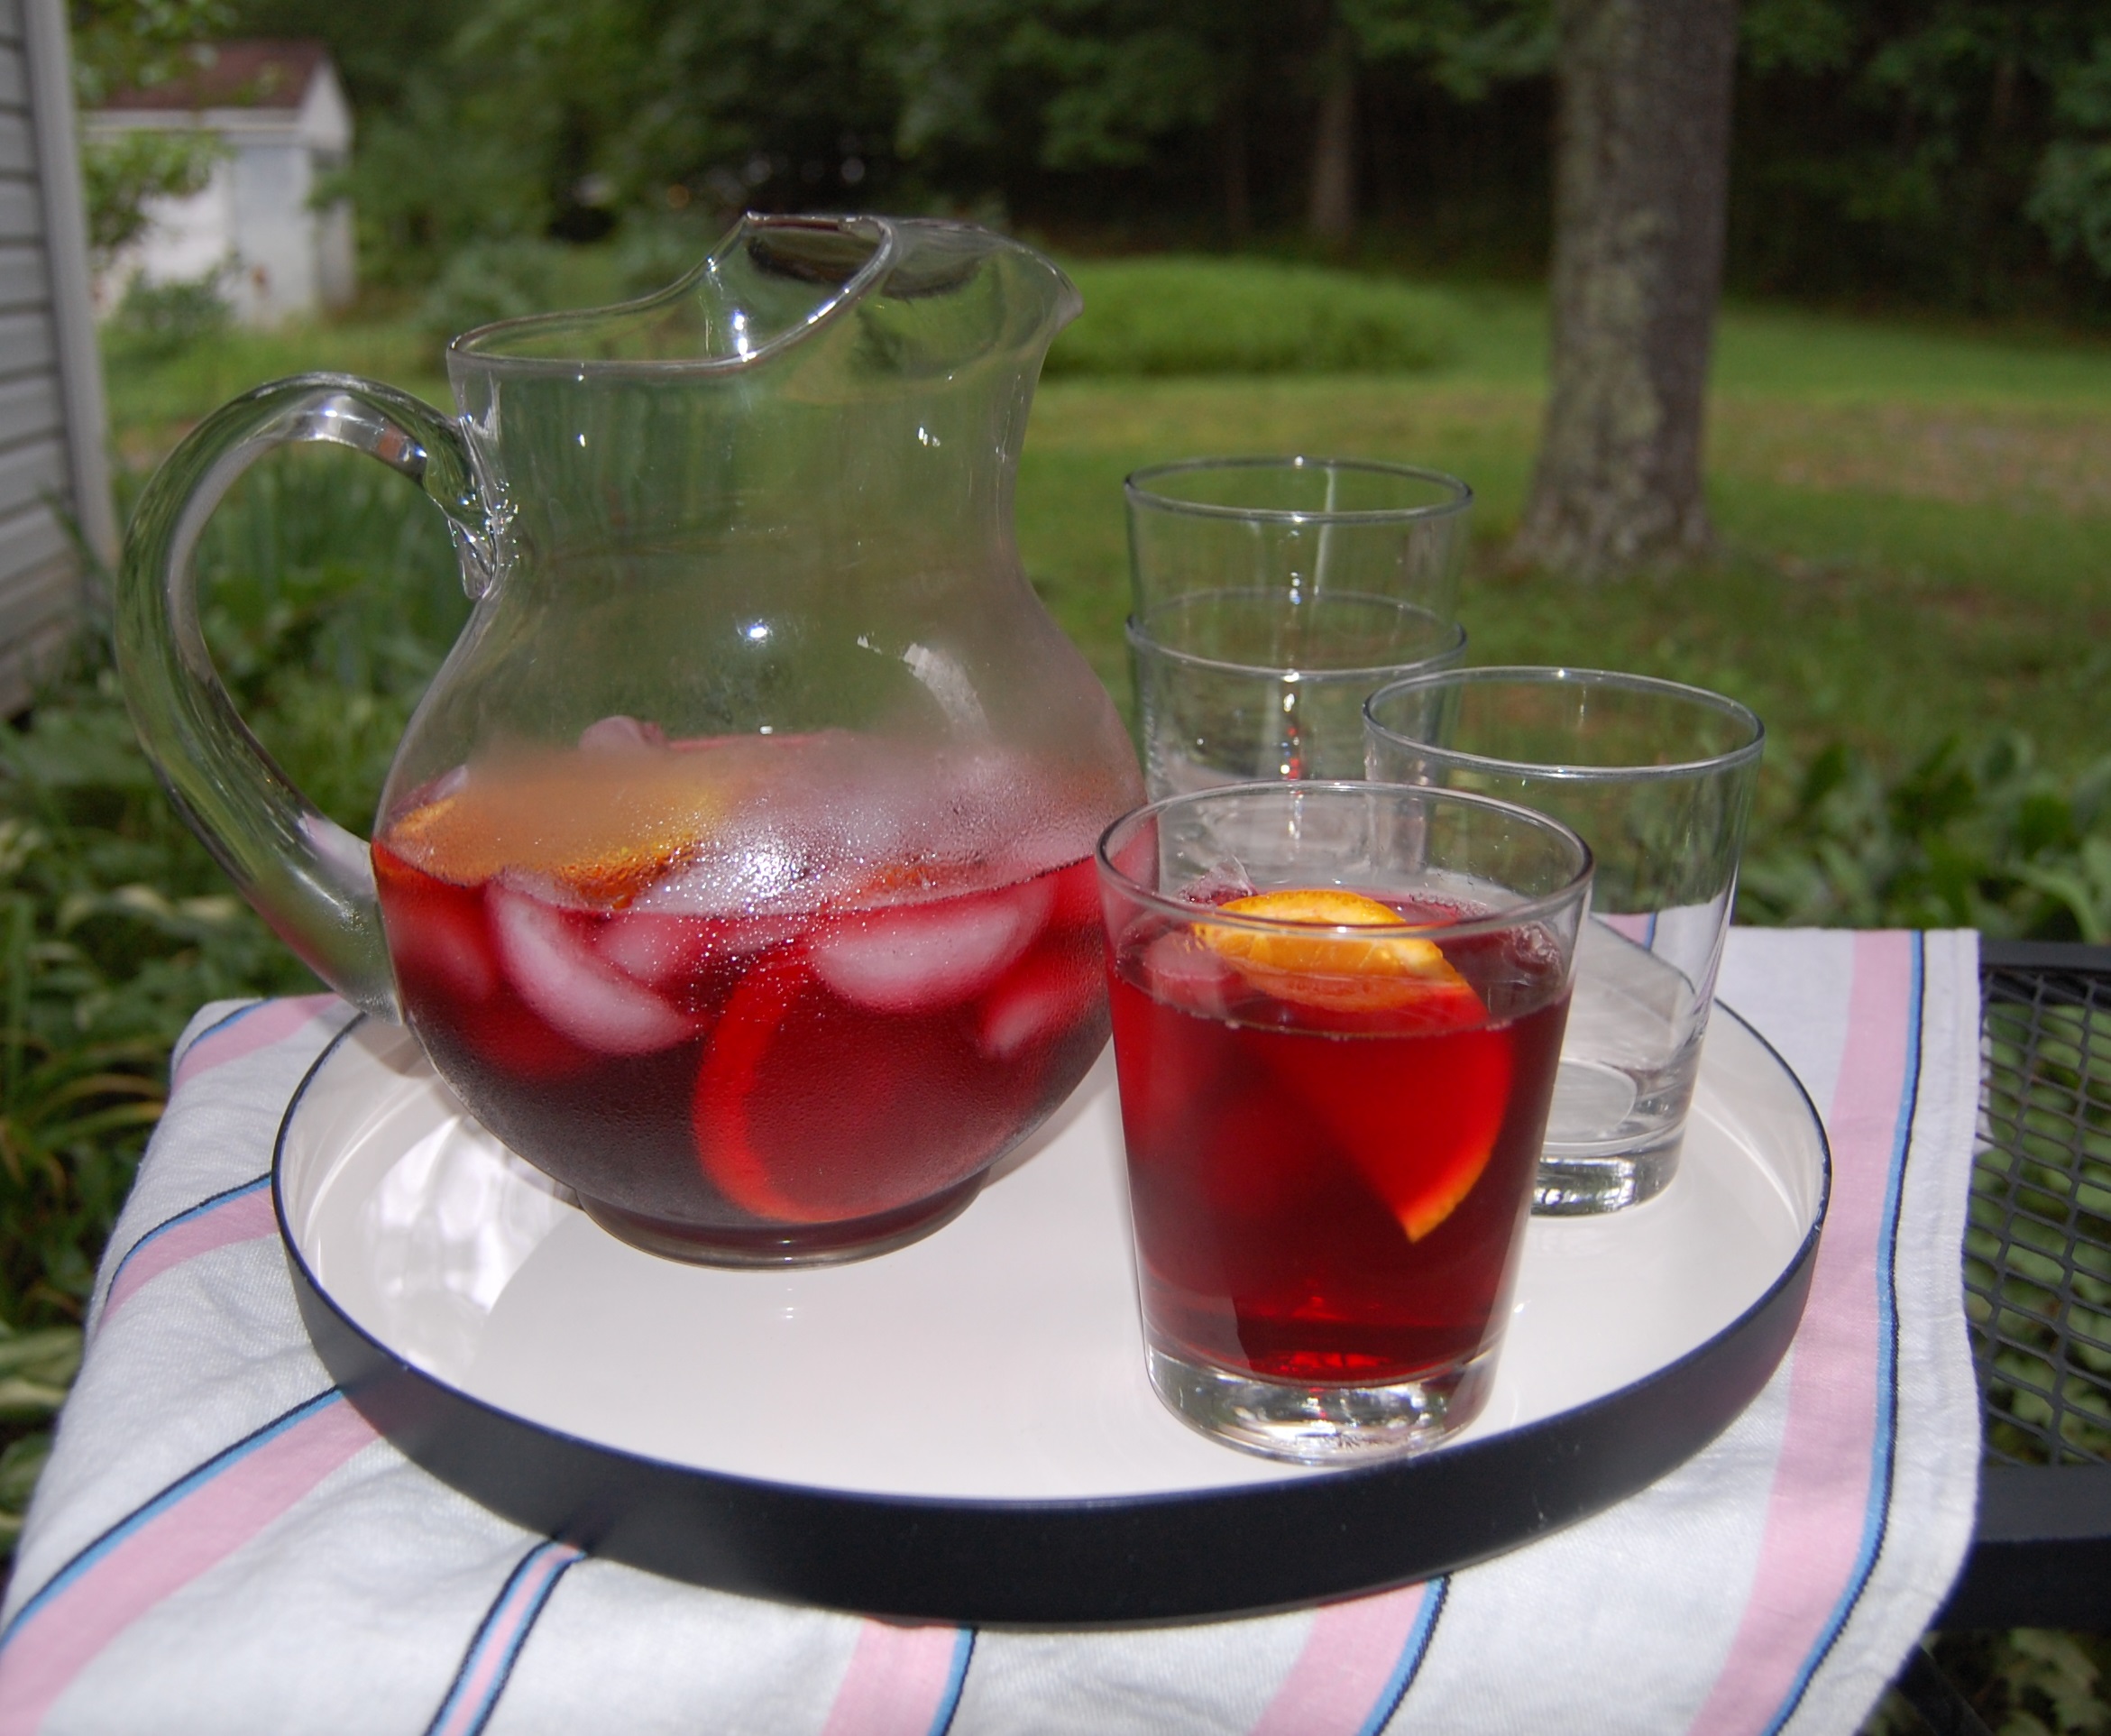
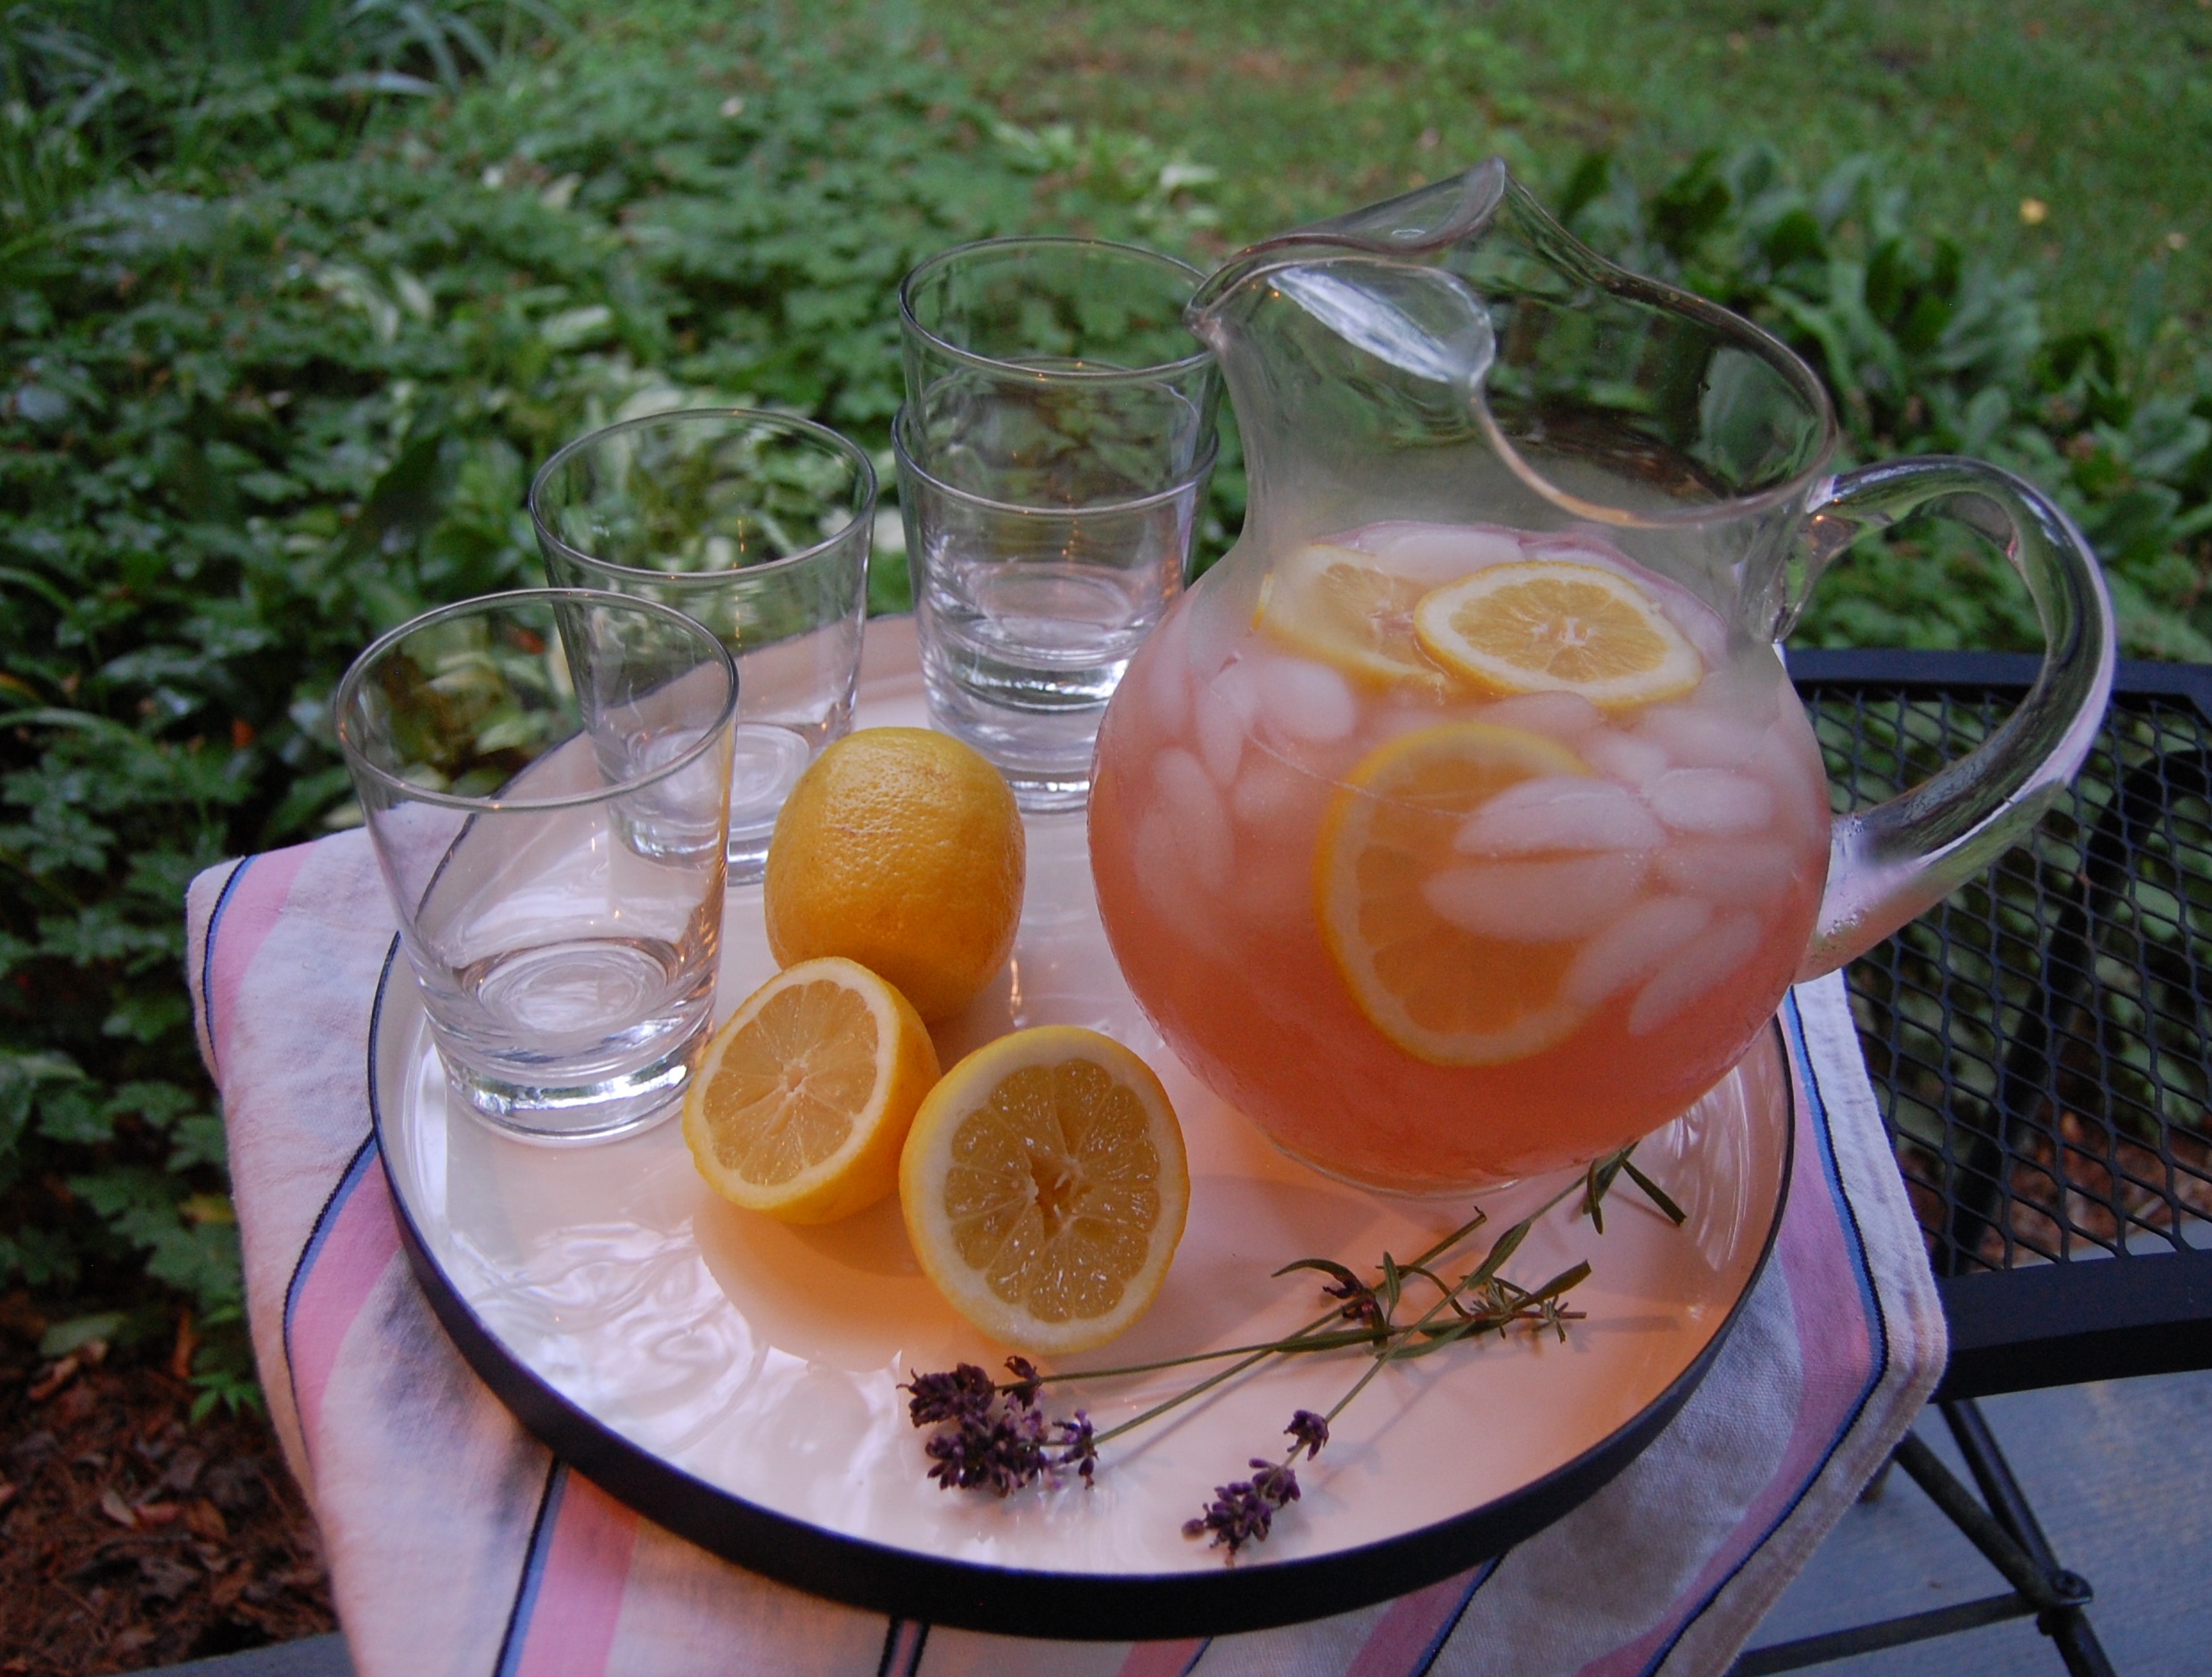
Lavender Lemonade: I love that this recipe is infused with culinary lavender, not essential oil. I’m very certain that 1 cup(!) of honey would make this amazing, but I left it out because, keto. I colored my lemonade with one drop each of blue and red plant based food color. https://www.smallfootprintfamily.com/lavender-lemonade-with-honey-recipe
Keto Lavender Scones with Lemon Glaze: These little goodies are so tasty, you’ll forget that they are low carb!
I modified this recipe as follows: Keto Lavender Scones 1 1/4 C Almond Flour 1/3 C Coconut Flour 8 packets Whole Earth sweetener 1/4 tsp Salt 1/2 tsp Baking Powder 1 Tbsp Dried Culinary Lavender 1/4 C Almond Milk 1/4 C Heavy Whipping Cream 2 Tbsp Butter, softened 1 tsp Vanilla 1 Egg In a mixing bowl, blend the dry ingredients together. Mix the wet ingredients in a separate bowl. Pour the wet ingredients into the dry ingredients and mix well. On a baking sheet lined with parchment paper or a Silpat™, form the dough into an 8″ round. Slice into 8 wedges. Bake at 350º for 18 minutes.
You can stop right there and serve these with fresh butter, or for extra credit, make them even more gorgeous and delicious with this glaze!
Keto Lemon Glaze: 2 packets Whole Earth sweetener 4 Tbsp coconut oil, melted 4 Tbsp canned, unsweetened coconut milk cream (not the milk), at room temperature 2 tsp. freshly squeezed lemon juice Optional Garnish – lemon zest and culinary lavender Whisk sweetener, oil, coconut cream and lemon juice together until smooth and glaze the scones. While the glaze is still wet, garnish with a light sprinkle of lemon zest and lavender, if desired. Refrigerate to harden the glaze. The scones will keep in the refrigerator for a few days, or in the freezer for a month, if they last that long!
Scones with butter. Gotta serve ’em on legit English ironstone!Serve these glazed beauties on Grandma’s china, with a proper cup of tea.
What do you think? Do you cook with flowers? Is this something you would try?
Disclosure: In addition to occasional sponsored posts, Arthurized Home uses clickable affiliate links. That means that I may receive a small commission from sales at no extra charge to you. As always, my opinion is 100% my own, and I only recommend things that I truly love or use myself. Thank you for patronizing the brands that support Arthurized Home!