Tag: home cooking

Favorite 10% Food Products

One of my goals is to eat real foods as much as possible. I define real food as “made in nature, not in a factory”. If you define it differently, that’s great! Do what works best for your health, lifestyle and budget. We shoot for 90% natural foods and less than 10% factory foods. The products in this post are some of our favorites, and run the gamut from barely processed to very processed.

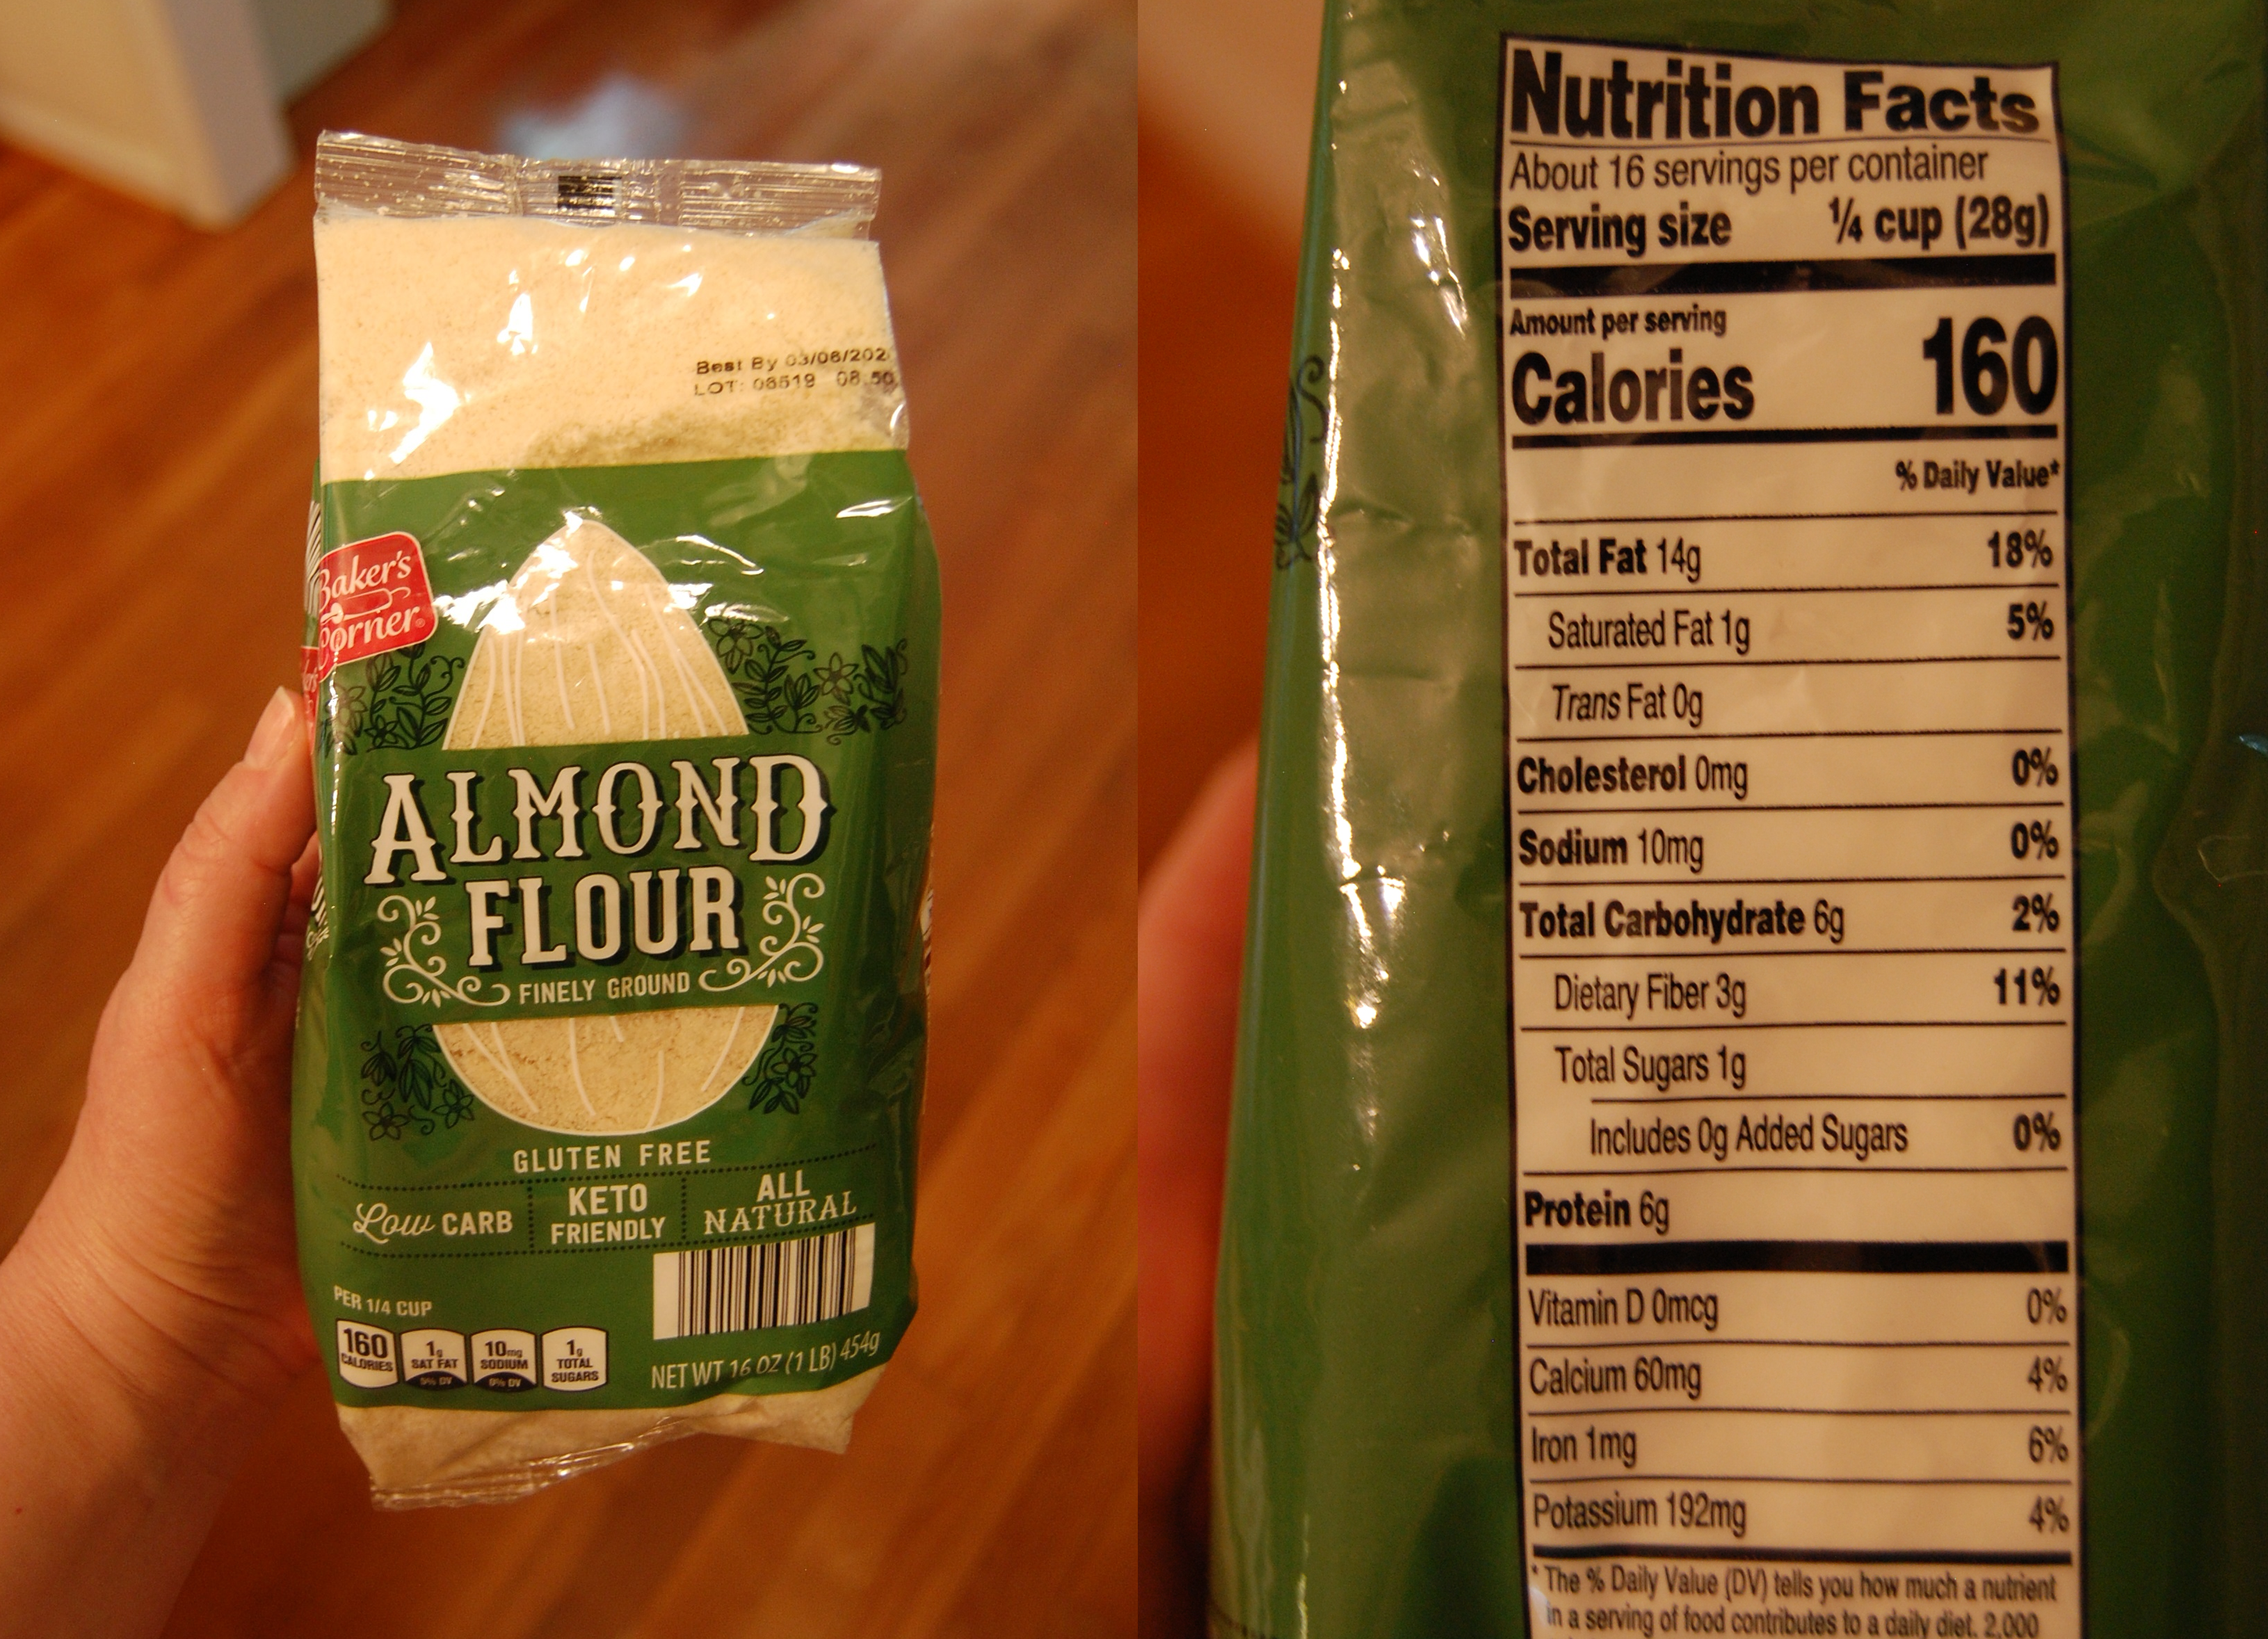
Almond Flour (Aldi) – Almond flour is our go-to for gluten-free and now keto baking. We use it for muffins, pancakes, biscuits and breads. It’s pricey compared to wheat flour, but very nutrient dense.

Elmhurst Milked Almonds – Simple ingredients; almond and water. This is a good all-purpose milk substitute. We found the flavor to be very mild.

Grass Fed Cheddar (Aldi) – I think that grass-fed cheddar is a hilarious word picture. I imagine little chunks of free-range cheddar just roaming the hills, filling their little bellies with all the grass they can stand! This cheddar is tasty and a great value.

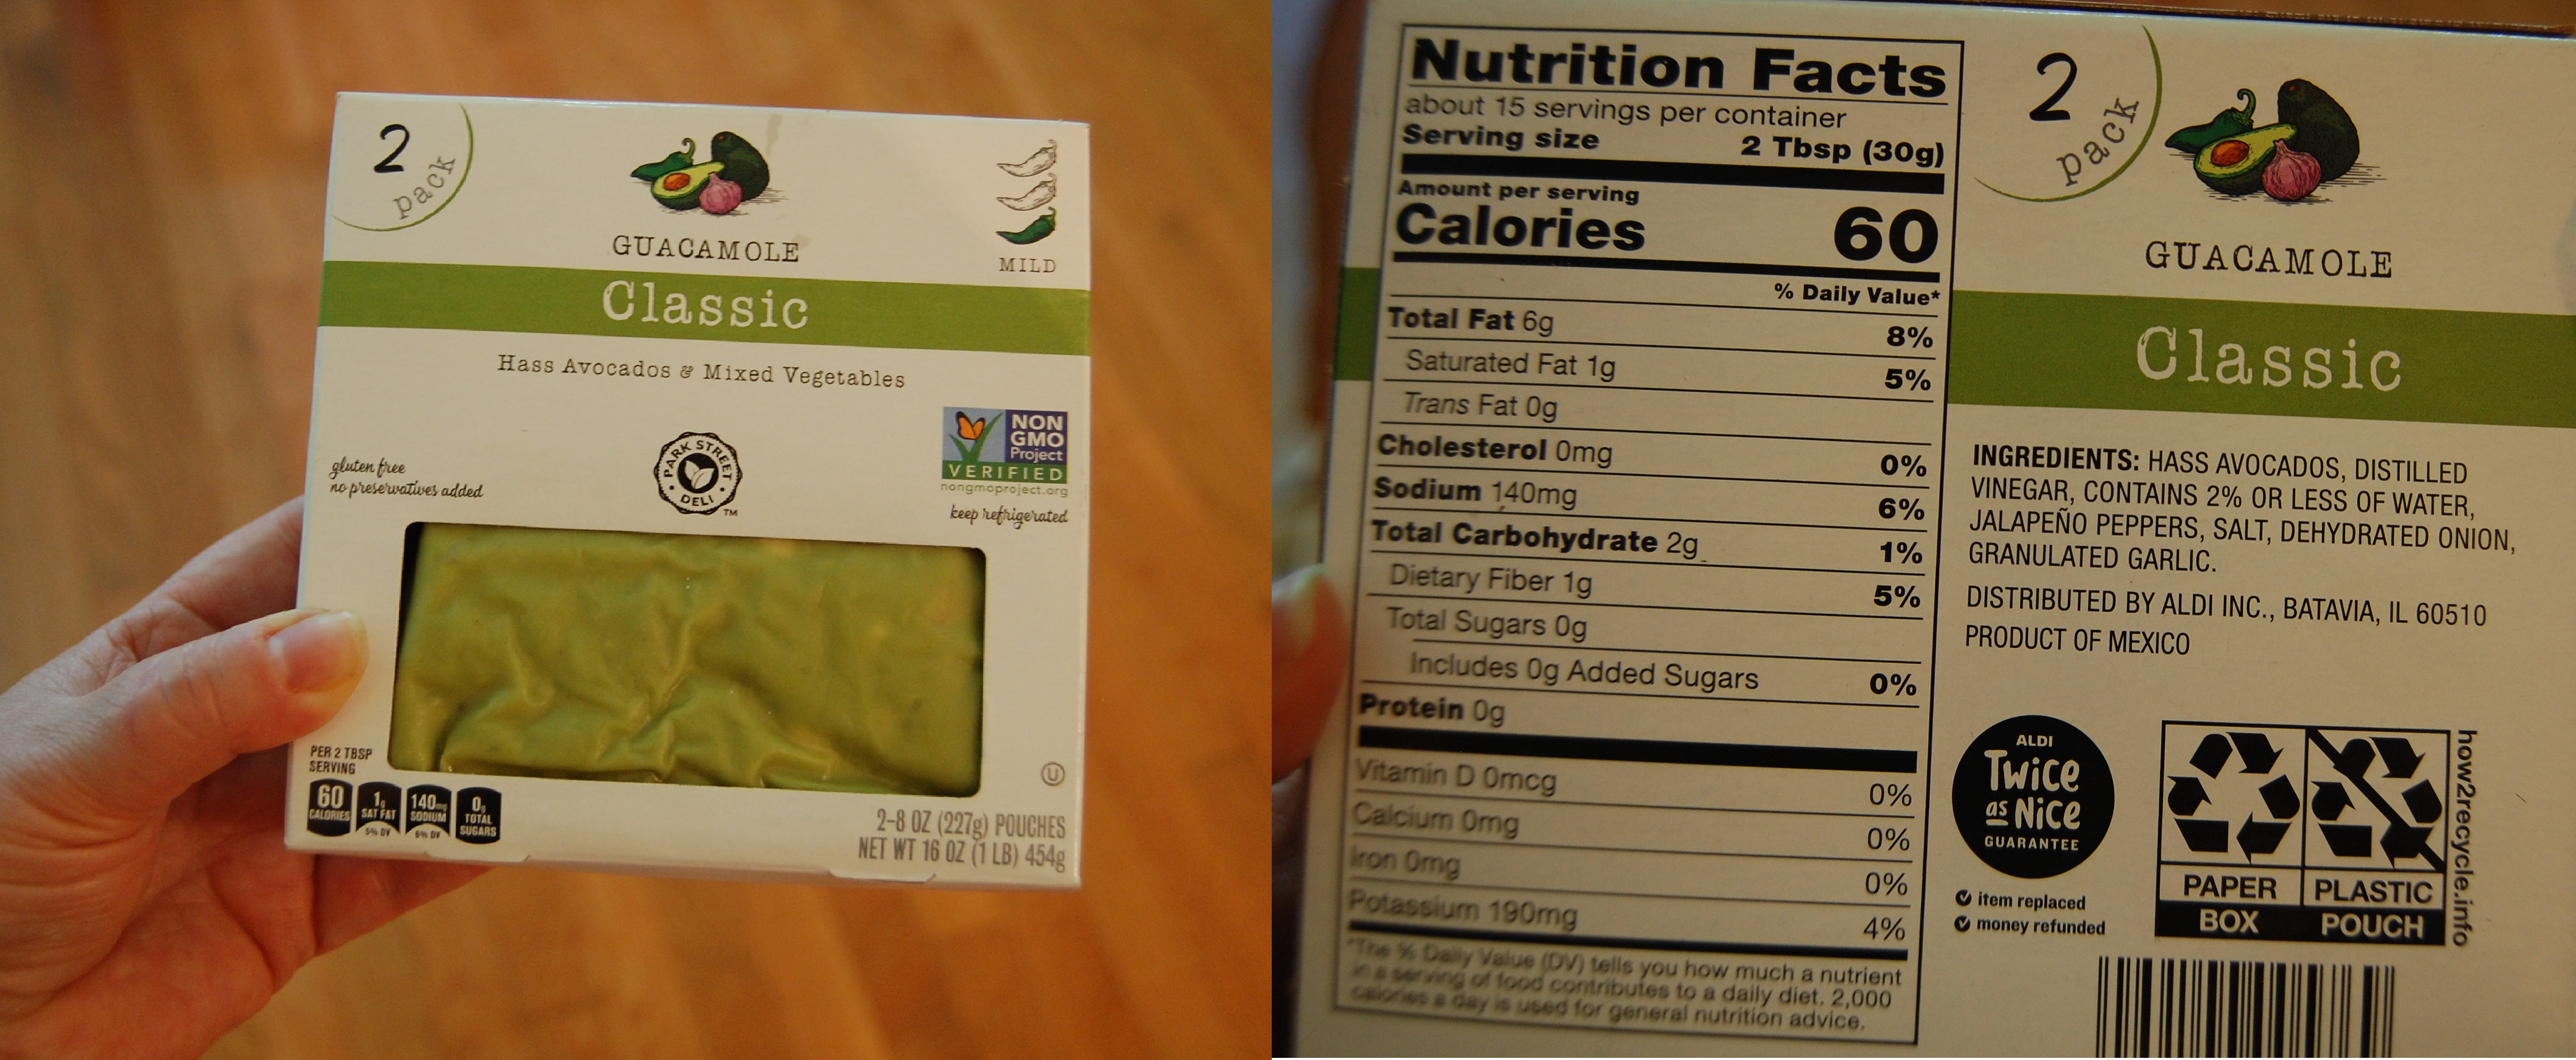
Guacamole (Classic from Aldi) – Purists would turn their noses up at factory guac when it’s so easy to make. But this works in a pinch, and contains only ingredients you would use at home.

Hormel Natural Pepperoni – We love this stuff! No hormones, MSG, nitrates or nitrites added except those naturally occurring in the celery and cherry.

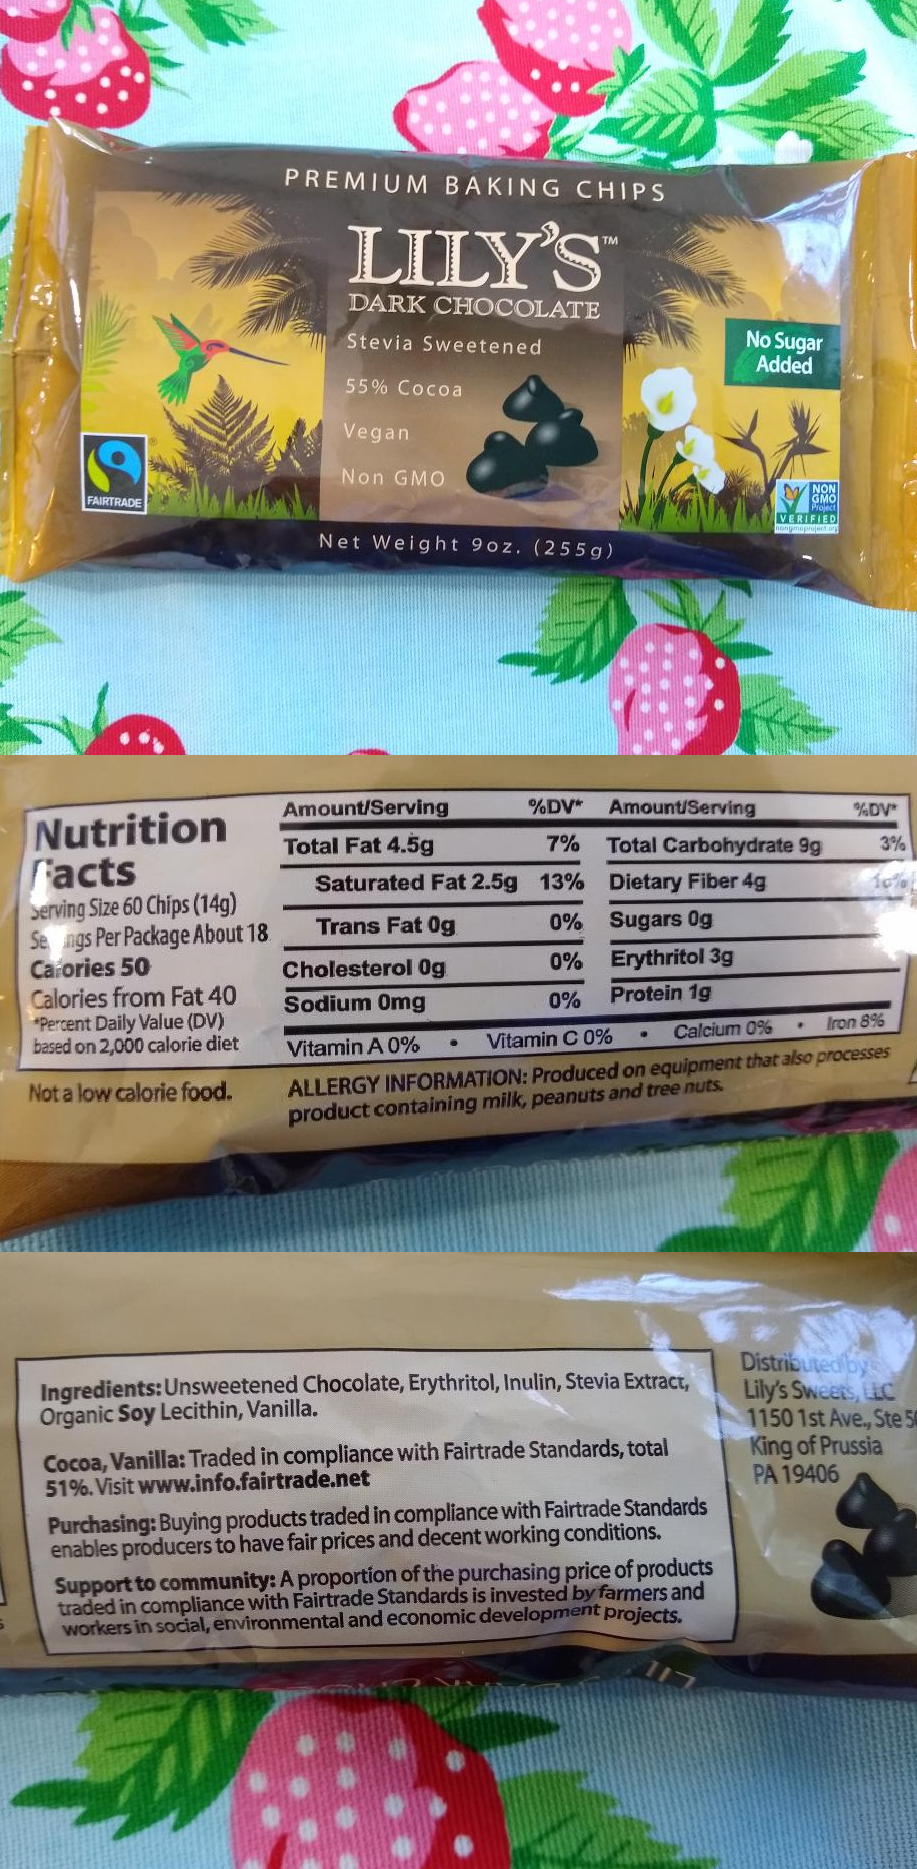
Lily’s Chocolate Chips – Mmmm, Lily’s. Not 100% clean, but pretty darn good. These are tiny, and pack a lot of chocolate flavor without the sugar buzz.

Portofino Yellowfin Tuna in Extra Virgin Olive Oil – We’re late converts to tuna packed in oil, but it’s great for the light, summer salads we’ve been fixing lately.

Sir Kensington’s Mayonnaise – We like the original, avocado oil and organic varieties. The original has a slight tang from the lemon juice, but it’s not overpowering. This is great in homemade dips and dressings. The avocado oil mayonnaise can be a little strong, so use it in dishes with bold flavors.

Tolerant Lentil Pasta – Two ingredient pasta is about as unprocessed as you can get for a factory noodle. When cooked to al dente, the pasta retain their shape and don’t get mushy.

Whole Earth Sweetener – We call this the “Green Stuff”. Low carb without the stevia aftertaste. Dissolves really well in cold drinks. One packet sweetens a 20-32 oz. beverage.

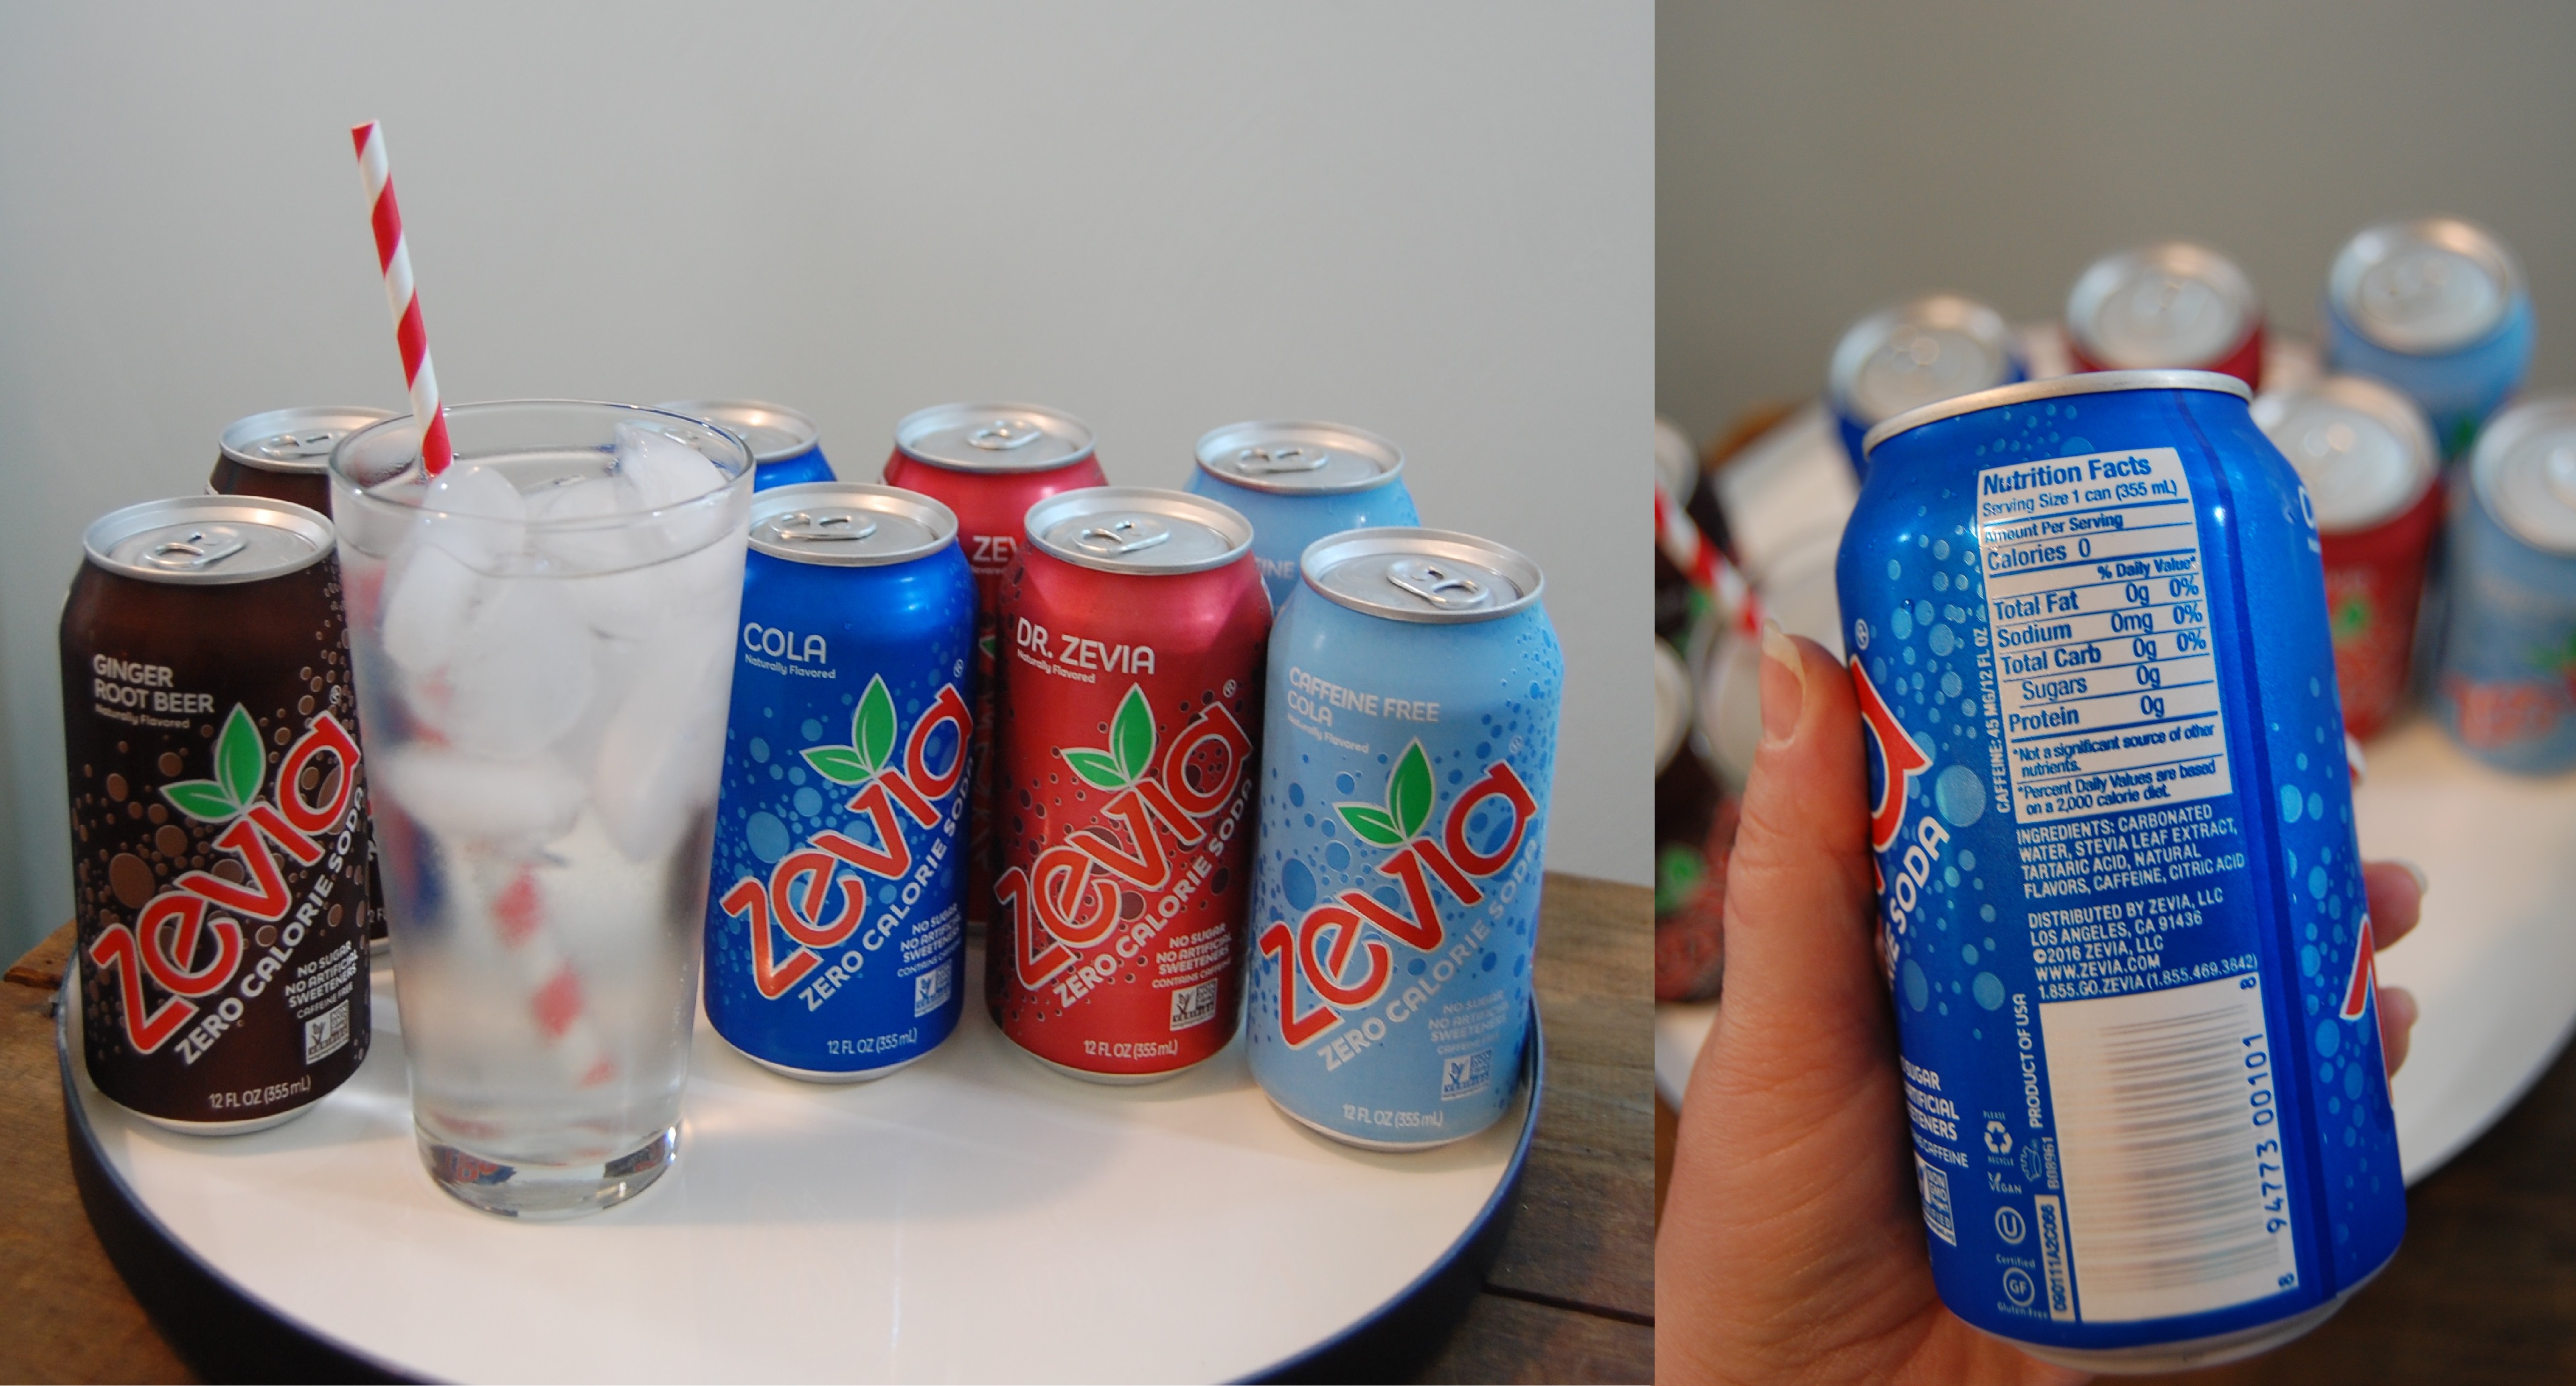
Zevia – We love Zevia because it scratches the soda itch without resorting to zero calorie drinks containing aspartame. Some flavors are caffeinated and some are decaf, but all of the flavors are free of food dyes.

I hope you’ll give some of these products a try. What are your favorite 10% products? Let me know in the comments or via email at:
arthurized dot home at gmail dot com

I’m not in partnership with any brands referenced in this post. I’m simply sharing products that I use and enjoy, and I hope you will like them too!

Disclosure: In addition to occasional sponsored posts, Arthurized Home uses clickable affiliate links. That means that I may receive a small commission from sales at no extra charge to you. As always, my opinion is 100% my own, and I only recommend things that I truly love or use myself. Thank you for patronizing the brands that support Arthurized Home!

Copyright 2019-2021 © Arthurized Home – All Rights Reserved. This post is the original content of Arthurized Home. If you’re reading this on another site, it’s unArthurized.

How I Remove Rust From Cast Iron

Now that we’ve made it through our rainy, Virginia springtime; we’re overdue for some outdoor chores. At Arthurized Home, we use cast iron for our everyday cooking. We’re careful to season it regularly so rust is not a problem. However, I just bought a cast iron pot with some pretty severe rust on it. It’s not pitted, so that’s good. Actually, I would have passed on buying pitted cast iron. No amount of TLC can bring that back.

A quick Google search shows countless methods for removing rust from cast iron. The process I’m using is one that I have used successfully over the years. I burn the rust off the cast iron in a fire and then season it in the oven. This method avoids using noxious chemicals and hours (and hours!) of obnoxious scrubbing.

My cast iron is good quality and very serviceable, but solidly average. It’s not rare or valuable. I would not use this method on Granny’s heirloom cast iron. For that, I would get out the steel wool, get to scrubbin’ and develop tendinitis.

I can’t speak to whether vinegar baths, oven cleaner (seems toxic), electrolysis and lye baths work on rusty cast iron, because I haven’t tried those methods.

Cast Iron Care: Take care not to shock your cast iron, which can cause it to crack. Bring the cast iron to temperature along with the heat source. Never place cold cast iron onto a hot stove, into a hot oven or fire. Never place hot cast iron into the fridge/ freezer, cold water or an ice bath. Remember ‘hot with hot’ and ‘cold with cold’ and your cast iron will be just fine.

Pa Kettle decided to get in on the action by providing an actual kettle that he found in his basement when they bought the home. It’s been unloved and in Basement Purgatory for 50+ years. I’m not sure if it is salvageable, because the rust is thick and the pot is severely pitted. But, why not throw it in and see what happens?

This is a good project to start in the morning, as you need several hours for the fire and several hours for cooling. To prepare the fire, I placed a few logs into the fire pit and laid the pots on top. I positioned the pots so that as the logs burned down, they drop toward the center of the fire, not out of it. Then I covered the pots with more logs. The idea is to have the fire reach the entire pot, including the undersides.

Bring out a few of those great fire starters and put them to work. Once you have a roaring fire, it’s time to relax.

Contemplate the meaning of life, sing a few campfire songs and break out the hot dogs or s’mores fixin’s.

Without leaving the fire unattended, burn the cast iron for a few hours (I like a minimum of three hours) and then let the fire die out.

Don’t pour water to extinguish the fire, as that could shock the cast iron.

Once, the ashes cooled, I pulled the pots from the fire pit. See that red stuff? It’s red rust. This is oxidation at high temperature when raw metal is exposed to the air. Not to worry, though. A quick scrub with a paste made of baking soda and a splash of water, will take most of that off. I’ve read that a thin coat of red rust helps the first layer of season to bond. I have no idea if that’s true, but I’ll soon find out!

Pa Kettle’s pot will need another turn in the fire.
I would like to get all of the brown rust off of it before moving on to the next step.

Thoroughly rinse the baking soda off of the cast iron. If all the old season has been removed and the raw cast iron is exposed, the pot should be matte grey.

I placed a large baking sheet onto the lowest oven rack and put the pot on the top rack. I turned the oven to 300° and left the pan in for about five minutes. This ensures that the pan is completely dry before seasoning.

After drying the pot, let it cool a little, then season with oil or grease of your choice. I spread an extremely light layer of bacon grease over the pot, coating it entirely. Wipe excess grease off with a paper towel and place the pot back into the oven upside down. This allows any excess grease to drip out of the pot onto the baking sheet below. I usually season my cast iron between 375° and 425°, so I crank the oven up at this time.

After about an hour in the oven, I turn it off and let the cast iron cool down. Then I repeat this step. Again. And again. And again; building thin layers of season each time. Once the season is built up on the pot, it is ready for daily use in the kitchen.

A few more tips on cast iron care: Moisture is the enemy of cast iron. Never let cast iron soak in water. After use, and while your pans are still warm, quickly rinse, dry and re-oil your cast iron. If there are food particles cooked on, use a plastic scrub brush to remove them.

Cast iron is for cooking and baking, not food storage. You’ll need some vintage Pyrex refrigerator boxes for that. *winks*

Because our kitchen is small, we stack our cast iron for storage. Scratches can damage the season, so we place a microfiber cloth between each pan.

Take good care of your cast iron and it will serve you for a lifetime. Who knows; maybe the grandkids will fight over your collection one day?

For more reading on caring for cast iron, here’s an interesting article:
https://richsoil.com/cast-iron.jsp#seasoning

Disclosure: In addition to occasional sponsored posts, Arthurized Home uses clickable affiliate links. That means that I may receive a small commission from sales at no extra charge to you. As always, my opinion is 100% my own, and I only recommend things that I truly love or use myself. Thank you for patronizing the brands that support Arthurized Home!

Copyright 2019-2021 © Arthurized Home – All Rights Reserved. This post is the original content of Arthurized Home. If you’re reading this on another site, it’s unArthurized.

Real Food Meal Planning

An empty refrigerator can only mean one thing. It’s time to get meal planning! But first, a note about “real” food: I define real food as made in nature and not in a factory. If you define it differently, that’s great! Do what works best for your health, lifestyle and budget.

If you are on a budget like me, the first step is to review the online weekly grocery ads. In our small city we have Aldi, Kroger, Earth Fare, Fresh Market, Wal-mart and Food Lion. Skim the ads quickly because we’re looking for foods that are natural or minimally processed. List the sale items by store. I’m old school, so I use a low tech piece of paper for this step. Use ‘notes’ in your phone or a grocery store app if that works best for you.

Now it’s time for the menu. If you have go-to recipes for the sale items, list those. When I need some recipe inspiration I search my favorite real food websites. If strawberries are on sale this week, enter “strawberries” into the search box. Scroll through the recipes for something appealing and save to Pinterest or print the recipe out. I typically plan five dinners per week. This leaves room in the schedule for a leftovers night or eating out.

Bonus points if your meal uses more than one sale item!

We have a high tolerance for eating the same meal repeatedly, so breakfast and lunch are the same Monday-Friday. If that’s not you, make enough at dinner to have lunch leftovers the next day.

Once you’ve compiled your recipes, fill out the rest of the grocery list. I skim each recipe and make sure that I have the pantry items on hand. If not, they are added to the list, keeping a tally of how many of each item I need. For example, if three recipes call for garlic, total up the number of cloves needed and note that next to “garlic” on the list.

If I’m going to buy an item at a certain store, I add the store’s initial to the check box.

Now it’s time to grocery shop! I’m heading to the store(s), but if you’re using a grocery app, plug in your list or order online. I hope this is helpful to you. If you have any questions about my process let me know in the comments.

This is not a sponsored post. I am not in partnership with, nor do I own any of these websites or the recipes linked here.

Disclosure: In addition to occasional sponsored posts, Arthurized Home uses clickable affiliate links. That means that I may receive a small commission from sales at no extra charge to you. As always, my opinion is 100% my own, and I only recommend things that I truly love or use myself. Thank you for patronizing the brands that support Arthurized Home!

Copyright 2019-2021 © Arthurized Home – All Rights Reserved. This post is the original content of Arthurized Home. If you’re reading this on another site, it’s unArthurized.